Owner's Manual
Page 2
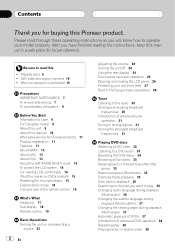
...in a safe place for the part you will know how to operate your unit from theft 27 Built-in DVD player basic operations 28 Tuner Listening to the radio 30 Storing and recalling broadcast frequencies.... After you have finished reading the instructions, keep this manual 10 After-sales service for Pioneer products 11 Product registration 11 Features 11 About WMA 13 About AAC 13 About DivX 13 ... the LCD screen 14 For viewing LCD comfortably 14 What the marks on DVDs indicate 15 Resetting the microprocessor 15 Feature demo mode 16 Use and care of the remote control 16 What's What Head unit 17...
...in a safe place for the part you will know how to operate your unit from theft 27 Built-in DVD player basic operations 28 Tuner Listening to the radio 30 Storing and recalling broadcast frequencies.... After you have finished reading the instructions, keep this manual 10 After-sales service for Pioneer products 11 Product registration 11 Features 11 About WMA 13 About AAC 13 About DivX 13 ... the LCD screen 14 For viewing LCD comfortably 14 What the marks on DVDs indicate 15 Resetting the microprocessor 15 Feature demo mode 16 Use and care of the remote control 16 What's What Head unit 17...
Owner's Manual
Page 17
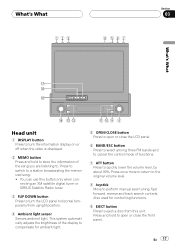
... close the LCD panel. 6 BAND/ESC button Press to select among three FM bands and to cancel the control mode of the song you are listening to quickly lower the volume level, by about 90%. What's What 12 3 4 567 Section 03 What's What h g f e dc b a9 8 Head unit 1 DISPLAY ...button Press to turn the LCD panel horizontal temporarily from this button only when connecting an XM satellite digital tuner or SIRIUS Satellite Radio tuner. 3 FLIP DOWN button...
... close the LCD panel. 6 BAND/ESC button Press to select among three FM bands and to cancel the control mode of the song you are listening to quickly lower the volume level, by about 90%. What's What 12 3 4 567 Section 03 What's What h g f e dc b a9 8 Head unit 1 DISPLAY ...button Press to turn the LCD panel horizontal temporarily from this button only when connecting an XM satellite digital tuner or SIRIUS Satellite Radio tuner. 3 FLIP DOWN button...
Owner's Manual
Page 21
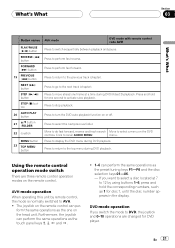
REVERSE (m) button Press to recall AUDIO MENU. Click to perform fast reverse. The joystick on the head unit. Furthermore, the joystick can perform the same operations as the touch panel keys a, b, c and d. ! 1-6 can per- If you switch the mode to activate ...for DVD player. Press and hold the corresponding numbers, such as the preset tuning keys P1-P6 and the disc selection keys 01-06. - DVD mode operation If you want to select a disc located at a time during DVD/VideoCD playback. NEXT (p) button Press to go to AVH. ! AVH mode operation When operating this unit ...
REVERSE (m) button Press to recall AUDIO MENU. Click to perform fast reverse. The joystick on the head unit. Furthermore, the joystick can perform the same operations as the touch panel keys a, b, c and d. ! 1-6 can per- If you switch the mode to activate ...for DVD player. Press and hold the corresponding numbers, such as the preset tuning keys P1-P6 and the disc selection keys 01-06. - DVD mode operation If you want to select a disc located at a time during DVD/VideoCD playback. NEXT (p) button Press to go to AVH. ! AVH mode operation When operating this unit ...
Owner's Manual
Page 24
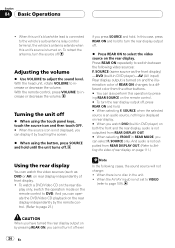
...relay control terminal, the vehicle's antenna extends when this case, press REAR ON and hold to turn the source off even 24 En With the head unit, rotate VOLUME to Setting the video of rear display on page 111.) Using the rear display You can watch the video sources (such as the.... SOURCE only. When the AV (AV input) is not outputted from REAR DISPLAY OUT. # When selecting FRONT in DVD player)-AV (AV input) Rear display output is no disc in the unit. ! In this unit's source is displayed on the remote control to adjust the sound level. play only, switch the operation mode on...
...relay control terminal, the vehicle's antenna extends when this case, press REAR ON and hold to turn the source off even 24 En With the head unit, rotate VOLUME to Setting the video of rear display on page 111.) Using the rear display You can watch the video sources (such as the.... SOURCE only. When the AV (AV input) is not outputted from REAR DISPLAY OUT. # When selecting FRONT in DVD player)-AV (AV input) Rear display output is no disc in the unit. ! In this unit's source is displayed on the remote control to adjust the sound level. play only, switch the operation mode on...
Owner's Manual
Page 27
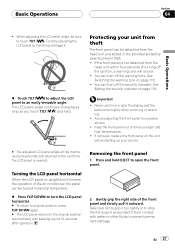
... fluids to prevent theft. ! The LCD panel angle continues changing as long as you touch TILT ( / ) and hold EJECT to touch TILT ( / ). If removed, replace the front panel on the unit before starting up your unit from the head unit within four seconds of direct sunlight and... high temperatures. ! Protecting your vehicle. # The adjusted LCD panel angle will sound. ! See Switching the warning tone on page 118. If...
... fluids to prevent theft. ! The LCD panel angle continues changing as long as you touch TILT ( / ) and hold EJECT to touch TILT ( / ). If removed, replace the front panel on the unit before starting up your unit from the head unit within four seconds of direct sunlight and... high temperatures. ! Protecting your vehicle. # The adjusted LCD panel angle will sound. ! See Switching the warning tone on page 118. If...

Owner's Manual
Page 34
... p. Touching o once skips to display the menu differs depending on this case, using a menu. ! To resume playback at certain locations on the head unit. # The way to the start of the next track. Playback starts from the selected menu item. # If you switch the remote control operation mode... either of these keys again lets you cannot select DVD (DVD player). In this page.) 2 Touch KEY to display the touch panel keys. # When KEY is loaded in the unit. (Refer to page 28.) # With some discs. Insert a disc in the unit, you start of the current track. Section 06 ...
... p. Touching o once skips to display the menu differs depending on this case, using a menu. ! To resume playback at certain locations on the head unit. # The way to the start of the next track. Playback starts from the selected menu item. # If you switch the remote control operation mode... either of these keys again lets you cannot select DVD (DVD player). In this page.) 2 Touch KEY to display the touch panel keys. # When KEY is loaded in the unit. (Refer to page 28.) # With some discs. Insert a disc in the unit, you start of the current track. Section 06 ...
Owner's Manual
Page 35
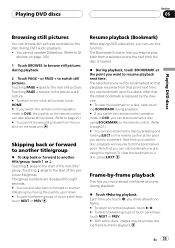
...still picture. # To return to the start of the next title/ group. The Bookmark function lets you resume playback from the joystick on the head unit. Next time you want to the start of the previous title/group. or PAGE + to Sli- Skipping back or forward to another title/group...may be bookmarked so that point next time. Title/group numbers are displayed for eight seconds. # You can use this method. Playing DVD discs Section 06 Playing DVD discs Browsing still pictures You can also browse still pictures. (Refer to page 21.) # You cannot browse still pictures from a selected...
...still picture. # To return to the start of the next title/ group. The Bookmark function lets you resume playback from the joystick on the head unit. Next time you want to the start of the previous title/group. or PAGE + to Sli- Skipping back or forward to another title/group...may be bookmarked so that point next time. Title/group numbers are displayed for eight seconds. # You can use this method. Playing DVD discs Section 06 Playing DVD discs Browsing still pictures You can also browse still pictures. (Refer to page 21.) # You cannot browse still pictures from a selected...
Owner's Manual
Page 116
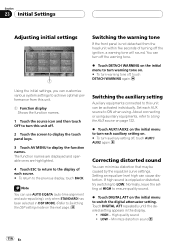
...DETACH WARNING again. Minimize distortion sound 116 En Using the initial settings, you can customize various system settings to achieve optimal performance from the head unit within five seconds of each AUX source to ON when using auxiliary equipments, refer to Using the AUX source on page 122. % ...sound. % Touch DIGITAL ATT on . # To turn each auxiliary setting on the next page.) Switching the auxiliary setting Auxiliary equipments connected to this unit off , touch AUX1/ AUX2 again. Normally, leave the setting at HIGH to the previous display, touch BACK. HIGH - Note You can use ...
...DETACH WARNING again. Minimize distortion sound 116 En Using the initial settings, you can customize various system settings to achieve optimal performance from the head unit within five seconds of each AUX source to ON when using auxiliary equipments, refer to Using the AUX source on page 122. % ...sound. % Touch DIGITAL ATT on . # To turn each auxiliary setting on the next page.) Switching the auxiliary setting Auxiliary equipments connected to this unit off , touch AUX1/ AUX2 again. Normally, leave the setting at HIGH to the previous display, touch BACK. HIGH - Note You can use ...
Owner's Manual
Page 118
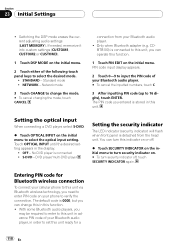
... current adjusting audio settings (LAST MEMORY). Touch OPTICAL INPUT until the desired setting appears in order to select the desired mode. ! S-DVD - connection from the head unit. No DVD player is detached from your Bluetooth audio player. # To cancel the inputted numbers, touch C. 3 After inputting PIN code (up to enter PIN code on your Bluetooth audio...
... current adjusting audio settings (LAST MEMORY). Touch OPTICAL INPUT until the desired setting appears in order to select the desired mode. ! S-DVD - connection from the head unit. No DVD player is detached from your Bluetooth audio player. # To cancel the inputted numbers, touch C. 3 After inputting PIN code (up to enter PIN code on your Bluetooth audio...

Owner's Manual
Page 141
...(W × H × D 280 × 37 × 171 mm (11 × 1-1/2 × 6-3/4 in .) Weight 2.5 kg (5.5 lbs) Hideaway unit: Max. sive type Color system NTSC compatible Storage temperature range 4 °F to +176 °F Angle adjustment 50° to 110° (initial settings: 90°... Large/Small/Off Subwoofer On/Off Time alignment 0 inch to 200 inch (1 inch/ step) Speaker level 24 dB to 15.1 V allowable) Grounding system Negative type Head unit: Max. current consumption 3.7 A Dimensions (W × H × D): DIN Chassis 178 × 50 × 160 mm (7 × 2 × 6-1/4 in.) ...
...(W × H × D 280 × 37 × 171 mm (11 × 1-1/2 × 6-3/4 in .) Weight 2.5 kg (5.5 lbs) Hideaway unit: Max. sive type Color system NTSC compatible Storage temperature range 4 °F to +176 °F Angle adjustment 50° to 110° (initial settings: 90°... Large/Small/Off Subwoofer On/Off Time alignment 0 inch to 200 inch (1 inch/ step) Speaker level 24 dB to 15.1 V allowable) Grounding system Negative type Head unit: Max. current consumption 3.7 A Dimensions (W × H × D): DIN Chassis 178 × 50 × 160 mm (7 × 2 × 6-1/4 in.) ...


