
User manual
Page 7
... Environmental Information 8 Acknowledgement 8 Supplied Accessories 8 Safety Information 8 Preparations Rear Connections 9-10 Optional Connections 10 Inserting batteries into the remote control 10 Dolby Pro Logic Setting up the Dolby Pro Logic system ......... 11 Test Tone 11-12 Switching the Dolby Pro Logic... 12 Subwoofer Setting up the Subwoofer 13 Operating the Subwoofer 13 Controls Controls on the system and remote control 14-15 Basic Functions Demonstration mode 16 Easy Set 16 Switching the system on 17 Switching the system to Standby mode ...
... Environmental Information 8 Acknowledgement 8 Supplied Accessories 8 Safety Information 8 Preparations Rear Connections 9-10 Optional Connections 10 Inserting batteries into the remote control 10 Dolby Pro Logic Setting up the Dolby Pro Logic system ......... 11 Test Tone 11-12 Switching the Dolby Pro Logic... 12 Subwoofer Setting up the Subwoofer 13 Operating the Subwoofer 13 Controls Controls on the system and remote control 14-15 Basic Functions Demonstration mode 16 Easy Set 16 Switching the system on 17 Switching the system to Standby mode ...
User manual
Page 8
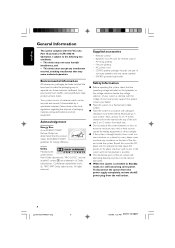
...observe the local regulations regarding the disposal of surround speakers and one center speaker) - Dolby Manufactured under license from each side. Remote control - FM wire antenna - CS-900 speaker package (includes one hour with the voltage of the set contain selflubricating bearings ...no disc in the system until normal playback is still consuming some power. Acknowledgement Energy Star As an ENERGY STARR Partner; Philips has determined that the operating voltage indicated on for about one pair of packaging materials, exhausted batteries and old equipment. Batteries ...
...observe the local regulations regarding the disposal of surround speakers and one center speaker) - Dolby Manufactured under license from each side. Remote control - FM wire antenna - CS-900 speaker package (includes one hour with the voltage of the set contain selflubricating bearings ...no disc in the system until normal playback is still consuming some power. Acknowledgement Energy Star As an ENERGY STARR Partner; Philips has determined that the operating voltage indicated on for about one pair of packaging materials, exhausted batteries and old equipment. Batteries ...
User manual
Page 10
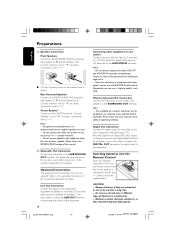
...-033/P900/37-Eng 10 Connecting other equipment to your respective local safety or approving authority. Inserting batteries into the Remote Control Insert two batteries (Type R06 or AA) into the remote control with your system Connect the audio left speaker to "L". Batteries contain chemical substances, so they are connecting an equipment...
...-033/P900/37-Eng 10 Connecting other equipment to your respective local safety or approving authority. Inserting batteries into the Remote Control Insert two batteries (Type R06 or AA) into the remote control with your system Connect the audio left speaker to "L". Batteries contain chemical substances, so they are connecting an equipment...
User manual
Page 11
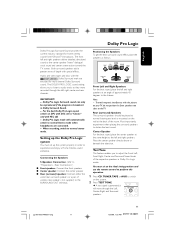
... level or mounted on DPL with DSC set up the Dolby Pro Logic system You must sit at the ideal sitting position and use the remote control to perform this operation. 1 Press CD, TUNER, TAPE or AUX to switch on your TV, do not position the front speakers too close to...
... level or mounted on DPL with DSC set up the Dolby Pro Logic system You must sit at the ideal sitting position and use the remote control to perform this operation. 1 Press CD, TUNER, TAPE or AUX to switch on your TV, do not position the front speakers too close to...
User manual
Page 14
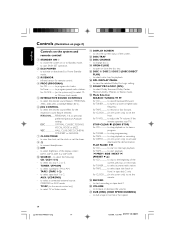
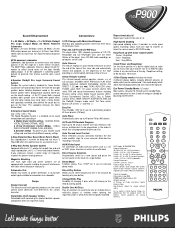
...program preset radio stations. for CLOCK ....... (on the system only) to activate/ deactivate the demonstration. for CD to stop programming. infrared sensor for remote control. 4 PROG (PROGRAM) for the respective sound feature selected. VEC HALL, CLUB, DISCO, CINEMA, CONCERT or ARCADE. 7 CLOCK/TIMER -...237; PREV / SIDE / NEXT ë (PRESET 4 3 ) for CLOCK ....... (on the system and remote control 1 STANDBY ON y - to adjust the TV volume (if the remote operates your TV). to view the current status of the current, previous, or next track. for CD to skip...
...program preset radio stations. for CLOCK ....... (on the system only) to activate/ deactivate the demonstration. for CD to stop programming. infrared sensor for remote control. 4 PROG (PROGRAM) for the respective sound feature selected. VEC HALL, CLUB, DISCO, CINEMA, CONCERT or ARCADE. 7 CLOCK/TIMER -...237; PREV / SIDE / NEXT ë (PRESET 4 3 ) for CLOCK ....... (on the system and remote control 1 STANDBY ON y - to adjust the TV volume (if the remote operates your TV). to view the current status of the current, previous, or next track. for CD to skip...
User manual
Page 15
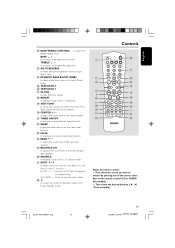
...- to turn off bass boost. ∞ TAPE DECK 2 § TAPE DECK 1 ≥ CLOCK - to increase or decrease the high tone. £ AUTO REVERSE - for remote control: - DSC VEC TIMER ON/OFF SLEEP MUTE BTC DBB ° ‡ £ ) * 5 ≤ ‹ Notes for TUNER ........ to balance the sound level...the surround speakers. fi BALANCE L/R - First, select the source you wish to adjust the sound level of the source select keys on the remote control (CD or TUNER for CD to select the desired playback modes in a preset radio station. °B - to check the sound level of...
...- to turn off bass boost. ∞ TAPE DECK 2 § TAPE DECK 1 ≥ CLOCK - to increase or decrease the high tone. £ AUTO REVERSE - for remote control: - DSC VEC TIMER ON/OFF SLEEP MUTE BTC DBB ° ‡ £ ) * 5 ≤ ‹ Notes for TUNER ........ to balance the sound level...the surround speakers. fi BALANCE L/R - First, select the source you wish to adjust the sound level of the source select keys on the remote control (CD or TUNER for CD to select the desired playback modes in a preset radio station. °B - to check the sound level of...
User manual
Page 17
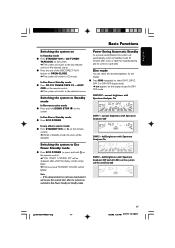
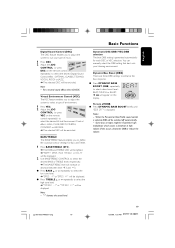
...DIM repeatedly to Standby mode In Demonstration mode G Press and hold B on the remote control). ➜ "LOW POWER STANDBY ON" will be displayed, after which the...1:53 PM 3139 115 20411 DIM 2 - G Press any others source mode G Press STANDBY ON (or B on the remote control). ➜ When in Standby mode, the clock will be switched off. In Eco Power Standby mode G Press ECO ... Note: - In Eco Power Standby mode G Press CD 123, TUNER, TAPE 1/2 or AUX/ CDR on the remote control. ➜ The system will switch to CD mode. Dim mode You can select the desired brightness for DIM ...
...DIM repeatedly to Standby mode In Demonstration mode G Press and hold B on the remote control). ➜ "LOW POWER STANDBY ON" will be displayed, after which the...1:53 PM 3139 115 20411 DIM 2 - G Press any others source mode G Press STANDBY ON (or B on the remote control). ➜ When in Standby mode, the clock will be switched off. In Eco Power Standby mode G Press ECO ... Note: - In Eco Power Standby mode G Press CD 123, TUNER, TAPE 1/2 or AUX/ CDR on the remote control. ➜ The system will switch to CD mode. Dim mode You can select the desired brightness for DIM ...
User manual
Page 18
... To change any previous setting before storing G Press à on the system to 10 characters. 8 To store the setting, press PERSONAL on the remote control repeatedly) to confirm the selection. ➜ "ADAPT MID FREQ LEVEL" will be displayed and the next followed by "ADAPT HIGH FREQ LEVEL". ...system until "SELECT PRESET NUMBER" is pressed within 90 seconds, the system will be continued without storing the setting G Press Çon the remote control. ➜ Playback will be muted. Up to 6 Personal settings can use the JOG CONTROL to adjust the Personal setting to increase ...
... To change any previous setting before storing G Press à on the system to 10 characters. 8 To store the setting, press PERSONAL on the remote control repeatedly) to confirm the selection. ➜ "ADAPT MID FREQ LEVEL" will be displayed and the next followed by "ADAPT HIGH FREQ LEVEL". ...system until "SELECT PRESET NUMBER" is pressed within 90 seconds, the system will be continued without storing the setting G Press Çon the remote control. ➜ Playback will be muted. Up to 6 Personal settings can use the JOG CONTROL to adjust the Personal setting to increase ...
User manual
Page 19
...feature enables you to adjust the system to select a type of music. 1 Press DSC. 2 Adjust the JOG CONTROL (or press DSC on the remote control repeatedly) to select the desired Digital Sound Control effect : OPTIMAL, CLASSIC,TECHNO, VOCAL, ROCK or JAZZ. ➜ The selected DSC will be...OFF" is displayed. G Press BASS # or $ repeatedly to select the low tone level. ➜ "BASS -X" or "BASS +X" will appear on the remote control repeatedly) to select the desired Virtual Environment Control effect : HALL, CLUB, DISCO, CINEMA, CONCERT or ARCADE. ➜ The selected VEC will increase or ...
...feature enables you to adjust the system to select a type of music. 1 Press DSC. 2 Adjust the JOG CONTROL (or press DSC on the remote control repeatedly) to select the desired Digital Sound Control effect : OPTIMAL, CLASSIC,TECHNO, VOCAL, ROCK or JAZZ. ➜ The selected DSC will be...OFF" is displayed. G Press BASS # or $ repeatedly to select the low tone level. ➜ "BASS -X" or "BASS +X" will appear on the remote control repeatedly) to select the desired Virtual Environment Control effect : HALL, CLUB, DISCO, CINEMA, CONCERT or ARCADE. ➜ The selected VEC will increase or ...
User manual
Page 21
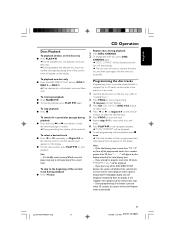
...237; once. G To resume playback, press PLAYÉÅ again. To select a desired track G Press í or ë repeatedly (or Digits 0-9 on the remote control) until the desired track appears on the display instead of the current track. Replace discs during playback G Press and hold à or á and...Load the desired discs on the disc tray (refer to "Loading Discs"). 2 Press PROG to start programming. ➜ PROGRAM will appear on the remote control) to select the desired track. 5 Press PROG to retrieve the inner disc and then open again with the inner disc accessible. If you ...
...237; once. G To resume playback, press PLAYÉÅ again. To select a desired track G Press í or ë repeatedly (or Digits 0-9 on the remote control) until the desired track appears on the display instead of the current track. Replace discs during playback G Press and hold à or á and...Load the desired discs on the disc tray (refer to "Loading Discs"). 2 Press PROG to start programming. ➜ PROGRAM will appear on the remote control) to select the desired track. 5 Press PROG to retrieve the inner disc and then open again with the inner disc accessible. If you ...
User manual
Page 22
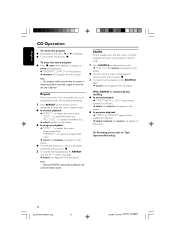
...selection. ➜ REPEAT, PROGRAM and SHUFFLE will disappear from the display. The program will be played in random order. 1 Press SHUFFLE on the remote control. ➜ "SHUFFLE" and SHUFFLE will appear on the display. "DISC" - G In program playback ➜ "TRACK" - G ...In program playback ➜ "TRACK" or "PROGRAM" repeat modes available for selection. ➜ REPEAT and SHUFFLE will appear on the remote control repeatedly to repeat the current track. For Recording, please refer to repeat the current programmed track. to repeat the entire disc. Shuffle...
...selection. ➜ REPEAT, PROGRAM and SHUFFLE will disappear from the display. The program will be played in random order. 1 Press SHUFFLE on the remote control. ➜ "SHUFFLE" and SHUFFLE will appear on the display. "DISC" - G In program playback ➜ "TRACK" - G ...In program playback ➜ "TRACK" or "PROGRAM" repeat modes available for selection. ➜ REPEAT and SHUFFLE will appear on the remote control repeatedly to repeat the current track. For Recording, please refer to repeat the current programmed track. to repeat the entire disc. Shuffle...
User manual
Page 23
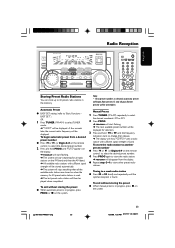
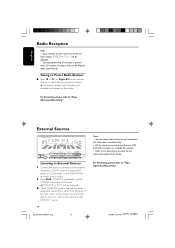
... available radio stations with sufficient signal strength is selected, automatic preset will begin automatic preset from preset (1) and all radio stations on the remote control) to select the desired preset number. 4 Press PROG again to a weak radio station G Press à or á briefly...preset radio station will disappear from the display. To begin from a desired preset number G Press í or ë (or Digits 0-9 on the remote control) to change, then release. ➜ The display will show "SEARCH" until "AUTO" appears on the display. ➜ PROGRAM will start flashing...
... available radio stations with sufficient signal strength is selected, automatic preset will begin automatic preset from preset (1) and all radio stations on the remote control) to select the desired preset number. 4 Press PROG again to a weak radio station G Press à or á briefly...preset radio station will disappear from the display. To begin from a desired preset number G Press í or ë (or Digits 0-9 on the remote control) to change, then release. ➜ The display will show "SEARCH" until "AUTO" appears on the display. ➜ PROGRAM will start flashing...
User manual
Page 24
... your system. 2 Press AUX (CDR/DVD) repeatedly to select the desired preset number. ➜ The preset number, radio frequency, and waveband will appear on the remote control) to select CDR/DVD or normal AUX mode. ➜ "CDR/DVD" or "AUX" will exit the Program mode automatically. G When CDR/DVD mode is...
... your system. 2 Press AUX (CDR/DVD) repeatedly to select the desired preset number. ➜ The preset number, radio frequency, and waveband will appear on the remote control) to select CDR/DVD or normal AUX mode. ➜ "CDR/DVD" or "AUX" will exit the Program mode automatically. G When CDR/DVD mode is...
User manual
Page 27
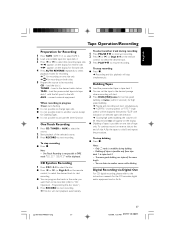
... of tapes is not possible listen to another source while dubbing. G It is possible on one side only. ➜ ∂ for recording on the remote control) to select the desired track to start recording. To stop dubbing G Press Ç. CD Synchro Recording 1 Press CD 1•2•3 to the ...interrupt recording. 2 Pressí or ë (or Digit 0-9 on reverse side, at the end of the same length. - To continue record on the remote control) to select the desired track. 3 Press PLAYÉÅ to the desired passage where recording will start. 2 Press DUB (HSD) once for normal...
... of tapes is not possible listen to another source while dubbing. G It is possible on one side only. ➜ ∂ for recording on the remote control) to select the desired track to start recording. To stop dubbing G Press Ç. CD Synchro Recording 1 Press CD 1•2•3 to the ...interrupt recording. 2 Pressí or ë (or Digit 0-9 on reverse side, at the end of the same length. - To continue record on the remote control) to select the desired track. 3 Press PLAYÉÅ to the desired passage where recording will start. 2 Press DUB (HSD) once for normal...

User manual
Page 28
... Standby mode, the clock will start flashing. 3 Press à or á on the system repeatedly to set the hour. 4 Press í or ë on the remote control). ➜ The clock will be displayed for a few seconds. ➜ If the clock has not been set in Standby mode. The clock settings will...
... Standby mode, the clock will start flashing. 3 Press à or á on the system repeatedly to set the hour. 4 Press í or ë on the remote control). ➜ The clock will be displayed for a few seconds. ➜ If the clock has not been set in Standby mode. The clock settings will...
User manual
Page 29
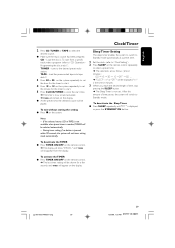
... the system to switch to Standby mode automatically at a preset time. 1 Set the clock (refer to "Clock Setting"). 2 Press SLEEP on the remote control. ➜ The last timer setting will switch to select the desired source. G Make sure the music source has been prepared. TAPE - To... exit without storing the setting G Press Çon the remote control. ➜ The display will show "CANCEL" and TIMER will disappear from a specific track, make a program (refer to select a preset time. ➜...
... the system to switch to Standby mode automatically at a preset time. 1 Set the clock (refer to "Clock Setting"). 2 Press SLEEP on the remote control. ➜ The last timer setting will switch to select the desired source. G Make sure the music source has been prepared. TAPE - To... exit without storing the setting G Press Çon the remote control. ➜ The display will show "CANCEL" and TIMER will disappear from a specific track, make a program (refer to select a preset time. ➜...
User manual
Page 32
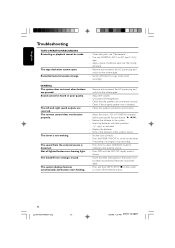
Clean deck parts, see "Maintenance". - Switch off the Demonstration. 32 pg 001-033/P900/37-Eng 32 12/8/00, 1:53 PM 3139 115 20411 The remote control does not function properly. Adjust the volume. - Check if the stripped speaker wire is not working. Check the speaker connections and location. - Select the ...
Clean deck parts, see "Maintenance". - Switch off the Demonstration. 32 pg 001-033/P900/37-Eng 32 12/8/00, 1:53 PM 3139 115 20411 The remote control does not function properly. Adjust the volume. - Check if the stripped speaker wire is not working. Check the speaker connections and location. - Select the ...
Leaflet
Page 2
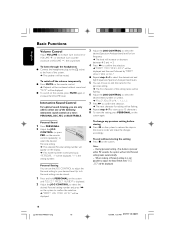
... of a built-in which they are all equipped with Motorized Drawer Multi-disc play any desired time of frequency response for greater listening pleasure. FWP900 Sound Enhancement 2 x 80 Watts + 50 Watts + 2 x 25 Watts Dolby® Pro Logic Output Mode, 50 Watts Powered Subwoofer 80... This infrared remote control operates volume +/±, all , the subwoofer is essential for deep and rich music. 3 Step DBB offers the optimal level for a more than 10% Total Harmonic distortion (THD). 50 W powered subwoofer Subwoofers add dynamism to a subwoofer. The 50W Philips subwoofer features a...
... of a built-in which they are all equipped with Motorized Drawer Multi-disc play any desired time of frequency response for greater listening pleasure. FWP900 Sound Enhancement 2 x 80 Watts + 50 Watts + 2 x 25 Watts Dolby® Pro Logic Output Mode, 50 Watts Powered Subwoofer 80... This infrared remote control operates volume +/±, all , the subwoofer is essential for deep and rich music. 3 Step DBB offers the optimal level for a more than 10% Total Harmonic distortion (THD). 50 W powered subwoofer Subwoofers add dynamism to a subwoofer. The 50W Philips subwoofer features a...


