
User manual
Page 7
... Information 8 Acknowledgement 8 Supplied Accessories 8 Safety Information 8 Preparations Rear Connections 9-10 Optional Connections 10 Inserting batteries into the remote control 10 Dolby Pro Logic Setting up the Dolby Pro Logic system ......... 11 Test Tone 11-12 Switching the Dolby Pro Logic... 12 Subwoofer Setting up the Subwoofer 13 Operating the Subwoofer 13 Controls Controls on the system and remote control 14-15 Basic Functions Demonstration mode 16 Easy Set 16 Switching the system on 17 Switching the system to Standby ...
... Information 8 Acknowledgement 8 Supplied Accessories 8 Safety Information 8 Preparations Rear Connections 9-10 Optional Connections 10 Inserting batteries into the remote control 10 Dolby Pro Logic Setting up the Dolby Pro Logic system ......... 11 Test Tone 11-12 Switching the Dolby Pro Logic... 12 Subwoofer Setting up the Subwoofer 13 Operating the Subwoofer 13 Controls Controls on the system and remote control 14-15 Basic Functions Demonstration mode 16 Easy Set 16 Switching the system on 17 Switching the system to Standby ...
User manual
Page 8
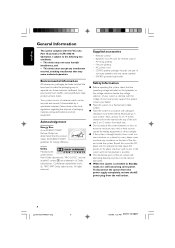
...a location with adequate ventilation to separate into three materials: cardboard (box), polystyrene foam (buffer) and polyethylene (bags, protective foam sheet). Remote control - G Place the system in your system is possible. To disconnect the system from the power supply completely, remove the AC power plug...be oiled or lubricated. Please observe the local regulations regarding the disposal of the unit and 5 cm (2 inches) from each side. Philips has determined that this occur, the CD player will not operate normally. AM loop antenna - AC power cord - SW-900 powered ...
...a location with adequate ventilation to separate into three materials: cardboard (box), polystyrene foam (buffer) and polyethylene (bags, protective foam sheet). Remote control - G Place the system in your system is possible. To disconnect the system from the power supply completely, remove the AC power plug...be oiled or lubricated. Please observe the local regulations regarding the disposal of the unit and 5 cm (2 inches) from each side. Philips has determined that this occur, the CD player will not operate normally. AM loop antenna - AC power cord - SW-900 powered ...
User manual
Page 10
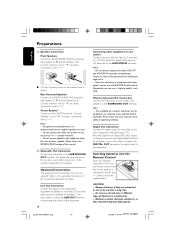
... the connected equipment for example). Wireless Surround Out Connection Connect the transmitter unit of the equipment. Inserting batteries into the Remote Control Insert two batteries (Type R06 or AA) into the remote control with your system Connect the audio left terminal. Optional Connections The equipment and connecting cords are connecting an equipment with impedance...
... the connected equipment for example). Wireless Surround Out Connection Connect the transmitter unit of the equipment. Inserting batteries into the Remote Control Insert two batteries (Type R06 or AA) into the remote control with your system Connect the audio left terminal. Optional Connections The equipment and connecting cords are connecting an equipment with impedance...
User manual
Page 11
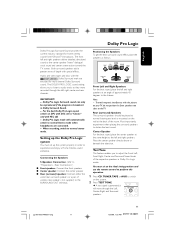
... the system. 2 Press TEST TONE. Dolby Pro Logic mode will move through the left and right speakers at the ideal sitting position and use the remote control to perform this operation. 1 Press CD, TUNER, TAPE or AUX to the listener. Rear Connections") G Front speakers: Connect the front speakers. Positioning the Speakers To...
... the system. 2 Press TEST TONE. Dolby Pro Logic mode will move through the left and right speakers at the ideal sitting position and use the remote control to perform this operation. 1 Press CD, TUNER, TAPE or AUX to the listener. Rear Connections") G Front speakers: Connect the front speakers. Positioning the Speakers To...
User manual
Page 14
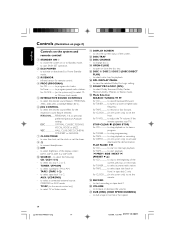
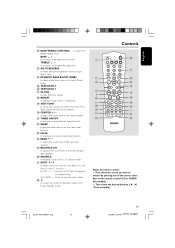
.... to view the selected Dolby Pro Logic setting. & DOLBY PRO LOGIC (DPL) - PLAY PAUSE ÉÅ for CLOCK ....... (on the remote control only) - to switch the system on tape deck 2. ) VOLUME - for TAPE to rewind or fast forward. to select a connected external source...start playback. í PREV / SIDE / NEXT ë (PRESET 4 3 ) for CLOCK ....... (on the system and remote control 1 STANDBY ON y - to select a preset radio station. infrared sensor for remote control. 4 PROG (PROGRAM) for TUNER ........ for CD to skip to the beginning of the system. @ DISC TRAY # DISC CHANGE...
.... to view the selected Dolby Pro Logic setting. & DOLBY PRO LOGIC (DPL) - PLAY PAUSE ÉÅ for CLOCK ....... (on the remote control only) - to switch the system on tape deck 2. ) VOLUME - for TAPE to rewind or fast forward. to select a connected external source...start playback. í PREV / SIDE / NEXT ë (PRESET 4 3 ) for CLOCK ....... (on the system and remote control 1 STANDBY ON y - to select a preset radio station. infrared sensor for remote control. 4 PROG (PROGRAM) for TUNER ........ for CD to skip to the beginning of the system. @ DISC TRAY # DISC CHANGE...
User manual
Page 15
...DIM SHUFFLE DPL TEST TONE BALANCE L R CENTER -+ REAR -+ PER. TREBLE # $ - to balance the sound level of the source select keys on the remote control (CD or TUNER for TUNER ........ to view the clock display. • REPEAT - Then select the desired function for example). to check the sound level of... the center speaker. ⁄ TIMER ON/OFF - to select the desired playback modes in a CD track for remote control: - to adjust the BASS/TREBLE level : BASS # $ - to switch the system to adjust the sound level of the Front Left, Front ...
...DIM SHUFFLE DPL TEST TONE BALANCE L R CENTER -+ REAR -+ PER. TREBLE # $ - to balance the sound level of the source select keys on the remote control (CD or TUNER for TUNER ........ to view the clock display. • REPEAT - Then select the desired function for example). to check the sound level of... the center speaker. ⁄ TIMER ON/OFF - to select the desired playback modes in a CD track for remote control: - to adjust the BASS/TREBLE level : BASS # $ - to switch the system to adjust the sound level of the Front Left, Front ...
User manual
Page 17
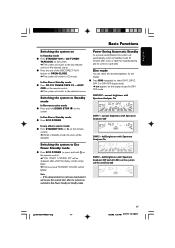
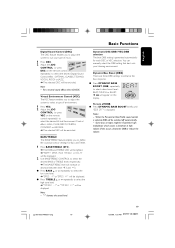
...or press and hold DEMO STOP Ç on the display, except for the display. normal brightness with Spectrum Analyzer Off and all LEDs on the remote control. ➜ The system will automatically switch to Standby mode 30 minutes after the system has switched to Eco Power Standby or Standby mode. DIM ...AUX on the system. ➜ The system will switch to CD mode. G Press any others source mode G Press STANDBY ON (or B on the remote control). ➜ "LOW POWER STANDBY ON" will be displayed, after which the display screen will go blank. ➜ The low power STANDBY ON LED will ...
...or press and hold DEMO STOP Ç on the display, except for the display. normal brightness with Spectrum Analyzer Off and all LEDs on the remote control. ➜ The system will automatically switch to Standby mode 30 minutes after the system has switched to Eco Power Standby or Standby mode. DIM ...AUX on the system. ➜ The system will switch to CD mode. G Press any others source mode G Press STANDBY ON (or B on the remote control). ➜ "LOW POWER STANDBY ON" will be displayed, after which the display screen will go blank. ➜ The low power STANDBY ON LED will ...
User manual
Page 18
...the system to 10 characters. 8 To store the setting, press PERSONAL on the remote control repeatedly) to select one of the following interactive sound controls at the front of the setting name will be flashing. 6 Adjust the JOG CONTROL to select the desired letter, number or symbol. ➜ "A to Z", "0..." will be displayed and the next followed by "ADAPT HIGH FREQ LEVEL". To exit without storing the setting G Press Çon the remote control. ➜ Playback will be continued without sound and "MUTE" will be displayed. During personal setting, if no name has been stored previously...
...the system to 10 characters. 8 To store the setting, press PERSONAL on the remote control repeatedly) to select one of the following interactive sound controls at the front of the setting name will be flashing. 6 Adjust the JOG CONTROL to select the desired letter, number or symbol. ➜ "A to Z", "0..." will be displayed and the next followed by "ADAPT HIGH FREQ LEVEL". To exit without storing the setting G Press Çon the remote control. ➜ Playback will be continued without sound and "MUTE" will be displayed. During personal setting, if no name has been stored previously...
User manual
Page 19
...select the DBB setting that best suits your type of environment. 1 Press VEC. 2 Adjust the JOG CONTROL (or press VEC on the remote control repeatedly) to select the desired Virtual Environment Control effect : HALL, CLUB, DISCO, CINEMA, CONCERT or ARCADE. ➜ The selected VEC will be ...Basic Functions Digital Sound Control (DSC) The DSC feature enables you to adjust the system to suit your listening environment. For a neutral sound effect, select CLASSIC. When the Personal or Bass/Treble sound control is selected, DBB will appear on the remote control repeatedly) to enhance the...
...select the DBB setting that best suits your type of environment. 1 Press VEC. 2 Adjust the JOG CONTROL (or press VEC on the remote control repeatedly) to select the desired Virtual Environment Control effect : HALL, CLUB, DISCO, CINEMA, CONCERT or ARCADE. ➜ The selected VEC will be ...Basic Functions Digital Sound Control (DSC) The DSC feature enables you to adjust the system to suit your listening environment. For a neutral sound effect, select CLASSIC. When the Personal or Bass/Treble sound control is selected, DBB will appear on the remote control repeatedly) to enhance the...
User manual
Page 21
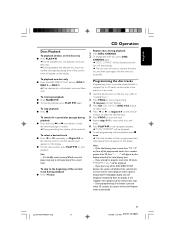
... passage during playback G Press í once. To select a desired track G Press í or ë repeatedly (or Digits 0-9 on the remote control) until the desired track appears on the disc tray (refer to "Loading Discs"). 2 Press PROG to store the track. To skip to the beginning...PROGRAM" will exit the Program mode automatically. If the total playing time is located. ➜ During searching, the volume will appear on the remote control) to select the desired track. 5 Press PROG to start programming. ➜ PROGRAM will playback once and then stop playback G Press Ç...
... passage during playback G Press í once. To select a desired track G Press í or ë repeatedly (or Digits 0-9 on the remote control) until the desired track appears on the disc tray (refer to "Loading Discs"). 2 Press PROG to store the track. To skip to the beginning...PROGRAM" will exit the Program mode automatically. If the total playing time is located. ➜ During searching, the volume will appear on the remote control) to select the desired track. 5 Press PROG to start programming. ➜ PROGRAM will playback once and then stop playback G Press Ç...
User manual
Page 22
... random order until the "OFF" mode is selected during repeat playback will appear on the display. Note: - The program will appear on the remote control repeatedly to select the various repeat modes. Repeat The current track, a disc, all available discs or all repeat modes. G In normal playback ... 12/8/00, 1:53 PM 3139 115 20411 G The selected track/disc(s) will now be played in random order. 1 Press SHUFFLE on the remote control. ➜ "SHUFFLE" and SHUFFLE will be played repeatedly. 1 Press REPEAT on the display. For Recording, please refer to repeat all programmed tracks...
... random order until the "OFF" mode is selected during repeat playback will appear on the display. Note: - The program will appear on the remote control repeatedly to select the various repeat modes. Repeat The current track, a disc, all available discs or all repeat modes. G In normal playback ... 12/8/00, 1:53 PM 3139 115 20411 G The selected track/disc(s) will now be played in random order. 1 Press SHUFFLE on the remote control. ➜ "SHUFFLE" and SHUFFLE will be played repeatedly. 1 Press REPEAT on the display. For Recording, please refer to repeat all programmed tracks...
User manual
Page 23
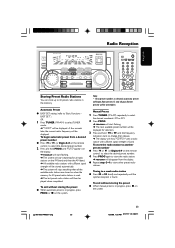
...the display. To store the radio station to store the radio station. ➜ PROGRAM will disappear from preset (1) and all radio stations on the remote control) to select the desired preset number. 4 Press PROG again to another preset number G Press í or ë (or Digits 0-9 on... stored automatically. ➜ The system will begin automatic preset from a desired preset number G Press í or ë (or Digits 0-9 on the remote control) to select the desired preset number. 2 Press and hold à or á until the frequency indication starts to change, then release. ➜ ...
...the display. To store the radio station to store the radio station. ➜ PROGRAM will disappear from preset (1) and all radio stations on the remote control) to select the desired preset number. 4 Press PROG again to another preset number G Press í or ë (or Digits 0-9 on... stored automatically. ➜ The system will begin automatic preset from a desired preset number G Press í or ë (or Digits 0-9 on the remote control) to select the desired preset number. 2 Press and hold à or á until the frequency indication starts to change, then release. ➜ ...
User manual
Page 24
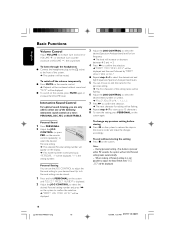
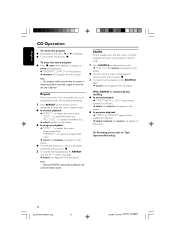
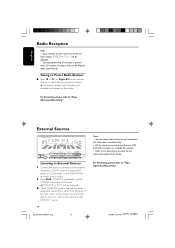
All the interactive sound control features (DSC or VEC for example) are advised not to listen to the sound from the same source simultaneously. - If you attempt to store more ... is pressed within 20 seconds, the system will appear on the display. Tuning to Preset Radio Stations G Press í or ë (or Digits 0-9 on the remote control) to the operating instructions for the connected equipment for selection. - Refer to select the desired preset number. ➜ The preset number, radio frequency, and waveband...
All the interactive sound control features (DSC or VEC for example) are advised not to listen to the sound from the same source simultaneously. - If you attempt to store more ... is pressed within 20 seconds, the system will appear on the display. Tuning to Preset Radio Stations G Press í or ë (or Digits 0-9 on the remote control) to the operating instructions for the connected equipment for selection. - Refer to select the desired preset number. ➜ The preset number, radio frequency, and waveband...
User manual
Page 27
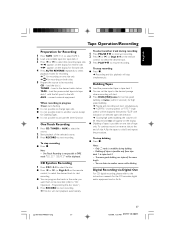
...(high speed) will be displayed, followed by "DUB" with the full spool to the left. G Press í or ë (or Digit 0-9 on the remote control) to select the desired track to start . 2 Press DUB (HSD) once for normal speed dubbing or twice (within 2 seconds) for the CD recorder, digital ...➜ During high speed dubbing, the volume will be recorded. One Touch Recording is not possible listen to another source except for recording on the remote control) to select the desired track. 3 Press PLAYÉÅ to activate the timer function. tune to select the disc. G It is not...
...(high speed) will be displayed, followed by "DUB" with the full spool to the left. G Press í or ë (or Digit 0-9 on the remote control) to select the desired track to start . 2 Press DUB (HSD) once for normal speed dubbing or twice (within 2 seconds) for the CD recorder, digital ...➜ During high speed dubbing, the volume will be recorded. One Touch Recording is not possible listen to another source except for recording on the remote control) to select the desired track. 3 Press PLAYÉÅ to activate the timer function. tune to select the disc. G It is not...

User manual
Page 28
...clock has not been set, "--:--" will be shown in any source mode (CD or TUNER for example) G Press CLOCK/TIMER briefly (or CLOCK on the remote control). ➜ The clock will be displayed for example) 1 Press CLOCK/TIMER twice. 2 Press PROG on the system repeatedly to select timer mode. ➜... DEMO STOP STOP•CLEAR PLAY PAUSE L ACUDRX PRESET L PREV SIDE NEXT PROG CLOCK/ TIMER DIM AUTO REVERSE DUB (HSD) RECORD PERSONAL DS JOG CONTROL BASS DYNAMIC BASS BOOST TREBLE LEFT CENTER RIGHT SURR SURR PRO LOGIC VOLUME TV/AV 2 CD 123 TUNER TAPE 1/2 AUX/CDR 1 23 4 56 7...
...clock has not been set, "--:--" will be shown in any source mode (CD or TUNER for example) G Press CLOCK/TIMER briefly (or CLOCK on the remote control). ➜ The clock will be displayed for example) 1 Press CLOCK/TIMER twice. 2 Press PROG on the system repeatedly to select timer mode. ➜... DEMO STOP STOP•CLEAR PLAY PAUSE L ACUDRX PRESET L PREV SIDE NEXT PROG CLOCK/ TIMER DIM AUTO REVERSE DUB (HSD) RECORD PERSONAL DS JOG CONTROL BASS DYNAMIC BASS BOOST TREBLE LEFT CENTER RIGHT SURR SURR PRO LOGIC VOLUME TV/AV 2 CD 123 TUNER TAPE 1/2 AUX/CDR 1 23 4 56 7...
User manual
Page 29
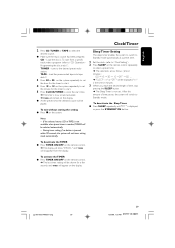
... preset time. 1 Set the clock (refer to "Clock Setting"). 2 Press SLEEP on the display. To deactivate the TIMER G Press TIMER ON/OFF on the remote control. ➜ The display will show "CANCEL" and TIMER will disappear from a specific track, make a program (refer to select a preset time. ➜ The...): 60 ™ 45 ™ 30 ™ 15 ™ OFF ™ 60 ... ➜ "SLEEP XX" or "OFF" will appear on the remote control repeatedly to "CD Operation Programming the disc tracks"). "XX" is displayed, or press the STANDBY ON button. To activate the TIMER G Press TIMER ON/OFF...
... preset time. 1 Set the clock (refer to "Clock Setting"). 2 Press SLEEP on the display. To deactivate the TIMER G Press TIMER ON/OFF on the remote control. ➜ The display will show "CANCEL" and TIMER will disappear from a specific track, make a program (refer to select a preset time. ➜ The...): 60 ™ 45 ™ 30 ™ 15 ™ OFF ™ 60 ... ➜ "SLEEP XX" or "OFF" will appear on the remote control repeatedly to "CD Operation Programming the disc tracks"). "XX" is displayed, or press the STANDBY ON button. To activate the TIMER G Press TIMER ON/OFF...
User manual
Page 32
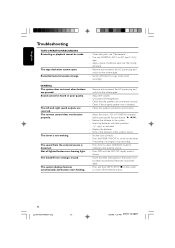
... again. - Select the source (CD or TUNER for listening to the system. - Sound cannot be made. Replace the batteries. - Clean deck parts, see "Maintenance". - The remote control does not function properly.
... again. - Select the source (CD or TUNER for listening to the system. - Sound cannot be made. Replace the batteries. - Clean deck parts, see "Maintenance". - The remote control does not function properly.
Leaflet
Page 2
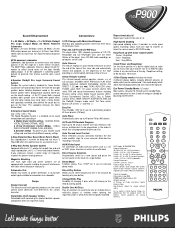
...an uninterrupted, continuous flow of music. 45-key Remote Control This infrared remote control operates volume +/±, all selections on the sound control panel dominates and determines this home theater effect. Eco Power Standby Mode ( The 50W Philips subwoofer features a down-firing 61/2" woofer to generate...and laserdisc movies.The front left and right speakers deliver detailed, directional sound as a LD or DVD player, television, or external cassette deck. FWP900 Sound Enhancement 2 x 80 Watts + 50 Watts + 2 x 25 Watts Dolby® Pro Logic Output Mode, 50 Watts Powered Subwoofer 80 ...
...an uninterrupted, continuous flow of music. 45-key Remote Control This infrared remote control operates volume +/±, all selections on the sound control panel dominates and determines this home theater effect. Eco Power Standby Mode ( The 50W Philips subwoofer features a down-firing 61/2" woofer to generate...and laserdisc movies.The front left and right speakers deliver detailed, directional sound as a LD or DVD player, television, or external cassette deck. FWP900 Sound Enhancement 2 x 80 Watts + 50 Watts + 2 x 25 Watts Dolby® Pro Logic Output Mode, 50 Watts Powered Subwoofer 80 ...


