
Leaflet
Page 1
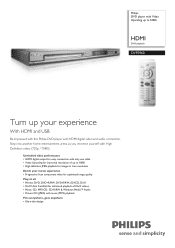
... & Windows Media™ Audio • Picture CD (JPEG) with music (MP3) playback Fits everywhere, goes anywhere • Ultra-slim design Philips DVD player with Video Upscaling up to 1080i HDMI DivX playback DVP5960 Turn up to 1080i • High definition JPEG playback for images in true resolution Enrich your experience With HDMI and USB...
... & Windows Media™ Audio • Picture CD (JPEG) with music (MP3) playback Fits everywhere, goes anywhere • Ultra-slim design Philips DVD player with Video Upscaling up to 1080i HDMI DivX playback DVP5960 Turn up to 1080i • High definition JPEG playback for images in true resolution Enrich your experience With HDMI and USB...
Leaflet
Page 2
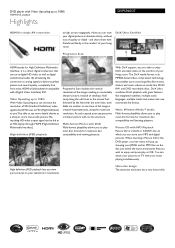
... enclosure has a very low profile. High definition JPEG playback Progressive Scan doubles the vertical resolution of the image resulting in the DVD player, a screen menu will pop up to 1080i With Video Upscaling you to play most disc formats for maximum disc compatibility and ... Ultra Certified Progressive Scan HDMI stands for High Definition Multimedia Interface. You can view your living room. DVD player with Video Upscaling up to 1080i HDMI DivX playback Highlights DVP5960/37 HDMI for simple AV connection as high as digital multichannel audio. When inserting a Picture CD in...
... enclosure has a very low profile. High definition JPEG playback Progressive Scan doubles the vertical resolution of the image resulting in the DVD player, a screen menu will pop up to 1080i With Video Upscaling you to play most disc formats for maximum disc compatibility and ... Ultra Certified Progressive Scan HDMI stands for High Definition Multimedia Interface. You can view your living room. DVD player with Video Upscaling up to 1080i HDMI DivX playback Highlights DVP5960/37 HDMI for simple AV connection as high as digital multichannel audio. When inserting a Picture CD in...
Leaflet
Page 3
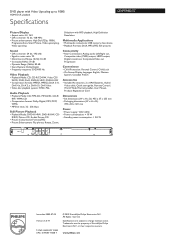
DVD player with Video Upscaling up to 1080i HDMI DivX playback Specifications DVP5960/37 Picture/Display • Aspect ratio: 4:3, 16:9 • D/A converter: 12 bit, 108 MHz • Picture enhancement: High Def (720p, 1080i), Progressive Scan, Smart Picture, Video ... consumption: < 10 W • Standby power consumption: < 0.8 W • Issue date 2009-07-03 Version: 5.0.14 12 NC: 8622 810 13255 UPC: 6 09585 11068 7 © 2009 Koninklijke Philips Electronics N.V. or their respective owners. All Rights reserved. Specifications are the property of Koninklijke...
DVD player with Video Upscaling up to 1080i HDMI DivX playback Specifications DVP5960/37 Picture/Display • Aspect ratio: 4:3, 16:9 • D/A converter: 12 bit, 108 MHz • Picture enhancement: High Def (720p, 1080i), Progressive Scan, Smart Picture, Video ... consumption: < 10 W • Standby power consumption: < 0.8 W • Issue date 2009-07-03 Version: 5.0.14 12 NC: 8622 810 13255 UPC: 6 09585 11068 7 © 2009 Koninklijke Philips Electronics N.V. or their respective owners. All Rights reserved. Specifications are the property of Koninklijke...
User manual
Page 4
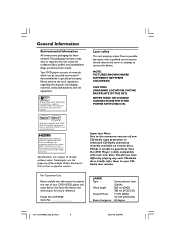
...set out in hazardous radiation exposure. IF THERE ARE QUESTIONS REGARDING OUR TV SET COMPATIBILITY WITH THIS MODEL 525p AND 625p DVD PLAYER, PLEASE CONTACT OUR CUSTOMER SERVICE CENTER.' VARNING! or DANGER - OCH SPARREN AR URKOPPLAD.BETRAKTA EJ STRÅLEN. IN...DANGER:IANVVOISIIDBLEDLIRAESCERT RADIATION WHEN OPEN. AVATTAESSA JA SUOJALUKITUS OHITETTAESSA OLET ALTTIINANAKYMATTOMAALLE LASERSATEILYLLE. The apparatus shall not be easy to www.philips.com/support for radio noise emissions from digital apparatus as vases, shall be placed on the rear panel and inside this...
...set out in hazardous radiation exposure. IF THERE ARE QUESTIONS REGARDING OUR TV SET COMPATIBILITY WITH THIS MODEL 525p AND 625p DVD PLAYER, PLEASE CONTACT OUR CUSTOMER SERVICE CENTER.' VARNING! or DANGER - OCH SPARREN AR URKOPPLAD.BETRAKTA EJ STRÅLEN. IN...DANGER:IANVVOISIIDBLEDLIRAESCERT RADIATION WHEN OPEN. AVATTAESSA JA SUOJALUKITUS OHITETTAESSA OLET ALTTIINANAKYMATTOMAALLE LASERSATEILYLLE. The apparatus shall not be easy to www.philips.com/support for radio noise emissions from digital apparatus as vases, shall be placed on the rear panel and inside this...
User manual
Page 6
...or enhanced CD-Audio protection recently available on certain discs, Philips is fully compatible with such new discs. Model No. Specifications are trademarks, or registered trademarks of Koninklijke Philips Electronics N.V. Your DVD player consists of DivX, Inc. and are the property of Microsoft.... Laser safety This unit employs a laser. HDMI (High Definition Multimedia Interface) is a digital interface that this DVD Player is unable to your DVD VIDEO player and enter below the Serial No. or their respective owners. DivX Ultra Certified products: "DivX", DivX Ultra Certified...
...or enhanced CD-Audio protection recently available on certain discs, Philips is fully compatible with such new discs. Model No. Specifications are trademarks, or registered trademarks of Koninklijke Philips Electronics N.V. Your DVD player consists of DivX, Inc. and are the property of Microsoft.... Laser safety This unit employs a laser. HDMI (High Definition Multimedia Interface) is a digital interface that this DVD Player is unable to your DVD VIDEO player and enter below the Serial No. or their respective owners. DivX Ultra Certified products: "DivX", DivX Ultra Certified...
User manual
Page 11
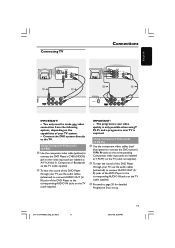
... corresponding Component video input jacks (or labeled as A/V In,Video In, Composite or Baseband) on the TV (cable supplied). 2 To hear the sound of the DVD Player to page 20 for detailed Progressive Scan set up. 001-51 DVP5960_Eng_37_RC3 11 11 05/07/06, 3:59 PM Using Composite Video jacks (CVBS) 1 Use... the composite video cable (yellow) to connect the DVD Player's CVBS (VIDEO) jack to the video input jack (or labeled as Y Pb Pr) on the TV (cable not supplied). 2 To hear the sound of ...
... corresponding Component video input jacks (or labeled as A/V In,Video In, Composite or Baseband) on the TV (cable supplied). 2 To hear the sound of the DVD Player to page 20 for detailed Progressive Scan set up. 001-51 DVP5960_Eng_37_RC3 11 11 05/07/06, 3:59 PM Using Composite Video jacks (CVBS) 1 Use... the composite video cable (yellow) to connect the DVD Player's CVBS (VIDEO) jack to the video input jack (or labeled as Y Pb Pr) on the TV (cable not supplied). 2 To hear the sound of ...
User manual
Page 12
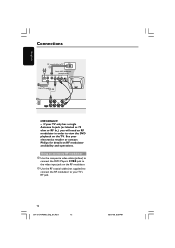
...coaxial cable to the video input jack on the TV. If your electronics retailer or contact Philips for details on RF modulator availability and operations. See your TV only has a single Antenna... (or labeled as 75 ohm or RF In,) you will need an RF modulator in order to view the DVD playback on the RF modulator. 2 Use the RF coaxial cable (not supplied) to connect the RF modulator to...05/07/06, 3:59 PM Using an accessory RF modulator 1 Use the composite video cable (yellow) to connect the DVD Player's CVBS jack to TV 2 Back of RF Modulator (example only) INT IN TO TV VIDEO IN AUDIO IN R ...
...coaxial cable to the video input jack on the TV. If your electronics retailer or contact Philips for details on RF modulator availability and operations. See your TV only has a single Antenna... (or labeled as 75 ohm or RF In,) you will need an RF modulator in order to view the DVD playback on the RF modulator. 2 Use the RF coaxial cable (not supplied) to connect the RF modulator to...05/07/06, 3:59 PM Using an accessory RF modulator 1 Use the composite video cable (yellow) to connect the DVD Player's CVBS jack to TV 2 Back of RF Modulator (example only) INT IN TO TV VIDEO IN AUDIO IN R ...

User manual
Page 13
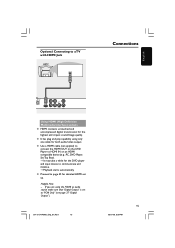
English Connecting the power cord AUDIO OUT COMPONENT VIDEO IN S-VIDEO IN V (Pr/Cr) VIDEO IN U (Pb/Cb) Y ~ AC MAINS Connections After everything is loaded, press STANDBY ON on the DVD Player front panel, "NO DISC" may appear on . NO DISC 001-51 DVP5960_Eng_37_RC3 13 13 05/07/06, 3:59 PM When no disc is connected properly, plug in the AC power cord to the power outlet. Never make or change any connections with the power switched on the display panel.
English Connecting the power cord AUDIO OUT COMPONENT VIDEO IN S-VIDEO IN V (Pr/Cr) VIDEO IN U (Pb/Cb) Y ~ AC MAINS Connections After everything is loaded, press STANDBY ON on the DVD Player front panel, "NO DISC" may appear on . NO DISC 001-51 DVP5960_Eng_37_RC3 13 13 05/07/06, 3:59 PM When no disc is connected properly, plug in the AC power cord to the power outlet. Never make or change any connections with the power switched on the display panel.

User manual
Page 14
...IN) depending on the options available on your TV. 2 Use the audio cables (white/red) to connect AUDIO OUT (L/R) jacks of the DVD Player to PCM-ONLY or ALL depending on the stereo system (cable supplied). English Connections Optional: Connecting to an Audio System STEREO OPTICAL AUDIO IN ... IN) depending on the options available on your TV. 2 Connect the COAXIAL jack of the DVD Player to the corresponding Digital Audio In jack on your Receiver (cable not supplied). 3 Set the DVD Player's Digital Output to the corresponding AUDIO IN jacks on the capabilities of your Receiver (see page ...
...IN) depending on the options available on your TV. 2 Use the audio cables (white/red) to connect AUDIO OUT (L/R) jacks of the DVD Player to PCM-ONLY or ALL depending on the stereo system (cable supplied). English Connections Optional: Connecting to an Audio System STEREO OPTICAL AUDIO IN ... IN) depending on the options available on your TV. 2 Connect the COAXIAL jack of the DVD Player to the corresponding Digital Audio In jack on your Receiver (cable not supplied). 3 Set the DVD Player's Digital Output to the corresponding AUDIO IN jacks on the capabilities of your Receiver (see page ...
User manual
Page 15
.... G Use a HDMI cable (not supplied) to connect the HDMI OUT on the DVD Player to HDMI IN on an HDMI compatible device (e.g.; G Proceed to page 42 for the DVD player and input device to communicate and initialise. ➜ Playback starts automatically. PC, DVD Player, Set Top Box). ➜ It may take a while for detailed HDMI set...
.... G Use a HDMI cable (not supplied) to connect the HDMI OUT on the DVD Player to HDMI IN on an HDMI compatible device (e.g.; G Proceed to page 42 for the DVD player and input device to communicate and initialise. ➜ Playback starts automatically. PC, DVD Player, Set Top Box). ➜ It may take a while for detailed HDMI set...
User manual
Page 17
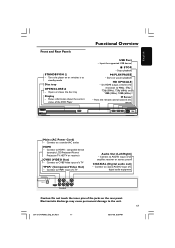
PLAY/PAUSE - Connect to YPbPr input of the DVD Player Functional Overview USB Port - Shows information about the current status of a TV Audio Out (Left/Right) - Input the supported USB device. 9 STOP - Set HDMI output, ... Out) - Electrostatic discharge may cause permanent damage to HDMI - Connect to the unit. 17 001-51 DVP5960_Eng_37_RC3 17 05/07/06, 3:59 PM Turns the player on the rear panel. Opens or closes the disc tray Display - Connect to standby mode Disc tray OPEN/CLOSE / -
PLAY/PAUSE - Connect to YPbPr input of the DVD Player Functional Overview USB Port - Shows information about the current status of a TV Audio Out (Left/Right) - Input the supported USB device. 9 STOP - Set HDMI output, ... Out) - Electrostatic discharge may cause permanent damage to HDMI - Connect to the unit. 17 001-51 DVP5960_Eng_37_RC3 17 05/07/06, 3:59 PM Turns the player on the rear panel. Opens or closes the disc tray Display - Connect to standby mode Disc tray OPEN/CLOSE / -
User manual
Page 19
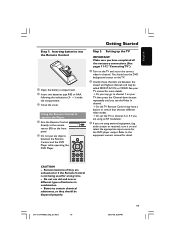
... system or receiver), turn it on the TV. 2 Usually these channels are exhausted or if the Remote Control is not being used for the DVD player output. See your TV, then press the Channel down button repeatedly until you may be disposed properly. 001-51 DVP5960_Eng_37_RC3 19 19 05/07/06...1 on your TV manual for detail. Batteries contain chemical substances, so they are between the lowest and highest channels and may go to operate the Player 1 Aim the Remote Control directly at the remote sensor (IR) on the front panel. 2 Do not put any objects between the Remote Control and...
... system or receiver), turn it on the TV. 2 Usually these channels are exhausted or if the Remote Control is not being used for the DVD player output. See your TV, then press the Channel down button repeatedly until you may be disposed properly. 001-51 DVP5960_Eng_37_RC3 19 19 05/07/06...1 on your TV manual for detail. Batteries contain chemical substances, so they are between the lowest and highest channels and may go to operate the Player 1 Aim the Remote Control directly at the remote sensor (IR) on the front panel. 2 Do not put any objects between the Remote Control and...
User manual
Page 20
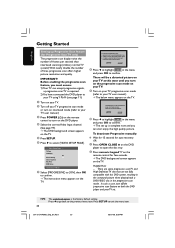
...GOOD, PRESS OK BUTTON ON REMOTE. In such a case, turn off your TV progressive scan mode or turn on the DVD player. 4 Select the correct Video Input channel. (See page 19). ➜ The DVD background screen appears on the TV. 5 Press SETUP. 6 Press 2 to confirm. ➜ The set . ENSURE YOUR...}. - - TIPS: 20 The underlined option is complete now and you can accept progressive signals, a progressive scan TV is required. 2) You have connected the DVD player to your TV using Y Pb Pr (see page 11.) 1 Turn on your TV. 2 Turn off the progressive scan feature on the TV. Press SETUP...
...GOOD, PRESS OK BUTTON ON REMOTE. In such a case, turn off your TV progressive scan mode or turn on the DVD player. 4 Select the correct Video Input channel. (See page 19). ➜ The DVD background screen appears on the TV. 5 Press SETUP. 6 Press 2 to confirm. ➜ The set . ENSURE YOUR...}. - - TIPS: 20 The underlined option is complete now and you can accept progressive signals, a progressive scan TV is required. 2) You have connected the DVD player to your TV using Y Pb Pr (see page 11.) 1 Turn on your TV. 2 Turn off the progressive scan feature on the TV. Press SETUP...
User manual
Page 21
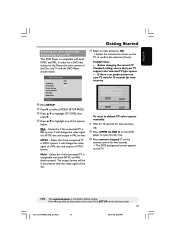
...video signal of the Disc, the TV and the DVD Player should match. - - OR 1 Press OPEN CLOSE 0 on the DVD player to open the disc tray. 2 Press numeric keypad '3' on the remote control for a DVD disc to play on the TV to your TV This DVD Player is PAL system. Helpful Hints: - In order ...for few seconds. ➜ The DVD background screen appears on your TV, wait for 15 seconds for auto recovery. Select...
...video signal of the Disc, the TV and the DVD Player should match. - - OR 1 Press OPEN CLOSE 0 on the DVD player to open the disc tray. 2 Press numeric keypad '3' on the remote control for a DVD disc to play on the TV to your TV This DVD Player is PAL system. Helpful Hints: - In order ...for few seconds. ➜ The DVD background screen appears on your TV, wait for 15 seconds for auto recovery. Select...
User manual
Page 23
... a certain disc, remove the disc and try a different one. If the inhibit icon (ø) appears on this DVD player. Playable Discs Your DVD Player will not play on the TV screen when a button is pressed, it means the function is designed to the instructions... compensation - If the number does not match the player's region number (see table below), the player may cause the disc player malfunction. Digital Video Discs + Recordable[Rewritable] (DVD+R[W]) - DivX Ultra on CD-R[W]/DVD±R[W]: Region Codes This DVD player is not available on the disc tray. and Canada...
... a certain disc, remove the disc and try a different one. If the inhibit icon (ø) appears on this DVD player. Playable Discs Your DVD Player will not play on the TV screen when a button is pressed, it means the function is designed to the instructions... compensation - If the number does not match the player's region number (see table below), the player may cause the disc player malfunction. Digital Video Discs + Recordable[Rewritable] (DVD+R[W]) - DivX Ultra on CD-R[W]/DVD±R[W]: Region Codes This DVD player is not available on the disc tray. and Canada...
User manual
Page 24
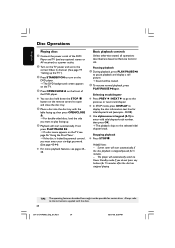
...-51 DVP5960_Eng_37_RC3 24 05/07/06, 3:59 PM Selecting track/chapter G Press PREV ¡ / NEXT ™ to go to turn on the DVD player. ➜ The DVD background screen appears on the TV. 4 Press OPEN/CLOSE 0 on the TV, see pages 24- 29. English Disc Operations Playing discs 1 Connect the... power cords of the DVD player. TIPS: The operating features described here might not be muted. 2 To resume normal playback, press PLAY/PAUSE 2; Always refer to play facing up , ...
...-51 DVP5960_Eng_37_RC3 24 05/07/06, 3:59 PM Selecting track/chapter G Press PREV ¡ / NEXT ™ to go to turn on the DVD player. ➜ The DVD background screen appears on the TV. 4 Press OPEN/CLOSE 0 on the TV, see pages 24- 29. English Disc Operations Playing discs 1 Connect the... power cords of the DVD player. TIPS: The operating features described here might not be muted. 2 To resume normal playback, press PLAY/PAUSE 2; Always refer to play facing up , ...
User manual
Page 30
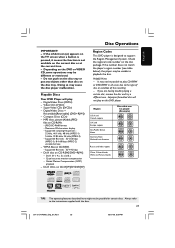
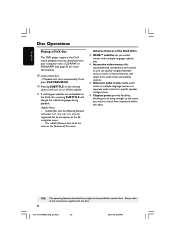
..., allowing you to jump straight to the scene you download from your computer onto a CD-R/RW or DVD±R/RW (see page 35 for certain discs. English Disc Operations Playing a DivX disc This DVD player supports the DivX movie playback that you want to watch from anywhere within the video. Subtitle files with...
..., allowing you to jump straight to the scene you download from your computer onto a CD-R/RW or DVD±R/RW (see page 35 for certain discs. English Disc Operations Playing a DivX disc This DVD player supports the DivX movie playback that you want to watch from anywhere within the video. Subtitle files with...
User manual
Page 34
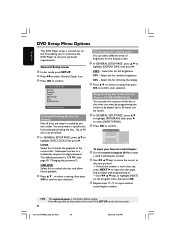
...PAGE', press 3 4 to highlight {DISC LOCK}, then press 2. Select this to block the playback of the disc in the order you to customise the DVD Player to suit your particular requirements. Press 1 to go back to a locked disc requires six-digit password. Subsequent access to the previous menu item. The ... to the next position. ➜ If the track number is carried out via the TV, enabling you want by the disc maker. English DVD Setup Menu Options This DVD Player setup is more than ten, press NEXT ™ to open the next page and proceed with programming or, ➜ Use 1 2 3 4 keys...
...PAGE', press 3 4 to highlight {DISC LOCK}, then press 2. Select this to block the playback of the disc in the order you to customise the DVD Player to suit your particular requirements. Press 1 to go back to a locked disc requires six-digit password. Subsequent access to the previous menu item. The ... to the next position. ➜ If the track number is carried out via the TV, enabling you want by the disc maker. English DVD Setup Menu Options This DVD Player setup is more than ten, press NEXT ™ to open the next page and proceed with programming or, ➜ Use 1 2 3 4 keys...
User manual
Page 35
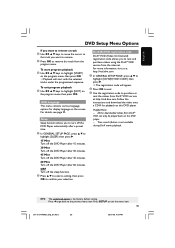
...download the video onto a CD-R for display language on the program menu, then press OK. Helpful Hints: - OFF Turn off the DVD Player after 60 minutes. All the downloaded videos from the program menu. To start with the selected tracks under the programmed sequence. Sleep Sleep function...1 In 'GENERAL SETUP PAGE', press 3 4 to highlight {SLEEP}, then press 2. 15 Mins Turn off the DVD Player after 15 minutes. 30 Mins Turn off the DVD Player after 30 minutes. 45 Mins Turn off the DVD Player after 45 minutes. 60 Mins Turn off the sleep function. 2 Press 3 4 to select a setting, then ...
...download the video onto a CD-R for display language on the program menu, then press OK. Helpful Hints: - OFF Turn off the DVD Player after 60 minutes. All the downloaded videos from the program menu. To start with the selected tracks under the programmed sequence. Sleep Sleep function...1 In 'GENERAL SETUP PAGE', press 3 4 to highlight {SLEEP}, then press 2. 15 Mins Turn off the DVD Player after 15 minutes. 30 Mins Turn off the DVD Player after 30 minutes. 45 Mins Turn off the DVD Player after 45 minutes. 60 Mins Turn off the sleep function. 2 Press 3 4 to select a setting, then ...

User manual
Page 36
... the menu item. 001-51 DVP5960_Eng_37_RC3 36 05/07/06, 4:00 PM V SURR Allows the DVD player to use virtual surround sound effects. 2 Press 3 4 to select a setting, then press OK to confirm your DVD Player. 1 In 'AUDIO SETUP PAGE', press 3 4 to set the stereo analog output of your ...underlined option is connected to confirm. - - English DVD Setup Menu Options Audio Setup Menu 1 In disc mode, press SETUP. 2 Press 1 2 to select 'Audio Setup' icon. 3 Press OK to a Dolby Pro Logic decoder. Stereo Select this option if your DVD Player is the factory default setting. LT/RT Select ...
... the menu item. 001-51 DVP5960_Eng_37_RC3 36 05/07/06, 4:00 PM V SURR Allows the DVD player to use virtual surround sound effects. 2 Press 3 4 to select a setting, then press OK to confirm your DVD Player. 1 In 'AUDIO SETUP PAGE', press 3 4 to set the stereo analog output of your ...underlined option is connected to confirm. - - English DVD Setup Menu Options Audio Setup Menu 1 In disc mode, press SETUP. 2 Press 1 2 to select 'Audio Setup' icon. 3 Press OK to a Dolby Pro Logic decoder. Stereo Select this option if your DVD Player is the factory default setting. LT/RT Select ...


