
User Manual
Page 3
...other unsafe operation. IF THERE ARE QUESTIONS REGARDING OUR TV SET COMPATIBILITY WITH THIS MODEL 525p AND 625p DVD PLAYER, PLEASE CONTACT OUR CUSTOMER SERVICE CENTER.' DVP4050 / DVP4060 / DVP4080 / DVP4090 _____ Manufactured under license from Dolby Laboratories, Dolby and the double-D ...TO THE 'STANDARD DEFINITION' OUTPUT. Specifications are trademarks, or registered trademarks of your DVD Video player and enter below the Serial No. Trademarks are trademarks of Koninklijke Philips Electronics N.V. For Customer Use: Read carefully the information located at the bottom or ...
...other unsafe operation. IF THERE ARE QUESTIONS REGARDING OUR TV SET COMPATIBILITY WITH THIS MODEL 525p AND 625p DVD PLAYER, PLEASE CONTACT OUR CUSTOMER SERVICE CENTER.' DVP4050 / DVP4060 / DVP4080 / DVP4090 _____ Manufactured under license from Dolby Laboratories, Dolby and the double-D ...TO THE 'STANDARD DEFINITION' OUTPUT. Specifications are trademarks, or registered trademarks of your DVD Video player and enter below the Serial No. Trademarks are trademarks of Koninklijke Philips Electronics N.V. For Customer Use: Read carefully the information located at the bottom or ...
User Manual
Page 6
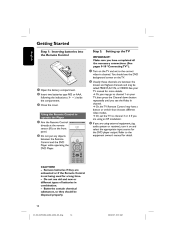
...13 Getting Started Step 1: Inserting batteries into the Remote Control ...14 Using the Remote Control to operate the Player ...14 Operations for video playback (DVD/VCD/ SVCD) ...21-22 Using the Disc Menu ...21 Zooming in ...21 Slow motion ...21 Forward / Reverse Searching ...21 OSD (On-Screen... Display) ...22 Special DVD Features ...23 Playing a Title ...23 Changing the Audio Language ...23 Subtitles ...23 Special VCD & SVCD Features ...23 Playback Control (PBC) ...23 Playing...
...13 Getting Started Step 1: Inserting batteries into the Remote Control ...14 Using the Remote Control to operate the Player ...14 Operations for video playback (DVD/VCD/ SVCD) ...21-22 Using the Disc Menu ...21 Zooming in ...21 Slow motion ...21 Forward / Reverse Searching ...21 OSD (On-Screen... Display) ...22 Special DVD Features ...23 Playing a Title ...23 Changing the Audio Language ...23 Subtitles ...23 Special VCD & SVCD Features ...23 Playback Control (PBC) ...23 Playing...

User Manual
Page 7
...-30 Changing the Password ...31 Restoring to original settings ...31 Troubleshooting ...32-33 Specifications ...34 Glossary ...35 7 01-35_DVP4080_4060_4050_55_Eng 7 05/02/07, 9:37 AM English DVD Menu Options Contents General Setup menu ...25 OSD Language ...25 Sleep ...25 Audio Setup Menu ...26 Setting the Downmix ...26 Digital Audio Setup ...26 Video...
...-30 Changing the Password ...31 Restoring to original settings ...31 Troubleshooting ...32-33 Specifications ...34 Glossary ...35 7 01-35_DVP4080_4060_4050_55_Eng 7 05/02/07, 9:37 AM English DVD Menu Options Contents General Setup menu ...25 OSD Language ...25 Sleep ...25 Audio Setup Menu ...26 Setting the Downmix ...26 Digital Audio Setup ...26 Video...
User Manual
Page 8
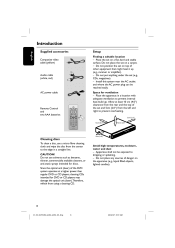
...filled objects, lighted candles). 8 01-35_DVP4080_4060_4050_55_Eng 8 05/02/07, 9:37 AM Allow at a higher power than regular DVD or CD players, cleaning CDs intended for DVD or CD players may damage the optical unit (laser).Therefore, refrain from the rear and the top of other equipment ... available cleaners, or anti-static sprays intended for ventilation - Do not position the set (e.g., CDs, magazines). - Do not place any sources of the DVD system operates at least 10 cm (4.0") clearance from using a cleaning CD. Do not place the set on a carpet. - Place the set on a...
...filled objects, lighted candles). 8 01-35_DVP4080_4060_4050_55_Eng 8 05/02/07, 9:37 AM Allow at a higher power than regular DVD or CD players, cleaning CDs intended for DVD or CD players may damage the optical unit (laser).Therefore, refrain from the rear and the top of other equipment ... available cleaners, or anti-static sprays intended for ventilation - Do not position the set (e.g., CDs, magazines). - Do not place any sources of the DVD system operates at least 10 cm (4.0") clearance from using a cleaning CD. Do not place the set on a carpet. - Place the set on a...
User Manual
Page 9
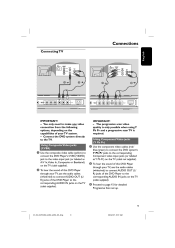
... 2 IMPORTANT! - Using Composite Video jacks (CVBS) IMPORTANT! - Using Component Video jacks (Y Pb Pr) 1 Use the component video cables (red/ blue/green) to connect the DVD system's Y Pb Pr jacks to the corresponding Component video input jacks (or labeled as Y Pb Pr) on the TV (cable not supplied). 1 Use the composite... video cable (yellow) to connect the DVD Player's CVBS (VIDEO) jack to the video input jack (or labeled as A/V In,Video In, Composite or Baseband) on the TV (cable supplied)....
... 2 IMPORTANT! - Using Composite Video jacks (CVBS) IMPORTANT! - Using Component Video jacks (Y Pb Pr) 1 Use the component video cables (red/ blue/green) to connect the DVD system's Y Pb Pr jacks to the corresponding Component video input jacks (or labeled as Y Pb Pr) on the TV (cable not supplied). 1 Use the composite... video cable (yellow) to connect the DVD Player's CVBS (VIDEO) jack to the video input jack (or labeled as A/V In,Video In, Composite or Baseband) on the TV (cable supplied)....
User Manual
Page 10
Never make or change any connections with the power switched on. 1 Use the composite video cable (yellow) to connect the DVD Player's CVBS jack to the video input jack on the RF modulator. 2 Use the RF coaxial cable (not supplied) to connect the RF modulator to .... 10 01-35_DVP4080_4060_4050_55_Eng 10 05/02/07, 9:37 AM Using an accessory RF modulator After everything is connected properly, plug in order to view the DVD playback on RF modulator availability and operations. See your electronics retailer or contact Philips for details on the TV.
Never make or change any connections with the power switched on. 1 Use the composite video cable (yellow) to connect the DVD Player's CVBS jack to the video input jack on the RF modulator. 2 Use the RF coaxial cable (not supplied) to connect the RF modulator to .... 10 01-35_DVP4080_4060_4050_55_Eng 10 05/02/07, 9:37 AM Using an accessory RF modulator After everything is connected properly, plug in order to view the DVD playback on RF modulator availability and operations. See your electronics retailer or contact Philips for details on the TV.
User Manual
Page 11
... VIDEO IN) depending on the options available on your TV. 1 2 Use the audio cables (white/red) to connect AUDIO OUT (L/R) jacks of the DVD Player to the corresponding AUDIO IN jacks on the stereo system (cable supplied). 2 Receiver has a PCM, Dolby Digital, or MPEG2 decoder Select one of ... IN) depending on the options available on your receiver, the receiver will produce a strong, distorted sound or no sound at all. 3 Set the DVD Player's Digital Output to the corresponding Digital Audio In jack on the capabilities of your Receiver (cable not supplied). PCM-ONLY or ALL depending on...
... VIDEO IN) depending on the options available on your TV. 1 2 Use the audio cables (white/red) to connect AUDIO OUT (L/R) jacks of the DVD Player to the corresponding AUDIO IN jacks on the stereo system (cable supplied). 2 Receiver has a PCM, Dolby Digital, or MPEG2 decoder Select one of ... IN) depending on the options available on your receiver, the receiver will produce a strong, distorted sound or no sound at all. 3 Set the DVD Player's Digital Output to the corresponding Digital Audio In jack on the capabilities of your Receiver (cable not supplied). PCM-ONLY or ALL depending on...
User Manual
Page 12
LED lights up when the power is on English STANDBY - To switch the DVD player to a standard AC outlet COAXIAL (Digital audio out) - Starts or pauses playback Mains (AC Power Cord) - Connect to coaxial AUDIO input of an amplifier, ...
LED lights up when the power is on English STANDBY - To switch the DVD player to a standard AC outlet COAXIAL (Digital audio out) - Starts or pauses playback Mains (AC Power Cord) - Connect to coaxial AUDIO input of an amplifier, ...
User Manual
Page 13
...title/chapter/ track 3 4 - STOP ( 9 ) - Enters or exits system setup menu. Starts or pauses playback MUTE ( H ) - Selects an audio language (DVD/VCD) or audio channels. Repeats playback a specific section on a disc Tip: Press "STOP" for VCD version 2.0 only) B - Selects various repeat mode REPEAT A-B -... up/ down, do a slow forward. backward Confirms an entry or selection PREV ( ¡ ) - NEXT ( ™ ) - Selects a DVD subtitle language AUDIO - Enlarge a picture on or off the playback control mode (for about 2 seconds to standby mode DISPLAY -
...title/chapter/ track 3 4 - STOP ( 9 ) - Enters or exits system setup menu. Starts or pauses playback MUTE ( H ) - Selects an audio language (DVD/VCD) or audio channels. Repeats playback a specific section on a disc Tip: Press "STOP" for VCD version 2.0 only) B - Selects various repeat mode REPEAT A-B -... up/ down, do a slow forward. backward Confirms an entry or selection PREV ( ¡ ) - NEXT ( ™ ) - Selects a DVD subtitle language AUDIO - Enlarge a picture on or off the playback control mode (for about 2 seconds to standby mode DISPLAY -
User Manual
Page 14
... equipment owner's manual for more details. ➜ Or, you may go to channel 3 or 4 if you are between the Remote Control and the DVD Player while operating the DVD Player. Do not use old and new or different types of batteries in channel. See your TV, then press the Channel down button... repeatedly until you see the DVD background screen on and select the appropriate input source for a long time. - audio system or receiver), turn it on the TV. 2 Usually these channels are...
... equipment owner's manual for more details. ➜ Or, you may go to channel 3 or 4 if you are between the Remote Control and the DVD Player while operating the DVD Player. Do not use old and new or different types of batteries in channel. See your TV, then press the Channel down button... repeatedly until you see the DVD background screen on and select the appropriate input source for a long time. - audio system or receiver), turn it on the TV. 2 Usually these channels are...
User Manual
Page 15
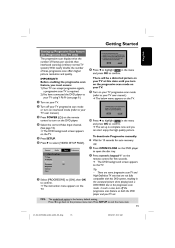
...and press OK to select {VIDEO SETUP PAGE}. CONFIRM AGAIN TO USE PROGRESSIVE SCAN. in the progressive scan mode. OR 1 Press OPEN/CLOSE on the DVD player. 0 Press 1 to the previous menu item. TY Type TV Display Progressive Sharpness Brightness Contrast Color On Off 2 Press numeric keypad '1' on the...on the TV. Video Setup Page - Press 1 to go back to highlight 4 Select the correct Video Input channel. (See page 14). ➜ The DVD background screen appears on the TV. ENSURE YOUR TV HAS PROGRESSIVE SCAN. 2. There will be a distorted picture on your TV progressive scan mode (refer to...
...and press OK to select {VIDEO SETUP PAGE}. CONFIRM AGAIN TO USE PROGRESSIVE SCAN. in the progressive scan mode. OR 1 Press OPEN/CLOSE on the DVD player. 0 Press 1 to the previous menu item. TY Type TV Display Progressive Sharpness Brightness Contrast Color On Off 2 Press numeric keypad '1' on the...on the TV. Video Setup Page - Press 1 to go back to highlight 4 Select the correct Video Input channel. (See page 14). ➜ The DVD background screen appears on the TV. ENSURE YOUR TV HAS PROGRESSIVE SCAN. 2. There will be a distorted picture on your TV progressive scan mode (refer to...
User Manual
Page 16
... PAL disc and output in PAL format. CHANGING NTSC TO PAL: 1. Before changing the current TV Standard setting, ensure that corresponds to your TV This DVD Player is the factory default setting. To reset to exit the menu item. 16 01-35_DVP4080_4060_4050_55_Eng 16 05/02/07, 9:37 AM IF THERE IS... A DISTORTED PICTURE DISPLAYED ON THE TV, WAIT 15 SECONDS FOR AUTO RECOVER. It will change the video signal of the Disc, the TV and the DVD Player should match. TIPS: The underlined option is compatible with both NTSC and PAL. below: PAL - NTSC - Multi - Press SETUP to default TV ...
... PAL disc and output in PAL format. CHANGING NTSC TO PAL: 1. Before changing the current TV Standard setting, ensure that corresponds to your TV This DVD Player is the factory default setting. To reset to exit the menu item. 16 01-35_DVP4080_4060_4050_55_Eng 16 05/02/07, 9:37 AM IF THERE IS... A DISTORTED PICTURE DISPLAYED ON THE TV, WAIT 15 SECONDS FOR AUTO RECOVER. It will change the video signal of the Disc, the TV and the DVD Player should match. TIPS: The underlined option is compatible with both NTSC and PAL. below: PAL - NTSC - Multi - Press SETUP to default TV ...
User Manual
Page 18
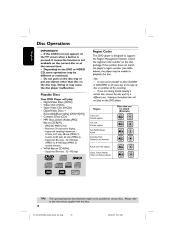
... be possible to the type of disc or condition of the recording. - Improper formatted disc will play: - Digital Video Discs (DVDs) - Digital Video Discs + Recordable[Rewritable] (DVD+R[W]) - Maximum 30 characters display. - Supported Bit-rates : 32~256 kbps (MPEG-1), 8~160 kbps (MPEG-2) variable bitrates Discs ...supplied with the discs. 18 01-35_DVP4080_4060_4050_55_Eng 18 05/02/07, 9:37 AM Region Codes This DVD player is not available on the disc tray. WMA files on this DVD player. and Canada regions U.K and Europe regions Asia Pacific,Taiwan, Korea Australia, New Zealand, ...
... be possible to the type of disc or condition of the recording. - Improper formatted disc will play: - Digital Video Discs (DVDs) - Digital Video Discs + Recordable[Rewritable] (DVD+R[W]) - Maximum 30 characters display. - Supported Bit-rates : 32~256 kbps (MPEG-1), 8~160 kbps (MPEG-2) variable bitrates Discs ...supplied with the discs. 18 01-35_DVP4080_4060_4050_55_Eng 18 05/02/07, 9:37 AM Region Codes This DVD player is not available on the disc tray. WMA files on this DVD player. and Canada regions U.K and Europe regions Asia Pacific,Taiwan, Korea Australia, New Zealand, ...
User Manual
Page 19
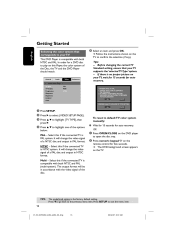
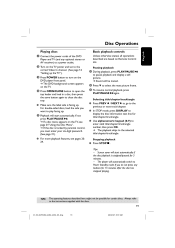
... mode if you want to select the next picture frame. 3 To resume normal playback, press PLAY/PAUSE 2; Disc Operations 1 Connect the power cords of the DVD Player and TV (and any buttons for certain discs. Unless otherwise stated, all operations described are based on the TV. 4 Press OPEN/CLOSE button to... up the TV"). 1 During playback, press PLAY/PAUSE 2; TIPS: The operating features described here might not be muted. 3 Press POWER button to turn on the DVD player front panel. ➜ The DVD background screen appears on Remote Control use.
... mode if you want to select the next picture frame. 3 To resume normal playback, press PLAY/PAUSE 2; Disc Operations 1 Connect the power cords of the DVD Player and TV (and any buttons for certain discs. Unless otherwise stated, all operations described are based on the TV. 4 Press OPEN/CLOSE button to... up the TV"). 1 During playback, press PLAY/PAUSE 2; TIPS: The operating features described here might not be muted. 3 Press POWER button to turn on the DVD player front panel. ➜ The DVD background screen appears on Remote Control use.

User Manual
Page 20
Folder (playing all files in one folder once) - For DVD - Off (cancel) For Video CD, Audio CD - Track (currently playing track) - Folder (playing all files in one folder once) - Repeat One (currently playing file) - Chapter (...
Folder (playing all files in one folder once) - For DVD - Off (cancel) For Video CD, Audio CD - Track (currently playing track) - Folder (playing all files in one folder once) - Repeat One (currently playing file) - Chapter (...

User Manual
Page 21
... picture on the remote. Forward / Reverse Searching 1 Press 1 2 during playback to select the required speed: 1/2, 1/4, 1/8 or 1/16 (forward {DVD/SVCD/VCD}). ➜ Sound will continue. 2 Press ZOOM repeatedly to return to the original size. English Operations for certain discs. Zooming in This function... Press 3 during playback to select the required speed: 2X, 4X, 8X, 16X or 32X (backward or forward). ➜ Sound will be muted (DVD/VCD) or intermittent (CD). 2 To return to normal speed, press PLAY/ PAUSE 2;. 1 During playback, press ZOOM repeatedly to display the picture with...
... picture on the remote. Forward / Reverse Searching 1 Press 1 2 during playback to select the required speed: 1/2, 1/4, 1/8 or 1/16 (forward {DVD/SVCD/VCD}). ➜ Sound will continue. 2 Press ZOOM repeatedly to return to the original size. English Operations for certain discs. Zooming in This function... Press 3 during playback to select the required speed: 2X, 4X, 8X, 16X or 32X (backward or forward). ➜ Sound will be muted (DVD/VCD) or intermittent (CD). 2 To return to normal speed, press PLAY/ PAUSE 2;. 1 During playback, press ZOOM repeatedly to display the picture with...

User Manual
Page 22
...:TT}: enable to the instructions supplied with the discs. 22 01-35_DVP4080_4060_4050_55_Eng 22 05/02/07, 9:37 AM Always refer to select any track. For DVD ➜ {Title CT:TT Chapter XX/TC}: displays the total available title and chapters in the disc and enable to select a chapter for certain discs...
...:TT}: enable to the instructions supplied with the discs. 22 01-35_DVP4080_4060_4050_55_Eng 22 05/02/07, 9:37 AM Always refer to select any track. For DVD ➜ {Title CT:TT Chapter XX/TC}: displays the total available title and chapters in the disc and enable to select a chapter for certain discs...

User Manual
Page 23
Disc Operations English Special DVD Features Playing a Title Special VCD & SVCD Features Playback Control (PBC) For VCD with the discs. 23 01-35_DVP4080_4060_4050_55_Eng 23 05/02/07, 9:37 AM Subtitles G ... keypad 3 Press OK key to select the available audio channels provided by the disc (MONO LEFT, MONO RIGHT, MIXMONO, STEREO). Changing the Audio Language For DVD G Press AUDIO repeatedly to select different subtitle languages. G Press DISC MENU to toggle between 'PBC ON' and 'PBC OFF'. ➜ If you want to skip...
Disc Operations English Special DVD Features Playing a Title Special VCD & SVCD Features Playback Control (PBC) For VCD with the discs. 23 01-35_DVP4080_4060_4050_55_Eng 23 05/02/07, 9:37 AM Subtitles G ... keypad 3 Press OK key to select the available audio channels provided by the disc (MONO LEFT, MONO RIGHT, MIXMONO, STEREO). Changing the Audio Language For DVD G Press AUDIO repeatedly to select different subtitle languages. G Press DISC MENU to toggle between 'PBC ON' and 'PBC OFF'. ➜ If you want to skip...
User Manual
Page 25
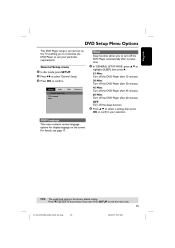
... 'General Setup'. 3 Press OK to exit the menu item. 25 01-35_DVP4080_4060_4050_55_Eng 25 05/02/07, 9:37 AM OFF Turn off the DVD Player after a preset time. Press SETUP to confirm. OSD Language This menu contains various language options for display language on the screen. General Setup... setting, then press OK to suit your selection. For details, see page 17. Sleep Sleep function allows you to customise the DVD Player to confirm your particular requirements. TIPS: The underlined option is carried out via the TV, enabling you to the previous menu item.
... 'General Setup'. 3 Press OK to exit the menu item. 25 01-35_DVP4080_4060_4050_55_Eng 25 05/02/07, 9:37 AM OFF Turn off the DVD Player after a preset time. Press SETUP to confirm. OSD Language This menu contains various language options for display language on the screen. General Setup... setting, then press OK to suit your selection. For details, see page 17. Sleep Sleep function allows you to customise the DVD Player to confirm your particular requirements. TIPS: The underlined option is carried out via the TV, enabling you to the previous menu item.
User Manual
Page 26
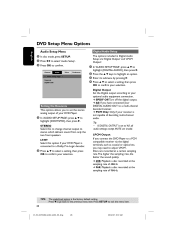
... an option. 3 Enter its submenu by pressing 2. 4 Press 3 4 to select a setting, then press OK to - - highlight {DIGITAL AUDIO}, then press 2. DVD Setup Menu Options Audio Setup Menu Digital Audio Setup The options included in Digital Audio Setup are recorded at the sampling rate of 96kHz. 2 Press... 3 4 to select a setting, then press OK to confirm your receiver is not capable of decoding multi-channel audio. STEREO Select this option if your DVD Player. 1 In 'AUDIO SETUP PAGE', press 3 4 to highlight {DOWNMIX}, then press 2. Discs are : 'Digital Output' and 'LPCM Output'. Press...
... an option. 3 Enter its submenu by pressing 2. 4 Press 3 4 to select a setting, then press OK to - - highlight {DIGITAL AUDIO}, then press 2. DVD Setup Menu Options Audio Setup Menu Digital Audio Setup The options included in Digital Audio Setup are recorded at the sampling rate of 96kHz. 2 Press... 3 4 to select a setting, then press OK to confirm your receiver is not capable of decoding multi-channel audio. STEREO Select this option if your DVD Player. 1 In 'AUDIO SETUP PAGE', press 3 4 to highlight {DOWNMIX}, then press 2. Discs are : 'Digital Output' and 'LPCM Output'. Press...


