Owner Manual
Page 4
...you intend not to prevent damage from leak- IMPORTANT The plug is fitted with the corresponding technical standards such as that the ONKYO product described in this instruction manual is marked with the letter L or coloured red. For European Models Declaration of the ...on packaging, the letter at the end of Conformity We, ONKYO EUROPE ELECTRONICS GmbH LIEGNITZERSTRASSE 6, 82194 GROEBENZELL, GERMANY declare in your socket outlets, cut it at the AV receiver's remote control sensor, as possible to use the remote controller, point it off and fit a suitable plug. Check ...
...you intend not to prevent damage from leak- IMPORTANT The plug is fitted with the corresponding technical standards such as that the ONKYO product described in this instruction manual is marked with the letter L or coloured red. For European Models Declaration of the ...on packaging, the letter at the end of Conformity We, ONKYO EUROPE ELECTRONICS GmbH LIEGNITZERSTRASSE 6, 82194 GROEBENZELL, GERMANY declare in your socket outlets, cut it at the AV receiver's remote control sensor, as possible to use the remote controller, point it off and fit a suitable plug. Check ...
Owner Manual
Page 5
... 59 Controlling Your iPod 60 Controlling Other Components 62 Preprogrammed Remote Control Codes 62 Looking up for Remote Control Code 62 Entering Remote Control Codes 63 Remote Control Codes for Onkyo Components Connected via V 63 Resetting REMOTE MODE Buttons 64 Resetting the Remote Controller 64 Controlling Other Components 64 Others Troubleshooting 66 Specifications 71 About HDMI 72...
... 59 Controlling Your iPod 60 Controlling Other Components 62 Preprogrammed Remote Control Codes 62 Looking up for Remote Control Code 62 Entering Remote Control Codes 63 Remote Control Codes for Onkyo Components Connected via V 63 Resetting REMOTE MODE Buttons 64 Resetting the Remote Controller 64 Controlling Other Components 64 Others Troubleshooting 66 Specifications 71 About HDMI 72...
Owner Manual
Page 6
... D/A Converters • Powerful and Highly Accurate 32-bit Processing DSP Connections • 6 HDMI*6 Inputs (1 on front panel) and 1 Output • Onkyo Q for System Control • 4 Digital Inputs (2 Optical/2 Coaxial) • Component Video Switching (2 Inputs/1 Output) • Front "Line in" .../200 Hz) • A/V Sync Control Function (up to 200 ms) • On-Screen Display via HDMI • Preprogrammed V-Compatible Remote *1 THX and the THX logo are trademarks of Dolby Laboratories. *4 Manufactured under license from Dolby Laboratories. Features Amplifier • 100 Watts/...
... D/A Converters • Powerful and Highly Accurate 32-bit Processing DSP Connections • 6 HDMI*6 Inputs (1 on front panel) and 1 Output • Onkyo Q for System Control • 4 Digital Inputs (2 Optical/2 Coaxial) • Component Video Switching (2 Inputs/1 Output) • Front "Line in" .../200 Hz) • A/V Sync Control Function (up to 200 ms) • On-Screen Display via HDMI • Preprogrammed V-Compatible Remote *1 THX and the THX logo are trademarks of Dolby Laboratories. *4 Manufactured under license from Dolby Laboratories. Features Amplifier • 100 Watts/...

Owner Manual
Page 8
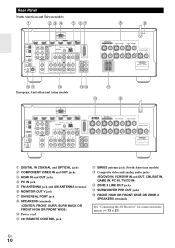
... can find the main explanation for clarity. B ON/STANDBY button (➔ 22) C STANDBY indicator (➔ 22) D HDMI THRU indicator (➔ 52) E ZONE 2 indicator (➔ 56) F Remote control sensor (➔ 4) G ZONE 2, OFF, ZONE 2 LEVEL/TONE LEVEL and TONE buttons (➔ 54, 56 to 29), arrow and ENTER buttons P RETURN button Q MASTER VOLUME...
... can find the main explanation for clarity. B ON/STANDBY button (➔ 22) C STANDBY indicator (➔ 22) D HDMI THRU indicator (➔ 52) E ZONE 2 indicator (➔ 56) F Remote control sensor (➔ 4) G ZONE 2, OFF, ZONE 2 LEVEL/TONE LEVEL and TONE buttons (➔ 54, 56 to 29), arrow and ENTER buttons P RETURN button Q MASTER VOLUME...
Owner Manual
Page 10
... and AM ANTENNA terminal G MONITOR OUT V jack H UNIVERSAL PORT jack I SPEAKERS terminals (CENTER, FRONT, SURR, SURR BACK OR FRONT HIGH OR FRONT WIDE) J Power cord K V REMOTE CONTROL jack L SIRIUS antenna jack (North American models) M Composite video and analog audio jacks (BD/DVD IN, VCR/DVR IN and OUT, CBL/SAT IN...
... and AM ANTENNA terminal G MONITOR OUT V jack H UNIVERSAL PORT jack I SPEAKERS terminals (CENTER, FRONT, SURR, SURR BACK OR FRONT HIGH OR FRONT WIDE) J Power cord K V REMOTE CONTROL jack L SIRIUS antenna jack (North American models) M Composite video and analog audio jacks (BD/DVD IN, VCR/DVR IN and OUT, CBL/SAT IN...

Owner Manual
Page 11
...C To control the AV receiver, press RECEIVER to control D Onkyo Blu-ray Disc/DVD player, CD player, and other components. B Arrow R/X buttons (➔ 28) C D.TUN button (➔ 28) N D DISPLAY button E CH +/- See "Entering Remote Control Codes" for more details (➔ 63). I DISPLAY ... ■ Controlling the tuner To control the AV receiver's tuner, press TUNER (or RECEIVER). B ON/STANDBY button (➔ 22) K C REMOTE MODE/INPUT SELECTOR buttons (➔ 23) E D SP LAYOUT button (➔ 24) E Arrow R/X/F/S and ENTER buttons *1 F SETUP button (&#...
...C To control the AV receiver, press RECEIVER to control D Onkyo Blu-ray Disc/DVD player, CD player, and other components. B Arrow R/X buttons (➔ 28) C D.TUN button (➔ 28) N D DISPLAY button E CH +/- See "Entering Remote Control Codes" for more details (➔ 63). I DISPLAY ... ■ Controlling the tuner To control the AV receiver's tuner, press TUNER (or RECEIVER). B ON/STANDBY button (➔ 22) K C REMOTE MODE/INPUT SELECTOR buttons (➔ 23) E D SP LAYOUT button (➔ 24) E Arrow R/X/F/S and ENTER buttons *1 F SETUP button (&#...

Owner Manual
Page 20
...ANALOG AUDIO OUT R L ANALOG AUDIO OUT Connecting Antenna This section explains how to control your other V-capable Onkyo components, pointing the remote controller at the AV receiver's remote control sensor instead of the component. Insert the plug fully into the jack. En • If you ...work. Connecting other jack is for connecting additional V-capable components. • Connect only Onkyo components to the AV receiver. Insert the plug fully into the jack. With V (Remote Interactive), you cannot achieve good reception with a commercially available outdoor AM 20 antenna. ...
...ANALOG AUDIO OUT R L ANALOG AUDIO OUT Connecting Antenna This section explains how to control your other V-capable Onkyo components, pointing the remote controller at the AV receiver's remote control sensor instead of the component. Insert the plug fully into the jack. En • If you ...work. Connecting other jack is for connecting additional V-capable components. • Connect only Onkyo components to the AV receiver. Insert the plug fully into the jack. With V (Remote Interactive), you cannot achieve good reception with a commercially available outdoor AM 20 antenna. ...

Owner Manual
Page 22
The AV receiver will enter Standby mode. En 22 To prevent any loud surprises when you turn on the AV receiver, always turn down the volume before you turn it off . Turning Off Press ON/STANDBY on the front panel. Turning On/Off the AV Receiver ON/STANDBY STANDBY indicator ON/STANDBY RECEIVER Front panel Remote controller Turning On Press ON/STANDBY on the front panel or the remote controller. The AV receiver comes on the remote controller. or Press RECEIVER followed by ON/STANDBY on , the display lights, and the STANDBY indicator goes off .
The AV receiver will enter Standby mode. En 22 To prevent any loud surprises when you turn on the AV receiver, always turn down the volume before you turn it off . Turning Off Press ON/STANDBY on the front panel. Turning On/Off the AV Receiver ON/STANDBY STANDBY indicator ON/STANDBY RECEIVER Front panel Remote controller Turning On Press ON/STANDBY on the front panel or the remote controller. The AV receiver comes on the remote controller. or Press RECEIVER followed by ON/STANDBY on , the display lights, and the STANDBY indicator goes off .
Owner Manual
Page 23
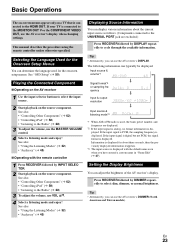
...; Operating on the AV receiver 1 Use the input selector buttons to select: dim, dimmer, or normal brightness. This manual describes the procedure using the remote controller unless otherwise specified. The following information can adjust the brightness of the AV receiver's display. Basic Operations The on-screen menus appear only on... Used for the Onscreen Setup Menus You can use the AV receiver's DIMMER (North American and Taiwan models). Information is displayed with the remote controller 1 Press RECEIVER followed by INPUT SELECTOR. 2 Start playback on the source component.
...; Operating on the AV receiver 1 Use the input selector buttons to select: dim, dimmer, or normal brightness. This manual describes the procedure using the remote controller unless otherwise specified. The following information can adjust the brightness of the AV receiver's display. Basic Operations The on-screen menus appear only on... Used for the Onscreen Setup Menus You can use the AV receiver's DIMMER (North American and Taiwan models). Information is displayed with the remote controller 1 Press RECEIVER followed by INPUT SELECTOR. 2 Start playback on the source component.
Owner Manual
Page 24
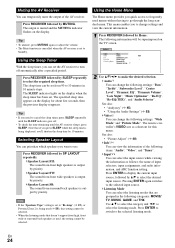
...: The sound from front wide speakers is used (➔ 56), this menu. This menu enables you want to go through the long standard menu. The remote controller's VIDEO acts as follows: the name of the AV receiver. Use R/X to select the category and F/S to the selected listening mode. Using the Sleep...
...: The sound from front wide speakers is used (➔ 56), this menu. This menu enables you want to go through the long standard menu. The remote controller's VIDEO acts as follows: the name of the AV receiver. Use R/X to select the category and F/S to the selected listening mode. Using the Sleep...
Owner Manual
Page 25
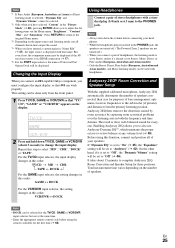
...TV/CD, GAME or VCR/DVR (about 15 minutes to complete Audyssey 2EQ Room Correction and Speaker Setup for three positions. Before using the remote controller for the TV/CD, GAME or VCR/DVR input selector, but not at any volume level (➔ 45). On the other hand,... plug (1/4 inch or 6.3 mm) to "Off" (➔ 46). "Brightness", "Contrast", "Hue", and "Saturation". Changing the Input Display When you connect an V-capable Onkyo component, you to also use Audyssey Dynamic EQ™, which maintains the proper octave-to Stereo, Mono, Direct, or Pure Audio (European, Australian and Asian...
...TV/CD, GAME or VCR/DVR (about 15 minutes to complete Audyssey 2EQ Room Correction and Speaker Setup for three positions. Before using the remote controller for the TV/CD, GAME or VCR/DVR input selector, but not at any volume level (➔ 45). On the other hand,... plug (1/4 inch or 6.3 mm) to "Off" (➔ 46). "Brightness", "Contrast", "Hue", and "Saturation". Changing the Input Display When you connect an V-capable Onkyo component, you to also use Audyssey Dynamic EQ™, which maintains the proper octave-to Stereo, Mono, Direct, or Pure Audio (European, Australian and Asian...

Owner Manual
Page 28
... the Radio Press TUNER to the station in tuner you can tune into AM and FM stations directly by entering the appropriate frequency. 1 On the remote controller, press TUNER repeatedly to select "AM" or "FM", followed by D.TUN. Tuning into a station, the TUNED indicator lights. Searching stops when a station is weak...
... the Radio Press TUNER to the station in tuner you can tune into AM and FM stations directly by entering the appropriate frequency. 1 On the remote controller, press TUNER repeatedly to select "AM" or "FM", followed by D.TUN. Tuning into a station, the TUNED indicator lights. Searching stops when a station is weak...

Owner Manual
Page 29
...This allows you to delete. Selecting Presets To select a preset, use it these days. The preset is flashing (about 8 seconds), use the remote controller's number buttons to store the station or channel. In addition to an RDS station that 's broadcasting PS information, the station's name will ... for RDS radio stations by the radio station. When tuned to displaying text information, RDS can be shown on the AV receiver, or the remote controller's CH +/-. The preset number flashes. 3 While the preset number is deleted and its number disappears from 1 through 40. 4 Press ...
...This allows you to delete. Selecting Presets To select a preset, use it these days. The preset is flashing (about 8 seconds), use the remote controller's number buttons to store the station or channel. In addition to an RDS station that 's broadcasting PS information, the station's name will ... for RDS radio stations by the radio station. When tuned to displaying text information, RDS can be shown on the AV receiver, or the remote controller's CH +/-. The preset number flashes. 3 While the preset number is deleted and its number disappears from 1 through 40. 4 Press ...

Owner Manual
Page 38
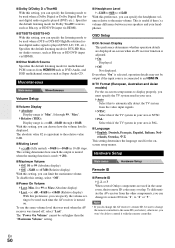
...Room Correction and Speaker Setup, messages, etc., that are organized into nine categories on the main menu. Input/Output Assign C 2. Hardware Setup I Remote Controller Setup (➔ 62) 8. OSD Setup C Speaker Setup (➔ 40) H Hardware Setup (➔ 50) 2. Speaker Setup 1. Level...your TV is connected to the composite video MONITOR OUT or the COMPONENT VIDEO OUT, use the AV receiver's display when changing settings. Remote Controller Setup J 9. LFE Level I 8. Audio Adjust 4. HDMI Input 3. Speaker Settings 2. Multiplex/Mono 2. VCR/DVR 3. THX Audio...
...Room Correction and Speaker Setup, messages, etc., that are organized into nine categories on the main menu. Input/Output Assign C 2. Hardware Setup I Remote Controller Setup (➔ 62) 8. OSD Setup C Speaker Setup (➔ 40) H Hardware Setup (➔ 50) 2. Speaker Setup 1. Level...your TV is connected to the composite video MONITOR OUT or the COMPONENT VIDEO OUT, use the AV receiver's display when changing settings. Remote Controller Setup J 9. LFE Level I 8. Audio Adjust 4. HDMI Input 3. Speaker Settings 2. Multiplex/Mono 2. VCR/DVR 3. THX Audio...

Owner Manual
Page 47
... ■ A/V Sync `0ms to the audio signal. With the A/V Sync setting, you 've finished, to store a name, be performed on the remote controller, you can correct this step to enter up to 10 characters. 2 When you can set the level. OK: Selects when the entry is pressed...(➔ 47). • You cannot enter a custom name for each letter. The custom name is edited using +10. *2 Press CLR on the remote controller by entering an empty white space for each individual input selector and radio preset for easy identification. With IntelliVolume, you can enter a custom name...
... ■ A/V Sync `0ms to the audio signal. With the A/V Sync setting, you 've finished, to store a name, be performed on the remote controller, you can correct this step to enter up to 10 characters. 2 When you can set the level. OK: Selects when the entry is pressed...(➔ 47). • You cannot enter a custom name for each letter. The custom name is edited using +10. *2 Press CLR on the remote controller by entering an empty white space for each individual input selector and radio preset for easy identification. With IntelliVolume, you can enter a custom name...

Owner Manual
Page 49
... the Home menu (➔ 24). *2 Press CLR if you want to set to Standby. AUX 7. With this setting, you can reduce noise appearing on the remote controller by setting "Film Mode" yourself. For example, you can set to "Auto", the AV receiver automatically detects the picture source and in either "3 : 2" or...
... the Home menu (➔ 24). *2 Press CLR if you want to set to Standby. AUX 7. With this setting, you can reduce noise appearing on the remote controller by setting "Film Mode" yourself. For example, you can set to "Auto", the AV receiver automatically detects the picture source and in either "3 : 2" or...
Owner Manual
Page 50
... setup menus to display properly, you must specify the TV system used in your headphones. Hardware Setup Main menu Hardware Setup Remote ID ■ Remote ID ` 1, 2, or 3 When several Onkyo components are displayed on-screen when an AV receiver function is equivalent to the relative value 0 dB. ■ Muting Level...the AV receiver is played (DVD, LD, CD, etc.). To differentiate the AV receiver from the other components, you can change the remote controller to the same ID (see below), otherwise, you can specify the headphone volume relative to the main volume. This setting determines ...
... setup menus to display properly, you must specify the TV system used in your headphones. Hardware Setup Main menu Hardware Setup Remote ID ■ Remote ID ` 1, 2, or 3 When several Onkyo components are displayed on-screen when an AV receiver function is equivalent to the relative value 0 dB. ■ Muting Level...the AV receiver is played (DVD, LD, CD, etc.). To differentiate the AV receiver from the other components, you can change the remote controller to the same ID (see below), otherwise, you can specify the headphone volume relative to the main volume. This setting determines ...
Owner Manual
Page 51
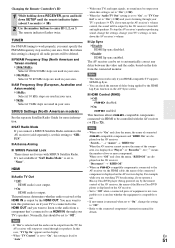
... steps are used in your TV's settings, or turn this setting is output by the HDMI Lip Sync function on the AV receiver. Changing the Remote Controller's ID 1 While holding down RECEIVER, press and hold down the AV receiver's volume. ■ Lip Sync ` Disable: HDMI lip sync ...72 to "SIRIUS". ■ Antenna Aiming ■ SIRIUS Parental Lock These items are watching TV broadcasting, if you want to turn down SETUP until the remote indicator lights (about 3 seconds) (➔ 38). 2 Use the number buttons to an HDMI IN, through your TV's speakers. Normally, this setting ...
... steps are used in your TV's settings, or turn this setting is output by the HDMI Lip Sync function on the AV receiver. Changing the Remote Controller's ID 1 While holding down RECEIVER, press and hold down the AV receiver's volume. ■ Lip Sync ` Disable: HDMI lip sync ...72 to "SIRIUS". ■ Antenna Aiming ■ SIRIUS Parental Lock These items are watching TV broadcasting, if you want to turn down SETUP until the remote indicator lights (about 3 seconds) (➔ 38). 2 Use the number buttons to an HDMI IN, through your TV's speakers. Normally, this setting ...

Owner Manual
Page 54
... listening mode. • This procedure can be heard. If both coaxial and optical inputs have been assigned, HDMI input is selected. 1 Press TONE on the remote controller by using the Home menu (➔ 24).
... listening mode. • This procedure can be heard. If both coaxial and optical inputs have been assigned, HDMI input is selected. 1 Press TONE on the remote controller by using the Home menu (➔ 24).

Owner Manual
Page 57
...Zone 2, press ZONE2 followed by MUTING again. En 57 For example, if you must press the remote controller's ZONE2 first. Adjusting the Volume for Zone 2 ■ Operating with the Remote Controller ON/STANDBY ZONE2 Input selector buttons MUTING VOLR/X 1 Press ZONE2 and then press ON/STANDBY.... Tip • To unmute, press ZONE2 followed by ON/ STANDBY. Controlling Zone 2 with the remote controller 1 Press ZONE2. 2 Use VOL R/X to adjust the volume. ■ Operating on the AV receiver 1 Press ZONE 2 (the ZONE 2 ...
...Zone 2, press ZONE2 followed by MUTING again. En 57 For example, if you must press the remote controller's ZONE2 first. Adjusting the Volume for Zone 2 ■ Operating with the Remote Controller ON/STANDBY ZONE2 Input selector buttons MUTING VOLR/X 1 Press ZONE2 and then press ON/STANDBY.... Tip • To unmute, press ZONE2 followed by ON/ STANDBY. Controlling Zone 2 with the remote controller 1 Press ZONE2. 2 Use VOL R/X to adjust the volume. ■ Operating on the AV receiver 1 Press ZONE 2 (the ZONE 2 ...


