Owner Manual
Page 1
Please read this manual thoroughly before making any connections and plugging it in this manual for purchasing an Onkyo AV Receiver. Please retain this manual will enable you for future reference. Contents Introduction 2 Connections 20 First Time Setup 38 Basic Operations 51 Advanced Operations 64 Advanced Setup 68 Zone 2 74 Controlling Other Components ....78 Specifications 83 Troubleshooting 84 En AV Receiver TX-SR603X Instruction Manual Thank you to obtain optimum performance and listening enjoyment from your new AV Receiver. Following the instructions in .
Please read this manual thoroughly before making any connections and plugging it in this manual for purchasing an Onkyo AV Receiver. Please retain this manual will enable you for future reference. Contents Introduction 2 Connections 20 First Time Setup 38 Basic Operations 51 Advanced Operations 64 Advanced Setup 68 Zone 2 74 Controlling Other Components ....78 Specifications 83 Troubleshooting 84 En AV Receiver TX-SR603X Instruction Manual Thank you to obtain optimum performance and listening enjoyment from your new AV Receiver. Following the instructions in .

Owner Manual
Page 4
...your plug, proceed as EN60065, EN55013, EN55020 and EN61000-3-2, -3-3. For European Models Declaration of Conformity We, ONKYO EUROPE ELECTRONICS GmbH LIEGNITZERSTRASSE 6, 82194 GROEBENZELL, GERMANY declare in own responsibility, that is intended for the ASTA ...ONKYO product described in this instruction manual is fitted in this plug. Reverse engineering or disassembly is approved by qualified service personnel. Specifications and operations are coloured in accordance with the following accessories: Remote controller & three batteries (AA/R6) Speaker setup...
...your plug, proceed as EN60065, EN55013, EN55020 and EN61000-3-2, -3-3. For European Models Declaration of Conformity We, ONKYO EUROPE ELECTRONICS GmbH LIEGNITZERSTRASSE 6, 82194 GROEBENZELL, GERMANY declare in own responsibility, that is intended for the ASTA ...ONKYO product described in this instruction manual is fitted in this plug. Reverse engineering or disassembly is approved by qualified service personnel. Specifications and operations are coloured in accordance with the following accessories: Remote controller & three batteries (AA/R6) Speaker setup...

Owner Manual
Page 5
...under license from Dolby Laboratories. "CinemaFILTER" is a trademark of Apple Computer, Inc., registered in the U.S. Apple and iPod are trademarks of Onkyo Corporation. *4. "DTS," "DTS 96/24," "DTS-ES," and "Neo:6" are the property of Digital Theater Systems, Inc. *3. All... and S-Video to component video conver- sold separately) Others • Includes microphone for automatic speaker setup • Easy-to-use onscreen setup menus • Preprogrammed remote controller for use with other countries. "Xantech" is a registered trademark of Dolby Laboratories. *2.
...under license from Dolby Laboratories. "CinemaFILTER" is a trademark of Apple Computer, Inc., registered in the U.S. Apple and iPod are trademarks of Onkyo Corporation. *4. "DTS," "DTS 96/24," "DTS-ES," and "Neo:6" are the property of Digital Theater Systems, Inc. *3. All... and S-Video to component video conver- sold separately) Others • Includes microphone for automatic speaker setup • Easy-to-use onscreen setup menus • Preprogrammed remote controller for use with other countries. "Xantech" is a registered trademark of Dolby Laboratories. *2.
Owner Manual
Page 6
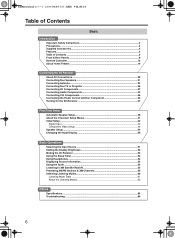
... 36 Connecting the Power Cord of Another Component 36 Turning On the AV Receiver 37 First Time Setup Automatic Speaker Setup 38 About the Onscreen Setup Menus 41 Initial Setup...42 Digital Input ...42 Component Video Setup 43 Speaker Setup ...44 Changing the Input Display 50 Basic Operations Selecting the Input Source 51 Setting the Display...
... 36 Connecting the Power Cord of Another Component 36 Turning On the AV Receiver 37 First Time Setup Automatic Speaker Setup 38 About the Onscreen Setup Menus 41 Initial Setup...42 Digital Input ...42 Component Video Setup 43 Speaker Setup ...44 Changing the Input Display 50 Basic Operations Selecting the Input Source 51 Setting the Display...

Owner Manual
Page 7
... of Contents-Continued Advanced Controlling Other Components Advanced Features Entering Remote Control Codes 78 Learning Commands from Other Remote Controllers 81 Using Macros...82 Advanced Setup Advanced Features Adjusting the Bass & Treble 68 Audio Adjust Functions 68 Assigning Listening Modes to Input Sources 70 IntelliVolume ...71 Setting Preferences...71 Digital Input...
... of Contents-Continued Advanced Controlling Other Components Advanced Features Entering Remote Control Codes 78 Learning Commands from Other Remote Controllers 81 Using Macros...82 Advanced Setup Advanced Features Adjusting the Bass & Treble 68 Audio Adjust Functions 68 Assigning Listening Modes to Input Sources 70 IntelliVolume ...71 Setting Preferences...71 Digital Input...

Owner Manual
Page 8
... adjust the display brightness. D ZONE 2 LEVEL button (76) This button is used to select the input source for each item. Front & Rear Panels Front Panel TX-SR603X 1 234 5 6 7 8 9 0 A B C DE FG H STANDBY/ON ZONE2 OFF ZONE 2 LEVEL PHONES TUNING / PRESET MASTER VOLUME STANDBY TONE + ...DISPLAY MULTl CH DVD VIDEO 1 VIDEO 2 VIDEO 3 VIDEO 4 VCR 1 VCR 2 ENTER RETURN SETUP CLEAR TAPE TUNER CD VIDEO 4 INPUT SETUP MIC S VIDEO VIDEO L AUDIO R DIGITAL I Display See "Display" on page 10. TUNING [ ] [ ] buttons are used to...
... adjust the display brightness. D ZONE 2 LEVEL button (76) This button is used to select the input source for each item. Front & Rear Panels Front Panel TX-SR603X 1 234 5 6 7 8 9 0 A B C DE FG H STANDBY/ON ZONE2 OFF ZONE 2 LEVEL PHONES TUNING / PRESET MASTER VOLUME STANDBY TONE + ...DISPLAY MULTl CH DVD VIDEO 1 VIDEO 2 VIDEO 3 VIDEO 4 VCR 1 VCR 2 ENTER RETURN SETUP CLEAR TAPE TUNER CD VIDEO 4 INPUT SETUP MIC S VIDEO VIDEO L AUDIO R DIGITAL I Display See "Display" on page 10. TUNING [ ] [ ] buttons are used to...

Owner Manual
Page 9
U Input selector buttons (51) These buttons are used to adjust the bass and treble. V SETUP MIC (38) The included speaker setup microphone is for automatic speaker setup. T TONE, [-] & [+] buttons (68) These buttons are used to MIN, 1 through 99, or MAX. There are jacks for private listening. S ...or CD. W VIDEO 4 INPUT This input can be used to access the onscreen setup menus that appear on . The [MULTI CH] button selects the DVD analog multichannel input. Front & Rear Panels-Continued Q SETUP button This button is used to connect a camcorder, game console, and so on the...
U Input selector buttons (51) These buttons are used to adjust the bass and treble. V SETUP MIC (38) The included speaker setup microphone is for automatic speaker setup. T TONE, [-] & [+] buttons (68) These buttons are used to MIN, 1 through 99, or MAX. There are jacks for private listening. S ...or CD. W VIDEO 4 INPUT This input can be used to access the onscreen setup menus that appear on . The [MULTI CH] button selects the DVD analog multichannel input. Front & Rear Panels-Continued Q SETUP button This button is used to connect a camcorder, game console, and so on the...

Owner Manual
Page 14
...Note: Some of component. To set the remote controller to control the AV receiver. By entering the appropriate remote control code, you can control an Onkyo CD player in this mode. You must enter the appropriate remote control code first (see page 78). A B C D RECEIVER 5 ...Onkyo cassette recorder connected via . CD TAPE TUNER 7 8 9 T V VOL +10 0 CLEAR --/--- 10 11 12 INPUT SELECTOR MACRO 1 2 3 ZONE2 RECEIVER TAPE/AMP REMOTE MODE DVD CD HDD TV DIMMER + CH DISC ALBUM - VCR CABLE CDR TOP MENU MENU ENTER SAT MD SLEEP VOL PREV CH DISPLAY RETURN SETUP...
...Note: Some of component. To set the remote controller to control the AV receiver. By entering the appropriate remote control code, you can control an Onkyo CD player in this mode. You must enter the appropriate remote control code first (see page 78). A B C D RECEIVER 5 ...Onkyo cassette recorder connected via . CD TAPE TUNER 7 8 9 T V VOL +10 0 CLEAR --/--- 10 11 12 INPUT SELECTOR MACRO 1 2 3 ZONE2 RECEIVER TAPE/AMP REMOTE MODE DVD CD HDD TV DIMMER + CH DISC ALBUM - VCR CABLE CDR TOP MENU MENU ENTER SAT MD SLEEP VOL PREV CH DISPLAY RETURN SETUP...

Owner Manual
Page 15
... track. Remote Controller-Continued For detailed information, see the pages in parentheses. B ON button (37) This button is used to eject the cassette tape. 15 Q SETUP button This button is used to adjust the display brightness. Rewind & FF [ ]/[ ] buttons The Rewind [ ] button is used to select the listening modes. REC [ ] button...
... track. Remote Controller-Continued For detailed information, see the pages in parentheses. B ON button (37) This button is used to eject the cassette tape. 15 Q SETUP button This button is used to adjust the display brightness. Rewind & FF [ ]/[ ] buttons The Rewind [ ] button is used to select the listening modes. REC [ ] button...

Owner Manual
Page 16
...SUBTITLE button This button is used to Standby. VCR CABLE CDR TOP MENU MENU ENTER SAT MD SLEEP VOL PREV CH DISPLAY RETURN SETUP MUTING REC PLAYLIST RANDOM STEREO LISTENING MODE SURR REPEAT AUDIO SUBTITLE PLAY MODE DIRECT ALLST TESTTONE CH SEL LEVEL OPEN/CLOSE VIDEO OFF..., Slow Reverse, and Slow Forward. K AUDIO button This button selects foreign language soundtracks and audio formats (e.g., Dolby Digital or DTS). O SETUP button This button is used to select play modes. P RANDOM button This button is used to set the remote controller to open and close...
...SUBTITLE button This button is used to Standby. VCR CABLE CDR TOP MENU MENU ENTER SAT MD SLEEP VOL PREV CH DISPLAY RETURN SETUP MUTING REC PLAYLIST RANDOM STEREO LISTENING MODE SURR REPEAT AUDIO SUBTITLE PLAY MODE DIRECT ALLST TESTTONE CH SEL LEVEL OPEN/CLOSE VIDEO OFF..., Slow Reverse, and Slow Forward. K AUDIO button This button selects foreign language soundtracks and audio formats (e.g., Dolby Digital or DTS). O SETUP button This button is used to select play modes. P RANDOM button This button is used to set the remote controller to open and close...

Owner Manual
Page 17
... DVD CD HDD TV DIMMER + CH DISC ALBUM - VCR CABLE CDR TOP MENU MENU ENTER SAT MD SLEEP VOL PREV CH DISPLAY RETURN SETUP MUTING REC PLAYLIST RANDOM STEREO LISTENING MODE SURR REPEAT AUDIO SUBTITLE PLAY MODE DIRECT ALLST TESTTONE CH SEL OPEN/CLOSE VIDEO OFF LEVEL L NIGHT ... H REC [ ] button This button is used to select the CD remote controller mode. Remote Controller-Continued CD, MD & CDR Modes To control an Onkyo CD player, or a CD/MD recorder made by another manufacturer, you must first enter the appropriate remote control code (see page 78). To control...
... DVD CD HDD TV DIMMER + CH DISC ALBUM - VCR CABLE CDR TOP MENU MENU ENTER SAT MD SLEEP VOL PREV CH DISPLAY RETURN SETUP MUTING REC PLAYLIST RANDOM STEREO LISTENING MODE SURR REPEAT AUDIO SUBTITLE PLAY MODE DIRECT ALLST TESTTONE CH SEL OPEN/CLOSE VIDEO OFF LEVEL L NIGHT ... H REC [ ] button This button is used to select the CD remote controller mode. Remote Controller-Continued CD, MD & CDR Modes To control an Onkyo CD player, or a CD/MD recorder made by another manufacturer, you must first enter the appropriate remote control code (see page 78). To control...

Owner Manual
Page 18
... button Press and hold to navigate menus on the HDD-compatible component. E DISPLAY button* This button turns on the backlight for controlling Onkyo's next generation HDD-compatible components. F Previous [ ] button This button restarts the current song on the HDD-compatible component. J REPEAT ... V4 MULTI CH DVD T V CH 4 5 6 - VCR CABLE CDR TOP MENU MENU ENTER SAT MD SLEEP VOL PREV CH DISPLAY RETURN SETUP MUTING REC PLAYLIST RANDOM STEREO LISTENING MODE SURR REPEAT AUDIO SUBTITLE PLAY MODE DIRECT ALLST TESTTONE CH SEL LEVEL OPEN/CLOSE VIDEO OFF L NIGHT LEVEL...
... button Press and hold to navigate menus on the HDD-compatible component. E DISPLAY button* This button turns on the backlight for controlling Onkyo's next generation HDD-compatible components. F Previous [ ] button This button restarts the current song on the HDD-compatible component. J REPEAT ... V4 MULTI CH DVD T V CH 4 5 6 - VCR CABLE CDR TOP MENU MENU ENTER SAT MD SLEEP VOL PREV CH DISPLAY RETURN SETUP MUTING REC PLAYLIST RANDOM STEREO LISTENING MODE SURR REPEAT AUDIO SUBTITLE PLAY MODE DIRECT ALLST TESTTONE CH SEL LEVEL OPEN/CLOSE VIDEO OFF L NIGHT LEVEL...

Owner Manual
Page 21
TX-SR 603X ANTENNA AM VIDEO 3 VIDEO 2 FM 75 VIDEO 1 PR IN 2 IN OUT IN OUT IN IN 3 IN OUT IN IN OUT IN OUT IN L ... left Blue Surround right Gray Surround back left and right speakers. Surround right speaker 7. The following table indicates the channels you 're using the supplied setup microphone (see page 38). Number of speakers that their arrows point toward each speaker cable in two directions. Dipole speakers typically have . Dipole speakers TV...
TX-SR 603X ANTENNA AM VIDEO 3 VIDEO 2 FM 75 VIDEO 1 PR IN 2 IN OUT IN OUT IN IN 3 IN OUT IN IN OUT IN OUT IN L ... left Blue Surround right Gray Surround back left and right speakers. Surround right speaker 7. The following table indicates the channels you 're using the supplied setup microphone (see page 38). Number of speakers that their arrows point toward each speaker cable in two directions. Dipole speakers typically have . Dipole speakers TV...

Owner Manual
Page 32
... TONE MULTl CH + DVD STEREO LISTENING MODE DISPLAY DIGITAL INPUT RT/PTY/TP MEMORY TUNING MODE RETURN SETUP CLEAR VIDEO 1 VIDEO 2 VIDEO 3 VIDEO 4 TAPE TUNER CD VIDEO 4 INPUT VCR 1 VCR 2 SETUP MIC S VIDEO VIDEO L AUDIO R DIGITAL AUDIO OUTPUT L R L AUDIO R Camcorder, game console... DISPLAY DIGITAL INPUT RT/PTY/TP MEMORY TUNING MODE RETURN SETUP CLEAR VIDEO 1 VIDEO 2 VIDEO 3 VIDEO 4 TAPE TUNER CD VIDEO 4 INPUT VCR 1 VCR 2 SETUP MIC S VIDEO VIDEO L AUDIO R DIGITAL DIGITAL OUT Camcorder, game console, etc. TX-SR 603X ANTENNA AM VIDEO 3 VIDEO 2 FM 75...
... TONE MULTl CH + DVD STEREO LISTENING MODE DISPLAY DIGITAL INPUT RT/PTY/TP MEMORY TUNING MODE RETURN SETUP CLEAR VIDEO 1 VIDEO 2 VIDEO 3 VIDEO 4 TAPE TUNER CD VIDEO 4 INPUT VCR 1 VCR 2 SETUP MIC S VIDEO VIDEO L AUDIO R DIGITAL AUDIO OUTPUT L R L AUDIO R Camcorder, game console... DISPLAY DIGITAL INPUT RT/PTY/TP MEMORY TUNING MODE RETURN SETUP CLEAR VIDEO 1 VIDEO 2 VIDEO 3 VIDEO 4 TAPE TUNER CD VIDEO 4 INPUT VCR 1 VCR 2 SETUP MIC S VIDEO VIDEO L AUDIO R DIGITAL DIGITAL OUT Camcorder, game console, etc. TX-SR 603X ANTENNA AM VIDEO 3 VIDEO 2 FM 75...

Owner Manual
Page 38
...AV receiver and the connected TV. VCR CABLE CDR TOP MENU MENU ENTER SAT MD SLEEP VOL PREV CH DISPLAY RETURN SETUP MUTING 1 Turn on . Setup the room as you can be used while a pair of speakers connected, their sizes, the distance from each speaker ...2 3 + + DVD V 4 STEREO LISTENING MODE MULTI CH DISPLAY DIGITAL INPUT VIDEO 1 4 VIDEO 2 5 VIDEO 3 VIDEO 4 DVD T V CH DIMMER MEMORY TUNING MODE RETURN SETUP CLEAR 6 TAPE - Notes: • Make sure the microphone is connected. If you use a tripod or level table, you would normally be at the listening position...
...AV receiver and the connected TV. VCR CABLE CDR TOP MENU MENU ENTER SAT MD SLEEP VOL PREV CH DISPLAY RETURN SETUP MUTING 1 Turn on . Setup the room as you can be used while a pair of speakers connected, their sizes, the distance from each speaker ...2 3 + + DVD V 4 STEREO LISTENING MODE MULTI CH DISPLAY DIGITAL INPUT VIDEO 1 4 VIDEO 2 5 VIDEO 3 VIDEO 4 DVD T V CH DIMMER MEMORY TUNING MODE RETURN SETUP CLEAR 6 TAPE - Notes: • Make sure the microphone is connected. If you use a tripod or level table, you would normally be at the listening position...

Owner Manual
Page 39
...display the following screen to check, and then press [ENTER]. Return to Verify the Measurement Results" described below. To cancel the automatic setup while it's in turn, measured by the microphone, and the speaker settings set accordingly. Once the measurement is picked up : Retries...and Down [ ]/[ ] buttons to select the item that you may not work correctly, so be careful. Continue with step 5. 5 Disconnect the speaker setup microphone. phone. ENTER 1 Warning 2 Number of the following completion screen appears. Use the Up and Down [ ]/[ ] buttons to select any extraneous...
...display the following screen to check, and then press [ENTER]. Return to Verify the Measurement Results" described below. To cancel the automatic setup while it's in turn, measured by the microphone, and the speaker settings set accordingly. Once the measurement is picked up : Retries...and Down [ ]/[ ] buttons to select the item that you may not work correctly, so be careful. Continue with step 5. 5 Disconnect the speaker setup microphone. phone. ENTER 1 Warning 2 Number of the following completion screen appears. Use the Up and Down [ ]/[ ] buttons to select any extraneous...

Owner Manual
Page 40
... page 44. When you want to adjust any amplifier-builtin subwoofer is generated from the low position with very low frequencies. First Time Setup-Continued * results confirmation screen, turn on the Direct switch, if available. tion (e.g., L, R, and so on country) *When a speaker has a warning, its sound may...
... page 44. When you want to adjust any amplifier-builtin subwoofer is generated from the low position with very low frequencies. First Time Setup-Continued * results confirmation screen, turn on the Direct switch, if available. tion (e.g., L, R, and so on country) *When a speaker has a warning, its sound may...

Owner Manual
Page 41
Submenus p. 43 p. 75 p. 44 p. 47 p. 48 Main menu p. 68 * p. 58 p. 49 p. 70 * For multichannel connection, "3. Level Calibration." 41 p. 71 tich Level Adjust" appears instead of the MONITOR OUT jacks. First Time Setup-Continued About the Onscreen Setup Menus The AV receiver is configured using onscreen setup menus, which are displayed on your TV, they appear on the TV that's connected to either of "3. Mul- Because they 're large and clear, making setup a breeze.
Submenus p. 43 p. 75 p. 44 p. 47 p. 48 Main menu p. 68 * p. 58 p. 49 p. 70 * For multichannel connection, "3. Level Calibration." 41 p. 71 tich Level Adjust" appears instead of the MONITOR OUT jacks. First Time Setup-Continued About the Onscreen Setup Menus The AV receiver is configured using onscreen setup menus, which are displayed on your TV, they appear on the TV that's connected to either of "3. Mul- Because they 're large and clear, making setup a breeze.

Owner Manual
Page 42
...CH + DVD STEREO LISTENING MODE DISPLAY DIGITAL INPUT VIDEO 1 VIDEO 2 VIDEO 3 VIDEO 4 DIMMER MEMORY TUNING MODE RETURN SETUP CLEAR TAPE TUNER CD VIDEO 4 INPUT VCR 1 VCR 2 SETUP MIC S VIDEO VIDEO L AUDIO R DIGITAL Input selector buttons 1 Press the input selector button for the source that jack...connect your CD player to the OPTICAL IN2 jack, you should assign that you want to DVD VIDEO 1 VIDEO 2 assign. First Time Setup-Continued Initial Setup Digital Input If you connect a component to a digital input jack, you must assign that you don't want to assign a digital ...
...CH + DVD STEREO LISTENING MODE DISPLAY DIGITAL INPUT VIDEO 1 VIDEO 2 VIDEO 3 VIDEO 4 DIMMER MEMORY TUNING MODE RETURN SETUP CLEAR TAPE TUNER CD VIDEO 4 INPUT VCR 1 VCR 2 SETUP MIC S VIDEO VIDEO L AUDIO R DIGITAL Input selector buttons 1 Press the input selector button for the source that jack...connect your CD player to the OPTICAL IN2 jack, you should assign that you want to DVD VIDEO 1 VIDEO 2 assign. First Time Setup-Continued Initial Setup Digital Input If you connect a component to a digital input jack, you must assign that you don't want to assign a digital ...

Owner Manual
Page 43
...selector VIDEO IN jack DVD IN 1 VIDEO 1 IN 2 VIDEO 2 VIDEO 3 VIDEO 4 IN 3 VIDEO VIDEO 1 RECEIVER Press the [RECEIVER] button followed by using its [SETUP] button, arrow buttons, and [ENTER] button. 2 ENTER Use the Up and Down [ ]/[ ] buttons to output composite and S-Video sources from the COMPONENT VIDEO OUT. ...43 Note: This procedure can also be performed on the AV receiver by the [SETUP] button. VIDEO: Output composite video and S-Video sources from the COMPONENT VIDEO OUT, select VIDEO, as explained below. The Initial...
...selector VIDEO IN jack DVD IN 1 VIDEO 1 IN 2 VIDEO 2 VIDEO 3 VIDEO 4 IN 3 VIDEO VIDEO 1 RECEIVER Press the [RECEIVER] button followed by using its [SETUP] button, arrow buttons, and [ENTER] button. 2 ENTER Use the Up and Down [ ]/[ ] buttons to output composite and S-Video sources from the COMPONENT VIDEO OUT. ...43 Note: This procedure can also be performed on the AV receiver by the [SETUP] button. VIDEO: Output composite video and S-Video sources from the COMPONENT VIDEO OUT, select VIDEO, as explained below. The Initial...


