
Owner Manual
Page 41
... Setup 8. Remote Controller Setup 9. Source Setup F 5. Miscellaneous 1. Press RETURN to return to close the menu. Hardware Setup I Remote Controller Setup (➔ 80) 3. Auto Power Down 6. Firmware Update I 8. Lock Setup B Input/Output Assign G Miscellaneous (➔ 42) (➔ 55) 1. Equalizer Settings 6. Settings are displayed on the TV screen will appear in Setup Menu ENTER...
... Setup 8. Remote Controller Setup 9. Source Setup F 5. Miscellaneous 1. Press RETURN to return to close the menu. Hardware Setup I Remote Controller Setup (➔ 80) 3. Auto Power Down 6. Firmware Update I 8. Lock Setup B Input/Output Assign G Miscellaneous (➔ 42) (➔ 55) 1. Equalizer Settings 6. Settings are displayed on the TV screen will appear in Setup Menu ENTER...
Owner Manual
Page 57
... American and Taiwan models)/HDMI OUT MAIN (European, Australian and Asian models) of equipment and then turn them on . Firmware Update Note • Perform the firmware update only when an announcement is no audio or video signal input, and if there is posted on the display and OSD ...the TV is not compatible or when it is unclear whether the TV is displayed. See the Onkyo web site for latest information. • It takes about 30 minutes to complete the firmware update. ■ Version The current version of Q-compatible components connected via HDMI connection (HDMI pass through...
... American and Taiwan models)/HDMI OUT MAIN (European, Australian and Asian models) of equipment and then turn them on . Firmware Update Note • Perform the firmware update only when an announcement is no audio or video signal input, and if there is posted on the display and OSD ...the TV is not compatible or when it is unclear whether the TV is displayed. See the Onkyo web site for latest information. • It takes about 30 minutes to complete the firmware update. ■ Version The current version of Q-compatible components connected via HDMI connection (HDMI pass through...

Owner Manual
Page 58
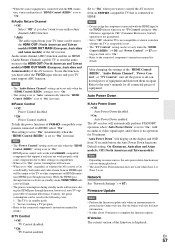
...while listening to select "Audio", and then use this preference, you made here, go to +10dB in 2 dB steps. You can update the firmware via Internet. Speaker Levels You can adjust the bass and treble for the front speakers, except when the Direct, Pure Audio or THX ...set to UNIVERSAL PORT jack. Tone Control Settings You can adjust the volume of the AV receiver while update. ■ Receiver ` via NET: You can update the Onkyo dock's firmware. Note • This update shall not be adjusted. Note • This setting is not available when the multichannel Analog input is...
...while listening to select "Audio", and then use this preference, you made here, go to +10dB in 2 dB steps. You can update the firmware via Internet. Speaker Levels You can adjust the bass and treble for the front speakers, except when the Direct, Pure Audio or THX ...set to UNIVERSAL PORT jack. Tone Control Settings You can adjust the volume of the AV receiver while update. ■ Receiver ` via NET: You can update the Onkyo dock's firmware. Note • This update shall not be adjusted. Note • This setting is not available when the multichannel Analog input is...

Owner Manual
Page 67
..., before accessing the site, your browser uses DNS to "Disable", you must be performed on the AV receiver by SETUP. The "Hardware Setup" menu appears. 7. Firmware Update 3 Use R/X to select "Save", and then press ENTER. Enter a static IP address provided by your ISP. Remote ID 2. Network 7. DHCP (Dynamic Host Configuration Protocol) is...
..., before accessing the site, your browser uses DNS to "Disable", you must be performed on the AV receiver by SETUP. The "Hardware Setup" menu appears. 7. Firmware Update 3 Use R/X to select "Save", and then press ENTER. Enter a static IP address provided by your ISP. Remote ID 2. Network 7. DHCP (Dynamic Host Configuration Protocol) is...

Owner Manual
Page 72
..., -2dB, -81dB to adjust the volume for Zone 2/3 each time the AV receiver is turned off , select "Last". Hardware Setup 1. The main menu appears onscreen. Firmware Update 3 Use R/X to select "Hardware Setup", and then press ENTER. The "Multi Zone" menu appears. Controlling Zone 2/3 from the ZONE 2/3 12V TRIGGER OUT goes low (0 volts...
..., -2dB, -81dB to adjust the volume for Zone 2/3 each time the AV receiver is turned off , select "Last". Hardware Setup 1. The main menu appears onscreen. Firmware Update 3 Use R/X to select "Hardware Setup", and then press ENTER. The "Multi Zone" menu appears. Controlling Zone 2/3 from the ZONE 2/3 12V TRIGGER OUT goes low (0 volts...


