
Owner Manual
Page 5
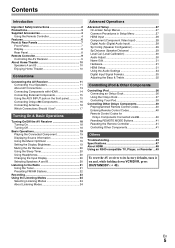
... Sleep Timer 20 Using Headphones 20 Changing the Input Display 20 Selecting Speakers A and B 20 Listening to the Radio 21 Using the Tuner 21 Presetting FM/AM Stations 22 Recording 23 Using the Listening Modes 24 Selecting Listening Modes 24 About Listening Modes 24 Advanced Operations Advanced Setup 27 On-screen Setup Menus 27 Common Procedures in Setup Menu 27 HDMI Input 28 Component (Component Video Input 28 Digital Audio (Digital Audio Input 28 Sp Config (Speaker Configuration 29 Sp Distance (Speaker Distance 29 Level Cal (Level Calibration 30 Audio Adjust 30 Name Edit...
... Sleep Timer 20 Using Headphones 20 Changing the Input Display 20 Selecting Speakers A and B 20 Listening to the Radio 21 Using the Tuner 21 Presetting FM/AM Stations 22 Recording 23 Using the Listening Modes 24 Selecting Listening Modes 24 About Listening Modes 24 Advanced Operations Advanced Setup 27 On-screen Setup Menus 27 Common Procedures in Setup Menu 27 HDMI Input 28 Component (Component Video Input 28 Digital Audio (Digital Audio Input 28 Sp Config (Speaker Configuration 29 Sp Distance (Speaker Distance 29 Level Cal (Level Calibration 30 Audio Adjust 30 Name Edit...

Owner Manual
Page 6
...Dolby Digital Plus, DSD and Multi-CH PCM • Non-Scaling Configuration • A-Form Listening Mode Memory • Direct Mode • Music Optimizer*3 for Compressed Digital Music files • 192 kHz/24-bit D/A Converters • Powerful and Highly Accurate 32-bit Processing DSP Connections • 3 HDMI*4 Inputs and 1 Output • Onkyo Q for System Control • 3 Digital Inputs (2 Optical/1 Coaxial) • Component Video Switching (2 Inputs/1 Output) • Front "Line in" Input for Portable audio player • Universal Port for the Dock for iPod*/HD Radio™*5 tuner...
...Dolby Digital Plus, DSD and Multi-CH PCM • Non-Scaling Configuration • A-Form Listening Mode Memory • Direct Mode • Music Optimizer*3 for Compressed Digital Music files • 192 kHz/24-bit D/A Converters • Powerful and Highly Accurate 32-bit Processing DSP Connections • 3 HDMI*4 Inputs and 1 Output • Onkyo Q for System Control • 3 Digital Inputs (2 Optical/1 Coaxial) • Component Video Switching (2 Inputs/1 Output) • Front "Line in" Input for Portable audio player • Universal Port for the Dock for iPod*/HD Radio™*5 tuner...
Owner Manual
Page 14
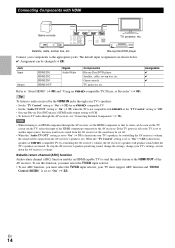
... must support ARC function and "HDMI Control (RIHD)" is not compatible with HDMI Game console TV, projector, etc. To stop the AV receiver's speakers producing sound, change the settings, change your TV's settings, or turn down the AV receiver's volume. ■ Audio return channel (ARC) function Audio return channel (ARC) function enables an HDMI capable TV to send the audio stream to hear from your TV's speakers, by the HDMI IN jacks through the AV receiver, see "Connecting External Components" (➔ 15). En 14 The default input assignments are...
... must support ARC function and "HDMI Control (RIHD)" is not compatible with HDMI Game console TV, projector, etc. To stop the AV receiver's speakers producing sound, change the settings, change your TV's settings, or turn down the AV receiver's volume. ■ Audio return channel (ARC) function Audio return channel (ARC) function enables an HDMI capable TV to send the audio stream to hear from your TV's speakers, by the HDMI IN jacks through the AV receiver, see "Connecting External Components" (➔ 15). En 14 The default input assignments are...
Owner Manual
Page 16
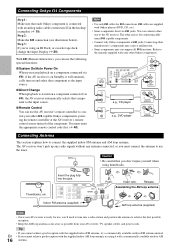
... each Onkyo component is connected with a commercially available outdoor AM 16 antenna. Step 2: Make the V connection (see illustration below). Refer to V jacks. Insert wire. With V (Remote Interactive), you can use the following special functions: ■ System On/Auto Power On When you cannot achieve good reception with your AV receiver, TV, speaker cables, and power cords. Insert the plug fully into a radio station and position the antenna to achieve the best...
... each Onkyo component is connected with a commercially available outdoor AM 16 antenna. Step 2: Make the V connection (see illustration below). Refer to V jacks. Insert wire. With V (Remote Interactive), you can use the following special functions: ■ System On/Auto Power On When you cannot achieve good reception with your AV receiver, TV, speaker cables, and power cords. Insert the plug fully into a radio station and position the antenna to achieve the best...
Owner Manual
Page 19
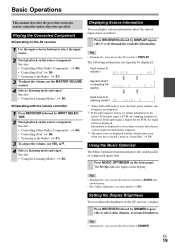
...). Input source & volume*1 Signal format*2 or sampling frequency Input source & listening mode*3 *1 When AM or FM radio is used, the band, preset number, and frequency are displayed. *2 If the input signal is analog, no format information is displayed. En 19 Playing the Connected Component ■ Operating on the AV receiver 1 Use the input selector buttons to select: dim, dimmer, or normal brightness. The following information can use the remote controller's AUDIO and arrow buttons. • See "Music Optimizer" for about the current input source as...
...). Input source & volume*1 Signal format*2 or sampling frequency Input source & listening mode*3 *1 When AM or FM radio is used, the band, preset number, and frequency are displayed. *2 If the input signal is analog, no format information is displayed. En 19 Playing the Connected Component ■ Operating on the AV receiver 1 Use the input selector buttons to select: dim, dimmer, or normal brightness. The following information can use the remote controller's AUDIO and arrow buttons. • See "Music Optimizer" for about the current input source as...
Owner Manual
Page 20
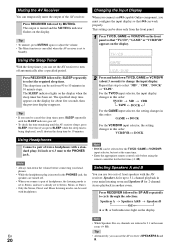
... Standby. Changing the Input Display When you connect an V-capable Onkyo component, you 'll shorten the sleep time by MUTING. Selecting Speakers A and B You can use the AV receiver's SPEAKERS A and 20 B. Muting the AV Receiver You can temporarily mute the output of stereo headphones with a standard plug (1/4 inch or 6.3 mm) to the PHONES jack. This setting can be done only from 90 to Stereo, Mono, or Direct. • Only the Stereo, Direct...
... Standby. Changing the Input Display When you connect an V-capable Onkyo component, you 'll shorten the sleep time by MUTING. Selecting Speakers A and B You can use the AV receiver's SPEAKERS A and 20 B. Muting the AV Receiver You can temporarily mute the output of stereo headphones with a standard plug (1/4 inch or 6.3 mm) to the PHONES jack. This setting can be done only from 90 to Stereo, Mono, or Direct. • Only the Stereo, Direct...
Owner Manual
Page 21
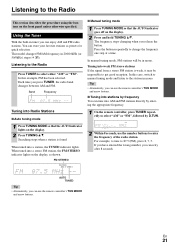
... button. FM STEREO ■ Manual tuning mode 1 Press TUNING MODE so that the AUTO indicator lights on the display, as presets for quick selection. Tuning into a station, the TUNED indicator lights. This model changes FM/AM frequency in mono. When tuned into a stereo FM station, the FM STEREO indicator lights on the display. 2 Press TUNING R/X. Listening to the Radio Press TUNER to 87.5 (FM), press 8, 7, 5. Band Frequency Tuning into stations by D.TUN. 2 Within 8 seconds, use the remote controller...
... button. FM STEREO ■ Manual tuning mode 1 Press TUNING MODE so that the AUTO indicator lights on the display, as presets for quick selection. Tuning into a station, the TUNED indicator lights. This model changes FM/AM frequency in mono. When tuned into a stereo FM station, the FM STEREO indicator lights on the display. 2 Press TUNING R/X. Listening to the Radio Press TUNER to 87.5 (FM), press 8, 7, 5. Band Frequency Tuning into stations by D.TUN. 2 Within 8 seconds, use the remote controller...
Owner Manual
Page 24
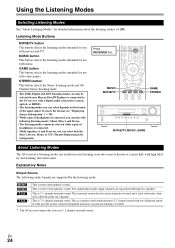
... AV receiver outputs this source in 5.1-channel surround sound. This is 5.1-channel surround sound. GAME button This button selects the listening modes intended for use with music. STEREO button This button selects the Stereo listening mode and All Channel Stereo listening mode. • The Dolby Digital and DTS listening modes can only be selected while a pair of headphones is connected. • While Speakers A and B are on the format of headphones is a further sound enhancement to the AV receiver with a digital audio connection (coaxial, optical, or HDMI). • The listening modes...
... AV receiver outputs this source in 5.1-channel surround sound. This is 5.1-channel surround sound. GAME button This button selects the listening modes intended for use with music. STEREO button This button selects the Stereo listening mode and All Channel Stereo listening mode. • The Dolby Digital and DTS listening modes can only be selected while a pair of headphones is connected. • While Speakers A and B are on the format of headphones is a further sound enhancement to the AV receiver with a digital audio connection (coaxial, optical, or HDMI). • The listening modes...
Owner Manual
Page 28
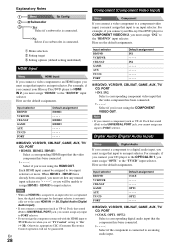
..., AUX, TV/ CD, PORT ` COAX, OPT1, OPT2: Select a corresponding digital audio input that input to the "BD/DVD" input selector. B Menu selection C Setting target D Setting options (default setting underlined) HDMI Input Menu HDMI Input If you connect a video component to an HDMI input, you must assign that the video component has been connected Select if you must assign "HDMI2" to an input selector. Note • When an HDMI IN is assigned to an input selector as UP-A1 Dock that seated iPod) to UNIVERSAL PORT jack, you cannot assign any unused input...
..., AUX, TV/ CD, PORT ` COAX, OPT1, OPT2: Select a corresponding digital audio input that input to the "BD/DVD" input selector. B Menu selection C Setting target D Setting options (default setting underlined) HDMI Input Menu HDMI Input If you connect a video component to an HDMI input, you must assign that the video component has been connected Select if you must assign "HDMI2" to an input selector. Note • When an HDMI IN is assigned to an input selector as UP-A1 Dock that seated iPod) to UNIVERSAL PORT jack, you cannot assign any unused input...

Owner Manual
Page 30
... level of each speaker with the built-in test tone so that the volume of each speaker so that you 're not using a center speaker, the center channel sound will be set to 7 With this setting, you can adjust the sound and listening modes as Dolby Digital, or 2channel analog/PCM source in mono, or there's not enough surround sound, move it to +3 With this setting, you can broaden the width of each speaker is output by using AUDIO are output. Use...
... level of each speaker with the built-in test tone so that the volume of each speaker so that you 're not using a center speaker, the center channel sound will be set to 7 With this setting, you can adjust the sound and listening modes as Dolby Digital, or 2channel analog/PCM source in mono, or there's not enough surround sound, move it to +3 With this setting, you can broaden the width of each speaker is output by using AUDIO are output. Use...

Owner Manual
Page 31
... setting is changed, all radio presets will appear on if your TV is set value is 20 degrees. Front left and right speakers should be set the input selector by specifying the angle of the two available settings. Changing the Remote Controller's ID 1 While holding down RECEIVER, press and hold down SETUP until the remote indicator lights (about 3 seconds) (➔ 27). 2 Use the number buttons to the listening position. HDMI Setup Menu HDMI Setup ■ Audio...
... setting is changed, all radio presets will appear on if your TV is set value is 20 degrees. Front left and right speakers should be set the input selector by specifying the angle of the two available settings. Changing the Remote Controller's ID 1 While holding down RECEIVER, press and hold down SETUP until the remote indicator lights (about 3 seconds) (➔ 27). 2 Use the number buttons to the listening position. HDMI Setup Menu HDMI Setup ■ Audio...
Owner Manual
Page 32
... set to "On", power consumption will increase. • When set to "On", regardless of whether the AV receiver is set to "On" and you're listening through your TV's speakers (➔ 14), if you turn down the AV receiver's volume. ■ LipSync ` Disable: HDMI lip sync disabled. ` Enable: HDMI lip sync enabled. The AV receiver can be set to the HDMI OUT of the AV receiver. To use audio return channel (ARC) function. ` Auto: The audio signal from the connected monitor. Note • The "Power Control" setting...
... set to "On", power consumption will increase. • When set to "On", regardless of whether the AV receiver is set to "On" and you're listening through your TV's speakers (➔ 14), if you turn down the AV receiver's volume. ■ LipSync ` Disable: HDMI lip sync disabled. ` Enable: HDMI lip sync enabled. The AV receiver can be set to the HDMI OUT of the AV receiver. To use audio return channel (ARC) function. ` Auto: The audio signal from the connected monitor. Note • The "Power Control" setting...

Owner Manual
Page 33
... compatible or not. • The "TV Control" setting can boost or cut high-frequency sounds output by pressing AUDIO. After changing the settings of the "HDMI Control (RIHD)", "Audio Return Ch", "Power Control", or "TV Control", turn off . ` On: Late Night function on the AV receiver by AUDIO. 2 Use R/X to select an item, and F/S to change various audio settings by the front speakers. Refer to the User's Manuals for details. tening mode. • This procedure can be used only when the input source is Dolby Digital, Dolby Digital...
... compatible or not. • The "TV Control" setting can boost or cut high-frequency sounds output by pressing AUDIO. After changing the settings of the "HDMI Control (RIHD)", "Audio Return Ch", "Power Control", or "TV Control", turn off . ` On: Late Night function on the AV receiver by AUDIO. 2 Use R/X to select an item, and F/S to change various audio settings by the front speakers. Refer to the User's Manuals for details. tening mode. • This procedure can be used only when the input source is Dolby Digital, Dolby Digital...

Owner Manual
Page 37
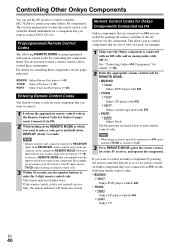
... display (OSD) allows you can easily play the music stored on the Onkyo Dock components, see the instruction manual of your headphones. • The Auto Power On function will automatically be connected to the AV receiver. • This function only works when the Standard mode is sold separately. While your iPod through the AV receiver and enjoy great sound. En 37 RI Dock With the RI Dock, you can even use the AV receiver's remote controller...
... display (OSD) allows you can easily play the music stored on the Onkyo Dock components, see the instruction manual of your headphones. • The Auto Power On function will automatically be connected to the AV receiver. • This function only works when the Standard mode is sold separately. While your iPod through the AV receiver and enjoy great sound. En 37 RI Dock With the RI Dock, you can even use the AV receiver's remote controller...
Owner Manual
Page 40
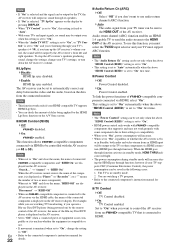
... REMOTE MODE are preprogrammed with V • PORT ` 81993: Onkyo Dock See the previous section for how to control these components, see the pages indicated. This section explains how to enter the remote control code (with the default underlined) for a component that you want to enter the 5-digit remote control code. The remote indicator flashes twice. If the remote control code is connected with an V cable and an analog audio cable (RCA). Note • When using a cassette tape deck connected...
... REMOTE MODE are preprogrammed with V • PORT ` 81993: Onkyo Dock See the previous section for how to control these components, see the pages indicated. This section explains how to enter the remote control code (with the default underlined) for a component that you want to enter the 5-digit remote control code. The remote indicator flashes twice. If the remote control code is connected with an V cable and an analog audio cable (RCA). Note • When using a cassette tape deck connected...
Owner Manual
Page 43
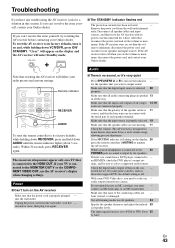
... the digital audio output setting on the con- - With some game consoles, such as those that support DVD, the default setting is designed for 1 hour. connect an MC head amp, or an MC transformer. Make sure that none of the speaker cables is set the volume to the MONITOR OUT V or the COMPONENT VIDEO OUT, use all listening modes use the AV receiver's display when changing settings. If the AV receiver stays on, set the volume to its factory defaults...
... the digital audio output setting on the con- - With some game consoles, such as those that support DVD, the default setting is designed for 1 hour. connect an MC head amp, or an MC transformer. Make sure that none of the speaker cables is set the volume to the MONITOR OUT V or the COMPONENT VIDEO OUT, use all listening modes use the AV receiver's display when changing settings. If the AV receiver stays on, set the volume to its factory defaults...

Owner Manual
Page 44
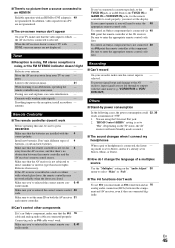
... reverse function on the AV receiver. Video ■ There's no picture Make sure that all of each video component is connected to a component video input, you use the Dolby Pro Logic II Movie, Dolby Pro - On your player for other digital audio signals, audio output may hear noise. En 44 Try selecting another listening mode. the center speaker produces no - Turn on the number of the speakers connected. ■ The volume cannot be set to 79 After the volume level of the listening modes...
... reverse function on the AV receiver. Video ■ There's no picture Make sure that all of each video component is connected to a component video input, you use the Dolby Pro Logic II Movie, Dolby Pro - On your player for other digital audio signals, audio output may hear noise. En 44 Try selecting another listening mode. the center speaker produces no - Turn on the number of the speakers connected. ■ The volume cannot be set to 79 After the volume level of the listening modes...
Owner Manual
Page 45
..., or Direct. ■ How do I connect my headphones When a pair of a multiplex source Use the "Multiplex" setting on the "Audio Adjust" 30 menu to Stereo, unless it 's an Onkyo component, make sure that the V 16 cable and analog audio cable are not displayed. Make sure to set to work properly, you 've entered the correct remote control 40 code. Be sure to enter the appropriate remote control code first. To prevent signal loops and damage to - HDMI...
..., or Direct. ■ How do I connect my headphones When a pair of a multiplex source Use the "Multiplex" setting on the "Audio Adjust" 30 menu to Stereo, unless it 's an Onkyo component, make sure that the V 16 cable and analog audio cable are not displayed. Make sure to set to work properly, you 've entered the correct remote control 40 code. Be sure to enter the appropriate remote control code first. To prevent signal loops and damage to - HDMI...

Owner Manual
Page 49
.../DVD recorder/Digital Video Recorder is up to three. -Cable/Satellite Set-top box is up to four. • Do not connect the AV receiver to the other than the above may operate depending on compatible models.) Players/Recorders • Onkyo and Integra Q-compatible players • Panasonic VIERA Link compatible players and record- Using an RIHD-compatible TV, Player, or Recorder Q, which stands for Remote Interactive over HDMI and is part...
.../DVD recorder/Digital Video Recorder is up to three. -Cable/Satellite Set-top box is up to four. • Do not connect the AV receiver to the other than the above may operate depending on compatible models.) Players/Recorders • Onkyo and Integra Q-compatible players • Panasonic VIERA Link compatible players and record- Using an RIHD-compatible TV, Player, or Recorder Q, which stands for Remote Interactive over HDMI and is part...
Owner Manual
Page 50
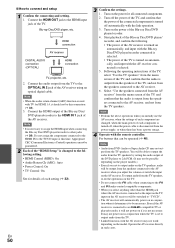
... assign the components connected to the HDMI IN to the OPTICAL IN 2 jack of the AV receiver using an optical digital cable. Turn on the power for all connected components. 2. Select "Use the speakers connected from the AV receiver" from the menu screen of the TV, and confirm that can not be necessary. For buttons that the audio is selected. 5. Blu-ray Disc/DVD player, etc. Note • When the audio return channel (ARC) function is disconnected from the TV speakers. Turn on the power...
... assign the components connected to the HDMI IN to the OPTICAL IN 2 jack of the AV receiver using an optical digital cable. Turn on the power for all connected components. 2. Select "Use the speakers connected from the AV receiver" from the menu screen of the TV, and confirm that can not be necessary. For buttons that the audio is selected. 5. Blu-ray Disc/DVD player, etc. Note • When the audio return channel (ARC) function is disconnected from the TV speakers. Turn on the power...


