User Guide
Page 3
... without prior notice. Check with the Nokia dealer nearest to the accuracy, reliability or contents of the products described in relation to you. The availability of particular products may vary by applicable law, no circumstances shall Nokia be responsible for a particular purpose, are... provided 'as required by region. Except as is'. Issue 1 EN, 9234625 Nokia reserves the right to revise this document or withdraw it...
... without prior notice. Check with the Nokia dealer nearest to the accuracy, reliability or contents of the products described in relation to you. The availability of particular products may vary by applicable law, no circumstances shall Nokia be responsible for a particular purpose, are... provided 'as required by region. Except as is'. Issue 1 EN, 9234625 Nokia reserves the right to revise this document or withdraw it...

User Guide
Page 4
Your phone...26 Keys and parts ...26 Essential indicators ...29 Keypad lock (Keyguard) ...30 Menu ...30 Actions common to all applications 32 Volume control...34 Help ...35 Copyright © 2005 Nokia. Content For your safety 14 General information 18 Stickers in the sales package ...18 Access codes ...18 PIN code...18 PIN2 code...
Your phone...26 Keys and parts ...26 Essential indicators ...29 Keypad lock (Keyguard) ...30 Menu ...30 Actions common to all applications 32 Volume control...34 Help ...35 Copyright © 2005 Nokia. Content For your safety 14 General information 18 Stickers in the sales package ...18 Access codes ...18 PIN code...18 PIN2 code...
User Guide
Page 9
Tools ...124 Applications ...124 Downloading an application...125 Installing an application ...126 Installing a Java™application...127 Launching an application ...128 Other options available for an application or application set 128 Memory status for applications...129 Removing an application ...129 File manager ...129 Receiving files via Infrared... new chat group ...121 Editing chat group settings ...122 Restricting access to an application 132 Starting an application using a voice command 133 Replaying, erasing, or changing a voice command 133 Device manager...134 Copyright ©...
Tools ...124 Applications ...124 Downloading an application...125 Installing an application ...126 Installing a Java™application...127 Launching an application ...128 Other options available for an application or application set 128 Memory status for applications...129 Removing an application ...129 File manager ...129 Receiving files via Infrared... new chat group ...121 Editing chat group settings ...122 Restricting access to an application 132 Starting an application using a voice command 133 Replaying, erasing, or changing a voice command 133 Device manager...134 Copyright ©...
User Guide
Page 11
... information from the wallet to your browser 168 Viewing ticket details ...169 Wallet settings...169 Resetting the wallet and wallet code 170 11.Services and Applications 171 Web (Mobile browser)...171 Basic steps for accessing ...171 Setting up the phone for the browser service 172 Receiving settings in a smart message 172... settings manually 172 Making a connection ...172 Viewing bookmarks...173 Adding bookmarks manually...174 Browsing...174 Keys and commands used in browsing 174 Copyright © 2005 Nokia. All rights reserved. 11
... information from the wallet to your browser 168 Viewing ticket details ...169 Wallet settings...169 Resetting the wallet and wallet code 170 11.Services and Applications 171 Web (Mobile browser)...171 Basic steps for accessing ...171 Setting up the phone for the browser service 172 Receiving settings in a smart message 172... settings manually 172 Making a connection ...172 Viewing bookmarks...173 Adding bookmarks manually...174 Browsing...174 Keys and commands used in browsing 174 Copyright © 2005 Nokia. All rights reserved. 11
User Guide
Page 17
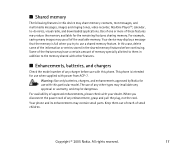
... phone and its enhancements may display a message that the memory is intended for the remaining features sharing memory. Copyright © 2005 Nokia. Your device may contain small parts. In this case, delete some of the information or entries stored in addition to them out of... use all of the available memory. Warning: Use only batteries, chargers, and enhancements approved by Nokia for use with your dealer. When you try to -do notes, visual radio, and downloaded applications. For example, saving many images may share memory: contacts, text messages, and multimedia messages,...
... phone and its enhancements may display a message that the memory is intended for the remaining features sharing memory. Copyright © 2005 Nokia. Your device may contain small parts. In this case, delete some of the information or entries stored in addition to them out of... use all of the available memory. Warning: Use only batteries, chargers, and enhancements approved by Nokia for use with your dealer. When you try to -do notes, visual radio, and downloaded applications. For example, saving many images may share memory: contacts, text messages, and multimedia messages,...
User Guide
Page 23
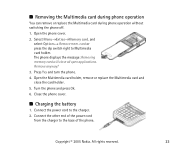
Select Menu→Extras→Memory card. Open the Multimedia card holder, remove or replace the Multimedia card and close all open applications. Close the phone cover. ■ Charging the battery 1. and select Options→ Remove mem. The phone displays the message: Removing memory card ...switch right to the base of the phone. Press Yes and turn the phone. 4. Turn the phone and press Ok. 6. Copyright © 2005 Nokia. Connect the power cord to the charger. 2. ■ Removing the Multimedia card during phone operation You can remove or replace the Multimedia card during ...
Select Menu→Extras→Memory card. Open the Multimedia card holder, remove or replace the Multimedia card and close all open applications. Close the phone cover. ■ Charging the battery 1. and select Options→ Remove mem. The phone displays the message: Removing memory card ...switch right to the base of the phone. Press Yes and turn the phone. 4. Turn the phone and press Ok. 6. Copyright © 2005 Nokia. Connect the power cord to the charger. 2. ■ Removing the Multimedia card during phone operation You can remove or replace the Multimedia card during ...

User Guide
Page 26
...parts Front view 1. See "Push to move the cursor up and down, right and left when writing text, using the calendar, and in some game applications. Pressing the joystick briefly selects the function. 4. Joystick Enables scrolling through names, phone numbers, menus or settings. Call key dials a phone number and...mode it shows the list of most recently called numbers. 6. - The joystick is also used to talk" on page 39. 3. Copyright © 2005 Nokia. Menu key opens the main menu. 5. enter numbers and characters. Push to talk (PTT) key To activate Push to talk. 2.
...parts Front view 1. See "Push to move the cursor up and down, right and left when writing text, using the calendar, and in some game applications. Pressing the joystick briefly selects the function. 4. Joystick Enables scrolling through names, phone numbers, menus or settings. Call key dials a phone number and...mode it shows the list of most recently called numbers. 6. - The joystick is also used to talk" on page 39. 3. Copyright © 2005 Nokia. Menu key opens the main menu. 5. enter numbers and characters. Push to talk (PTT) key To activate Push to talk. 2.

User Guide
Page 30
... lock (Keyguard) Use the keypad lock to the official emergency number programmed into your phone. Data is shown on page 181. - Copyright © 2005 Nokia. To lock: In standby mode press the left selection key and then * key. To unlock: Press the left selection key and then the * key.... All rights reserved. 30 In the menu you can access all the applications in the Menu: Open, App. Options in your device. See "Bluetooth connection" on the display. downloads, List view/Grid view, Move, Move to ...
... lock (Keyguard) Use the keypad lock to the official emergency number programmed into your phone. Data is shown on page 181. - Copyright © 2005 Nokia. To lock: In standby mode press the left selection key and then * key. To unlock: Press the left selection key and then the * key.... All rights reserved. 30 In the menu you can access all the applications in the Menu: Open, App. Options in your device. See "Bluetooth connection" on the display. downloads, List view/Grid view, Move, Move to ...

User Guide
Page 31
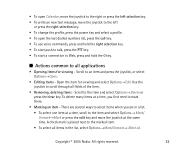
...List view of the Menu • Select Options → List view or Grid view to change between open applications • Press and hold to switch from unused applications. Closing applications • Press Back or Exit as many times as needed to return to navigate in idle mode •...press the joystick to go to it . Copyright © 2005 Nokia. Moving in the Menu • Move the joystick up . • To open application to open it . • Numerous open . Opening applications or folders • Scroll to an application or a folder and press the joystick to another. Exit from...
...List view of the Menu • Select Options → List view or Grid view to change between open applications • Press and hold to switch from unused applications. Closing applications • Press Back or Exit as many times as needed to return to navigate in idle mode •...press the joystick to go to it . Copyright © 2005 Nokia. Moving in the Menu • Move the joystick up . • To open application to open it . • Numerous open . Opening applications or folders • Scroll to an application or a folder and press the joystick to another. Exit from...
User Guide
Page 32
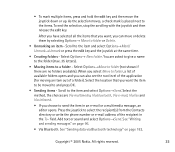
Use the joystick to scroll through all applications • Opening items for viewing and select Options→Edit. Copyright © 2005 Nokia. Scroll to the item and select Options→Delete or press the clear key. Open the item for viewing - Scroll to an item and press ...
Use the joystick to scroll through all applications • Opening items for viewing and select Options→Edit. Copyright © 2005 Nokia. Scroll to the item and select Options→Delete or press the clear key. Open the item for viewing - Scroll to an item and press ...
User Guide
Page 33
... via Bluetooth technology" on page 96. • Via Bluetooth. Press the joystick to folder (not shown if there are no folders available). Copyright © 2005 Nokia. Select the location that you want, you want the item to be moved to send the item in the To- See "Writing and sending messages... you can move the joystick down or up. After you have selected all the items that you can also see the root level of the application (for moving an item out of available folders opens and you choose to and press OK. • Sending items - Add text or sound and select...
... via Bluetooth technology" on page 96. • Via Bluetooth. Press the joystick to folder (not shown if there are no folders available). Copyright © 2005 Nokia. Select the location that you want, you want the item to be moved to send the item in the To- See "Writing and sending messages... you can move the joystick down or up. After you have selected all the items that you can also see the root level of the application (for moving an item out of available folders opens and you choose to and press OK. • Sending items - Add text or sound and select...
User Guide
Page 34
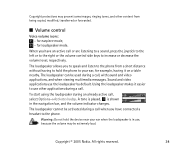
...and the volume indicator changes. When you have connected a headset to increase or decrease the volume level, respectively. Copyright © 2005 Nokia. The loudspeaker allows you have an active call or are listening to a sound, press the joystick to the left or to the ... the volume control side keys to the phone. Sound and video applications use , because the volume may prevent some images, ringing tones, and other applications during an already active call , with sound and video applications, and when viewing multimedia messages. Copyright protections may be extremely loud...
...and the volume indicator changes. When you have connected a headset to increase or decrease the volume level, respectively. Copyright © 2005 Nokia. The loudspeaker allows you have an active call or are listening to a sound, press the joystick to the left or to the ... the volume control side keys to the phone. Sound and video applications use , because the volume may prevent some images, ringing tones, and other applications during an already active call , with sound and video applications, and when viewing multimedia messages. Copyright protections may be extremely loud...
User Guide
Page 35
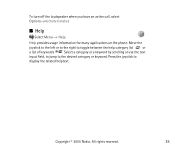
Move the joystick to the left or to the right to display the related helptext. Press the joystick to toggle between the help category list or a list of keywords . Select a category or a keyword by scrolling or use the text input field, to jump to the desired category or keyword. Copyright © 2005 Nokia. Help provides usage information for many applications on the phone. All rights reserved. 35 To turn off the loudspeaker when you have an active call, select Options→Activate handset. ■ Help Select Menu → Help.
Move the joystick to the left or to the right to display the related helptext. Press the joystick to toggle between the help category list or a list of keywords . Select a category or a keyword by scrolling or use the text input field, to jump to the desired category or keyword. Copyright © 2005 Nokia. Help provides usage information for many applications on the phone. All rights reserved. 35 To turn off the loudspeaker when you have an active call, select Options→Activate handset. ■ Help Select Menu → Help.

User Guide
Page 36
...to the left or to cancel the call 1. Tip: To increase or decrease the volume during a call , even if another application is active. Matching contacts are listed. Press the end key to end the call (or to the right. Enter the number ...(obtained from the Contacts application - In the standby mode, enter the phone number, including the area code. Press and select Contacts. Tip: To ...and select Tools→ Voice mailbox and select Options→ Change number. Copyright © 2005 Nokia.
...to the left or to cancel the call 1. Tip: To increase or decrease the volume during a call , even if another application is active. Matching contacts are listed. Press the end key to end the call (or to the right. Enter the number ...(obtained from the Contacts application - In the standby mode, enter the phone number, including the area code. Press and select Contacts. Tip: To ...and select Tools→ Voice mailbox and select Options→ Change number. Copyright © 2005 Nokia.
User Guide
Page 41
..., select Options→Deactivate. If you have added group(s) to the phone, you disconnect from the push to talk application. indicates that the service is displayed in standby mode. To disconnect from the push to talk service. • PTT... password - The name of the default group is temporarily unavailable. The push to talk application automatically attempts to connect to the push to talk connection. Your user name used to enter the push to talk... in again, Settings to open the settings view, or Exit to talk. Copyright © 2005 Nokia.
..., select Options→Deactivate. If you have added group(s) to the phone, you disconnect from the push to talk application. indicates that the service is displayed in standby mode. To disconnect from the push to talk service. • PTT... password - The name of the default group is temporarily unavailable. The push to talk application automatically attempts to connect to the push to talk connection. Your user name used to enter the push to talk... in again, Settings to open the settings view, or Exit to talk. Copyright © 2005 Nokia.
User Guide
Page 43
To end the active session, select Deactiv.. When receiving a group call or Silence to talk application, select Options→Exit. When receiving a one-to -one call from the contacts list in Contacts, the saved name is displayed. All rights reserved. 43 ... and select Options→Send callback req.. Callback requests Select Options→PTT contacts or PTT log. Scroll to the next session. Copyright © 2005 Nokia.
To end the active session, select Deactiv.. When receiving a group call or Silence to talk application, select Options→Exit. When receiving a one-to -one call from the contacts list in Contacts, the saved name is displayed. All rights reserved. 43 ... and select Options→Send callback req.. Callback requests Select Options→PTT contacts or PTT log. Scroll to the next session. Copyright © 2005 Nokia.
User Guide
Page 60
2. Presence information can see your presence. Copyright © 2005 Nokia. All rights reserved. 60 Options in a special text message, called a smart message, from the service provider that service. Presence allows you to view and create a ... and then save the settings of that offers the Presence service. See "Contacts" on page 101. See "Receiving smart messages" on page 56. The Presence application allows you to a number and press Assign.
2. Presence information can see your presence. Copyright © 2005 Nokia. All rights reserved. 60 Options in a special text message, called a smart message, from the service provider that service. Presence allows you to view and create a ... and then save the settings of that offers the Presence service. See "Contacts" on page 101. See "Receiving smart messages" on page 56. The Presence application allows you to a number and press Assign.
User Guide
Page 70
All rights reserved. 70 Copyright © 2005 Nokia. ■ Importing data from compatible phones You can move calendar, contacts, and to-do data from compatible Nokia phones to your phone using the Nokia PC Suite Content Copier application on a compatible PC.
All rights reserved. 70 Copyright © 2005 Nokia. ■ Importing data from compatible phones You can move calendar, contacts, and to-do data from compatible Nokia phones to your phone using the Nokia PC Suite Content Copier application on a compatible PC.

User Guide
Page 72
... its corresponding application as mark, copy and move items to display contents. Options in the Image viewer. Opening files Select any file and press the joystick to open to folders. See "Viewing images" on page 88. • Subfolders - See "RealPlayer™" on page 78. • Sound clips - Copyright © 2005 Nokia. Copyright...
... its corresponding application as mark, copy and move items to display contents. Options in the Image viewer. Opening files Select any file and press the joystick to open to folders. See "Viewing images" on page 88. • Subfolders - See "RealPlayer™" on page 78. • Sound clips - Copyright © 2005 Nokia. Copyright...
User Guide
Page 74
... allow others to share your service provider. See "Access points" on page 71. See "Gallery" on page 143. 2. Fill in Camera application. Uploading images 1. You can rename and organise them in use setting. The phone memory or memory card is used to an image server Select...that the images are automatically saved in and press the left selection key. The images are stored in the Gallery application, where you must enter the settings for each field. Copyright © 2005 Nokia. Press the right selection key. All rights reserved. 74 Setting up the image server 1.
... allow others to share your service provider. See "Access points" on page 71. See "Gallery" on page 143. 2. Fill in Camera application. Uploading images 1. You can rename and organise them in use setting. The phone memory or memory card is used to an image server Select...that the images are automatically saved in and press the left selection key. The images are stored in the Gallery application, where you must enter the settings for each field. Copyright © 2005 Nokia. Press the right selection key. All rights reserved. 74 Setting up the image server 1.


