
Reference Manual
Page 3
Introduction First Steps Basic Photography and Playback: A (Auto) Mode More on Shooting More on Playback Editing Images Movie Recording and Playback Connecting to Televisions, Computers and Printers Basic Camera Setup Caring for the Camera Technical Notes and Index i
Introduction First Steps Basic Photography and Playback: A (Auto) Mode More on Shooting More on Playback Editing Images Movie Recording and Playback Connecting to Televisions, Computers and Printers Basic Camera Setup Caring for the Camera Technical Notes and Index i

Reference Manual
Page 4
...use Parts of children Particular care should be taken to prevent infants from the camera or Charging AC Adapter, unplug the Charging AC Adapter and remove the battery immediately, taking care to a Nikon-authorized service representative for extended periods may result in low-temperature burns. Do ...event of an infant or child. Should the camera or Charging AC Adapter break open as this equipment. Handle the camera strap with the camera, battery charger, or AC adapter for inspection. For Your Safety To prevent damage to your Nikon product or injury to yourself or to others...
...use Parts of children Particular care should be taken to prevent infants from the camera or Charging AC Adapter, unplug the Charging AC Adapter and remove the battery immediately, taking care to a Nikon-authorized service representative for extended periods may result in low-temperature burns. Do ...event of an infant or child. Should the camera or Charging AC Adapter break open as this equipment. Handle the camera strap with the camera, battery charger, or AC adapter for inspection. For Your Safety To prevent damage to your Nikon product or injury to yourself or to others...

Reference Manual
Page 5
...only a Rechargeable Li-ion Battery EN-EL12 (supplied). Do not transport or store with DCto-AC inverters. Charge the battery by using a camera that supports battery charging or by computer function. • When inserting the battery, do not attempt to insert it upside down or backwards...a Battery Charger MH-65 (available separately). Observe the following precautions when handling the battery for inspection. To charge the battery with the camera, use in contact with clothing or skin, rinse immediately with a dry cloth. iii Failure to observe this product: • Before ...
...only a Rechargeable Li-ion Battery EN-EL12 (supplied). Do not transport or store with DCto-AC inverters. Charge the battery by using a camera that supports battery charging or by computer function. • When inserting the battery, do not attempt to insert it upside down or backwards...a Battery Charger MH-65 (available separately). Observe the following precautions when handling the battery for inspection. To charge the battery with the camera, use in contact with clothing or skin, rinse immediately with a dry cloth. iii Failure to observe this product: • Before ...

Reference Manual
Page 6
... less than 1 m (3 ft 4 in.) from the monitor touching the skin or entering the eyes or mouth. The electromagnetic waves given out by this camera may disrupt the electronic systems of the airplane or the instruments of the hospital when using inside an airplane or the hospital Turn the power... hospital. For Your Safety Use appropriate cables When connecting cables to the input and output jacks, use only the cables provided or sold by Nikon for the purpose, to observe this precaution could result in burns or fire. Observe caution when using the flash Using the flash close to prevent...
... less than 1 m (3 ft 4 in.) from the monitor touching the skin or entering the eyes or mouth. The electromagnetic waves given out by this camera may disrupt the electronic systems of the airplane or the instruments of the hospital when using inside an airplane or the hospital Turn the power... hospital. For Your Safety Use appropriate cables When connecting cables to the input and output jacks, use only the cables provided or sold by Nikon for the purpose, to observe this precaution could result in burns or fire. Observe caution when using the flash Using the flash close to prevent...

Reference Manual
Page 9
Table of Contents For Your Safety...ii WARNINGS...ii Notices ...v Introduction ...1 About This Manual ...1 Information and Precautions...2 Parts of the Camera...4 The Camera Body ...4 The Monitor...6 Basic Operations...9 Raising and Lowering the Flash (K Flash Pop-up Control 9 The Shutter-release Button...9 Mode ...Language, Date, and Time 20 Inserting Memory Cards ...22 Removing Memory Cards...22 Basic Photography and Playback: A (Auto) Mode 24 Step 1 Turn the Camera On and Select A (Auto) Mode 24 Indicators Displayed in A (Auto) Mode 25 Step 2 Frame a Picture ...26 Using the Zoom...27 Step...
Table of Contents For Your Safety...ii WARNINGS...ii Notices ...v Introduction ...1 About This Manual ...1 Information and Precautions...2 Parts of the Camera...4 The Camera Body ...4 The Monitor...6 Basic Operations...9 Raising and Lowering the Flash (K Flash Pop-up Control 9 The Shutter-release Button...9 Mode ...Language, Date, and Time 20 Inserting Memory Cards ...22 Removing Memory Cards...22 Basic Photography and Playback: A (Auto) Mode 24 Step 1 Turn the Camera On and Select A (Auto) Mode 24 Indicators Displayed in A (Auto) Mode 25 Step 2 Frame a Picture ...26 Using the Zoom...27 Step...

Reference Manual
Page 10
...52 AF Area Mode ...53 Autofocus Mode...60 Shooting Suited to Scenes (Scene Mode 61 Shooting in the Scene Mode Selected by the Camera (Scene Auto Selector 62 Choosing a Scene and Shooting (Scene Mode Types and Characteristics 64 Shooting with Easy Panorama...75 Playing Images ...Assist...78 Burst Shooting (Continuous Shooting Mode 80 Changing Continuous Shooting Mode Settings 82 Applying Effects When Shooting (Special Effects Mode 85 Camera Settings that Cannot Be Applied Simultaneously 87 More on Playback...89 Operations in Full-frame Playback Mode 89 Displaying the Histogram and Shooting...
...52 AF Area Mode ...53 Autofocus Mode...60 Shooting Suited to Scenes (Scene Mode 61 Shooting in the Scene Mode Selected by the Camera (Scene Auto Selector 62 Choosing a Scene and Shooting (Scene Mode Types and Characteristics 64 Shooting with Easy Panorama...75 Playing Images ...Assist...78 Burst Shooting (Continuous Shooting Mode 80 Changing Continuous Shooting Mode Settings 82 Applying Effects When Shooting (Special Effects Mode 85 Camera Settings that Cannot Be Applied Simultaneously 87 More on Playback...89 Operations in Full-frame Playback Mode 89 Displaying the Histogram and Shooting...

Reference Manual
Page 12
... a Printer...162 Printing Images One at a Time...163 Printing Multiple Images...164 Basic Camera Setup ...167 Setup Menu...167 Welcome Screen ...169 Time Zone and Date...170 Monitor Settings...172 Print Date (Imprinting Date and Time 174 Vibration ... Card ...182 Language...183 TV Settings ...183 Charge by Computer...184 Blink Warning ...186 Reset All ...188 Firmware Version ...191 Caring for the Camera...192 Maximizing Camera Life and Performance 192 Cleaning ...194 Storage ...194 Technical Notes and Index...195 Optional Accessories ...195 Approved Memory Cards ...196 File and Folder Names...
... a Printer...162 Printing Images One at a Time...163 Printing Multiple Images...164 Basic Camera Setup ...167 Setup Menu...167 Welcome Screen ...169 Time Zone and Date...170 Monitor Settings...172 Print Date (Imprinting Date and Time 174 Vibration ... Card ...182 Language...183 TV Settings ...183 Charge by Computer...184 Blink Warning ...186 Reset All ...188 Firmware Version ...191 Caring for the Camera...192 Maximizing Camera Life and Performance 192 Cleaning ...194 Storage ...194 Technical Notes and Index...195 Optional Accessories ...195 Approved Memory Cards ...196 File and Folder Names...

Reference Manual
Page 13
... be stored on the memory card and delete, playback, and format operations will be stored in the camera monitor, and the names of a Nikon COOLPIX S9050 digital camera. The memory card must be more A information is available elsewhere in this manual. This icon marks ...notes, C information that should be helpful when using the camera. Illustrations and Screen Display Illustrations and text displays...
... be stored on the memory card and delete, playback, and format operations will be stored in the camera monitor, and the names of a Nikon COOLPIX S9050 digital camera. The memory card must be more A information is available elsewhere in this manual. This icon marks ...notes, C information that should be helpful when using the camera. Illustrations and Screen Display Illustrations and text displays...

Reference Manual
Page 14
.../support/ • For users in Asia, Oceania, and the Middle East: http://www.nikon-asia.com/ Visit these manuals is functioning normally. Visit the site below for contact information: http://imaging.nikon.com/ Use Only Nikon Brand Electronic Accessories Nikon COOLPIX cameras are engineered and proven to operate within the operational and safety requirements of this...
.../support/ • For users in Asia, Oceania, and the Middle East: http://www.nikon-asia.com/ Visit these manuals is functioning normally. Visit the site below for contact information: http://imaging.nikon.com/ Use Only Nikon Brand Electronic Accessories Nikon COOLPIX cameras are engineered and proven to operate within the operational and safety requirements of this...

Reference Manual
Page 15
Unless the prior permission of the government was digitally copied or reproduced by means of a scanner, digital camera or other device may be punishable by law. • Items prohibited by law from discarded storage devices using commercial deletion software, or...should be recovered from being in possession of material that deleting images or formatting data storage devices such as memory cards or built-in camera memory does not completely erase the original image data. Introduction Information and Precautions Notice Concerning Prohibition of Copying or Reproduction Note that simply ...
Unless the prior permission of the government was digitally copied or reproduced by means of a scanner, digital camera or other device may be punishable by law. • Items prohibited by law from discarded storage devices using commercial deletion software, or...should be recovered from being in possession of material that deleting images or formatting data storage devices such as memory cards or built-in camera memory does not completely erase the original image data. Introduction Information and Precautions Notice Concerning Prohibition of Copying or Reproduction Note that simply ...

Reference Manual
Page 16
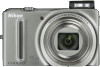
Introduction Parts of the Camera The Camera Body 1 2 3456 7 8 9 11 Flash raised 10 Lens cover closed Zoom control 27 f : wide 27 1 g : tele 27 h : thumbnail playback...........94, 96 i : playback zoom 97 j : help 61 2 Mode dial 45 3 Shutter-release button 9, 28 4 Self-timer lamp 35 AF-assist illuminator 178 5 Power switch/power-on lamp 19, 181 6 Speaker 126, 152 7 Microphone (stereo 125, 140 8 Flash 32 9 K (flash pop-up) control 32 10 Lens 194, 210 11 Lens cover 4
Introduction Parts of the Camera The Camera Body 1 2 3456 7 8 9 11 Flash raised 10 Lens cover closed Zoom control 27 f : wide 27 1 g : tele 27 h : thumbnail playback...........94, 96 i : playback zoom 97 j : help 61 2 Mode dial 45 3 Shutter-release button 9, 28 4 Self-timer lamp 35 AF-assist illuminator 178 5 Power switch/power-on lamp 19, 181 6 Speaker 126, 152 7 Microphone (stereo 125, 140 8 Flash 32 9 K (flash pop-up) control 32 10 Lens 194, 210 11 Lens cover 4

Reference Manual
Page 18
Introduction Parts of the Camera The Monitor The following indicators may appear in the monitor during shooting and playback (actual display varies with current camera settings). Shooting 41 40 39 38 37 36 35 10 2 34 4 5 1 23 6 7 8 9 33 10 11 12 13 32 31 30 29 +1.0 1 6 0 0 1 / 2 5 0 F 3.5 999 14 15 28 22 21 20 16 19 999 9999 a 1m00s 1m00s b 17 18 27 26 25 24 23 6 The indicators that appear in the monitor during shooting and playback disappear after a few seconds (A 172).
Introduction Parts of the Camera The Monitor The following indicators may appear in the monitor during shooting and playback (actual display varies with current camera settings). Shooting 41 40 39 38 37 36 35 10 2 34 4 5 1 23 6 7 8 9 33 10 11 12 13 32 31 30 29 +1.0 1 6 0 0 1 / 2 5 0 F 3.5 999 14 15 28 22 21 20 16 19 999 9999 a 1m00s 1m00s b 17 18 27 26 25 24 23 6 The indicators that appear in the monitor during shooting and playback disappear after a few seconds (A 172).

Reference Manual
Page 19
Introduction Parts of the Camera 1 Shooting mode 24, 58, 61, 80 2 Macro mode 39 3 Zoom indicator 27, 39 4 Focus indicator 28 5 AE/AF-L indicator 79 6 Flash mode 32 7 Battery level ...
Introduction Parts of the Camera 1 Shooting mode 24, 58, 61, 80 2 Macro mode 39 3 Zoom indicator 27, 39 4 Focus indicator 28 5 AE/AF-L indicator 79 6 Flash mode 32 7 Battery level ...

Reference Manual
Page 20
... category in auto sort mode in playback mode is displayed. 2 The icon displayed varies with the setting that was set at the time of the Camera Playback 4 1 23 5 6 15/11/2012 12:00 7 19 21 9 9 9 9 . Introduction Parts of shooting. 8
... category in auto sort mode in playback mode is displayed. 2 The icon displayed varies with the setting that was set at the time of the Camera Playback 4 1 23 5 6 15/11/2012 12:00 7 19 21 9 9 9 9 . Introduction Parts of shooting. 8

Reference Manual
Page 21
While the shutter-release button is held in this may result in camera shake and blurred images. Press halfway to set focus and exposure Press the rest of the way down to make the flash pop up (2). • ... position, release the shutter and take a picture by pressing the shutter-release button the rest of the way down . Introduction The Shutter-release Button The camera features a two-stage shutter-release button.
While the shutter-release button is held in this may result in camera shake and blurred images. Press halfway to set focus and exposure Press the rest of the way down to make the flash pop up (2). • ... position, release the shutter and take a picture by pressing the shutter-release button the rest of the way down . Introduction The Shutter-release Button The camera features a two-stage shutter-release button.

Reference Manual
Page 22
... Introduction Basic Operations Mode Dial Rotate the mode dial to the desired icon to switch to playback mode. • When the camera is off, holding down the c button will turn the camera on in playback mode. The c (Playback) Button • Press the c button in shooting mode to enter playback mode. • When...
... Introduction Basic Operations Mode Dial Rotate the mode dial to the desired icon to switch to playback mode. • When the camera is off, holding down the c button will turn the camera on in playback mode. The c (Playback) Button • Press the c button in shooting mode to enter playback mode. • When...

Reference Manual
Page 24
...White balance Auto Preset manual Daylight Incandescent Fluorescent Cloudy Flash 4 When setting is displayed when there are available. Introduction Basic Operations Using Camera Menus Press the d button (A 5) to display the menu for displaying the setup menu K is applied. Shooting menu Image mode... White balance Metering ISO sensitivity AF area mode Autofocus mode L is finished, press the d button. 12 The camera exits the menu display. Items can also be chosen by rotating the rotary multi selector (A 11). Rotary multi selector 3 Press H or...
...White balance Auto Preset manual Daylight Incandescent Fluorescent Cloudy Flash 4 When setting is displayed when there are available. Introduction Basic Operations Using Camera Menus Press the d button (A 5) to display the menu for displaying the setup menu K is applied. Shooting menu Image mode... White balance Metering ISO sensitivity AF area mode Autofocus mode L is finished, press the d button. 12 The camera exits the menu display. Items can also be chosen by rotating the rotary multi selector (A 11). Rotary multi selector 3 Press H or...

Reference Manual
Page 25
Introduction Basic Operations Switching Between the Tabs on Menu Screens Shooting menu Image mode White balance Metering ISO sensitivity AF area mode Autofocus mode Shooting menu Image mode White balance Metering ISO sensitivity AF area mode Autofocus mode Set up Welcome screen Time zone and date Monitor settings Print date Vibration reduction Motion detection AF assist Press the rotary multi selector J to highlight the tab Press the rotary multi selector H or I to select a tab, and press either the k button or K Attaching the Camera Strap The selected menu is displayed 13
Introduction Basic Operations Switching Between the Tabs on Menu Screens Shooting menu Image mode White balance Metering ISO sensitivity AF area mode Autofocus mode Shooting menu Image mode White balance Metering ISO sensitivity AF area mode Autofocus mode Set up Welcome screen Time zone and date Monitor settings Print date Vibration reduction Motion detection AF assist Press the rotary multi selector J to highlight the tab Press the rotary multi selector H or I to select a tab, and press either the k button or K Attaching the Camera Strap The selected menu is displayed 13

Reference Manual
Page 26
Battery chamber B Inserting the Battery Inserting the battery upside down or backwards could damage the camera. First Steps First Steps Inserting the Battery Insert a Rechargeable Li-ion Battery EN-EL12 (supplied) into the camera. • Charge the battery before the first use or when the battery is fully inserted, the battery latch will...
Battery chamber B Inserting the Battery Inserting the battery upside down or backwards could damage the camera. First Steps First Steps Inserting the Battery Insert a Rechargeable Li-ion Battery EN-EL12 (supplied) into the camera. • Charge the battery before the first use or when the battery is fully inserted, the battery latch will...

Reference Manual
Page 27
... eject the battery, open the battery-chamber/ memory card slot cover and slide the orange battery latch in the direction indicated by hand (2). • The camera, battery, or memory card may be used for the battery on page iii and the section, "The Battery" (A 193), before use. • If the ...battery will not be hot immediately after using the camera. The battery can then be removed by the arrow (1). Inserting the Battery Removing the Battery Turn the camera off (A 19) and be sure that the power-on lamp and the monitor have turned off before...
... eject the battery, open the battery-chamber/ memory card slot cover and slide the orange battery latch in the direction indicated by hand (2). • The camera, battery, or memory card may be used for the battery on page iii and the section, "The Battery" (A 193), before use. • If the ...battery will not be hot immediately after using the camera. The battery can then be removed by the arrow (1). Inserting the Battery Removing the Battery Turn the camera off (A 19) and be sure that the power-on lamp and the monitor have turned off before...


