
Reference Manual
Page 19
... Movies.... 95 Recording Movies 96 Features That Can Be Set with the d Button (Movie Menu 99 Playing Back Movies 100 General Camera Setup 103 Features That Can Be Set with the d Button (Setup Menu 104 Using the Wi-Fi (Wireless LAN) Feature 107 Installing the Software on the Smart Device 108 Connecting the Smart Device to the Camera 109 Reference Section E1 Using Easy Panorama (Shooting and Playback E2 Shooting with Easy Panorama E2 Viewing Images Captured with Easy Panorama E5 Favorite Pictures Mode...
... Movies.... 95 Recording Movies 96 Features That Can Be Set with the d Button (Movie Menu 99 Playing Back Movies 100 General Camera Setup 103 Features That Can Be Set with the d Button (Setup Menu 104 Using the Wi-Fi (Wireless LAN) Feature 107 Installing the Software on the Smart Device 108 Connecting the Smart Device to the Camera 109 Reference Section E1 Using Easy Panorama (Shooting and Playback E2 Shooting with Easy Panorama E2 Viewing Images Captured with Easy Panorama E5 Favorite Pictures Mode...

Reference Manual
Page 25
1 Shutter-release button 30 Zoom control 29 f: wide-angle 29 2 g: telephoto 29 h: thumbnail playback 81 i: playback zoom 80 j: help 41 3 Power switch/power-on lamp 24 4 Flash 57 5 Self-timer lamp 60 AF-assist illuminator 104 6 Lens 7 Lens cover 8 Microphone (stereo 84, 96 9 Eyelet for camera strap 5 10 Connector cover 16, 86 11 HDMI micro connector (Type D 86 12 USB/audio/video output connector 16, 86 Parts of the Camera 3
1 Shutter-release button 30 Zoom control 29 f: wide-angle 29 2 g: telephoto 29 h: thumbnail playback 81 i: playback zoom 80 j: help 41 3 Power switch/power-on lamp 24 4 Flash 57 5 Self-timer lamp 60 AF-assist illuminator 104 6 Lens 7 Lens cover 8 Microphone (stereo 84, 96 9 Eyelet for camera strap 5 10 Connector cover 16, 86 11 HDMI micro connector (Type D 86 12 USB/audio/video output connector 16, 86 Parts of the Camera 3
Reference Manual
Page 41
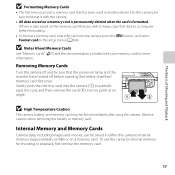
... memory card for shooting or playback, first remove the memory card. 19 Removing Memory Cards Turn the camera off and be sure that the power-on the memory card that you insert a memory card that data to a computer before opening the battery-chamber/ memory card slot cover. The Basics of Shooting and Playback B Formatting Memory Cards • The first time you wish to keep, copy that has been used in another device into this camera. • All data stored on a memory card. Internal Memory and Memory Cards Camera data, including images...
... memory card for shooting or playback, first remove the memory card. 19 Removing Memory Cards Turn the camera off and be sure that the power-on the memory card that you insert a memory card that data to a computer before opening the battery-chamber/ memory card slot cover. The Basics of Shooting and Playback B Formatting Memory Cards • The first time you wish to keep, copy that has been used in another device into this camera. • All data stored on a memory card. Internal Memory and Memory Cards Camera data, including images...

Reference Manual
Page 47
...; C Power Saving Function (Auto Off) If no operations are performed for approximately another make or model of Shooting and Playback No operations performed No operations performed 25m 0s 3 min 890 Camera enters Camera turns off automatically. If no operations are performed for a while, the monitor will turn off, the camera will enter standby mode, and the power-on lamp will turn off setting in the setup menu (A104). • By default, the camera enters standby mode...
...; C Power Saving Function (Auto Off) If no operations are performed for approximately another make or model of Shooting and Playback No operations performed No operations performed 25m 0s 3 min 890 Camera enters Camera turns off automatically. If no operations are performed for a while, the monitor will turn off, the camera will enter standby mode, and the power-on lamp will turn off setting in the setup menu (A104). • By default, the camera enters standby mode...

Reference Manual
Page 49
... That Can Be Set with the d Button (Shooting Menu)" (A67) for more information. • See "Features That Can Be Set with the d Button (Setup Menu)" (A104) for more information. - You can take images using scene auto selector, the camera automatically selects the optimum scene mode when you select. See "Using the Flash (Flash Modes)" (A57) for more information. 27 See "Using Macro Mode" (A62) for more information. - See "Using the Self-timer" (A60) for...
... That Can Be Set with the d Button (Shooting Menu)" (A67) for more information. • See "Features That Can Be Set with the d Button (Setup Menu)" (A104) for more information. - You can take images using scene auto selector, the camera automatically selects the optimum scene mode when you select. See "Using the Flash (Flash Modes)" (A57) for more information. 27 See "Using Macro Mode" (A62) for more information. - See "Using the Self-timer" (A60) for...

Reference Manual
Page 53
... the flash (A57) may result in damage to release the shutter and take an image. C To Make Sure You Do Not Miss a Shot If you feel a slight resistance. Press the button gently. Do not open the battery-chamber/memory card slot cover or remove the battery or memory card while an indicator is pressed all the way To set focus and exposure (shutter speed and aperture value), press the shutter-release button lightly until you...
... the flash (A57) may result in damage to release the shutter and take an image. C To Make Sure You Do Not Miss a Shot If you feel a slight resistance. Press the button gently. Do not open the battery-chamber/memory card slot cover or remove the battery or memory card while an indicator is pressed all the way To set focus and exposure (shutter speed and aperture value), press the shutter-release button lightly until you...

Reference Manual
Page 66
... shooting screen. - Once the shutter-release button is displayed. k Close-up • Macro mode (A62) is set to cancel focusarea selection, then change settings for any of the camera focusing. 44 Self-timer - You may hear the sound of the following functions, first press the k button to On. - To move the focus area. Vibration reduction is disabled even when Vibration reduction (A104) in the setup menu is enabled and the camera automatically zooms...
... shooting screen. - Once the shutter-release button is displayed. k Close-up • Macro mode (A62) is set to cancel focusarea selection, then change settings for any of the camera focusing. 44 Self-timer - You may hear the sound of the following functions, first press the k button to On. - To move the focus area. Vibration reduction is disabled even when Vibration reduction (A104) in the setup menu is enabled and the camera automatically zooms...

Reference Manual
Page 67
... hue setting is saved in the setup menu (A104) when using scene modes indicated with O, because the shutter speed is automatically selected and saved (BSS (Best Shot Selector)). • The flash does not fire. Set Vibration reduction to Off in the camera's memory even after the camera is fixed at infinity. • The focus indicator (A9) always glows green when the shutter-release button is pressed halfway. • The shutter speed is turned off. Self-timer - You...
... hue setting is saved in the setup menu (A104) when using scene modes indicated with O, because the shutter speed is automatically selected and saved (BSS (Best Shot Selector)). • The flash does not fire. Set Vibration reduction to Off in the camera's memory even after the camera is fixed at infinity. • The focus indicator (A9) always glows green when the shutter-release button is pressed halfway. • The shutter speed is turned off. Self-timer - You...

Reference Manual
Page 92
... self-timer cannot be used when Continuous is fixed at Auto. Shooting Features 70 When Blink proof is set as follows depending on the continuous shooting setting: • Continuous H: 120 fps: O (image size: 640 × 480 pixels) • Continuous H: 60 fps: M (image size: 1280 × 960 pixels) • Multi-shot 16: L (image size: 2560 × 1920 pixels) When using Black-and-white, Sepia, or Cyanotype, the White balance setting is set to Pre-shooting cache, the Continuous setting changes to On, the flash...
... self-timer cannot be used when Continuous is fixed at Auto. Shooting Features 70 When Blink proof is set as follows depending on the continuous shooting setting: • Continuous H: 120 fps: O (image size: 640 × 480 pixels) • Continuous H: 60 fps: M (image size: 1280 × 960 pixels) • Multi-shot 16: L (image size: 2560 × 1920 pixels) When using Black-and-white, Sepia, or Cyanotype, the White balance setting is set to Pre-shooting cache, the Continuous setting changes to On, the flash...

Reference Manual
Page 121
.... E74 Open with HS footage Autofocus mode Wind noise reduction Recording and Playing Back Movies Option Description A Movie options Select the movie type. E80 Autofocus mode When Single AF (default setting) is selected, focus is selected, the camera focuses continuously while recording. When Full-time AF is locked when movie recording begins. Wind noise reduction • When an HS movie option is selected in Movie options, the setting is fixed at normal speed, or...
.... E74 Open with HS footage Autofocus mode Wind noise reduction Recording and Playing Back Movies Option Description A Movie options Select the movie type. E80 Autofocus mode When Single AF (default setting) is selected, focus is selected, the camera focuses continuously while recording. When Full-time AF is locked when movie recording begins. Wind noise reduction • When an HS movie option is selected in Movie options, the setting is fixed at normal speed, or...

Reference Manual
Page 139
... Favorite pictures Back Add Playing Back Images in full-frame playback mode or thumbnail playback mode, press the d button to the selected album. • The following operations are added and the camera switches to the playback menu. • To add the same image to multiple albums, repeat from the internal memory or the memory card. l button: Deletes all images in the selected album. • When viewing images in Albums Press the c button (playback mode) M c button M h Favorite pictures M k button Use the multi...
... Favorite pictures Back Add Playing Back Images in full-frame playback mode or thumbnail playback mode, press the d button to the selected album. • The following operations are added and the camera switches to the playback menu. • To add the same image to multiple albums, repeat from the internal memory or the memory card. l button: Deletes all images in the selected album. • When viewing images in Albums Press the c button (playback mode) M c button M h Favorite pictures M k button Use the multi...

Reference Manual
Page 146
... displaying individual images to apply settings to display them as individual images. • Images captured continuously with cameras other than the COOLPIX S5200 cannot be displayed as a sequence. C Playback Menu Options Available When Using Sequence When the d button is pressed, the following menu operations are available for the images in that sequence. Display the images in the sequence individually and then press the d button. 2 If the d button is pressed when only a key picture displayed...
... displaying individual images to apply settings to display them as individual images. • Images captured continuously with cameras other than the COOLPIX S5200 cannot be displayed as a sequence. C Playback Menu Options Available When Using Sequence When the d button is pressed, the following menu operations are available for the images in that sequence. Display the images in the sequence individually and then press the d button. 2 If the d button is pressed when only a key picture displayed...

Reference Manual
Page 192
... by date mode, the screen shown on the right is used to create digital "print orders" for images saved in the playback menu is not displayed. Print order Select images Delete print order Reference Section E60 Print Order (Creating a DPOF Print Order) Press the c button (playback mode) M d button M Print order M k button When printing images saved on the memory card using any of the following methods, the Print order option in the internal memory if the memory card is removed from favorites. Proceed to a PictBridge-compatible (F23) printer...
... by date mode, the screen shown on the right is used to create digital "print orders" for images saved in the playback menu is not displayed. Print order Select images Delete print order Reference Section E60 Print Order (Creating a DPOF Print Order) Press the c button (playback mode) M d button M Print order M k button When printing images saved on the memory card using any of the following methods, the Print order option in the internal memory if the memory card is removed from favorites. Proceed to a PictBridge-compatible (F23) printer...

Reference Manual
Page 205
... the setting is turned off. Option Q Individual pictures C Key picture only (default setting) Description Set all images in all sequences to display a series of images. • When changing this setting, before pressing the d button, first select the desired sequence using their key pictures only. Sequence Display Options Press the c button (playback mode) M d button M Sequence display options M k button Choose the method used to be displayed individually. See "The Image Selection Screen" (E66) for each sequence of images shot continuously (sequence...
... the setting is turned off. Option Q Individual pictures C Key picture only (default setting) Description Set all images in all sequences to display a series of images. • When changing this setting, before pressing the d button, first select the desired sequence using their key pictures only. Sequence Display Options Press the c button (playback mode) M d button M Sequence display options M k button Choose the method used to be displayed individually. See "The Image Selection Screen" (E66) for each sequence of images shot continuously (sequence...

Reference Manual
Page 232
... Nikon Transfer 2, may be transferred with connection to a computer. If the camera's clock battery (A22) has been exhausted, the date and time must be reset before the battery can be charged or images can data be transferred, when the camera is connected to a computer before the camera's display language and date and time have been set the camera's date and time. • If the camera is turned off, charging will also stop. • If the computer enters sleep mode...
... Nikon Transfer 2, may be transferred with connection to a computer. If the camera's clock battery (A22) has been exhausted, the date and time must be reset before the battery can be charged or images can data be transferred, when the camera is connected to a computer before the camera's display language and date and time have been set the camera's date and time. • If the camera is turned off, charging will also stop. • If the computer enters sleep mode...

Reference Manual
Page 233
... , turn the camera off and disconnect the USB cable. Set Charge by computer, it may be impossible to print images with direct connection of 5°C to 35°C (41°F to 95°F). • The USB cable is not connected correctly, or the battery is faulty. If the PictBridge startup screen is not displayed in sleep mode and is not supplying power. Reference Section E101 Status Flashes slowly (green) Off Flashes quickly (green...
... , turn the camera off and disconnect the USB cable. Set Charge by computer, it may be impossible to print images with direct connection of 5°C to 35°C (41°F to 95°F). • The USB cable is not connected correctly, or the battery is faulty. If the PictBridge startup screen is not displayed in sleep mode and is not supplying power. Reference Section E101 Status Flashes slowly (green) Off Flashes quickly (green...

Reference Manual
Page 247
... medium before formatting the memory card. Formatting deletes all data saved on the memory card. Select Yes and press the k button to "write" position. - Format card? Out of any images, make sure to F5 select No and save the copies to keep copies of memory. Error accessing Eye-Fi card. • Check that terminals are clean. • Confirm that Eye-Fi card is in COOLPIX S5200. Write-protect switch of Eye-Fi card is correctly inserted. Error accessing memory card. • Use approved card. • Check...
... medium before formatting the memory card. Formatting deletes all data saved on the memory card. Select Yes and press the k button to "write" position. - Format card? Out of any images, make sure to F5 select No and save the copies to keep copies of memory. Error accessing Eye-Fi card. • Check that terminals are clean. • Confirm that Eye-Fi card is in COOLPIX S5200. Write-protect switch of Eye-Fi card is correctly inserted. Error accessing memory card. • Use approved card. • Check...

Reference Manual
Page 248
... screen. Delete images from album. • Add to other albums. A voice memo cannot be attached to 320 × 240 size or smaller with faster write speed. Check the image in the picture just taken. Time out error while saving movie on the memory card. Album is full. Image cannot be attached to save a copy. Cause/Solution Error occurred while saving image. Image cannot be registered as welcome screen. • Images captured at an Image mode setting of file numbers...
... screen. Delete images from album. • Add to other albums. A voice memo cannot be attached to 320 × 240 size or smaller with faster write speed. Check the image in the picture just taken. Time out error while saving movie on the memory card. Album is full. Image cannot be attached to save a copy. Cause/Solution Error occurred while saving image. Image cannot be registered as welcome screen. • Images captured at an Image mode setting of file numbers...

Reference Manual
Page 257
... the k button. Do not open the battery-chamber/memory card slot cover or remove the memory card or battery. - Format card? Do not disconnect the AC adapter. Memory Cards • Use only Secure Digital memory cards. If there is data saved on the memory card that has been used in damage to a computer before formatting. To format the memory card, select Yes. • Observe the following precautions while formatting the memory card, saving and deleting images, and copying images to a computer, otherwise data or the memory card itself...
... the k button. Do not open the battery-chamber/memory card slot cover or remove the memory card or battery. - Format card? Do not disconnect the AC adapter. Memory Cards • Use only Secure Digital memory cards. If there is data saved on the memory card that has been used in damage to a computer before formatting. To format the memory card, select Yes. • Observe the following precautions while formatting the memory card, saving and deleting images, and copying images to a computer, otherwise data or the memory card itself...

Reference Manual
Page 267
... memory card. pictures mode. displayed in the TV settings setup menu. • Cables are connected to the HDMI micro connector (Type D) and to albums cannot be card may not be played back correctly if overwritten by a camera other than the COOLPIX S5200 and images copied using the Copy option cannot be displayed in auto sort mode. • Images saved in the internal memory or on the memory added to the USB/audio/video output connector simultaneously. • Memory card contains no images. Problem...
... memory card. pictures mode. displayed in the TV settings setup menu. • Cables are connected to the HDMI micro connector (Type D) and to albums cannot be card may not be played back correctly if overwritten by a camera other than the COOLPIX S5200 and images copied using the Copy option cannot be displayed in auto sort mode. • Images saved in the internal memory or on the memory added to the USB/audio/video output connector simultaneously. • Memory card contains no images. Problem...


