
User Manual
Page 23
Apply selection (Go to the next screen). Display n (self- Select the item on the right/ go to the next screen (apply selection). Shooting menu Image mode White balance Continuous ISO sensitivity Color options 11 Select the item below . Apply selection. Select the item on ...the left (J), right (K), or by pressing it up (H), down (I), left / return to the previous screen. Display o (...
Apply selection (Go to the next screen). Display n (self- Select the item on the right/ go to the next screen (apply selection). Shooting menu Image mode White balance Continuous ISO sensitivity Color options 11 Select the item below . Apply selection. Select the item on ...the left (J), right (K), or by pressing it up (H), down (I), left / return to the previous screen. Display o (...
User Manual
Page 25
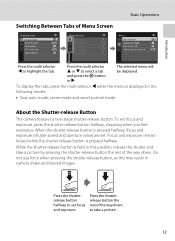
... the rest of the way down to highlight the tab. Introduction Basic Operations Switching Between Tabs of Menu Screen Shooting menu Image mode White balance Continuous ISO sensitivity Color options Shooting menu Image mode White balance Continuous ISO sensitivity Color options Movie Movie options Autofocus mode Electronic VR Enhanced resolution Press the multi...
... the rest of the way down to highlight the tab. Introduction Basic Operations Switching Between Tabs of Menu Screen Shooting menu Image mode White balance Continuous ISO sensitivity Color options Shooting menu Image mode White balance Continuous ISO sensitivity Color options Movie Movie options Autofocus mode Electronic VR Enhanced resolution Press the multi...

User Manual
Page 47
...Portrait) Portrait (A 36). 2 Press K, press the multi selector H, I to change the combination of Each Scene (Help) Choose a scene type from the scene selection screen (step 2) and rotate the zoom control (A 4) to g (j) to g (j) again. 35 The default setting is also applied to select a scene, and press ... the zoom control to view a description of that use the flash, be sure to press the m (flash pop-up u Food n Black and white copy o Backlighting f Party/indoor i Dusk/dawn l Museum BPanorama assist Selecting a Scene Mode 1 Press the A button in shooting mode and press the ...
...Portrait) Portrait (A 36). 2 Press K, press the multi selector H, I to change the combination of Each Scene (Help) Choose a scene type from the scene selection screen (step 2) and rotate the zoom control (A 4) to g (j) to g (j) again. 35 The default setting is also applied to select a scene, and press ... the zoom control to view a description of that use the flash, be sure to press the m (flash pop-up u Food n Black and white copy o Backlighting f Party/indoor i Dusk/dawn l Museum BPanorama assist Selecting a Scene Mode 1 Press the A button in shooting mode and press the ...

User Manual
Page 57
...D Combining Images to Make a Panorama (Panorama Maker 6) • Transfer images to a computer (A 95) and use Panorama Maker 6 to the on-screen instructions and help information contained in Panorama Maker 6. Windows: Select the Start menu > All Programs > ArcSoft Panorama Maker 6 > Panorama Maker 6 Mac OS...See "File and Folder Names" (A 131) for the Scene (Scene Mode) 5 Press the k button when shooting is enabled to indicate that exposure, white balance, and focus are locked. When the first picture is taken, R is displayed to a longer setting is taken. Images cannot be deleted, nor...
...D Combining Images to Make a Panorama (Panorama Maker 6) • Transfer images to a computer (A 95) and use Panorama Maker 6 to the on-screen instructions and help information contained in Panorama Maker 6. Windows: Select the Start menu > All Programs > ArcSoft Panorama Maker 6 > Panorama Maker 6 Mac OS...See "File and Folder Names" (A 131) for the Scene (Scene Mode) 5 Press the k button when shooting is enabled to indicate that exposure, white balance, and focus are locked. When the first picture is taken, R is displayed to a longer setting is taken. Images cannot be deleted, nor...

User Manual
Page 134
... numbering to "0001", delete all images (A 27) before selecting Reset all. • The following settings in the White balance menu (A 57) Setup menu: Images registered for Welcome screen (A 105), Time zone and date (A 106), Language (A 118), Video mode (A 119), and Battery type (A ... Autofocus mode (A 86) Electronic VR (A 86) Enhanced resolution (A 87) Default value HD 720p (1280×720) Single AF On Auto Setup Menu Option Welcome screen (A 105) Photo info (A 110) Image review (A 110) Brightness (A 110) Print date (A 112) Vibration reduction (A 113) Motion detection (A 114) Button sound...
... numbering to "0001", delete all images (A 27) before selecting Reset all. • The following settings in the White balance menu (A 57) Setup menu: Images registered for Welcome screen (A 105), Time zone and date (A 106), Language (A 118), Video mode (A 119), and Battery type (A ... Autofocus mode (A 86) Electronic VR (A 86) Enhanced resolution (A 87) Default value HD 720p (1280×720) Single AF On Auto Setup Menu Option Welcome screen (A 105) Photo info (A 110) Image review (A 110) Brightness (A 110) Print date (A 112) Vibration reduction (A 113) Motion detection (A 114) Button sound...
User Manual
Page 159
... 119 U USB cable 95 USB connector and audio/video output 4, 91, 95, 98 V Vibration reduction 113 ViewNX 2 93, 94 Vivid color 60 Volume 88 W Welcome screen 105 White balance 56 Z Zoom control 4, 23, 88 147 Technical Notes
... 119 U USB cable 95 USB connector and audio/video output 4, 91, 95, 98 V Vibration reduction 113 ViewNX 2 93, 94 Vivid color 60 Volume 88 W Welcome screen 105 White balance 56 Z Zoom control 4, 23, 88 147 Technical Notes


