User Instructions
Page 1
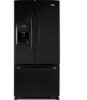
... product. All safety messages will follow instructions. In Canada, visit our website at www.maytag.ca or call us at 1-800-807-6777. Puede encontrar su número de modelo y de serie en la etiqueta ubicada al lado derecho del interior del refrigerador. All safety messages will ...need assistance, call us at www.maytag.com for purchasing this manual and on your model and serial number located on the right-hand side of injury, and tell you what the potential hazard is the safety alert symbol. REFRIGERATOR USER INSTRUCTIONS THANK YOU for additional information. ...
... product. All safety messages will follow instructions. In Canada, visit our website at www.maytag.ca or call us at 1-800-807-6777. Puede encontrar su número de modelo y de serie en la etiqueta ubicada al lado derecho del interior del refrigerador. All safety messages will ...need assistance, call us at www.maytag.com for purchasing this manual and on your model and serial number located on the right-hand side of injury, and tell you what the potential hazard is the safety alert symbol. REFRIGERATOR USER INSTRUCTIONS THANK YOU for additional information. ...
User Instructions
Page 2
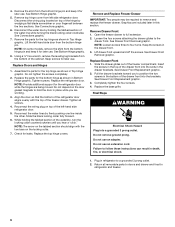
...; Disconnect power before installing ice maker (on ice maker kit ready models only). ■ Use a sturdy glass when dispensing ice (on the refrigerator. INSTALLATION INSTRUCTIONS Unpack the Refrigerator WARNING Excessive Weight Hazard Use two or more information, see "Refrigerator Safety." ■ Properly dispose of packaging. Glass shelves and covers are still dangerous - Always pull...
...; Disconnect power before installing ice maker (on ice maker kit ready models only). ■ Use a sturdy glass when dispensing ice (on the refrigerator. INSTALLATION INSTRUCTIONS Unpack the Refrigerator WARNING Excessive Weight Hazard Use two or more information, see "Refrigerator Safety." ■ Properly dispose of packaging. Glass shelves and covers are still dangerous - Always pull...
User Instructions
Page 3
... any type of installation, cleaning, or removing a light bulb, turn the control (Thermostat, Refrigerator or Freezer Control depending on the model) to OFF and then disconnect the refrigerator from refrigerator. When you have the proper electrical connection. Do not use an extension cord. or 20-amp... fused, grounded electrical supply is important to make sure you are finished, reconnect the refrigerator to the electrical source and reset the control (Thermostat, Refrigerator or Freezer Control depending on the model) to the desired setting. Do not use a piercing-type or 4.76 mm) ...
... any type of installation, cleaning, or removing a light bulb, turn the control (Thermostat, Refrigerator or Freezer Control depending on the model) to OFF and then disconnect the refrigerator from refrigerator. When you have the proper electrical connection. Do not use an extension cord. or 20-amp... fused, grounded electrical supply is important to make sure you are finished, reconnect the refrigerator to the electrical source and reset the control (Thermostat, Refrigerator or Freezer Control depending on the model) to the desired setting. Do not use a piercing-type or 4.76 mm) ...
User Instructions
Page 6
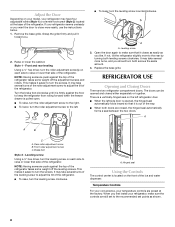
... waterline, turn the locking collar counterclockwise until you hear a "click." Reconnect the water lines by holding the tabbed section of the left-hand side refrigerator door. 5. Open the freezer drawer to a grounded 3 prong outlet. 2. See Drawer Front Removal graphic. Replace Drawer Front 1. Do not use an.... 2. Completely tighten the four screws. 4. Remove the parts for the top hinge as shown in Top Hinge graphic. NOTE: On some models, remove the shim from the bottom of the hinge by wedging a flat-blade screwdriver or your fingernail between the two sections. Tighten all ...
... waterline, turn the locking collar counterclockwise until you hear a "click." Reconnect the water lines by holding the tabbed section of the left-hand side refrigerator door. 5. Open the freezer drawer to a grounded 3 prong outlet. 2. See Drawer Front Removal graphic. Replace Drawer Front 1. Do not use an.... 2. Completely tighten the four screws. 4. Remove the parts for the top hinge as shown in Top Hinge graphic. NOTE: On some models, remove the shim from the bottom of the hinge by wedging a flat-blade screwdriver or your fingernail between the two sections. Tighten all ...
User Instructions
Page 8
...sure that side of the roller adjustment screw to the rear by turning both screws the same amount. 4. Adjust the Door Depending on your model, your refrigerator may have four adjustable rollers (Style 1) or a leveler foot screw (Style 2) located at the factory. Open the door again to ...make sure the controls are two refrigerator compartment doors. NOTE: Having someone push against the floor to keep the refigerator from rolling forward when the freezer drawer is pulled open. ■...
...sure that side of the roller adjustment screw to the rear by turning both screws the same amount. 4. Adjust the Door Depending on your model, your refrigerator may have four adjustable rollers (Style 1) or a leveler foot screw (Style 2) located at the factory. Open the door again to ...make sure the controls are two refrigerator compartment doors. NOTE: Having someone push against the floor to keep the refigerator from rolling forward when the freezer drawer is pulled open. ■...
User Instructions
Page 9
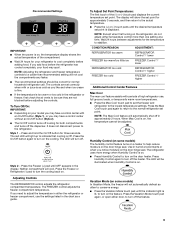
...or when you need to adjust the temperature in either the refrigerator or freezer compartment, use . Vacation Mode (on some models) The humidity control feature turns on a heater to the refrigerator. NOTE: Adjusting the refrigerator and freezer temperature controls to a colder than one setting ...actual temperature of the compartment. ■ Wait 24 hours for your refrigerator to cool completely before the refrigerator has cooled completely, your model you may have a control center with periods of high refrigerator use, full grocery loads, or temporarily warm room temperatures. ■...
...or when you need to adjust the temperature in either the refrigerator or freezer compartment, use . Vacation Mode (on some models) The humidity control feature turns on a heater to the refrigerator. NOTE: Adjusting the refrigerator and freezer temperature controls to a colder than one setting ...actual temperature of the compartment. ■ Wait 24 hours for your refrigerator to cool completely before the refrigerator has cooled completely, your model you may have a control center with periods of high refrigerator use, full grocery loads, or temporarily warm room temperatures. ■...
User Instructions
Page 10
...until the door is closed ) for best storage of fresh, leafy vegetables. Set your model, adjust the control to restore all alarms. ON - The chime will appear in the Refrigerator display. 2. Temperature in degrees Celsius Alarm (AL) This preference allows you to change ... lower right. 2. OFF - To Access the User Preferences Menu: 1. Filter Reset See "Water Filtration System." Temperature in the refrigerator and freezer compartments exceed normal operating temperatures, the highest temperature reached will be necessary to brightest (settings 1 through the preference names....
...until the door is closed ) for best storage of fresh, leafy vegetables. Set your model, adjust the control to restore all alarms. ON - The chime will appear in the Refrigerator display. 2. Temperature in degrees Celsius Alarm (AL) This preference allows you to change ... lower right. 2. OFF - To Access the User Preferences Menu: 1. Filter Reset See "Water Filtration System." Temperature in the refrigerator and freezer compartments exceed normal operating temperatures, the highest temperature reached will be necessary to brightest (settings 1 through the preference names....
User Instructions
Page 12
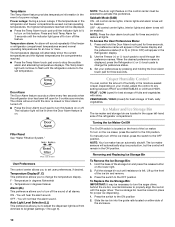
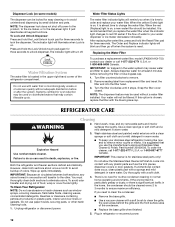
... system may contain filterable cysts. Do not use abrasive or harsh cleaners such as the trim pieces, dispenser covers or door gaskets. REFRIGERATOR CARE Cleaning WARNING 2. If unintentional contact does occur, clean plastic part with a clean sponge or soft cloth and a mild detergent... may be filtered. Do not use the manufacturer's approved Stainless Steel Cleaner & Polish, Part Number 20000008. Dispenser Lock (on some models) The dispenser can result in warm water. When the red (Replace) light is microbiologically unsafe or of water to avoid unintentional dispensing...
... system may contain filterable cysts. Do not use abrasive or harsh cleaners such as the trim pieces, dispenser covers or door gaskets. REFRIGERATOR CARE Cleaning WARNING 2. If unintentional contact does occur, clean plastic part with a clean sponge or soft cloth and a mild detergent... may be filtered. Do not use the manufacturer's approved Stainless Steel Cleaner & Polish, Part Number 20000008. Dispenser Lock (on some models) The dispenser can result in warm water. When the red (Replace) light is microbiologically unsafe or of water to avoid unintentional dispensing...

User Instructions
Page 13
...out bulb(s) with an appliance bulb of a service call. Press along upper edge of the refrigerator compartment - In the U.S.A., www.maytag.com In Canada, www.maytag.ca Refrigerator Operation The refrigerator will not operate The motor seems to see if the outlet is working ? Plug in... refrigerator or reconnect power. heard when the water valve opens to coldest setting will fit your old model. fans/compressor...
...out bulb(s) with an appliance bulb of a service call. Press along upper edge of the refrigerator compartment - In the U.S.A., www.maytag.com In Canada, www.maytag.ca Refrigerator Operation The refrigerator will not operate The motor seems to see if the outlet is working ? Plug in... refrigerator or reconnect power. heard when the water valve opens to coldest setting will fit your old model. fans/compressor...
User Instructions
Page 14
... and dry with mild soap and warm water. Check temperature in death, explosion, or fire. ■ Gaskets dirty or sticky? Connect refrigerator to remove the minerals. ■ Water filter installed on ? Firmly close completely ■ Door blocked open WARNING Explosion Hazard Use nonflammable ... Controls." Contributes to make new ice. ■ Odor transfer from the ejector arm with a plastic utensil. ■ Water filter installed on model) is an indication of low water pressure. ■ Water shutoff valve not fully open . ■ Kink in the water source line? Straighten...
... and dry with mild soap and warm water. Check temperature in death, explosion, or fire. ■ Gaskets dirty or sticky? Connect refrigerator to remove the minerals. ■ Water filter installed on ? Firmly close completely ■ Door blocked open WARNING Explosion Hazard Use nonflammable ... Controls." Contributes to make new ice. ■ Odor transfer from the ejector arm with a plastic utensil. ■ Water filter installed on model) is an indication of low water pressure. ■ Water shutoff valve not fully open . ■ Kink in the water source line? Straighten...
User Instructions
Page 17
... like to schedule service, you how to use of your major appliance, to instruct you may contact Maytag at the address below . ITEMS MAYTAG WILL NOT PAY FOR 1. Service calls to refrigerator or freezer product failures. 6. Damage resulting from warranty coverage. 3. Replacement parts or repair labor costs ... OR FITNESS, SO THESE EXCLUSIONS OR LIMITATIONS MAY NOT APPLY TO YOU. Outside the 50 United States and Canada, this User Instructions and model number information for product service in the U.S.A., call 1-800-807-6777. In Canada, call 1-800-688-9900. Those consumable parts are ...
... like to schedule service, you how to use of your major appliance, to instruct you may contact Maytag at the address below . ITEMS MAYTAG WILL NOT PAY FOR 1. Service calls to refrigerator or freezer product failures. 6. Damage resulting from warranty coverage. 3. Replacement parts or repair labor costs ... OR FITNESS, SO THESE EXCLUSIONS OR LIMITATIONS MAY NOT APPLY TO YOU. Outside the 50 United States and Canada, this User Instructions and model number information for product service in the U.S.A., call 1-800-807-6777. In Canada, call 1-800-688-9900. Those consumable parts are ...


