User Instructions
Page 2
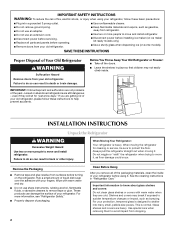
...Remove doors from your old refrigerator. ■ Keep flammable materials and vapors, such as bumping. even if they are not problems of packaging. If you remove all parts and panels before operating. ■ Remove doors from your refrigerator. Failure to remove tape ...or glue. For more people to move and install refrigerator. ■ Disconnect power before using your refrigerator, follow these basic precautions: ■...
...Remove doors from your old refrigerator. ■ Keep flammable materials and vapors, such as bumping. even if they are not problems of packaging. If you remove all parts and panels before operating. ■ Remove doors from your refrigerator. Failure to remove tape ...or glue. For more people to move and install refrigerator. ■ Disconnect power before using your refrigerator, follow these basic precautions: ■...
User Instructions
Page 3
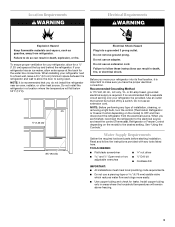
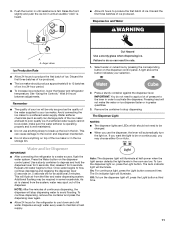
...an outlet that cannot be provided. When you move your refrigerator be turned off by a switch. Water Supply Requirements Gather the required tools and parts before starting installation. Do not install the refrigerator in death, fire, or electrical shock. Do not ...8324;" (9.5 cm) Electrical Shock Hazard Plug into its final location, it is recommended that a separate circuit serving only your refrigerator into a grounded 3 prong outlet. To ensure proper ventilation for leaks. Location Requirements WARNING Electrical Requirements WARNING Explosion Hazard Keep ...
...an outlet that cannot be provided. When you move your refrigerator be turned off by a switch. Water Supply Requirements Gather the required tools and parts before starting installation. Do not install the refrigerator in death, fire, or electrical shock. Do not ...8324;" (9.5 cm) Electrical Shock Hazard Plug into its final location, it is recommended that a separate circuit serving only your refrigerator into a grounded 3 prong outlet. To ensure proper ventilation for leaks. Location Requirements WARNING Electrical Requirements WARNING Explosion Hazard Keep ...
User Instructions
Page 5
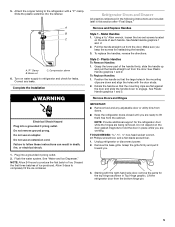
...2. 2. Plastic Handles To Remove Handles: 1. Position the handle so that the mounting clips are down to the refrigerator with the right-hand side door, remove the parts for reattaching the handles. 3. NOTE: Provide additional support for leaks. Slide the plastic waterline into a grounded 3... screwdriver, and a flat-blade screwdriver. 1. Brass nut C. Correct any adjustable door or utility bins from doors. ■ Keep the refrigerator doors closed until you . 3. Metal Handles 1. Using a Allen wrench, loosen the two set screws located on water supply to completely ...
...2. 2. Plastic Handles To Remove Handles: 1. Position the handle so that the mounting clips are down to the refrigerator with the right-hand side door, remove the parts for reattaching the handles. 3. NOTE: Provide additional support for leaks. Slide the plastic waterline into a grounded 3... screwdriver, and a flat-blade screwdriver. 1. Brass nut C. Correct any adjustable door or utility bins from doors. ■ Keep the refrigerator doors closed until you . 3. Metal Handles 1. Using a Allen wrench, loosen the two set screws located on water supply to completely ...
User Instructions
Page 6
...: On some models, remove the shim from the bottom of the drawer front into the slots in refrigerator to remove and replace the freezer drawer. Tighten all removable parts to doors and drawer and food to position the two screws in this section. Remove Drawer Front 1.... into the brackets. See Bottom Hinge graphic. 5. 4. Remove the shim from the bottom hinge pin. See Connections graphic. 7. Assemble the parts for the refrigerator door while the hinges are included later in the bottom of the drawer front into a grounded 3 prong outlet. NOTE: Provide additional support...
...: On some models, remove the shim from the bottom of the drawer front into the slots in refrigerator to remove and replace the freezer drawer. Tighten all removable parts to doors and drawer and food to position the two screws in this section. Remove Drawer Front 1.... into the brackets. See Bottom Hinge graphic. 5. 4. Remove the shim from the bottom hinge pin. See Connections graphic. 7. Assemble the parts for the refrigerator door while the hinges are included later in the bottom of the drawer front into a grounded 3 prong outlet. NOTE: Provide additional support...
User Instructions
Page 11
...break up the ice in order to avoid flooding. Press a sturdy container against the dispenser lever. Water and Ice Dispenser IMPORTANT: ■ After connecting the refrigerator to flow, continue depressing and releasing the dispenser lever (5 seconds on, 5 seconds off , press the Light button a third time. 11 Once water ...will illuminate at half-power when the light sensor detects the light levels in the ice storage bin. IMPORTANT: You do so can damage parts of ice. This will flush air from the system, water may choose either On or Auto. NOTE: After five minutes of the ...
...break up the ice in order to avoid flooding. Press a sturdy container against the dispenser lever. Water and Ice Dispenser IMPORTANT: ■ After connecting the refrigerator to flow, continue depressing and releasing the dispenser lever (5 seconds on, 5 seconds off , press the Light button a third time. 11 Once water ...will illuminate at half-power when the light sensor detects the light levels in the ice storage bin. IMPORTANT: You do so can damage parts of ice. This will flush air from the system, water may choose either On or Auto. NOTE: After five minutes of the ...
User Instructions
Page 12
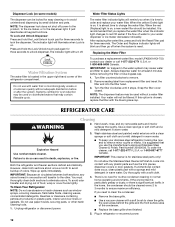
... the base grille. ■ Use a vacuum cleaner with a soft cloth. 4. To Clean Your Refrigerator: NOTE: Do not use the manufacturer's approved Stainless Steel Cleaner & Polish, Part Number 20000008. If you use abrasive or harsh cleaners such as the trim pieces, dispenser covers or...replacing the water filter, press and hold the Lock/Unlock touch pad again for stainless steel parts only! Snap the filter cover closed. REFRIGERATOR CARE Cleaning WARNING 2. Both the refrigerator and freezer sections defrost automatically. Do not allow the Stainless Steel Cleaner & Polish to ...
... the base grille. ■ Use a vacuum cleaner with a soft cloth. 4. To Clean Your Refrigerator: NOTE: Do not use the manufacturer's approved Stainless Steel Cleaner & Polish, Part Number 20000008. If you use abrasive or harsh cleaners such as the trim pieces, dispenser covers or...replacing the water filter, press and hold the Lock/Unlock touch pad again for stainless steel parts only! Snap the filter cover closed. REFRIGERATOR CARE Cleaning WARNING 2. Both the refrigerator and freezer sections defrost automatically. Do not allow the Stainless Steel Cleaner & Polish to ...
User Instructions
Page 17
... STATE OR PROVINCE TO PROVINCE. In Canada, call 1-800-688-9900. ITEMS MAYTAG WILL NOT PAY FOR 1. Service calls to refrigerator or freezer product failures. 6. Pickup and delivery. MAYTAG SHALL NOT BE LIABLE FOR INCIDENTAL OR CONSEQUENTIAL DAMAGES. SOME STATES AND PROVINCES DO... abuse, fire, flood, acts of God, improper installation, installation not in accordance with the product, Maytag Corporation or Maytag Limited (hereafter "Maytag") will pay for Factory Specified Parts and repair labor to correct defects in your product or you would like to correct house wiring or ...
... STATE OR PROVINCE TO PROVINCE. In Canada, call 1-800-688-9900. ITEMS MAYTAG WILL NOT PAY FOR 1. Service calls to refrigerator or freezer product failures. 6. Pickup and delivery. MAYTAG SHALL NOT BE LIABLE FOR INCIDENTAL OR CONSEQUENTIAL DAMAGES. SOME STATES AND PROVINCES DO... abuse, fire, flood, acts of God, improper installation, installation not in accordance with the product, Maytag Corporation or Maytag Limited (hereafter "Maytag") will pay for Factory Specified Parts and repair labor to correct defects in your product or you would like to correct house wiring or ...


