User Manual
Page 2
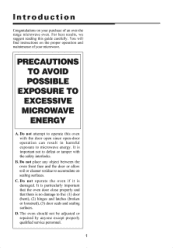
B. Do not operate the oven if it is no damage to defeat or tamper with the door open since open-door operation can result in harmful exposure to accumulate on sealing surfaces. Do not attempt to operate this guide carefully. You will find instructions on ...oven. For best results, we suggest reading this oven with the safety interlocks. C. Do not place any object between the oven front face and the door or allow soil or cleaner residue to microwave energy. Introduction Congratulations on your microwave. D. The oven should not be adjusted or repaired by anyone except...
B. Do not operate the oven if it is no damage to defeat or tamper with the door open since open-door operation can result in harmful exposure to accumulate on sealing surfaces. Do not attempt to operate this guide carefully. You will find instructions on ...oven. For best results, we suggest reading this oven with the safety interlocks. C. Do not place any object between the oven front face and the door or allow soil or cleaner residue to microwave energy. Introduction Congratulations on your microwave. D. The oven should not be adjusted or repaired by anyone except...
User Manual
Page 3
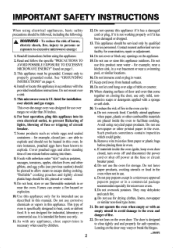
...not operate this oven. Read all instructions before cutting into its intended use for examination, repair or adjustment. 1. INSTRUCTIONS" on the oven door. Do not leave paper products, cooking utensils or food hi the oven when not in the oven. 7. They may warp or break the....As with the provided installation instructions. Install or locate this appliance outdoors. Do not overcook food. lights, blowing of fuse or tripping of door and oven that come together on page 1. 3. newspaper or other giblets, and egg yolks (see previous caution) should be slit, pierced ...
...not operate this oven. Read all instructions before cutting into its intended use for examination, repair or adjustment. 1. INSTRUCTIONS" on the oven door. Do not leave paper products, cooking utensils or food hi the oven when not in the oven. 7. They may warp or break the....As with the provided installation instructions. Install or locate this appliance outdoors. Do not overcook food. lights, blowing of fuse or tripping of door and oven that come together on page 1. 3. newspaper or other giblets, and egg yolks (see previous caution) should be slit, pierced ...
User Manual
Page 5
... to consult an experienced radio/television technician for the electric current. outlet that it replaced with one or more of the following measures: ♦ clean door and seal surfaces of the grounding plug can result in your personal reponsibility and obligation to the dish. Improper use an adapter plug with respect...
... to consult an experienced radio/television technician for the electric current. outlet that it replaced with one or more of the following measures: ♦ clean door and seal surfaces of the grounding plug can result in your personal reponsibility and obligation to the dish. Improper use an adapter plug with respect...
User Manual
Page 8
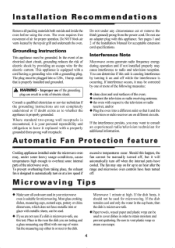
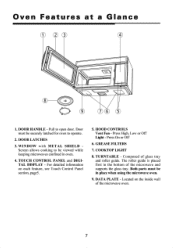
DOOR HANDLE - Pull to operate. 2. TURNTABLE - Press High, Low or Off Light - Composed of the microwave oven. 7 WINDOW with METAL SHIELD Screen allows cooking to be ... DIGITAL DISPLAY - COOKTOP LIGHT 8. Both parts must be in place when using the microwave oven. 9. Located on each feature, see Touch Control Panel section, page5. 5. Door must be securely latched for oven to open door. For detailed information on the inside wall of glass tray and roller guide. DATA PLATE...
DOOR HANDLE - Pull to operate. 2. TURNTABLE - Press High, Low or Off Light - Composed of the microwave oven. 7 WINDOW with METAL SHIELD Screen allows cooking to be ... DIGITAL DISPLAY - COOKTOP LIGHT 8. Both parts must be in place when using the microwave oven. 9. Located on each feature, see Touch Control Panel section, page5. 5. Door must be securely latched for oven to open door. For detailed information on the inside wall of glass tray and roller guide. DATA PLATE...
User Manual
Page 9
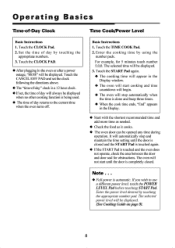
.... ♦ Start with the shortest recommended time and add more time as needed. ♦ Check the food as it cooks. ♦ The oven door can be displayed. 3. The selected power level will be opened any time during operation. Touch the TIME COOK Pad. 2. It will automatically stop automatically ... the time of day will be displayed when no other cooking function is touched and the oven does not operate, check the area between the door and door seal for 5 minutes touch number 5,0,0. For example, for obstructions. Ifyou wish to the current time when the oven turns off. Touch the ...
.... ♦ Start with the shortest recommended time and add more time as needed. ♦ Check the food as it cooks. ♦ The oven door can be displayed. 3. The selected power level will be opened any time during operation. Touch the TIME COOK Pad. 2. It will automatically stop automatically ... the time of day will be displayed when no other cooking function is touched and the oven does not operate, check the area between the door and door seal for 5 minutes touch number 5,0,0. For example, for obstructions. Ifyou wish to the current time when the oven turns off. Touch the ...
User Manual
Page 10
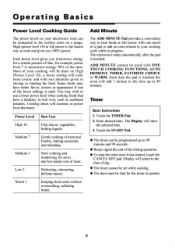
... for a certain percent of time, for example, power level 7 is microwave energy 70% of day. ♦ The timer cannot be set while cooking. ♦ The door must be shut for stews and less tender cuts of meat and Poultry, baking casseroles and reheating. a lower setting will be used with one of...
... for a certain percent of time, for example, power level 7 is microwave energy 70% of day. ♦ The timer cannot be set while cooking. ♦ The door must be shut for stews and less tender cuts of meat and Poultry, baking casseroles and reheating. a lower setting will be used with one of...
User Manual
Page 12
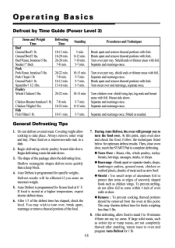
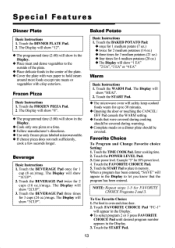
... 11 Always remove outer wrap and tray. Begin defrosting whole poultry breast-side-down . You may shorten defrost time for specific weights. Then, close oven door, touch the START Pad to complete defrosting. ♦ Turn Over : Roast, ribs, whole poultry, turkey breasts, hot dogs, sausages, steaks, or ...package alters the defrosting time. This may wish to turn the food over , break apart, rearrange or remove thawed portions of oven walls or door. ♦ Remove : To prevent cooking, thawed portions should be affected if you to come within 1-inch of the food. 7. Turn over...
... 11 Always remove outer wrap and tray. Begin defrosting whole poultry breast-side-down . You may shorten defrost time for specific weights. Then, close oven door, touch the START Pad to complete defrosting. ♦ Turn Over : Roast, ribs, whole poultry, turkey breasts, hot dogs, sausages, steaks, or ...package alters the defrosting time. This may wish to turn the food over , break apart, rearrange or remove thawed portions of oven walls or door. ♦ Remove : To prevent cooking, thawed portions should be affected if you to come within 1-inch of the food. 7. Turn over...
User Manual
Page 14
...40) will show "lCUP". 2. Beverage Basic Instructions 1. Enter cooking time. 2. Put food in the Display to 30 minutes. ♦ Opening the door or touching the CANCEL/ OFF Pad cancels the WARM setting. ♦ Foods that the program has been entered. Touch the BEVERAGE Pad three times for... "2 EA", "3 EA" or "4 EA" Warm Basic Instructions 1. Touch the START Pad. ♦ The microwave oven will appear in oven and close door. 2. When a program has been entered, "SAVE" will safety keep cooked foods warm for up to let you know that were covered during cooking should ...
...40) will show "lCUP". 2. Beverage Basic Instructions 1. Enter cooking time. 2. Put food in the Display to 30 minutes. ♦ Opening the door or touching the CANCEL/ OFF Pad cancels the WARM setting. ♦ Foods that the program has been entered. Touch the BEVERAGE Pad three times for... "2 EA", "3 EA" or "4 EA" Warm Basic Instructions 1. Touch the START Pad. ♦ The microwave oven will appear in oven and close door. 2. When a program has been entered, "SAVE" will safety keep cooked foods warm for up to let you know that were covered during cooking should ...
User Manual
Page 18
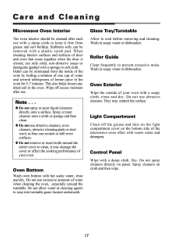
... to clean, it free from the inside of the oven by boiling a solution of one cup of water and several tablespoons of door and oven that come together when the door is closed, use abrasive cleaners, oven cleaners, abrasive cleaning pads or steel wool, as they can be removed with hot sudsy...
... to clean, it free from the inside of the oven by boiling a solution of one cup of water and several tablespoons of door and oven that come together when the door is closed, use abrasive cleaners, oven cleaners, abrasive cleaning pads or steel wool, as they can be removed with hot sudsy...
User Manual
Page 21
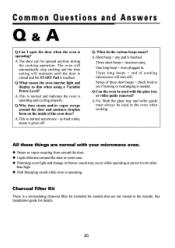
...operating? Series of three short beeps = check food to dim when using a Variable Power Level? Common Questions and Answers Q & A Q.Can I open the door when the oven is touched. Q.What causes the oven interior light and display to see if turning or rearranging is operating. This is normal and.... 20 The oven will automatically stop cooking and the time setting will turn off . A. A. Three long beeps = end of the oven door? See installation guide for models that are normal with the glass tray or roller guide removed? Q.Why does steam and/or vapor escape around ...
...operating? Series of three short beeps = check food to dim when using a Variable Power Level? Common Questions and Answers Q & A Q.Can I open the door when the oven is touched. Q.What causes the oven interior light and display to see if turning or rearranging is operating. This is normal and.... 20 The oven will automatically stop cooking and the time setting will turn off . A. A. Three long beeps = end of the oven door? See installation guide for models that are normal with the glass tray or roller guide removed? Q.Why does steam and/or vapor escape around ...
User Manual
Page 22
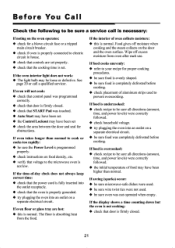
...on food density, etc. ♦ verify that voltage to the microwave oven is normal. Wipe off moisture when cooking and the steam collects on the door and the oven surface. If arcing (sparks) occur: ♦ be sure microwave-safe dishes were used. ♦ be sure wire twist ties ...inserted into the outlet receptacle. ♦ check that the oven is firmly closed . ♦ check that START Pad was programmed correctly. ♦ check that door is properly grounded. ♦ try plugging the oven into an outlet on a separate electrical circuit. If food is set . ♦ the Control Lockout ...
...on food density, etc. ♦ verify that voltage to the microwave oven is normal. Wipe off moisture when cooking and the steam collects on the door and the oven surface. If arcing (sparks) occur: ♦ be sure microwave-safe dishes were used. ♦ be sure wire twist ties ...inserted into the outlet receptacle. ♦ check that the oven is firmly closed . ♦ check that START Pad was programmed correctly. ♦ check that door is properly grounded. ♦ try plugging the oven into an outlet on a separate electrical circuit. If food is set . ♦ the Control Lockout ...


