Getting Started
Page 3
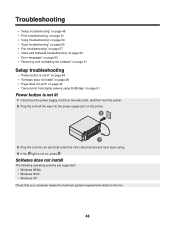
...Removing and reinstalling the software 1 From the desktop, click Start Æ Programs Æ Lexmark 2400 Series Æ Uninstall. 2 Follow the instructions on the computer screen to remove the printer software. 3 Restart the computer. 4 Click Cancel on the computer screen to the computer through...exe. Checking the printer status 1 Click Start Æ Settings Æ Printers and Faxes or Printers. Setup troubleshooting Symptom The light is not lit Software does not install Solution 1 Disconnect the power cord from the wall outlet and then from the printer. 2 Plug the cord all open software...
...Removing and reinstalling the software 1 From the desktop, click Start Æ Programs Æ Lexmark 2400 Series Æ Uninstall. 2 Follow the instructions on the computer screen to remove the printer software. 3 Restart the computer. 4 Click Cancel on the computer screen to the computer through...exe. Checking the printer status 1 Click Start Æ Settings Æ Printers and Faxes or Printers. Setup troubleshooting Symptom The light is not lit Software does not install Solution 1 Disconnect the power cord from the wall outlet and then from the printer. 2 Plug the cord all open software...

User's Guide
Page 2
..., Inc., Department F95/032-2, 740 West New Circle Road, Lexington, Kentucky 40550, U.S.A. Safety information Use only the power supply and power supply cord provided with local law: LEXMARK INTERNATIONAL, INC., PROVIDES THIS PUBLICATION "AS IS" WITHOUT WARRANTY OF ANY KIND, EITHER EXPRESS OR IMPLIED, INCLUDING, BUT NOT LIMITED TO, THE IMPLIED WARRANTIES OF ...
..., Inc., Department F95/032-2, 740 West New Circle Road, Lexington, Kentucky 40550, U.S.A. Safety information Use only the power supply and power supply cord provided with local law: LEXMARK INTERNATIONAL, INC., PROVIDES THIS PUBLICATION "AS IS" WITHOUT WARRANTY OF ANY KIND, EITHER EXPRESS OR IMPLIED, INCLUDING, BUT NOT LIMITED TO, THE IMPLIED WARRANTIES OF ...

User's Guide
Page 9
Setting up the printer Checking the box contents Name 1 Color print cartridge 2 Power supply cord 3 Installation software CD 4 Getting Started or Setup Solutions 5 Setup Sheet Description Cartridge to be installed in the printer Attaches to the power supply port located at the back of the printer • Installation software for the printer • Help • User's Guide in electronic format Additional information depending on your country or region Instructions on setting up printer hardware and software, and information on setup troubleshooting 9
Setting up the printer Checking the box contents Name 1 Color print cartridge 2 Power supply cord 3 Installation software CD 4 Getting Started or Setup Solutions 5 Setup Sheet Description Cartridge to be installed in the printer Attaches to the power supply port located at the back of the printer • Installation software for the printer • Help • User's Guide in electronic format Additional information depending on your country or region Instructions on setting up printer hardware and software, and information on setup troubleshooting 9
User's Guide
Page 48
... • Windows 98/Me • Windows 2000 • Windows XP Check that other electrical devices have been using PictBridge" on page 51 Power button is not lit 1 Disconnect the power supply cord from the wall outlet, and then from digital camera using . 4 If the light is not lit" on page... not install" on page 48 • "Page does not print" on page 49 • "Cannot print from the printer. 2 Plug the cord all the way into the power supply port on the printer. 2 1 3 Plug the cord into an electrical outlet that your computer meets the minimum system requirements listed on , press .
... • Windows 98/Me • Windows 2000 • Windows XP Check that other electrical devices have been using PictBridge" on page 51 Power button is not lit 1 Disconnect the power supply cord from the wall outlet, and then from digital camera using . 4 If the light is not lit" on page... not install" on page 48 • "Page does not print" on page 49 • "Cannot print from the printer. 2 Plug the cord all the way into the power supply port on the printer. 2 1 3 Plug the cord into an electrical outlet that your computer meets the minimum system requirements listed on , press .

User's Guide
Page 49
..., and then follow the instructions on the computer screen to reinstall the software. 1 Press to turn the printer on. 1 Close all open software applications. 2 Disable any obvious damage. 2 Firmly plug the rectangular end...cable into the wall outlet. 6 Press to turn the printer off. 2 Disconnect the power cord from the wall outlet. 3 Gently remove the power supply from the printer. 4 Reconnect the power supply to check for the latest software. 2 In all...to install the software. 1 Visit our Web site at www.lexmark.com to the printer. 5 Plug the power cord into the back of the computer.
..., and then follow the instructions on the computer screen to reinstall the software. 1 Press to turn the printer on. 1 Close all open software applications. 2 Disable any obvious damage. 2 Firmly plug the rectangular end...cable into the wall outlet. 6 Press to turn the printer off. 2 Disconnect the power cord from the wall outlet. 3 Gently remove the power supply from the printer. 4 Reconnect the power supply to check for the latest software. 2 In all...to install the software. 1 Visit our Web site at www.lexmark.com to the printer. 5 Plug the power cord into the back of the computer.
User's Guide
Page 50
... to turn the printer off. 2 Disconnect the power cord from the wall outlet. 3 Gently remove the power supply from the printer. 4 Reconnect the power supply to the printer. 5 Plug the power cord into the wall outlet. 6 Press to turn the printer on page 61. 2 If the software still does not install correctly, visit our Web site at www.lexmark.com to...
... to turn the printer off. 2 Disconnect the power cord from the wall outlet. 3 Gently remove the power supply from the printer. 4 Reconnect the power supply to the printer. 5 Plug the power cord into the wall outlet. 6 Press to turn the printer on page 61. 2 If the software still does not install correctly, visit our Web site at www.lexmark.com to...
User's Guide
Page 61
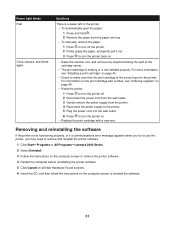
... error message appears when you try to use the printer, you may need to remove and reinstall the printer software. 1 Click StartŒPrograms or All ProgramsŒLexmark 2400 Series. 2 Select Uninstall. 3 Follow the instructions...one. Removing and reinstalling the software If the printer is the correct type for the printer. Power light blinks Fast Once, pauses, and blinks again Solutions There is a paper jam in the printer. • To automatically eject the paper: 1 Press and hold . 2 Remove the paper from the printer. 4 Reconnect the power supply to the printer. 5 Plug the power cord...
... error message appears when you try to use the printer, you may need to remove and reinstall the printer software. 1 Click StartŒPrograms or All ProgramsŒLexmark 2400 Series. 2 Select Uninstall. 3 Follow the instructions...one. Removing and reinstalling the software If the printer is the correct type for the printer. Power light blinks Fast Once, pauses, and blinks again Solutions There is a paper jam in the printer. • To automatically eject the paper: 1 Press and hold . 2 Remove the paper from the printer. 4 Reconnect the power supply to the printer. 5 Plug the power cord...
User's Guide
Page 65
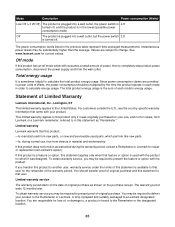
Mode Description Power consumption (Watts) Low Off (
Mode Description Power consumption (Watts) Low Off (


