User's Guide for Windows 95 and Windows 98 (1.1 MB)
Page 3
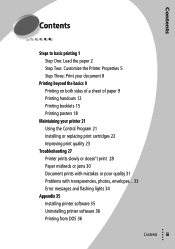
...: Print your document 8 Printing beyond the basics 9 Printing on both sides of a sheet of paper 9 Printing handouts 12 Printing booklets 15 Printing posters 18 Maintaining your printer 21 Using the Control Program 21 Installing or replacing print cartridges 22 Improving print quality 23 Troubleshooting 27 Printer prints slowly or doesn't print 28 Paper misfeeds or jams 30 Document prints with mistakes or poor quality 31 Problems with transparencies, photos, envelopes... 33 Error messages and flashing lights 34 Appendix 35 Installing printer software 35 Uninstalling printer software 36 Printing...
...: Print your document 8 Printing beyond the basics 9 Printing on both sides of a sheet of paper 9 Printing handouts 12 Printing booklets 15 Printing posters 18 Maintaining your printer 21 Using the Control Program 21 Installing or replacing print cartridges 22 Improving print quality 23 Troubleshooting 27 Printer prints slowly or doesn't print 28 Paper misfeeds or jams 30 Document prints with mistakes or poor quality 31 Problems with transparencies, photos, envelopes... 33 Error messages and flashing lights 34 Appendix 35 Installing printer software 35 Uninstalling printer software 36 Printing...

User's Guide for Windows 95 and Windows 98 (1.1 MB)
Page 11
... print quality, replace the black cartridge with your printer. Banner paper Paper Note: You can print quality photos with the black and color cartridge combination that came with a photo cartridge. For help, see page 22. Steps to basic printing Choosing printer settings for specialty papers When your printer settings for printing on specialty papers, use the following table: When you are designed to override the envelope settings in Printer Properties. Use the default settings for printing most documents on this specialty paper: Envelopes Click this Printer...
... print quality, replace the black cartridge with your printer. Banner paper Paper Note: You can print quality photos with the black and color cartridge combination that came with a photo cartridge. For help, see page 22. Steps to basic printing Choosing printer settings for specialty papers When your printer settings for printing on specialty papers, use the following table: When you are designed to override the envelope settings in Printer Properties. Use the default settings for printing most documents on this specialty paper: Envelopes Click this Printer...

User's Guide for Windows 95 and Windows 98 (1.1 MB)
Page 13
.... Step One: Load the paper Load up to print: • on both sides of a sheet of paper (see the next section) • handouts (see page 12) • booklets (see page 15) • posters (see page 2. Printing beyond the basics You can use your printer to 100 sheets of paper against the right side of paper. Besides saving paper, this feature is helpful when you print on both sides of a sheet of the sheet feeder.
.... Step One: Load the paper Load up to print: • on both sides of a sheet of paper (see the next section) • handouts (see page 12) • booklets (see page 15) • posters (see page 2. Printing beyond the basics You can use your printer to 100 sheets of paper against the right side of paper. Besides saving paper, this feature is helpful when you print on both sides of a sheet of the sheet feeder.

User's Guide for Windows 95 and Windows 98 (1.1 MB)
Page 17
... changes as you make selections, showing how the printed page will look. b To receive paper reloading instructions, select Print reloading instructions after the first side prints. Printing beyond the basics 4 Customize the Printer Properties for each page image, select Print Page Borders. 5 To print your handout on both sides of the paper, click OK. c Select the Number of Prints (page images) to print on one side of the paper: a Select Two-sided printing. a Click the Job Finishing tab. To print...
... changes as you make selections, showing how the printed page will look. b To receive paper reloading instructions, select Print reloading instructions after the first side prints. Printing beyond the basics 4 Customize the Printer Properties for each page image, select Print Page Borders. 5 To print your handout on both sides of the paper, click OK. c Select the Number of Prints (page images) to print on one side of the paper: a Select Two-sided printing. a Click the Job Finishing tab. To print...

User's Guide for Windows 95 and Windows 98 (1.1 MB)
Page 25
...; Clean the print nozzles • View cartridge part numbers and order supplies directly from the Start menu, click: 1 Programs. 2 Lexmark Z52 Series. 3 Lexmark Z52 Control Program. Status tab to: Cartridges tab to enable/disable various printer software functions, such as Sound Effects and Buffer Mode. Click the... DOS Printing tab to find printer software version and copyright information. Maintaining your ink levels • Install or replace print cartridges • Align print cartridges for DOS printing. 3 Maintaining your printer Maintaining your printer Using the...
...; Clean the print nozzles • View cartridge part numbers and order supplies directly from the Start menu, click: 1 Programs. 2 Lexmark Z52 Series. 3 Lexmark Z52 Control Program. Status tab to: Cartridges tab to enable/disable various printer software functions, such as Sound Effects and Buffer Mode. Click the... DOS Printing tab to find printer software version and copyright information. Maintaining your ink levels • Install or replace print cartridges • Align print cartridges for DOS printing. 3 Maintaining your printer Maintaining your printer Using the...
User's Guide for Windows 95 and Windows 98 (1.1 MB)
Page 32
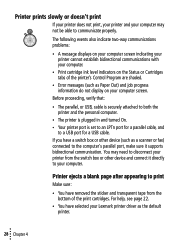
...; Your printer port is set to an LPTn port for a parallel cable, and to a USB port for a USB cable. For help, see page 22. • You have selected your computer. • Print cartridge ink level indicators on your computer screen indicating your printer cannot establish bidirectional communications with your Lexmark printer driver as the default printer. 28 Chapter 4 The following events also indicate two-way communications problems: • A message displays on the Status or Cartridges tabs...
...; Your printer port is set to an LPTn port for a parallel cable, and to a USB port for a USB cable. For help, see page 22. • You have selected your computer. • Print cartridge ink level indicators on your computer screen indicating your printer cannot establish bidirectional communications with your Lexmark printer driver as the default printer. 28 Chapter 4 The following events also indicate two-way communications problems: • A message displays on the Status or Cartridges tabs...

User's Guide for Windows 95 and Windows 98 (1.1 MB)
Page 39
..., type the letter of instructions that appear. 3 When the desktop appears, insert the software CD. The Win Self-Extractor window opens. • • Appendix •••35 The Lexmark Z52 software installation screen appears. 4 Click Install Printer Software. For help, see "Uninstalling printer software" on any subsequent screens. Using the World Wide Web If your computer does not have a CD-ROM drive, you can obtain the printer software using: •...
..., type the letter of instructions that appear. 3 When the desktop appears, insert the software CD. The Win Self-Extractor window opens. • • Appendix •••35 The Lexmark Z52 software installation screen appears. 4 Click Install Printer Software. For help, see "Uninstalling printer software" on any subsequent screens. Using the World Wide Web If your computer does not have a CD-ROM drive, you can obtain the printer software using: •...

User's Guide for Windows 95 and Windows 98 (1.1 MB)
Page 40
..., type the letter of the printer software: 1 Insert the printer software CD into your disk drive and click OK. 6 Follow the instructions on the screen. Uninstalling printer software If your printer software does not install properly, you may need three blank 3.5 inch diskettes. To uninstall the printer software: 1 From the Start menu, select Programs. 2 Select Lexmark Z52 Series. 3 Select Lexmark Z52 Series Uninstall. 4 Follow the instructions on your printer online Help system and find information on printing from Windows...
..., type the letter of the printer software: 1 Insert the printer software CD into your disk drive and click OK. 6 Follow the instructions on the screen. Uninstalling printer software If your printer software does not install properly, you may need three blank 3.5 inch diskettes. To uninstall the printer software: 1 From the Start menu, select Programs. 2 Select Lexmark Z52 Series. 3 Select Lexmark Z52 Series Uninstall. 4 Follow the instructions on your printer online Help system and find information on printing from Windows...
User's Guide for Windows 95 and Windows 98 (1.1 MB)
Page 41
... printing media outside of Lexmark specifications • use of failures caused by: • modification or attachments • accidents or misuse • unsuitable physical or operating environment • maintenance by a Lexmark warranty, technical support may be available for warranty service, remove all programs, data, and removable storage media. You are responsible for repair without charge. Warranty Lexmark warrants that this product: • Is manufactured from new parts, or new and serviceable used...
... printing media outside of Lexmark specifications • use of failures caused by: • modification or attachments • accidents or misuse • unsuitable physical or operating environment • maintenance by a Lexmark warranty, technical support may be available for warranty service, remove all programs, data, and removable storage media. You are responsible for repair without charge. Warranty Lexmark warrants that this product: • Is manufactured from new parts, or new and serviceable used...
User's Guide for Windows 95 and Windows 98 (1.1 MB)
Page 46
... 21 P Paper Feed light 34 paper guide locating 2 using 2 paper, loading 2 parallel cable connection problems 27 specifications 27 photo paper problems 33 setting recommendations 7 postcards loading 3 setting recommendations 7 poster assembling 19 printing 18 selecting specific pages 20 Power light flashing 34 power supply, replacing 39 print cartridges aligning 24 cleaning 25 installing 22 part numbers 21 preserving 26 removing 22 replacing 22 wiping nozzles 26 print nozzle contacts wiping 26 print nozzles cleaning 25 wiping 26 print quality banding 31 different colors 32 faded colors 33...
... 21 P Paper Feed light 34 paper guide locating 2 using 2 paper, loading 2 parallel cable connection problems 27 specifications 27 photo paper problems 33 setting recommendations 7 postcards loading 3 setting recommendations 7 poster assembling 19 printing 18 selecting specific pages 20 Power light flashing 34 power supply, replacing 39 print cartridges aligning 24 cleaning 25 installing 22 part numbers 21 preserving 26 removing 22 replacing 22 wiping nozzles 26 print nozzle contacts wiping 26 print nozzles cleaning 25 wiping 26 print quality banding 31 different colors 32 faded colors 33...

User's Guide for Windows NT 4.0 and Windows 2000 (2.7 MB)
Page 2
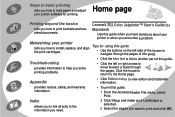
... you need. Index -provides quick links to the information you how to another part of this guide when you have questions about your printer -tells you encounter a problem. Tips for printing. Lexmark Z52 Color JetprinterTM User's Guide for solving printing problems. Appendix -provides notices, safety, and printer software installation information. Just click an index entry to go to install, replace, and align the print cartridges. Troubleshooting -provides information for Windows NT 4.0 and Windows 2000 Use this guide...
... you need. Index -provides quick links to the information you how to another part of this guide when you have questions about your printer -tells you encounter a problem. Tips for printing. Lexmark Z52 Color JetprinterTM User's Guide for solving printing problems. Appendix -provides notices, safety, and printer software installation information. Just click an index entry to go to install, replace, and align the print cartridges. Troubleshooting -provides information for Windows NT 4.0 and Windows 2000 Use this guide...

User's Guide for Windows NT 4.0 and Windows 2000 (2.7 MB)
Page 12
... Page Setup tab, make these selections: From the list of Paper Sizes, select the appropriate envelope size. From the Media Type drop-down menu, select Greeting Card Stock. Steps to basic printing Beyond the basics Maintaining your printer Troubleshooting Appendix Index Steps to basic printing Selecting settings for printing most documents on specialty media. Use the default settings for specialty media When your printer software was installed, the printer driver was set to the default settings. From the Media Type drop-down menu, select Glossy/Photo Paper...
... Page Setup tab, make these selections: From the list of Paper Sizes, select the appropriate envelope size. From the Media Type drop-down menu, select Greeting Card Stock. Steps to basic printing Beyond the basics Maintaining your printer Troubleshooting Appendix Index Steps to basic printing Selecting settings for printing most documents on specialty media. Use the default settings for specialty media When your printer software was installed, the printer driver was set to the default settings. From the Media Type drop-down menu, select Glossy/Photo Paper...

User's Guide for Windows NT 4.0 and Windows 2000 (2.7 MB)
Page 17
... Paper Size Media Type Paper Source Print Quality Orientation Copies Current Settings Setting Letter (8.5 x 11 in.) Plain Paper Automatic Paper Feed Normal Portrait 1 OK Cancel Help 17 b Select Natural Color. For help, see page 9. 2 Adjust the Document Color settings: a Click the Color tab. Steps to basic printing Beyond the basics Maintaining your printer Troubleshooting Appendix Index Beyond the basics Step Two: Customize the printer software for printing photos 1 Open the printer driver. Lexmark Z52 Series ColorFine Properties Page Setup Color Features Document Color Auto...
... Paper Size Media Type Paper Source Print Quality Orientation Copies Current Settings Setting Letter (8.5 x 11 in.) Plain Paper Automatic Paper Feed Normal Portrait 1 OK Cancel Help 17 b Select Natural Color. For help, see page 9. 2 Adjust the Document Color settings: a Click the Color tab. Steps to basic printing Beyond the basics Maintaining your printer Troubleshooting Appendix Index Beyond the basics Step Two: Customize the printer software for printing photos 1 Open the printer driver. Lexmark Z52 Series ColorFine Properties Page Setup Color Features Document Color Auto...

User's Guide for Windows NT 4.0 and Windows 2000 (2.7 MB)
Page 19
To replace the black cartridge with a photo and color cartridge combination in your photos, reinstall the black print cartridge. Besides saving paper, this feature is helpful when you want to 100 sheets of paper against the right side of paper. Step One: Load the paper Load up to print tablets. For help, see page 26. 1 From your application's File menu, click Print. 2 From the Print dialog box, click OK or Print (depending on the application). 3 When you print on...
To replace the black cartridge with a photo and color cartridge combination in your photos, reinstall the black print cartridge. Besides saving paper, this feature is helpful when you want to 100 sheets of paper against the right side of paper. Step One: Load the paper Load up to print tablets. For help, see page 26. 1 From your application's File menu, click Print. 2 From the Print dialog box, click OK or Print (depending on the application). 3 When you print on...

User's Guide for Windows NT 4.0 and Windows 2000 (2.7 MB)
Page 21
... side of a landscape-printed page). c Make sure Print Instruction Sheet is selected. Lexmark Z52 Series ColorFine Properties Page Setup Color Features Print Options Dry Time Delay Two-Sided Printing None Long Edge Short Edge Print Instruction Sheet Cartridge Maintenance Clean Rollers (Hagaki) Defaults About Lexmark Hot Spot Help Click this to basic printing Beyond the basics Maintaining your printer Troubleshooting Appendix Index Beyond the basics 3 Select a binding edge option: a Click the Features tab. Item Paper Size Media Type Paper Source Print Quality Orientation Copies...
... side of a landscape-printed page). c Make sure Print Instruction Sheet is selected. Lexmark Z52 Series ColorFine Properties Page Setup Color Features Print Options Dry Time Delay Two-Sided Printing None Long Edge Short Edge Print Instruction Sheet Cartridge Maintenance Clean Rollers (Hagaki) Defaults About Lexmark Hot Spot Help Click this to basic printing Beyond the basics Maintaining your printer Troubleshooting Appendix Index Beyond the basics 3 Select a binding edge option: a Click the Features tab. Item Paper Size Media Type Paper Source Print Quality Orientation Copies...

User's Guide for Windows NT 4.0 and Windows 2000 (2.7 MB)
Page 50
Using the CD-ROM Follow the set of your CDROM drive, followed by :\setup (for example, d:\setup), and then click OK. 50 parallel or USB cable 1 Start Windows. 2 Click Cancel on any screens that correspond to your operating system and printer cable (parallel or USB): Window 98 - The Lexmark Z52 software installation screen appears. 5 Click Install Printer Software. The Lexmark Z52 software installation screen appears. 4 Click Install Printer Software. For help, see Uninstalling printer software. You may need to uninstall, and then...
Using the CD-ROM Follow the set of your CDROM drive, followed by :\setup (for example, d:\setup), and then click OK. 50 parallel or USB cable 1 Start Windows. 2 Click Cancel on any screens that correspond to your operating system and printer cable (parallel or USB): Window 98 - The Lexmark Z52 software installation screen appears. 5 Click Install Printer Software. The Lexmark Z52 software installation screen appears. 4 Click Install Printer Software. For help, see Uninstalling printer software. You may need to uninstall, and then...
User's Guide for Windows NT 4.0 and Windows 2000 (2.7 MB)
Page 51
... of your disk drive, followed by :\setup (for your operating system. 2 Select Save to Disk. 3 Select a location on your hard disk drive. 4 Double-click the executable (.exe) file to open it : 1 From the Start menu, select Run. 2 In the command-line text box, type the letter of your CDROM drive, followed by :\setup (for example, d:\setup), and then click OK. 3 When the Lexmark Z52 software installation screen displays, select Tools...
... of your disk drive, followed by :\setup (for your operating system. 2 Select Save to Disk. 3 Select a location on your hard disk drive. 4 Double-click the executable (.exe) file to open it : 1 From the Start menu, select Run. 2 In the command-line text box, type the letter of your CDROM drive, followed by :\setup (for example, d:\setup), and then click OK. 3 When the Lexmark Z52 software installation screen displays, select Tools...
User's Guide for Macintosh (2.9 MB)
Page 2
... File menu, select Print. Lexmark Z52 Color Jetprinter™ User's Guide for printing. Maintaining your printer or when you encounter a problem. provides notices, safety, and warranty information. • To print this guide. Click the house to return to print booklets and twosided documents. Index allows you to link directly to the information you need. 2 Click Setup and make sure Landscape is selected. 3 Select the pages you want to load paper and adjust your printer software...
... File menu, select Print. Lexmark Z52 Color Jetprinter™ User's Guide for printing. Maintaining your printer or when you encounter a problem. provides notices, safety, and warranty information. • To print this guide. Click the house to return to print booklets and twosided documents. Index allows you to link directly to the information you need. 2 Click Setup and make sure Landscape is selected. 3 Select the pages you want to load paper and adjust your printer software...
User's Guide for Macintosh (2.9 MB)
Page 57
... replacement may only be available for warranty service, remove all programs, data, and removable storage media. Free remote technical support is set forth in this section. NO WARRANTIES, EXPRESS OR IMPLIED, WILL APPLY AFTER THIS PERIOD. Warranty service does not include repair of failures caused by: • modification or attachments • accidents or misuse • unsuitable physical or operating environment • maintenance by a Lexmark...
... replacement may only be available for warranty service, remove all programs, data, and removable storage media. Free remote technical support is set forth in this section. NO WARRANTIES, EXPRESS OR IMPLIED, WILL APPLY AFTER THIS PERIOD. Warranty service does not include repair of failures caused by: • modification or attachments • accidents or misuse • unsuitable physical or operating environment • maintenance by a Lexmark...

User's Guide for Macintosh (2.9 MB)
Page 64
... troubleshooting 48 print settings introduction 10 printer software introduction 9 printing booklets 17 documents 16 from an application 16 handouts 21 last page first 23 Macintosh locks up 55 on both sides of the paper 24 pages per sheet 21 printing on both sides of the paper loading paper 24 printing options customizing 9 printing problems error messages 54 poor quality 48 specialty papers 53 Q Quick Print 48 R release tab locating 5 using 5 replacing print cartridges 29 returning to defaults 16 reverse order printing 23 loading paper...
... troubleshooting 48 print settings introduction 10 printer software introduction 9 printing booklets 17 documents 16 from an application 16 handouts 21 last page first 23 Macintosh locks up 55 on both sides of the paper 24 pages per sheet 21 printing on both sides of the paper loading paper 24 printing options customizing 9 printing problems error messages 54 poor quality 48 specialty papers 53 Q Quick Print 48 R release tab locating 5 using 5 replacing print cartridges 29 returning to defaults 16 reverse order printing 23 loading paper...


