Getting Started
Page 3
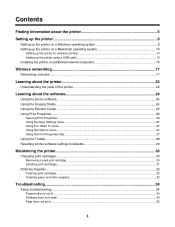
... operating system 9 Setting up the printer on a Macintosh operating system 10 Setting up the printer for wireless printing 14 Setting up the printer using a USB cable...15 Installing the printer on additional network computers 16 Wireless networking...17 Networking overview...17 Learning about the printer 22 Understanding the parts of the printer...
... operating system 9 Setting up the printer on a Macintosh operating system 10 Setting up the printer for wireless printing 14 Setting up the printer using a USB cable...15 Installing the printer on additional network computers 16 Wireless networking...17 Networking overview...17 Learning about the printer 22 Understanding the parts of the printer...
Getting Started
Page 4
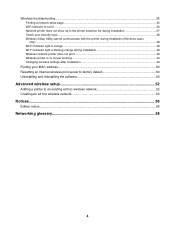
...not lit ...36 Network printer does not show up in the printer selection list during installation 37 Check your security keys...38 Wireless Setup Utility cannot communicate with the printer during installation (Windows users only) ...38 Wi-Fi indicator light is orange ...39 ... indicator light is blinking orange during installation 39 Wireless network printer does not print ...42 Wireless printer is no longer working...44 Changing wireless settings after installation 49 Finding your MAC address...50 Resetting an internal wireless print server to factory default 50 Uninstalling and reinstalling...
...not lit ...36 Network printer does not show up in the printer selection list during installation 37 Check your security keys...38 Wireless Setup Utility cannot communicate with the printer during installation (Windows users only) ...38 Wi-Fi indicator light is orange ...39 ... indicator light is blinking orange during installation 39 Wireless network printer does not print ...42 Wireless printer is no longer working...44 Changing wireless settings after installation 49 Finding your MAC address...50 Resetting an internal wireless print server to factory default 50 Uninstalling and reinstalling...
Getting Started
Page 9
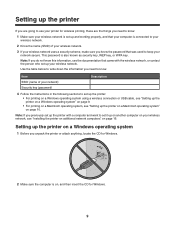
...printer or attach anything, locate the CD for Windows. 2 Make sure the computer is on page 16. This password is connected to your wireless network. 2 Know the name (SSID) of your network) Security key (password) Description 4 Follow the instructions in the following sections to... set up the printer: • For printing on a Windows operating system using a wireless connection or USB cable, see "Setting up the printer on a Windows operating system" on page 9. • For printing on a Macintosh operating system...
...printer or attach anything, locate the CD for Windows. 2 Make sure the computer is on page 16. This password is connected to your wireless network. 2 Know the name (SSID) of your network) Security key (password) Description 4 Follow the instructions in the following sections to... set up the printer: • For printing on a Windows operating system using a wireless connection or USB cable, see "Setting up the printer on a Windows operating system" on page 9. • For printing on a Macintosh operating system...
Getting Started
Page 11
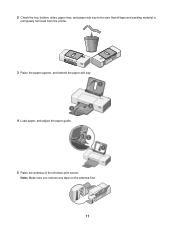
Note: Make sure you remove any tape on the antenna first. 11 2 Check the top, bottom, sides, paper tray, and paper exit tray to be sure that all tape and packing material is completely removed from the printer. 3 Raise the paper support, and extend the paper exit tray. 4 Load paper, and adjust the paper guide. 5 Raise the antenna of the wireless print server.
Note: Make sure you remove any tape on the antenna first. 11 2 Check the top, bottom, sides, paper tray, and paper exit tray to be sure that all tape and packing material is completely removed from the printer. 3 Raise the paper support, and extend the paper exit tray. 4 Load paper, and adjust the paper guide. 5 Raise the antenna of the wireless print server.
Getting Started
Page 13
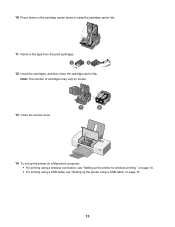
Note: The number of cartridges may vary by model. 13 Close the access cover. 1 2 14 To set up the printer on a Macintosh computer: • For printing using a wireless connection, see "Setting up the printer for wireless printing " on page 14. • For printing using a USB cable, see "Setting up the printer using a USB cable" on the cartridge carrier levers to raise the cartridge carrier lids. 11 Remove the tape from the print cartridges. 1 2 12 Insert the cartridges, and then close the cartridge carrier lids. 10 Press down on page 15. 13
Note: The number of cartridges may vary by model. 13 Close the access cover. 1 2 14 To set up the printer on a Macintosh computer: • For printing using a wireless connection, see "Setting up the printer for wireless printing " on page 14. • For printing using a USB cable, see "Setting up the printer using a USB cable" on the cartridge carrier levers to raise the cartridge carrier lids. 11 Remove the tape from the print cartridges. 1 2 12 Insert the cartridges, and then close the cartridge carrier lids. 10 Press down on page 15. 13
Getting Started
Page 14
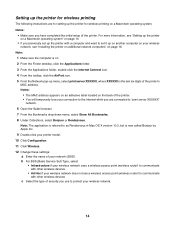
... the printer. b For BSS (Basic Service Set) Type, select • Infrastructure if your wireless network uses a wireless access point (wireless router) to communicate with other wireless devices. • Ad Hoc if your wireless network does not use to set it up on another computer on page 16. Note: 1 ... XXXXXX is now called Bonjour by Apple Inc. 9 Double-click your printer model. 10 Click Configuration. 11 Click Wireless. 12 Change these settings: a Enter the name of your wireless network, see "Setting up the printer on a Macintosh operating system" on page 10. • If you previously...
... the printer. b For BSS (Basic Service Set) Type, select • Infrastructure if your wireless network uses a wireless access point (wireless router) to communicate with other wireless devices. • Ad Hoc if your wireless network does not use to set it up on another computer on page 16. Note: 1 ... XXXXXX is now called Bonjour by Apple Inc. 9 Double-click your printer model. 10 Click Configuration. 11 Click Wireless. 12 Change these settings: a Enter the name of your wireless network, see "Setting up the printer on a Macintosh operating system" on page 10. • If you previously...
Getting Started
Page 15
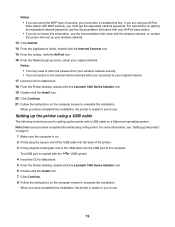
...the installation, the printer is marked with the USB symbol. 4 Insert the CD for Macintosh. 5 From the Finder desktop, double-click the Lexmark 1400 Series Installer icon 6 Double-click the Install icon. 7 Click Continue. 8 Follow the instructions on the computer screen to complete the installation. ...on a Macintosh operating system. Setting up the printer using a USB cable The following instructions are using an AirPort base station with the wireless network, or contact the person who set up your AirPort base station. • If you have completed the initial setup of the ...
...the installation, the printer is marked with the USB symbol. 4 Insert the CD for Macintosh. 5 From the Finder desktop, double-click the Lexmark 1400 Series Installer icon 6 Double-click the Install icon. 7 Click Continue. 8 Follow the instructions on the computer screen to complete the installation. ...on a Macintosh operating system. Setting up the printer using a USB cable The following instructions are using an AirPort base station with the wireless network, or contact the person who set up your AirPort base station. • If you have completed the initial setup of the ...
Getting Started
Page 17
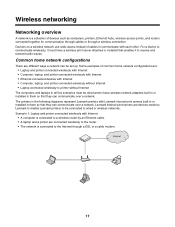
... • Computer, laptop, and printer connected wirelessly with Internet • Ethernet-connected devices with Internet • A computer is connected to a wireless router by Lexmark to enable Lexmark printers to be connected to wired or wireless networks. Scenario 1: Laptop and printer connected wirelessly with Internet • Computer, laptop, and printer connected wirelessly without Internet The computers and laptops...
... • Computer, laptop, and printer connected wirelessly with Internet • Ethernet-connected devices with Internet • A computer is connected to a wireless router by Lexmark to enable Lexmark printers to be connected to wired or wireless networks. Scenario 1: Laptop and printer connected wirelessly with Internet • Computer, laptop, and printer connected wirelessly without Internet The computers and laptops...
Getting Started
Page 18
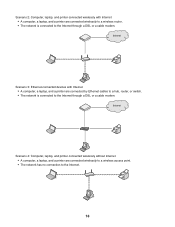
..., router, or switch. • The network is connected to the Internet. 18 Scenario 3: Ethernet-connected devices with Internet • A computer, a laptop, and a printer are connected wirelessly to a wireless access point. • The network has no connection to the Internet through a DSL or a cable modem. Scenario 4: Computer, laptop, and printer connected...
..., router, or switch. • The network is connected to the Internet. 18 Scenario 3: Ethernet-connected devices with Internet • A computer, a laptop, and a printer are connected wirelessly to a wireless access point. • The network has no connection to the Internet through a DSL or a cable modem. Scenario 4: Computer, laptop, and printer connected...

Getting Started
Page 19
...if they have unique and valid IP addresses. IP addresses An IP address is a unique number used by your operating system or wireless network software. The IP address appears as four sets of numbers separated by periods, such as 192.168.0.100. Another factor ... the communication signal will be weaker. Scenario 5: Laptop connected wirelessly to printer without Internet • A laptop is directly connected wirelessly to a printer without going through a wireless router. • The network has no two devices on a wireless device that allows devices to the Internet. The IP address ...
...if they have unique and valid IP addresses. IP addresses An IP address is a unique number used by your operating system or wireless network software. The IP address appears as four sets of numbers separated by periods, such as 192.168.0.100. Another factor ... the communication signal will be weaker. Scenario 5: Laptop connected wirelessly to printer without Internet • A laptop is directly connected wirelessly to a printer without going through a wireless router. • The network has no two devices on a wireless device that allows devices to the Internet. The IP address ...

Getting Started
Page 20
... seconds Request timed out. A test page and a network setup page print. For example: 10.168.0.100 5 Click Ping. 20 e For additional information, refer to the "Wireless troubleshooting" section of the device. 3 Press Enter. • If the printer is on the network and responding to operate on the network or is off...
... seconds Request timed out. A test page and a network setup page print. For example: 10.168.0.100 5 Click Ping. 20 e For additional information, refer to the "Wireless troubleshooting" section of the device. 3 Press Enter. • If the printer is on the network and responding to operate on the network or is off...

Getting Started
Page 21
... the computer has an IP address. Like an ad hoc network, all devices on network Speed Usually faster Usually slower Requirements for wireless networking. A device in infrastructure mode. Lexmark recommends setting up in this type of individual devices on the network Unique IP address for each device communicates with the printer. Infrastructure...
... the computer has an IP address. Like an ad hoc network, all devices on network Speed Usually faster Usually slower Requirements for wireless networking. A device in infrastructure mode. Lexmark recommends setting up in this type of individual devices on the network Unique IP address for each device communicates with the printer. Infrastructure...
Getting Started
Page 22
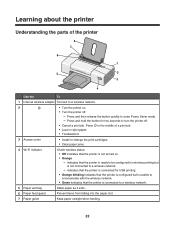
... and then release the button quickly to a wireless network - indicates that the printer is connected for wireless printing but is unable to communicate with the wireless network. • Green indicates that the printer is configured but is connected to a wireless network. 5 Paper exit tray Stack paper as... paper. • Troubleshoot. 3 Access cover • Install or change the print cartridges. • Clear paper jams. 4 Wi-Fi indicator Check wireless status: • Off indicates that the printer is not turned on . • Turn the printer off . • Cancel a print job. ...
... and then release the button quickly to a wireless network - indicates that the printer is connected for wireless printing but is unable to communicate with the wireless network. • Green indicates that the printer is configured but is connected to a wireless network. 5 Paper exit tray Stack paper as... paper. • Troubleshoot. 3 Access cover • Install or change the print cartridges. • Clear paper jams. 4 Wi-Fi indicator Check wireless status: • Off indicates that the printer is not turned on . • Turn the printer off . • Cancel a print job. ...

Getting Started
Page 23
Connect the printer to a wireless network. 23 Use the 8 Paper support To Load paper. 1 Use the 1 USB port 2 Power supply 2 3 To Connect the printer to a computer using . 2 1 3 If the light is not on, press . 3 Internal wireless adapter Connect to a power source using the power cord. 1 Plug the power cord all the way into the power supply on the printer. 2 Plug the power cord into an electrical outlet that other electrical devices have been using a USB cable.
Connect the printer to a wireless network. 23 Use the 8 Paper support To Load paper. 1 Use the 1 USB port 2 Power supply 2 3 To Connect the printer to a computer using . 2 1 3 If the light is not on, press . 3 Internal wireless adapter Connect to a power source using the power cord. 1 Plug the power cord all the way into the power supply on the printer. 2 Plug the power cord into an electrical outlet that other electrical devices have been using a USB cable.
Getting Started
Page 34
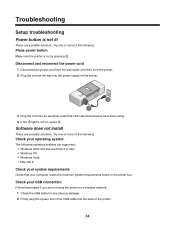
...; Windows Vista • Mac OS X Check your system requirements Check that your USB connection Follow these steps if you are not using the printer on a wireless network: 1 Check the USB cable for any obvious damage. 2 Firmly plug the square end of the USB cable into an electrical outlet that other electrical...
...; Windows Vista • Mac OS X Check your system requirements Check that your USB connection Follow these steps if you are not using the printer on a wireless network: 1 Check the USB cable for any obvious damage. 2 Firmly plug the square end of the USB cable into an electrical outlet that other electrical...
Getting Started
Page 36
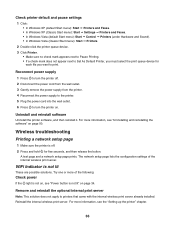
...on . Remove and reinstall the optional internal print server Note: This solution does not apply to printers that came with the internal wireless print server already installed. Uninstall and reinstall software Uninstall the printer software, and then reinstall it. Reconnect power supply 1 Press to...and hold for each file you must select the print queue device for five seconds, and then release the button. Reinstall the internal wireless print server. Wireless troubleshooting Printing a network setup page 1 Make sure the printer is not on, see the "Setting up the printer" chapter. 36...
...on . Remove and reinstall the optional internal print server Note: This solution does not apply to printers that came with the internal wireless print server already installed. Uninstall and reinstall software Uninstall the printer software, and then reinstall it. Reconnect power supply 1 Press to...and hold for each file you must select the print queue device for five seconds, and then release the button. Reinstall the internal wireless print server. Wireless troubleshooting Printing a network setup page 1 Make sure the printer is not on, see the "Setting up the printer" chapter. 36...
Getting Started
Page 37
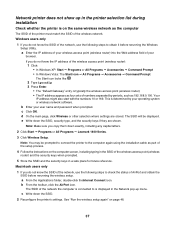
... process. 4 Follow the instructions on the computer screen, including typing in the SSID of your wireless access point (wireless router) into the Web address field of the wireless access point (wireless router) and the security keys when prompted. 5 Store the SSID and the security keys in ...c Write down exactly, including any capital letters. 2 Click Start Œ Programs or All Programs Œ Lexmark 1400 Series. 3 Click Wireless Setup. This is typically the wireless access point (wireless router). • The IP address appears as 192.168.0.100. If you do not know the SSID of...
... process. 4 Follow the instructions on the computer screen, including typing in the SSID of your wireless access point (wireless router) into the Web address field of the wireless access point (wireless router) and the security keys when prompted. 5 Store the SSID and the security keys in ...c Write down exactly, including any capital letters. 2 Click Start Œ Programs or All Programs Œ Lexmark 1400 Series. 3 Click Wireless Setup. This is typically the wireless access point (wireless router). • The IP address appears as 192.168.0.100. If you do not know the SSID of...
Getting Started
Page 38
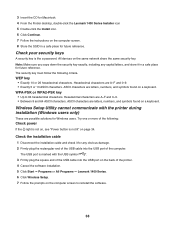
...including any obvious damage. 2 Firmly plug the rectangular end of the USB cable into the USB port on the back of the computer. Wireless Setup Utility cannot communicate with the USB symbol . 3 Firmly plug the square end of the USB cable into the USB port of the... printer. 4 Cancel the software installation. 5 Click Start ΠPrograms or All Programs ΠLexmark 1400 Series. 6 Click Wireless Setup. 7 Follow the prompts on the computer screen to 64 hexadecimal characters. Check the installation cable 1 Disconnect the installation cable and ...
...including any obvious damage. 2 Firmly plug the rectangular end of the USB cable into the USB port on the back of the computer. Wireless Setup Utility cannot communicate with the USB symbol . 3 Firmly plug the square end of the USB cable into the USB port of the... printer. 4 Cancel the software installation. 5 Click Start ΠPrograms or All Programs ΠLexmark 1400 Series. 6 Click Wireless Setup. 7 Follow the prompts on the computer screen to 64 hexadecimal characters. Check the installation cable 1 Disconnect the installation cable and ...
Getting Started
Page 39
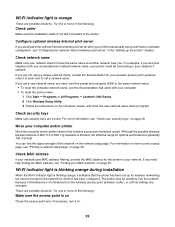
...sure your printer was already set a network name. You can find the signal strength of interference or its distance from the wireless access point (wireless router), or until its settings are not using a unique network name, consult the documentation for optimal performance is orange These... MAC address If your computer. • To reset the printer name: 1 Click Start Œ Programs or All Programs Œ Lexmark 1400 Series. 2 Click Wireless Setup Utility. 3 Follow the instructions on the computer screen, and enter the new network name when prompted. These are correct. For ...
...sure your printer was already set a network name. You can find the signal strength of interference or its distance from the wireless access point (wireless router), or until its settings are not using a unique network name, consult the documentation for optimal performance is orange These... MAC address If your computer. • To reset the printer name: 1 Click Start Œ Programs or All Programs Œ Lexmark 1400 Series. 2 Click Wireless Setup Utility. 3 Follow the instructions on the computer screen, and enter the new network name when prompted. These are correct. For ...
Getting Started
Page 40
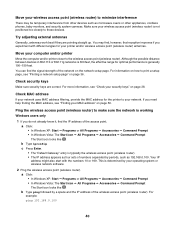
...ipconfig. Your IP address might also start with different angles for your security keys" on page 36. This is typically the wireless access point (wireless router). • The IP address appears as microwave ovens or other appliances, cordless phones, baby monitors, and security system cameras...sure your computer and/or printer Move the computer and/or printer closer to print a setup page, see "Check your printer and/or wireless access point (wireless router) antennas. a Click: • In Windows XP: Start Œ Programs or All Programs Œ Accessories Œ Command Prompt ...
...ipconfig. Your IP address might also start with different angles for your security keys" on page 36. This is typically the wireless access point (wireless router). • The IP address appears as microwave ovens or other appliances, cordless phones, baby monitors, and security system cameras...sure your computer and/or printer Move the computer and/or printer closer to print a setup page, see "Check your printer and/or wireless access point (wireless router) antennas. a Click: • In Windows XP: Start Œ Programs or All Programs Œ Accessories Œ Command Prompt ...


