Getting Started
Page 42
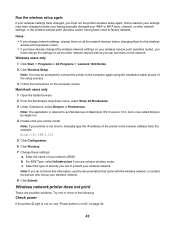
...of your wireless network. or the wireless access point (wireless router) having manually changed , you must change the settings on all the network devices before you have changed your printer model. ...printer is not shown, manually type the IP address of the printer in Macintosh OS X version 10.3, but is referred to factory defaults. Note: If your wireless network. 8 Click Submit. Note: If you are possible solutions. Windows users only 1 Click Start ΠPrograms or All Programs ΠLexmark 1400 Series. 2 Click Wireless Setup. Wireless network printer...
...of your wireless network. or the wireless access point (wireless router) having manually changed , you must change the settings on all the network devices before you have changed your printer model. ...printer is not shown, manually type the IP address of the printer in Macintosh OS X version 10.3, but is referred to factory defaults. Note: If your wireless network. 8 Click Submit. Note: If you are possible solutions. Windows users only 1 Click Start ΠPrograms or All Programs ΠLexmark 1400 Series. 2 Click Wireless Setup. Wireless network printer...
Getting Started
Page 48
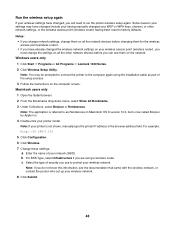
... to as part of your network (SSID). Run the wireless setup again If your wireless settings have already changed the wireless network settings on your wireless access point (wireless router), you must change them on all the other network settings, or the wireless access point (wireless router) having manually changed , you will need to run the printer wireless setup again.
... to as part of your network (SSID). Run the wireless setup again If your wireless settings have already changed the wireless network settings on your wireless access point (wireless router), you must change them on all the other network settings, or the wireless access point (wireless router) having manually changed , you will need to run the printer wireless setup again.

Getting Started
Page 49
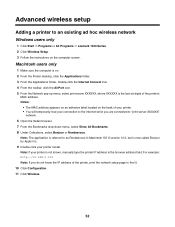
..., and make the changes you use to the computer again using a wireless router. Changing wireless settings after installation To change your printer is not shown, manually type the printer's IP address in Macintosh OS X version 10.3, but is now called... Bonjour by Apple Inc. 4 Double-click your network (SSID). Note: If your password, network name, or other wireless setting: Windows users only 1 Click Start ΠPrograms or All Programs ΠLexmark 1400 Series. 2 Click Wireless...
..., and make the changes you use to the computer again using a wireless router. Changing wireless settings after installation To change your printer is not shown, manually type the printer's IP address in Macintosh OS X version 10.3, but is now called... Bonjour by Apple Inc. 4 Double-click your network (SSID). Note: If your password, network name, or other wireless setting: Windows users only 1 Click Start ΠPrograms or All Programs ΠLexmark 1400 Series. 2 Click Wireless...
Getting Started
Page 52
... Windows users only 1 Click Start Œ Programs or All Programs Œ Lexmark 1400 Series. 2 Click Wireless Setup. 3 Follow the instructions on the back of your printer. • You will temporarily lose your printer model. For example: http://10.168.0.101 Note: If you are connected to the Internet while ...menu, select print server XXXXXX, where XXXXXX is the last six digits of the printer, print the network setup page to as Rendezvous in Macintosh OS X version 10.3, but is not shown, manually type the printer IP address in the browser address field. Notes: • The MAC address ...
... Windows users only 1 Click Start Œ Programs or All Programs Œ Lexmark 1400 Series. 2 Click Wireless Setup. 3 Follow the instructions on the back of your printer. • You will temporarily lose your printer model. For example: http://10.168.0.101 Note: If you are connected to the Internet while ...menu, select print server XXXXXX, where XXXXXX is the last six digits of the printer, print the network setup page to as Rendezvous in Macintosh OS X version 10.3, but is not shown, manually type the printer IP address in the browser address field. Notes: • The MAC address ...
Getting Started
Page 58
... received The name of a wireless network. A setting for a wireless device that lets it communicate directly with other network information of a Windows computer A hardware address that uniquely identifies each device on a network. The address may be assigned manually by the device (AutoIP address... network name ping printer nickname router security key signal strength SSID (Service Set Identifier) Static IP address switch A setting for a wireless device that lets it on the network A device that shares a single Internet connection with multiple computers or other wireless devices using ....
... received The name of a wireless network. A setting for a wireless device that lets it communicate directly with other network information of a Windows computer A hardware address that uniquely identifies each device on a network. The address may be assigned manually by the device (AutoIP address... network name ping printer nickname router security key signal strength SSID (Service Set Identifier) Static IP address switch A setting for a wireless device that lets it on the network A device that shares a single Internet connection with multiple computers or other wireless devices using ....

User's Guide
Page 26
Note: Do not force iron-on transfers. Note: To manually select a paper type, select Use my choice. 7 From the drop-down ... the Print Layout tab, select Mirror if you have a program that are open. 6 Print the iron-on transfers into the printer. Printing iron-on transfers 1 Load iron-on transfers. 2 With your image open, click File ΠPrint. 3 Click... Click the Quality/Copies tab. 5 From the Quality/Speed section, select Photo. 6 From the Paper Type section, select Use printer sensor to be surrounded by a border, select Print Page Borders. 7 Click OK. 8 Click OK or Print. 26 Select...
Note: Do not force iron-on transfers. Note: To manually select a paper type, select Use my choice. 7 From the drop-down ... the Print Layout tab, select Mirror if you have a program that are open. 6 Print the iron-on transfers into the printer. Printing iron-on transfers 1 Load iron-on transfers. 2 With your image open, click File ΠPrint. 3 Click... Click the Quality/Copies tab. 5 From the Quality/Speed section, select Photo. 6 From the Paper Type section, select Use printer sensor to be surrounded by a border, select Print Page Borders. 7 Click OK. 8 Click OK or Print. 26 Select...
User's Guide
Page 34
... satisfactory, replace the print cartridges. You may also align the print cartridges manually. 1 Load plain paper. 2 Open the Solution Center. 3 From the Maintenance tab, click Align to step 2. 2 Clean the print cartridge nozzles. Use Lexmark photo paper if you want, follow these steps: 1 Align the print...surface with the print quality of a document, make sure you aligned the cartridges to align the print cartridges: • After you install the printer software. • When you send your fingers or sharp objects. For more information, see "Removing a used print cartridge" on page 32...
... satisfactory, replace the print cartridges. You may also align the print cartridges manually. 1 Load plain paper. 2 Open the Solution Center. 3 From the Maintenance tab, click Align to step 2. 2 Clean the print cartridge nozzles. Use Lexmark photo paper if you want, follow these steps: 1 Align the print...surface with the print quality of a document, make sure you aligned the cartridges to align the print cartridges: • After you install the printer software. • When you send your fingers or sharp objects. For more information, see "Removing a used print cartridge" on page 32...


