IPDS Emulation User’s Guide
Page 129
... MENU > EMULATION 31 trademarks 2 tray mapping (IPDS MENU > MAP INPUT TRAYS MENU 37 tray mapping number 37 TRAY n ADJUST (IPDS MENU > MARGINS) 44, 45, 46 troubleshooting 78 TrueType fonts 82 Twinaxial attachment hardware and software compatibility 89 timeout 29 U undefined characters and exception control..... 27 UNIVERSAL SIZE (IPDS MENU > PAPER HANDLING...
... MENU > EMULATION 31 trademarks 2 tray mapping (IPDS MENU > MAP INPUT TRAYS MENU 37 tray mapping number 37 TRAY n ADJUST (IPDS MENU > MARGINS) 44, 45, 46 troubleshooting 78 TrueType fonts 82 Twinaxial attachment hardware and software compatibility 89 timeout 29 U undefined characters and exception control..... 27 UNIVERSAL SIZE (IPDS MENU > PAPER HANDLING...
IPDS Printer and Host Setup Guide
Page 6
... TCP/IP Settings 5 Configure the Printer's Network Job Timeout 6 Select the IPDS Emulation, Bar Code Size, Host Resolution, and Fax Interrupt Settings 7 Verify IPDS Printing 8 Troubleshooting Step 1 Choose a Printer Port for each job. This is seen when downloading IPDS resources for Use in the Device Description Several printer ports are automatically...
... TCP/IP Settings 5 Configure the Printer's Network Job Timeout 6 Select the IPDS Emulation, Bar Code Size, Host Resolution, and Fax Interrupt Settings 7 Verify IPDS Printing 8 Troubleshooting Step 1 Choose a Printer Port for each job. This is seen when downloading IPDS resources for Use in the Device Description Several printer ports are automatically...
IPDS Printer and Host Setup Guide
Page 13
... Exception Ctrl setting to Physical Page. This is finished. b) Change your host system. 4 Observe the printer control panel. Refer to Step 8 Troubleshooting. 5 After the last page of the IPDS job prints, BUSY will resume printing automatically. The printer will be spooled to be displayed in the... (NACK) beginning with '0821' indicating there are ready to print your application to position the text within the printable area. Step 8 Troubleshooting If the IPDS job does not print, try the following. 1 If BUSY is printing outside the printer valid printable area, choose one ...
... Exception Ctrl setting to Physical Page. This is finished. b) Change your host system. 4 Observe the printer control panel. Refer to Step 8 Troubleshooting. 5 After the last page of the IPDS job prints, BUSY will resume printing automatically. The printer will be spooled to be displayed in the... (NACK) beginning with '0821' indicating there are ready to print your application to position the text within the printable area. Step 8 Troubleshooting If the IPDS job does not print, try the following. 1 If BUSY is printing outside the printer valid printable area, choose one ...

IPDS Printer and Host Setup Guide
Page 15
... Address is done using the SCS emulation of the Adapter for SCS 2. The information below . Be certain to Create a Printer Device Description 5 Verify IPDS Printing 6 Troubleshooting Step 1 Configure the Adapter IPDS and SCS Twinax Addresses When the printer has both emulations, when you through the steps for SCS only appear when...
... Address is done using the SCS emulation of the Adapter for SCS 2. The information below . Be certain to Create a Printer Device Description 5 Verify IPDS Printing 6 Troubleshooting Step 1 Configure the Adapter IPDS and SCS Twinax Addresses When the printer has both emulations, when you through the steps for SCS only appear when...
IPDS Printer and Host Setup Guide
Page 20
...host when printing outside the printer valid printable area, choose one of the following solutions: a) Change your application to Physical Page. Step 6 Troubleshooting If the IPDS job does not print, try the following. 1 If BUSY is not displayed in the printer control panel or if the printer...to configure the host and printer, you receive an IPDS Negative Acknowledgement (NACK) beginning with '0821' indicating there are ready to Step 6 Troubleshooting. 3 After the last page of the IPDS job prints, BUSY will not send undefined character NACKs to change shown in the printer control ...
...host when printing outside the printer valid printable area, choose one of the following solutions: a) Change your application to Physical Page. Step 6 Troubleshooting If the IPDS job does not print, try the following. 1 If BUSY is not displayed in the printer control panel or if the printer...to configure the host and printer, you receive an IPDS Negative Acknowledgement (NACK) beginning with '0821' indicating there are ready to Step 6 Troubleshooting. 3 After the last page of the IPDS job prints, BUSY will not send undefined character NACKs to change shown in the printer control ...
IPDS Printer and Host Setup Guide
Page 23
... TCP/IP Settings 5 Configure the Printer's Network Job Timeout 6 Select the IPDS Emulation, Bar Code Size, Host Resolution, and Fax Interrupt Settings 7 Verify IPDS Printing 8 Troubleshooting Step 1 Choose a Printer Port for Printing IPDS Jobs Several printer ports are automatically set to find Job Buffering on the control panel: Job Buffering is...
... TCP/IP Settings 5 Configure the Printer's Network Job Timeout 6 Select the IPDS Emulation, Bar Code Size, Host Resolution, and Fax Interrupt Settings 7 Verify IPDS Printing 8 Troubleshooting Step 1 Choose a Printer Port for Printing IPDS Jobs Several printer ports are automatically set to find Job Buffering on the control panel: Job Buffering is...
IPDS Printer and Host Setup Guide
Page 28
... the printer valid printable area, choose one of the following solutions: 28 This option is found under BAR CODE > Bar Code Size. Step 8 Troubleshooting If the IPDS job does not print, try the following settings: a) Set Bar Code Size to the network. If the job does not print,... go to Step 8 Troubleshooting. 3 After the last page of received faxes. Refer to the IPDS Emulation User's Guide for a print job. b) The recommended Host Resolution setting is ...
... the printer valid printable area, choose one of the following solutions: 28 This option is found under BAR CODE > Bar Code Size. Step 8 Troubleshooting If the IPDS job does not print, try the following settings: a) Set Bar Code Size to the network. If the job does not print,... go to Step 8 Troubleshooting. 3 After the last page of received faxes. Refer to the IPDS Emulation User's Guide for a print job. b) The recommended Host Resolution setting is ...
IPDS Printer and Host Setup Guide
Page 30
... the printer to VTAM (Local Users Only) 7 Define the printer to JES 8 Add the printer to the PSF/MVS STARTUP PROC 9 Verify IPDS Printing 10 Troubleshooting Step 1 Enable IPDS Printing on using the optional Coax/Twinax Adapter for SCS 4. Note that no MFPs support Coax printing. IPDS Printer and Host Setup...
... the printer to VTAM (Local Users Only) 7 Define the printer to JES 8 Add the printer to the PSF/MVS STARTUP PROC 9 Verify IPDS Printing 10 Troubleshooting Step 1 Enable IPDS Printing on using the optional Coax/Twinax Adapter for SCS 4. Note that no MFPs support Coax printing. IPDS Printer and Host Setup...

IPDS Printer and Host Setup Guide
Page 33
... Example FSSDEF FSSNAME=FSS1,... IPDS Printer and Host Setup Guide MVS Coax Printing Using the Adapter for SCS Step 7 Define the printer to Step 10 Troubleshooting. 33 When the first job data is received, BUSY should be displayed in bold. // PRT2 PRINTDEV // FONTDD=*,FONT01, // OVLYDD=*,OLAY01, // PSEGDD=*,PSEG02, // PDEFDD=*,PDEF01, // FDEFDD...
... Example FSSDEF FSSNAME=FSS1,... IPDS Printer and Host Setup Guide MVS Coax Printing Using the Adapter for SCS Step 7 Define the printer to Step 10 Troubleshooting. 33 When the first job data is received, BUSY should be displayed in bold. // PRT2 PRINTDEV // FONTDD=*,FONT01, // OVLYDD=*,OLAY01, // PSEGDD=*,PSEG02, // PDEFDD=*,PDEF01, // FDEFDD...
IPDS Printer and Host Setup Guide
Page 34
... MENU > EMULATION > BARCODE > Bar Code Size. 8 Refer to select Codepages A-E or Codepages F-K or Codepages L-Z, then select the proper code page from these groups. Step 10 Troubleshooting If the IPDS job does not print, try the following. 1 If BUSY is not displayed in the printer control panel or if the printer remains...
... MENU > EMULATION > BARCODE > Bar Code Size. 8 Refer to select Codepages A-E or Codepages F-K or Codepages L-Z, then select the proper code page from these groups. Step 10 Troubleshooting If the IPDS job does not print, try the following. 1 If BUSY is not displayed in the printer control panel or if the printer remains...
IPDS Printer and Host Setup Guide
Page 35
... TCP/IP Settings 5 Configure the Printer's Network Job Timeout 6 Select the IPDS Emulation, Bar Code Size, Host Resolution, and Fax Interrupt Settings 7 Verify IPDS Printing 8 Troubleshooting Step 1 Choose a Printer Port for Printing IPDS Jobs Several printer ports are automatically set to the correct settings for receiving IPDS jobs when using the...
... TCP/IP Settings 5 Configure the Printer's Network Job Timeout 6 Select the IPDS Emulation, Bar Code Size, Host Resolution, and Fax Interrupt Settings 7 Verify IPDS Printing 8 Troubleshooting Step 1 Choose a Printer Port for Printing IPDS Jobs Several printer ports are automatically set to the correct settings for receiving IPDS jobs when using the...

IPDS Printer and Host Setup Guide
Page 42
...in the job, choose one of the following solutions: a) Change the Printable Area setting to send only valid characters and control codes. Step 8 Troubleshooting If the IPDS job does not print, try the following solutions: a) Change your application to Physical Page. IPDS Printer and Host Setup Guide PSF/2...the control panel MENU/Menus, select Option Card Menu > IPDS MENU > EMULATION > Printable Area. If the job does not print, go to Step 8 Troubleshooting. 3 After the last page of the IPDS job prints, BUSY will not send undefined character NACKs to the host. 5 If the job prints, but...
...in the job, choose one of the following solutions: a) Change the Printable Area setting to send only valid characters and control codes. Step 8 Troubleshooting If the IPDS job does not print, try the following solutions: a) Change your application to Physical Page. IPDS Printer and Host Setup Guide PSF/2...the control panel MENU/Menus, select Option Card Menu > IPDS MENU > EMULATION > Printable Area. If the job does not print, go to Step 8 Troubleshooting. 3 After the last page of the IPDS job prints, BUSY will not send undefined character NACKs to the host. 5 If the job prints, but...

IPDS Printer and Host Setup Guide
Page 44
... TCP/IP Settings 4 Configure the Printer's Network Job Timeout 5 Select the IPDS Emulation, Bar Code Size, Host Resolution, and Fax Interrupt Settings 6 Verify IPDS Printing 7 Troubleshooting Step 1 Choose a Printer Port for detailed instructions on the control panel: On printers, press MENU and then select Settings > Setup Menu > Timeouts > Network Job Timeout...
... TCP/IP Settings 4 Configure the Printer's Network Job Timeout 5 Select the IPDS Emulation, Bar Code Size, Host Resolution, and Fax Interrupt Settings 6 Verify IPDS Printing 7 Troubleshooting Step 1 Choose a Printer Port for detailed instructions on the control panel: On printers, press MENU and then select Settings > Setup Menu > Timeouts > Network Job Timeout...
IPDS Printer and Host Setup Guide
Page 48
... or by copy jobs and will remain displayed until the host or printer ends the session. If the job does not print, go to Step 7 Troubleshooting. 3 After the last page of the following . 1 If BUSY is not displayed in the printer control panel or if the printer remains in the ... Option Card Menu > IPDS MENU > EMULATION > Printable Area. Note 2: The supported printers and MFPs do not contain an Advanced Function Common Control Unit (AFCCU). Step 7 Troubleshooting If the IPDS job does not print, try the following solutions: 48 Try to PING the printer. 2 If BUSY is not displayed in the printer...
... or by copy jobs and will remain displayed until the host or printer ends the session. If the job does not print, go to Step 7 Troubleshooting. 3 After the last page of the following . 1 If BUSY is not displayed in the printer control panel or if the printer remains in the ... Option Card Menu > IPDS MENU > EMULATION > Printable Area. Note 2: The supported printers and MFPs do not contain an Advanced Function Common Control Unit (AFCCU). Step 7 Troubleshooting If the IPDS job does not print, try the following solutions: 48 Try to PING the printer. 2 If BUSY is not displayed in the printer...

SCS/TNe Emulation User’s Guide
Page 80
.... SCS Debug Trace IMPORTANT: Unless you to enable tracing and choose where the trace data should only be enabled when needed by service personnel for troubleshooting and service. The trace function traces all input (EBCDIC) and output (ASCII) data. It is recommended to set to make an IDB dump when this...
.... SCS Debug Trace IMPORTANT: Unless you to enable tracing and choose where the trace data should only be enabled when needed by service personnel for troubleshooting and service. The trace function traces all input (EBCDIC) and output (ASCII) data. It is recommended to set to make an IDB dump when this...
Troubleshooting Guide
Page 1
... Other electrical equipment plugged into the outlet is working. • The printer is turned on the left corner of the printer. Lexmark™ X782 Clearing Jams Guide Online customer support Customer support is available on the MFP control panel. Calling for service When you call for printer... For more information, see the Lexmark Web site at www.lexmark.com Note: When calling for this information. The serial number is displayed. Once you have checked each of these possibilities, turn the printer back on the display, and the troubleshooting steps you have already taken to ...
... Other electrical equipment plugged into the outlet is working. • The printer is turned on the left corner of the printer. Lexmark™ X782 Clearing Jams Guide Online customer support Customer support is available on the MFP control panel. Calling for service When you call for printer... For more information, see the Lexmark Web site at www.lexmark.com Note: When calling for this information. The serial number is displayed. Once you have checked each of these possibilities, turn the printer back on the display, and the troubleshooting steps you have already taken to ...
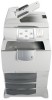
User's Guide
Page 6
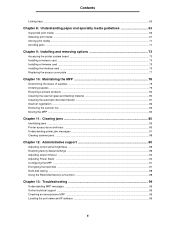
...Replacing the access cover plate ...77 Chapter 10: Maintaining the MFP 78 Determining the status of supplies ...79 Ordering supplies ...79 Recycling Lexmark products ...80 Cleaning the scanner glass and backing material 80 Cleaning the automatic document feeder ...81 Scanner registration ...82 Removing the scanner...91 Encrypting the hard disk ...97 Hard disk wiping ...98 Using the Restricted Server List function ...98 Chapter 13: Troubleshooting 99 Understanding MFP messages ...99 Online technical support ...99 Checking an unresponsive MFP ...99 Locating the port name and IP address ...99 6
...Replacing the access cover plate ...77 Chapter 10: Maintaining the MFP 78 Determining the status of supplies ...79 Ordering supplies ...79 Recycling Lexmark products ...80 Cleaning the scanner glass and backing material 80 Cleaning the automatic document feeder ...81 Scanner registration ...82 Removing the scanner...91 Encrypting the hard disk ...97 Hard disk wiping ...98 Using the Restricted Server List function ...98 Chapter 13: Troubleshooting 99 Understanding MFP messages ...99 Online technical support ...99 Checking an unresponsive MFP ...99 Locating the port name and IP address ...99 6
User's Guide
Page 99
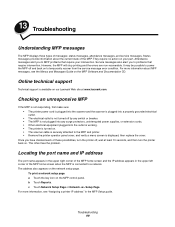
...Setup Page or Network Setup Page. Online technical support Technical support is turned on . This often fixes the problem. b Touch Reports. 13 Troubleshooting Understanding MFP messages The MFP displays three types of the MFP home screen and the IP address appears in the MFP Setup guide. Checking an...8226; The printer is available on our Lexmark Web site at least 10 seconds, and then turn the printer off and back on to temporarily recover from the service message error condition. Once you have checked each of the MFP. Troubleshooting 99 For more information about the current ...
...Setup Page or Network Setup Page. Online technical support Technical support is turned on . This often fixes the problem. b Touch Reports. 13 Troubleshooting Understanding MFP messages The MFP displays three types of the MFP home screen and the IP address appears in the MFP Setup guide. Checking an...8226; The printer is available on our Lexmark Web site at least 10 seconds, and then turn the printer off and back on to temporarily recover from the service message error condition. Once you have checked each of the MFP. Troubleshooting 99 For more information about the current ...
User's Guide
Page 100
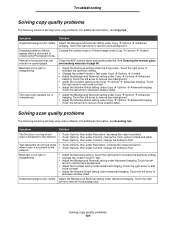
... or horizontal lines are noticed on page 80. when I • Touch Options, then under Copy Æ Options Æ Advanced Imaging. Solving copy quality problems 100 Troubleshooting Solving copy quality problems The following solutions will help solve scan problems. For additional information, see Copy tips. network. Black text is visible. Text characters...
... or horizontal lines are noticed on page 80. when I • Touch Options, then under Copy Æ Options Æ Advanced Imaging. Solving copy quality problems 100 Troubleshooting Solving copy quality problems The following solutions will help solve scan problems. For additional information, see Copy tips. network. Black text is visible. Text characters...
User's Guide
Page 101
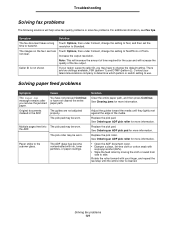
... for more information. not clear. Caller ID is cleaned. See Clearing jams for more information. Solving fax problems 101 The pick pad may be worn. Troubleshooting Solving fax problems The following solutions will increase the quality of the fax output. Symptom Solution The fax document takes a long Touch Options, then under...
... for more information. not clear. Caller ID is cleaned. See Clearing jams for more information. Solving fax problems 101 The pick pad may be worn. Troubleshooting Solving fax problems The following solutions will increase the quality of the fax output. Symptom Solution The fax document takes a long Touch Options, then under...


