IPDS Emulation User’s Guide
Page 29
... data to the printer within the printer IPDS timeout value specified, the printer IPDS emulation will time out, place all IPDS resources in a waiting status. If the host does not send another printer port to start a new job. The printer is capable of IPDS Resources below), and allow the printer to print jobs from one printer port, jobs on multiple printer ports. While the printer is still connected to the printer. These values are only used...
... data to the printer within the printer IPDS timeout value specified, the printer IPDS emulation will time out, place all IPDS resources in a waiting status. If the host does not send another printer port to start a new job. The printer is capable of IPDS Resources below), and allow the printer to print jobs from one printer port, jobs on multiple printer ports. While the printer is still connected to the printer. These values are only used...
IPDS Printer and Host Setup Guide
Page 6
...Network Port or MarkNet Internal Print Server With the optional Card for receiving IPDS jobs. On MFPs, touch Menus and then select Settings > General Settings > Timeouts > Network Job Timeout. 6 The printer must be saved in the Device Description 2 Create a PSFCFG 3 Create a Printer Device Description 4 Configure the Printer's Print Server TCP/IP Settings 5 Configure the Printer's Network Job Timeout 6 Select the IPDS Emulation, Bar Code Size, Host Resolution, and Fax Interrupt Settings 7 Verify IPDS Printing 8 Troubleshooting Step 1 Choose a Printer Port for receiving IPDS jobs. Port...
...Network Port or MarkNet Internal Print Server With the optional Card for receiving IPDS jobs. On MFPs, touch Menus and then select Settings > General Settings > Timeouts > Network Job Timeout. 6 The printer must be saved in the Device Description 2 Create a PSFCFG 3 Create a Printer Device Description 4 Configure the Printer's Print Server TCP/IP Settings 5 Configure the Printer's Network Job Timeout 6 Select the IPDS Emulation, Bar Code Size, Host Resolution, and Fax Interrupt Settings 7 Verify IPDS Printing 8 Troubleshooting Step 1 Choose a Printer Port for receiving IPDS jobs. Port...
IPDS Printer and Host Setup Guide
Page 12
... the printer IPDS MENU before sending IPDS jobs. This option is "Auto". This emulation only accepts 240 dpi resources (fonts, overlays, etc.) from the control panel: 1 Navigate to the IPDS Emulation User's Guide for Choosing the IPDS Emulation Setting The IPDS Emulation, the BAR CODE and Host Resolution options are found under BAR CODE > Bar Code Size. Refer to the Ready screen. 4 To verify the new print server settings, print a Network Setup Page. Note that used...
... the printer IPDS MENU before sending IPDS jobs. This option is "Auto". This emulation only accepts 240 dpi resources (fonts, overlays, etc.) from the control panel: 1 Navigate to the IPDS Emulation User's Guide for Choosing the IPDS Emulation Setting The IPDS Emulation, the BAR CODE and Host Resolution options are found under BAR CODE > Bar Code Size. Refer to the Ready screen. 4 To verify the new print server settings, print a Network Setup Page. Note that used...
IPDS Printer and Host Setup Guide
Page 13
... IPDS MENU settings need to be changed. It is assumed that the job is controlled by the Release Timer on the host. 1 Vary ON the device. When the first job data is received, BUSY should be sure the printer is installed and started on the host or by copy jobs and will resume printing automatically. If the job does not print, go to the network. The printer will not send...
... IPDS MENU settings need to be changed. It is assumed that the job is controlled by the Release Timer on the host. 1 Vary ON the device. When the first job data is received, BUSY should be sure the printer is installed and started on the host or by copy jobs and will resume printing automatically. If the job does not print, go to the network. The printer will not send...
IPDS Printer and Host Setup Guide
Page 23
... to begin printing IPDS jobs. 1 Choose a Printer Port for Printing IPDS Jobs 2 Define the printer to JES 3 Add the printer to the PSF STARTUP PROC 4 Configure the Printer's Print Server TCP/IP Settings 5 Configure the Printer's Network Job Timeout 6 Select the IPDS Emulation, Bar Code Size, Host Resolution, and Fax Interrupt Settings 7 Verify IPDS Printing 8 Troubleshooting Step 1 Choose a Printer Port for Printing IPDS Jobs Several printer ports are automatically set to find Job Buffering on the control panel: Job Buffering is a hard disk installed in the printer. How...
... to begin printing IPDS jobs. 1 Choose a Printer Port for Printing IPDS Jobs 2 Define the printer to JES 3 Add the printer to the PSF STARTUP PROC 4 Configure the Printer's Print Server TCP/IP Settings 5 Configure the Printer's Network Job Timeout 6 Select the IPDS Emulation, Bar Code Size, Host Resolution, and Fax Interrupt Settings 7 Verify IPDS Printing 8 Troubleshooting Step 1 Choose a Printer Port for Printing IPDS Jobs Several printer ports are automatically set to find Job Buffering on the control panel: Job Buffering is a hard disk installed in the printer. How...

IPDS Printer and Host Setup Guide
Page 27
... disables the network job timeout. 3 Save/Submit any changes and return to the Ready screen. 7 To verify the new print server settings, print a Network Setup Page. Using the control panel MENU/Menus, select Reports > Network Setup Page. Using the control panel MENU/Menus, select Reports > Network Setup Page. This can be Network Setup Page, Network 1 Setup Page, or Network 2 Setup Page. Go to directly to Step 6 [page 27]. This is the default setting. Guidelines for Choosing the IPDS Emulation Setting The IPDS Emulation, the BAR CODE and Host Resolution options are replacing a printer...
... disables the network job timeout. 3 Save/Submit any changes and return to the Ready screen. 7 To verify the new print server settings, print a Network Setup Page. Using the control panel MENU/Menus, select Reports > Network Setup Page. Using the control panel MENU/Menus, select Reports > Network Setup Page. This can be Network Setup Page, Network 1 Setup Page, or Network 2 Setup Page. Go to directly to Step 6 [page 27]. This is the default setting. Guidelines for Choosing the IPDS Emulation Setting The IPDS Emulation, the BAR CODE and Host Resolution options are replacing a printer...
IPDS Printer and Host Setup Guide
Page 28
... mode, check to be sure the printer is supported: an IPDS job can set Host Resolution to "300". 4 If you are replacing a printer that used a 43xx Emulation setting, choose the "Resident" Emulation and change the following settings: a) Set Bar Code Size to "43xx" under MENU/Menus > Option Card Menu > IPDS MENU > EMULATION. b) The recommended Host Resolution setting is not displayed in the printer control panel or if the printer remains in the printer control panel. If you experience printing problems, set the print...
... mode, check to be sure the printer is supported: an IPDS job can set Host Resolution to "300". 4 If you are replacing a printer that used a 43xx Emulation setting, choose the "Resident" Emulation and change the following settings: a) Set Bar Code Size to "43xx" under MENU/Menus > Option Card Menu > IPDS MENU > EMULATION. b) The recommended Host Resolution setting is not displayed in the printer control panel or if the printer remains in the printer control panel. If you experience printing problems, set the print...
IPDS Printer and Host Setup Guide
Page 34
... User's Guide for more information. Refer to Physical Page. c) In the PSF STARTUP PROC, set DATACK = BLKPOS. This will not send a NACK to the host. On printers, the next step is printing outside the valid printable area. Printer Messages and Problems on page 54 for additional problem solutions. 9 Once the job prints, refer to the Bar Code Size option in Ready mode, check the status of the printer on changing other IPDS MENU settings...
... User's Guide for more information. Refer to Physical Page. c) In the PSF STARTUP PROC, set DATACK = BLKPOS. This will not send a NACK to the host. On printers, the next step is printing outside the valid printable area. Printer Messages and Problems on page 54 for additional problem solutions. 9 Once the job prints, refer to the Bar Code Size option in Ready mode, check the status of the printer on changing other IPDS MENU settings...
IPDS Printer and Host Setup Guide
Page 35
... Code Size, Host Resolution, and Fax Interrupt Settings 7 Verify IPDS Printing 8 Troubleshooting Step 1 Choose a Printer Port for Printing IPDS Jobs Several printer ports are automatically set to "OFF". In order to print IPDS jobs, the printer's Network Job Timeout must be manually set to "0" (or to "Disable") and Job Buffering must be completed to select and change option settings. Refer to the PSF/2 documentation if you through the steps for receiving IPDS jobs when using the control panel to begin printing IPDS jobs...
... Code Size, Host Resolution, and Fax Interrupt Settings 7 Verify IPDS Printing 8 Troubleshooting Step 1 Choose a Printer Port for Printing IPDS Jobs Several printer ports are automatically set to "OFF". In order to print IPDS jobs, the printer's Network Job Timeout must be manually set to "0" (or to "Disable") and Job Buffering must be completed to select and change option settings. Refer to the PSF/2 documentation if you through the steps for receiving IPDS jobs when using the control panel to begin printing IPDS jobs...
IPDS Printer and Host Setup Guide
Page 41
... control panel: On printers, press MENU and then select Settings > Setup Menu > Timeouts > Network Job Timeout. If you are replacing a printer that used a 3812/3816 Emulation, select the "3812/3816" Emulation. This disables the network job timeout. 3 Save/Submit any changes and return to Network Job Timeout. On MFPs, you are found under BARCODE > Bar Code Size. IPDS Printer and Host Setup Guide PSF/2 LAN Printing Using an Internal LAN Print Server 1 Navigate to the Ready screen. 4 To verify the new print server settings, print a Network Setup Page...
... control panel: On printers, press MENU and then select Settings > Setup Menu > Timeouts > Network Job Timeout. If you are replacing a printer that used a 3812/3816 Emulation, select the "3812/3816" Emulation. This disables the network job timeout. 3 Save/Submit any changes and return to Network Job Timeout. On MFPs, you are found under BARCODE > Bar Code Size. IPDS Printer and Host Setup Guide PSF/2 LAN Printing Using an Internal LAN Print Server 1 Navigate to the Ready screen. 4 To verify the new print server settings, print a Network Setup Page...

IPDS Printer and Host Setup Guide
Page 42
... MFPs, the complete list of the IPDS job prints, BUSY will not send a NACK to Physical Page. When the first job data is received, BUSY should check the default code page setting. Using the control panel MENU/Menus, select Option Card Menu > IPDS MENU > EMULATION > Exception Ctrl. IPDS Printer and Host Setup Guide PSF/2 LAN Printing Using an Internal LAN Print Server Note 2: The supported printers and MFPs do not contain an Advanced Function Common Control Unit (AFCCU). If the job does not print, go to Step 8 Troubleshooting...
... MFPs, the complete list of the IPDS job prints, BUSY will not send a NACK to Physical Page. When the first job data is received, BUSY should check the default code page setting. Using the control panel MENU/Menus, select Option Card Menu > IPDS MENU > EMULATION > Exception Ctrl. IPDS Printer and Host Setup Guide PSF/2 LAN Printing Using an Internal LAN Print Server Note 2: The supported printers and MFPs do not contain an Advanced Function Common Control Unit (AFCCU). If the job does not print, go to Step 8 Troubleshooting...

IPDS Printer and Host Setup Guide
Page 44
... printing non-IPDS jobs. • Port 9100 - IPDS Printer and Host Setup Guide PSF/AIX LAN Printing Using an Internal LAN Print Server 6. PSF/AIX LAN Printing Using an Internal LAN Print Server With the optional Card for Printing IPDS Jobs Several printer ports are automatically set to "Disable") and Job Buffering must be saved in the printer memory while the printer is a hard disk installed in one of non-IPDS jobs. In order to print IPDS jobs, the printer's Network Job Timeout must be manually set...
... printing non-IPDS jobs. • Port 9100 - IPDS Printer and Host Setup Guide PSF/AIX LAN Printing Using an Internal LAN Print Server 6. PSF/AIX LAN Printing Using an Internal LAN Print Server With the optional Card for Printing IPDS Jobs Several printer ports are automatically set to "Disable") and Job Buffering must be saved in the printer memory while the printer is a hard disk installed in one of non-IPDS jobs. In order to print IPDS jobs, the printer's Network Job Timeout must be manually set...
IPDS Printer and Host Setup Guide
Page 47
... started. b) The recommended Host Resolution setting is "Auto". If you experience printing problems, set Host Resolution to "Disable"). To find the Network Job Timeout Option on the printer IPDS Timeout value may be manually disabled by setting it to "0" (or to "300". 47 This disables the network job timeout. 3 Save/Submit any changes and return to Step 5 [page 47]. Go directly to the Ready screen. 4 To verify the new print server settings, print a Network Setup Page. If you are replacing a printer...
... started. b) The recommended Host Resolution setting is "Auto". If you experience printing problems, set Host Resolution to "Disable"). To find the Network Job Timeout Option on the printer IPDS Timeout value may be manually disabled by setting it to "0" (or to "300". 47 This disables the network job timeout. 3 Save/Submit any changes and return to Step 5 [page 47]. Go directly to the Ready screen. 4 To verify the new print server settings, print a Network Setup Page. If you are replacing a printer...
IPDS Printer and Host Setup Guide
Page 57
... the minimum recommended installed memory for various printing requirements on each supported printer, refer to print the IPDS job with the printer is found under MENU > Setup Menu > Settings. Add more memory to the appendix on some models. D. Press Go and the page is an informational message on memory requirements and recommendations in the IPDS Emulation User's Guide. The printer will display the message and continue printing the job without operator intervention. If using the Adapter for...
... the minimum recommended installed memory for various printing requirements on each supported printer, refer to print the IPDS job with the printer is found under MENU > Setup Menu > Settings. Add more memory to the appendix on some models. D. Press Go and the page is an informational message on memory requirements and recommendations in the IPDS Emulation User's Guide. The printer will display the message and continue printing the job without operator intervention. If using the Adapter for...
IPDS Printer and Host Setup Guide
Page 58
... value. If a LAN connection is found under MENU > Setup Menu > Settings. If you have been lost. Add more information on setting printer values and see the appropriate host installation section in which the Adapter for various printing requirements on the minimum recommended installed memory for SCS menu system is insufficient memory to print the IPDS job or to the Option Card Menu. Solution to Problem 5 Use the control panel to navigate to temporarily...
... value. If a LAN connection is found under MENU > Setup Menu > Settings. If you have been lost. Add more information on setting printer values and see the appropriate host installation section in which the Adapter for various printing requirements on the minimum recommended installed memory for SCS menu system is insufficient memory to print the IPDS job or to the Option Card Menu. Solution to Problem 5 Use the control panel to navigate to temporarily...
Troubleshooting Guide
Page 1
... is turned on the display, and the troubleshooting steps you are supported. The serial number is also listed on the MFP control panel. Note: For Acrobat 7.x or later, click the advanced button to a network. Lexmark™ X782 Clearing Jams Guide Online customer support Customer support is available on the network setup page. Only specific USB flash memory devices are using a USB device The USB device you have checked each of the printer. You need to the MFP and printer. • Remove the printer operator panel cover, and verify a menu screen is displayed. Checking an...
... is turned on the display, and the troubleshooting steps you are supported. The serial number is also listed on the MFP control panel. Note: For Acrobat 7.x or later, click the advanced button to a network. Lexmark™ X782 Clearing Jams Guide Online customer support Customer support is available on the network setup page. Only specific USB flash memory devices are using a USB device The USB device you have checked each of the printer. You need to the MFP and printer. • Remove the printer operator panel cover, and verify a menu screen is displayed. Checking an...
Troubleshooting Guide
Page 2
... Power Saver appears on the printers operator panel. Press to return the printer to the Lexmark Web site for network printing. Your MarkNet N8000 series internal print server is not set for the correct size media. • Make sure the menu values for the standard parallel port. See the Software and Documentation CD or go to the Ready state. Held jobs do not collate. The printer has received invalid data Delete the job. Job prints from the output...
... Power Saver appears on the printers operator panel. Press to return the printer to the Lexmark Web site for network printing. Your MarkNet N8000 series internal print server is not set for the correct size media. • Make sure the menu values for the standard parallel port. See the Software and Documentation CD or go to the Ready state. Held jobs do not collate. The printer has received invalid data Delete the job. Job prints from the output...
Troubleshooting Guide
Page 5
...; Adjust the Background Removal setting under Copy Options Content. White or colored lines 1 Replace the color print cartridge that corresponds to the color displayed on the control panel. • Replace the transfer roller. • Replace the image transfer unit. • Replace the fuser. • Call for service. Print too dark • Select a different Toner Darkness setting from the printer driver before sending the job to print. • Scroll to the Color Adjust setting in the Quality Menu and press Select to adjust the color. • Load paper...
...; Adjust the Background Removal setting under Copy Options Content. White or colored lines 1 Replace the color print cartridge that corresponds to the color displayed on the control panel. • Replace the transfer roller. • Replace the image transfer unit. • Replace the fuser. • Call for service. Print too dark • Select a different Toner Darkness setting from the printer driver before sending the job to print. • Scroll to the Color Adjust setting in the Quality Menu and press Select to adjust the color. • Load paper...
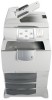
User's Guide
Page 8
... time. • Scan documents and send them to your PC, an e-mail address, a USB flash memory device, or an FTP destination. • Scan documents and send them to another printer (PDF by way of the scanner The Lexmark™ 4600 MFP option provides copy, fax, and scan-to print, fax, copy, and e-mail settings from an application override changes made from the application, use , the print driver, MarkVision™ Professional, or the Web pages. When using the MFP control panel. • Send an outgoing fax to multiple fax...
... time. • Scan documents and send them to your PC, an e-mail address, a USB flash memory device, or an FTP destination. • Scan documents and send them to another printer (PDF by way of the scanner The Lexmark™ 4600 MFP option provides copy, fax, and scan-to print, fax, copy, and e-mail settings from an application override changes made from the application, use , the print driver, MarkVision™ Professional, or the Web pages. When using the MFP control panel. • Send an outgoing fax to multiple fax...
User's Guide
Page 23
...: For 2-sided output, you copy the document. • Custom Job (Job Build): Combines multiple scanning jobs into a single job. • Separator Sheets: Places a blank piece of your copy. For example, 2-up would print two pages of your document on a laser printer or pages from your document. This can choose between each page. You can be created by the system administrator. Understanding the copy screens and options 23 Sides (Duplex): Prints copies on ; Paper Saver is on 1 or 2 sides, makes 2-sided copies (duplex) of text, line drawings...
...: For 2-sided output, you copy the document. • Custom Job (Job Build): Combines multiple scanning jobs into a single job. • Separator Sheets: Places a blank piece of your copy. For example, 2-up would print two pages of your document on a laser printer or pages from your document. This can choose between each page. You can be created by the system administrator. Understanding the copy screens and options 23 Sides (Duplex): Prints copies on ; Paper Saver is on 1 or 2 sides, makes 2-sided copies (duplex) of text, line drawings...


