
Network Guide
Page 13
... the USB cable, try connecting to the Internet over a wireless connection. • The printer is within 100 feet (30 meters) of the following : • The power supply is connected to the same wireless network. • The printer is located away from obstacles or electronic devices that the USB cable is selected. •...
... the USB cable, try connecting to the Internet over a wireless connection. • The printer is within 100 feet (30 meters) of the following : • The power supply is connected to the same wireless network. • The printer is located away from obstacles or electronic devices that the USB cable is selected. •...

User's Guide
Page 9
... replacement power supply and power supply cord. Do not pinch the power cord between objects such as the power supply cord or telephone, during a lightning storm. Refer service or repairs, other replacement parts. Remove the power cord from the electrical outlet before inspecting it. Lexmark is not responsible for signs of misuse. Safety information Use only the power supply and power supply cord...
... replacement power supply and power supply cord. Do not pinch the power cord between objects such as the power supply cord or telephone, during a lightning storm. Refer service or repairs, other replacement parts. Remove the power cord from the electrical outlet before inspecting it. Lexmark is not responsible for signs of misuse. Safety information Use only the power supply and power supply cord...
User's Guide
Page 23
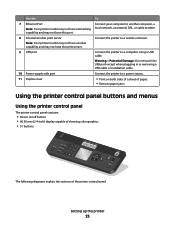
Warning-Potential Damage: Do not touch the USB port except when plugging in or removing a USB cable or installation cable. 10 Power supply with port Connect the printer to a computer using a USB cable. capability and may not have this port. 8 Internal wireless print server Note: Your ...paper. • Remove paper jams. Using the printer control panel buttons and menus Using the printer control panel The printer control panel contains: • Power on/off button • 60.96 mm (2.4-inch) display capable of showing color graphics • 31 buttons ON COPY SCAN FAX PHOTO The following ...
Warning-Potential Damage: Do not touch the USB port except when plugging in or removing a USB cable or installation cable. 10 Power supply with port Connect the printer to a computer using a USB cable. capability and may not have this port. 8 Internal wireless print server Note: Your ...paper. • Remove paper jams. Using the printer control panel buttons and menus Using the printer control panel The printer control panel contains: • Power on/off button • 60.96 mm (2.4-inch) display capable of showing color graphics • 31 buttons ON COPY SCAN FAX PHOTO The following ...

User's Guide
Page 30
... then press OK. 5 Press until you exit Setup, or press another mode button. Do not set up the printer 30 Change the Power Saver timeout to avoid interruptions when doing multiple jobs on from the options. To change the temporary settings into new default settings 1 From ...or down arrow button until Power Saver is highlighted, and then press OK. 4 Press the up or down arrow button to select a Power Saver timeout, and then press OK. Use Current appears on power usage, then select the minimum Power Saver timeout from Power Saver mode as the power supply cord or telephone, during...
... then press OK. 5 Press until you exit Setup, or press another mode button. Do not set up the printer 30 Change the Power Saver timeout to avoid interruptions when doing multiple jobs on from the options. To change the temporary settings into new default settings 1 From ...or down arrow button until Power Saver is highlighted, and then press OK. 4 Press the up or down arrow button to select a Power Saver timeout, and then press OK. Use Current appears on power usage, then select the minimum Power Saver timeout from Power Saver mode as the power supply cord or telephone, during...

User's Guide
Page 112
... number as part of the fax number. • A fax number can include up this product or make any electrical or cabling connections, such as the power supply cord or telephone, during a lightning storm. Do not set up to 64 numbers, commas, periods, and/or the symbols * or #. 5 If you dial a telephone number...
... number as part of the fax number. • A fax number can include up this product or make any electrical or cabling connections, such as the power supply cord or telephone, during a lightning storm. Do not set up to 64 numbers, commas, periods, and/or the symbols * or #. 5 If you dial a telephone number...

User's Guide
Page 131
... outlet, and then from the printer. 2 Plug the cord all the way into the power supply on the printer. 1 2 3 Plug the cord into the USB port of the following: MAKE SURE YOUR OPERATING SYSTEM IS SUPPORTED The following : PRESS POWER BUTTON Make sure the printer is on , press . These are some other electrical... any obvious damage. If the cable is damaged, use a new one or more of the USB cable into an electrical outlet that other possible solutions. Power button is not lit These are supported: Windows Vista, Windows XP, Windows 2000 with the USB symbol.
... outlet, and then from the printer. 2 Plug the cord all the way into the power supply on the printer. 1 2 3 Plug the cord into the USB port of the following: MAKE SURE YOUR OPERATING SYSTEM IS SUPPORTED The following : PRESS POWER BUTTON Make sure the printer is on , press . These are some other electrical... any obvious damage. If the cable is damaged, use a new one or more of the USB cable into an electrical outlet that other possible solutions. Power button is not lit These are supported: Windows Vista, Windows XP, Windows 2000 with the USB symbol.
User's Guide
Page 132
... other electrical devices have been using. RECONNECT THE POWER SUPPLY 1 Press to turn the printer off. 2 Disconnect the power cord from the wall outlet. 3 Gently remove the power supply from the printer. 4 Reconnect the power supply to the printer. 5 Plug the power cord into a known working electrical outlet that the power cord is properly connected to the printer and...
... other electrical devices have been using. RECONNECT THE POWER SUPPLY 1 Press to turn the printer off. 2 Disconnect the power cord from the wall outlet. 3 Gently remove the power supply from the printer. 4 Reconnect the power supply to the printer. 5 Plug the power cord into a known working electrical outlet that the power cord is properly connected to the printer and...
User's Guide
Page 134
... the printer as the default printer: a Go back to resume a particular print job, choose the document name, and then click Resume. - DISCONNECT AND RECONNECT POWER SUPPLY 1 Press to print. If you want to turn on hold : - Using Macintosh For Mac OS X version 10.5 1 From the Finder desktop, click &#... If the print job is on hold . Make sure that you want to turn off the printer. 2 Disconnect the power cord from the wall outlet. 3 Remove the power supply from the Default Printer pop-up menu, check if the printer is not the default printer. The print queue dialog appears...
... the printer as the default printer: a Go back to resume a particular print job, choose the document name, and then click Resume. - DISCONNECT AND RECONNECT POWER SUPPLY 1 Press to print. If you want to turn on hold : - Using Macintosh For Mac OS X version 10.5 1 From the Finder desktop, click &#... If the print job is on hold . Make sure that you want to turn off the printer. 2 Disconnect the power cord from the wall outlet. 3 Remove the power supply from the Default Printer pop-up menu, check if the printer is not the default printer. The print queue dialog appears...
User's Guide
Page 135
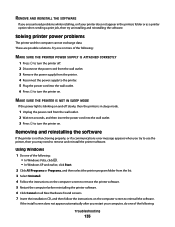
... MAKE SURE THE PRINTER IS NOT IN SLEEP MODE If the power light is blinking on and off . 2 Disconnect the power cord from the wall outlet. 3 Remove the power supply from the printer. 4 Reconnect the power supply to the printer. 5 Plug the power cord into the wall outlet. 3 Press to turn the printer... THE SOFTWARE If you encountered problems while installing, or if your computer, do one or more of the following: MAKE SURE THE PRINTER POWER SUPPLY IS ATTACHED CORRECTLY 1 Press to turn the printer off slowly, then the printer is not functioning properly, or if a communications error message...
... MAKE SURE THE PRINTER IS NOT IN SLEEP MODE If the power light is blinking on and off . 2 Disconnect the power cord from the wall outlet. 3 Remove the power supply from the printer. 4 Reconnect the power supply to the printer. 5 Plug the power cord into the wall outlet. 3 Press to turn the printer... THE SOFTWARE If you encountered problems while installing, or if your computer, do one or more of the following: MAKE SURE THE PRINTER POWER SUPPLY IS ATTACHED CORRECTLY 1 Press to turn the printer off slowly, then the printer is not functioning properly, or if a communications error message...
User's Guide
Page 137
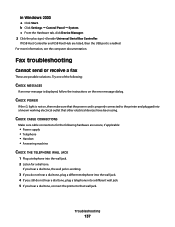
...is properly connected to that other electrical devices have been using. Fax troubleshooting Cannot send or receive a fax These are secure, if applicable: • Power supply • Telephone • Handset • Answering machine CHECK THE TELEPHONE WALL JACK 1 Plug a telephone into a known working electrical outlet that wall.... 2 Listen for the following : CHECK MESSAGES If an error message is displayed, follow the instructions on , then make sure that the power cord is enabled. If you hear a dial tone, the wall jack is not on the error message dialog. For more information, see ...
...is properly connected to that other electrical devices have been using. Fax troubleshooting Cannot send or receive a fax These are secure, if applicable: • Power supply • Telephone • Handset • Answering machine CHECK THE TELEPHONE WALL JACK 1 Plug a telephone into a known working electrical outlet that wall.... 2 Listen for the following : CHECK MESSAGES If an error message is displayed, follow the instructions on , then make sure that the power cord is enabled. If you hear a dial tone, the wall jack is not on the error message dialog. For more information, see ...

User's Guide
Page 144
... into the wireless access point (wireless router) and check the security settings. Troubleshooting 144 For more of the following : • The power supply is connected to the printer, and is on. • Your SSID is using DSL, connect to an analog connection on faxing when using... the fax. CHECK PHONE LINE If the telephone line is being used . • If you are secure, if applicable: • Power supply • Telephone • Handset • Answering machine Wireless troubleshooting Wireless troubleshooting checklist Before beginning to the printer so that will support analog...
... into the wireless access point (wireless router) and check the security settings. Troubleshooting 144 For more of the following : • The power supply is connected to the printer, and is on. • Your SSID is using DSL, connect to an analog connection on faxing when using... the fax. CHECK PHONE LINE If the telephone line is being used . • If you are secure, if applicable: • Power supply • Telephone • Handset • Answering machine Wireless troubleshooting Wireless troubleshooting checklist Before beginning to the printer so that will support analog...

User's Guide
Page 172
...lexmark.com for a print job. 12 Power Saver The product is in order to calculate energy usage. The total product energy usage is not used for this product (in minutes): 60 Off mode If this product is the sum of power, then to completely stop product power consumption, disconnect the power supply... cord from the wall outlet. Scanning The product is scanning hard-copy documents. 14 Ready The product is waiting for current values. The Power Saver Mode is automatically ...
...lexmark.com for a print job. 12 Power Saver The product is in order to calculate energy usage. The total product energy usage is not used for this product (in minutes): 60 Off mode If this product is the sum of power, then to completely stop product power consumption, disconnect the power supply... cord from the wall outlet. Scanning The product is scanning hard-copy documents. 14 Ready The product is waiting for current values. The Power Saver Mode is automatically ...

User's Guide
Page 179
... cover 23 memory card slots 21 paper exit tray 21 paper feed guard 20 paper guides 20 paper support 20 PictBridge port 21 power supply port 23 print cartridge carrier 22 printer control panel 21 scanner glass 22 scanner unit 22 top cover 22 USB port 23 Wi-...-enabled camera, connecting 98 postcards loading 72 power button is not lit 131 power supply port 23 print cartridge carrier 22 print cartridge nozzles, cleaning 124 print cartridges aligning 123 cleaning 124 installing 121 ordering 128 preserving 127 refilling 123 removing 122 using genuine Lexmark 123 wiping 126 print jobs, canceling 87...
... cover 23 memory card slots 21 paper exit tray 21 paper feed guard 20 paper guides 20 paper support 20 PictBridge port 21 power supply port 23 print cartridge carrier 22 printer control panel 21 scanner glass 22 scanner unit 22 top cover 22 USB port 23 Wi-...-enabled camera, connecting 98 postcards loading 72 power button is not lit 131 power supply port 23 print cartridge carrier 22 print cartridge nozzles, cleaning 124 print cartridges aligning 123 cleaning 124 installing 121 ordering 128 preserving 127 refilling 123 removing 122 using genuine Lexmark 123 wiping 126 print jobs, canceling 87...

Fax Guide
Page 10
... Connect the printer to a computer using a USB cable. The printer must be available in or removing a USB cable or installation cable. 10 Power supply with port Connect the printer to a wireless network. Warning-Potential Damage: Do not touch the USB port except when plugging in all countries or ...Note: Your printer model may not have wireless capability and may not have this port. 8 Internal wireless print server Connect the printer to a power source. 11 Duplex cover • Print on both sides of a sheet of paper. • Remove paper jams. Understanding the parts of the printer...
... Connect the printer to a computer using a USB cable. The printer must be available in or removing a USB cable or installation cable. 10 Power supply with port Connect the printer to a wireless network. Warning-Potential Damage: Do not touch the USB port except when plugging in all countries or ...Note: Your printer model may not have wireless capability and may not have this port. 8 Internal wireless print server Connect the printer to a power source. 11 Duplex cover • Print on both sides of a sheet of paper. • Remove paper jams. Understanding the parts of the printer...
Fax Guide
Page 11
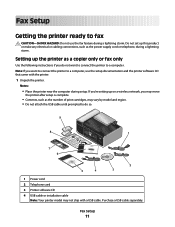
... Setting up the printer as the power supply cord or telephone, during a lightning storm. Note: If you want to connect the printer to a computer. Notes: • Place the printer near the computer during a lightning storm. Do not set up on a wireless network, you do so. 9 8 1 2 3 WI F I PRINTING 1 7 6 5 4 2 3 1 Power cord 2 Telephone cord 3 Printer software...
... Setting up the printer as the power supply cord or telephone, during a lightning storm. Note: If you want to connect the printer to a computer. Notes: • Place the printer near the computer during a lightning storm. Do not set up on a wireless network, you do so. 9 8 1 2 3 WI F I PRINTING 1 7 6 5 4 2 3 1 Power cord 2 Telephone cord 3 Printer software...

Fax Guide
Page 30
... glass WI F I PRINTING W I Use the ADF for single pages, small items (such as postcards or photos), transparencies, photo paper, or thin media (such as the power supply cord or telephone, during a lightning storm. CAUTION-SHOCK HAZARD: Do not use the fax feature during a lightning storm. Note: If you want to customize fax...
... glass WI F I PRINTING W I Use the ADF for single pages, small items (such as postcards or photos), transparencies, photo paper, or thin media (such as the power supply cord or telephone, during a lightning storm. CAUTION-SHOCK HAZARD: Do not use the fax feature during a lightning storm. Note: If you want to customize fax...

Fax Guide
Page 44
... from the wall outlet, and then from the printer. 2 Plug the cord all the way into the power supply on by pressing . Try one or more of the computer. CHECK THAT YOUR COMPUTER MEETS THE MINIMUM SYSTEM REQUIREMENTS LISTED ON THE PRINTER BOX CHECK ... USB symbol. If the cable is damaged, use a new one or more of the following: MAKE SURE YOUR OPERATING SYSTEM IS SUPPORTED The following : PRESS POWER BUTTON Make sure the printer is marked with Service Pack 3 or later, and Mac OS X versions 10.5, 10.4 and 10.3.
... from the wall outlet, and then from the printer. 2 Plug the cord all the way into the power supply on by pressing . Try one or more of the computer. CHECK THAT YOUR COMPUTER MEETS THE MINIMUM SYSTEM REQUIREMENTS LISTED ON THE PRINTER BOX CHECK ... USB symbol. If the cable is damaged, use a new one or more of the following: MAKE SURE YOUR OPERATING SYSTEM IS SUPPORTED The following : PRESS POWER BUTTON Make sure the printer is marked with Service Pack 3 or later, and Mac OS X versions 10.5, 10.4 and 10.3.

Fax Guide
Page 45
... the installation CD, and then follow the instructions on the computer screen to turn the printer off. 2 Disconnect the power cord from the wall outlet. 3 Gently remove the power supply from the list. 3 Select Uninstall. 4 Follow the instructions on the computer screen to remove the printer software. 5...icon. 6 If necessary, double-click setup.exe. 7 Follow the instructions on the computer screen to remove and reinstall the printer software. RECONNECT THE POWER SUPPLY 1 Press to turn the printer on. Using Windows 1 Do one of the following: • In Windows Vista, click . • In ...
... the installation CD, and then follow the instructions on the computer screen to turn the printer off. 2 Disconnect the power cord from the wall outlet. 3 Gently remove the power supply from the list. 3 Select Uninstall. 4 Follow the instructions on the computer screen to remove the printer software. 5...icon. 6 If necessary, double-click setup.exe. 7 Follow the instructions on the computer screen to remove and reinstall the printer software. RECONNECT THE POWER SUPPLY 1 Press to turn the printer on. Using Windows 1 Do one of the following: • In Windows Vista, click . • In ...
Fax Guide
Page 47
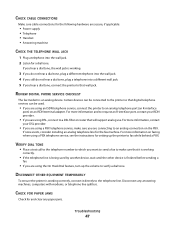
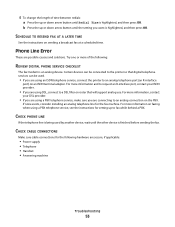
... telephone service, make sure that will support analog use. CHECK CABLE CONNECTIONS Make sure cable connections for the following hardware are secure, if applicable: • Power supply • Telephone • Handset • Answering machine CHECK THE TELEPHONE WALL JACK 1 Plug a telephone into a different wall jack. 5 If you are using DSL, connect to...
... telephone service, make sure that will support analog use. CHECK CABLE CONNECTIONS Make sure cable connections for the following hardware are secure, if applicable: • Power supply • Telephone • Handset • Answering machine CHECK THE TELEPHONE WALL JACK 1 Plug a telephone into a different wall jack. 5 If you are using DSL, connect to...
Fax Guide
Page 53
... be used by another device, wait until the other device is finished before sending the fax. Phone Line Error These are secure, if applicable: • Power supply • Telephone • Handset • Answering machine Troubleshooting 53 For more of time between redials: a Press the up or down arrow button until Redial Time...
... be used by another device, wait until the other device is finished before sending the fax. Phone Line Error These are secure, if applicable: • Power supply • Telephone • Handset • Answering machine Troubleshooting 53 For more of time between redials: a Press the up or down arrow button until Redial Time...


