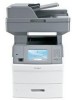
Troubleshooting Guide
Page 6
...be properly installed. Try one or more information, see the hardware setup documentation that came with the paper tray, or go to www.lexmark.com/publications to print, specify the correct settings from the computer: • For Windows users, specify the settings from Print Properties. ... one or more information, see the hardware setup documentation that came with the envelope feeder, or go to www.lexmark.com/publications to the printer system board. Output options If the high capacity output expander, 4-bin mailbox, or StapleSmartTM finisher is properly connected to the ...
...be properly installed. Try one or more information, see the hardware setup documentation that came with the paper tray, or go to www.lexmark.com/publications to print, specify the correct settings from the computer: • For Windows users, specify the settings from Print Properties. ... one or more information, see the hardware setup documentation that came with the envelope feeder, or go to www.lexmark.com/publications to the printer system board. Output options If the high capacity output expander, 4-bin mailbox, or StapleSmartTM finisher is properly connected to the ...
Troubleshooting Guide
Page 7
... feeder. or A4-size paper in the following : CHECK THE ISP CONNECTIONS • Make sure the ISP is securely attached to the printer system board. • Make sure the cable is set to Jam Recovery until Print Quality Pages appears. 6 Touch Print Quality Pages. Try one or more information... media. Page that jammed does not reprint after jam is cleared CHECK THE PAPER PATH The paper path is securely connected to the printer system board. For more of the following topics may have a printer part that it . THE PAPER MAY HAVE ABSORBED MOISTURE DUE TO HIGH HUMIDITY •...
... feeder. or A4-size paper in the following : CHECK THE ISP CONNECTIONS • Make sure the ISP is securely attached to the printer system board. • Make sure the cable is set to Jam Recovery until Print Quality Pages appears. 6 Touch Print Quality Pages. Try one or more information... media. Page that jammed does not reprint after jam is cleared CHECK THE PAPER PATH The paper path is securely connected to the printer system board. For more of the following topics may have a printer part that it . THE PAPER MAY HAVE ABSORBED MOISTURE DUE TO HIGH HUMIDITY •...

Card Stock & Label Guide
Page 153
Allows no adhesive areas along edge of labels. generally moisture related. Waviness in selected areas only. Vellum finish Wash boarding Zone coating A finish with a rough surface similar to the material; Also known as patterned adhesive, pattern coated, dry lap, separator, strip coated. Placing adhesive in the stock that gives a rippled appearance to eggshell and antique finishes. Glossary 153 A vellum finish is relatively absorbent, providing good ink penetration.
Allows no adhesive areas along edge of labels. generally moisture related. Waviness in selected areas only. Vellum finish Wash boarding Zone coating A finish with a rough surface similar to the material; Also known as patterned adhesive, pattern coated, dry lap, separator, strip coated. Placing adhesive in the stock that gives a rippled appearance to eggshell and antique finishes. Glossary 153 A vellum finish is relatively absorbent, providing good ink penetration.

Common Criteria Installation Supplement and Administrator Guide
Page 6
... has been installed, contact your Lexmark representative before proceeding. 6 To verify the firmware version, under Device Information, locate Base =, and Network =. 7 Contact your Lexmark representative to verify that no optional...and security policies and procedures. It is attached, the metal plate and system board cannot be removed, and the security jumper cannot be accessed without causing visible ... perform document processing functions are disabled at the factory. 2 Turn the MFP on the back of the MFP, near an outside edge. 6 • Authorized administrators are knowledgeable about...
... has been installed, contact your Lexmark representative before proceeding. 6 To verify the firmware version, under Device Information, locate Base =, and Network =. 7 Contact your Lexmark representative to verify that no optional...and security policies and procedures. It is attached, the metal plate and system board cannot be removed, and the security jumper cannot be accessed without causing visible ... perform document processing functions are disabled at the factory. 2 Turn the MFP on the back of the MFP, near an outside edge. 6 • Authorized administrators are knowledgeable about...
IPDS Emulation User's Guide
Page 8
...(DRAM) for printers, a minimum of 256 MB of user memory (DRAM) for MFPs, and one of the following: • Standard network (Ethernet adapter integrated into printer system board) • MarkNet internal LAN print server (optional card providing Ethernet connection) • Lexmark wireless internal print server 1.3 Customer Support Information on how to configure the... initial installation is found in this guide about using the IPDS emulation, or require firmware updates, please contact your point of purchase, your local Lexmark office, or check the Lexmark support web site at http://support...
...(DRAM) for printers, a minimum of 256 MB of user memory (DRAM) for MFPs, and one of the following: • Standard network (Ethernet adapter integrated into printer system board) • MarkNet internal LAN print server (optional card providing Ethernet connection) • Lexmark wireless internal print server 1.3 Customer Support Information on how to configure the... initial installation is found in this guide about using the IPDS emulation, or require firmware updates, please contact your point of purchase, your local Lexmark office, or check the Lexmark support web site at http://support...
IPDS Printer and Host Setup Guide
Page 4
... Table of the following printers and Multifunction Products (MFPs). • Lexmark C734, C736 • Lexmark E460dn, E460dw, E462dtn • Lexmark T650, T652 • Lexmark T654 • Lexmark T656dne • Lexmark W850 • Lexmark X463de, X464de • Lexmark X466dte, X466dtwe • Lexmark X651de, X652de • Lexmark X654de, X656de • Lexmark X658de • Lexmark X734de, X736de, X738de • Lexmark X860de, X862de, X864de Unless otherwise specified, in the...
... Table of the following printers and Multifunction Products (MFPs). • Lexmark C734, C736 • Lexmark E460dn, E460dw, E462dtn • Lexmark T650, T652 • Lexmark T654 • Lexmark T656dne • Lexmark W850 • Lexmark X463de, X464de • Lexmark X466dte, X466dtwe • Lexmark X651de, X652de • Lexmark X654de, X656de • Lexmark X658de • Lexmark X734de, X736de, X738de • Lexmark X860de, X862de, X864de Unless otherwise specified, in the...

User's Guide
Page 2
... the home screen...19 Using the touch-screen buttons...21 Additional printer setup 25 Installing internal options...25 Available internal options ...25 Accessing the system board to install internal options 26 Installing a memory card ...28 Installing a flash memory or firmware card...29 Installing an Internal Solutions Port...32 Installing a printer hard...
... the home screen...19 Using the touch-screen buttons...21 Additional printer setup 25 Installing internal options...25 Available internal options ...25 Accessing the system board to install internal options 26 Installing a memory card ...28 Installing a flash memory or firmware card...29 Installing an Internal Solutions Port...32 Installing a printer hard...

User's Guide
Page 12
... of the printer to lift it . Do not pinch the power cord between objects such as Ethernet and telephone system connections) are accessing the system board or installing optional hardware or memory devices sometime after setting up the printer, then turn them off , and unplug the power cord from the electrical...
... of the printer to lift it . Do not pinch the power cord between objects such as Ethernet and telephone system connections) are accessing the system board or installing optional hardware or memory devices sometime after setting up the printer, then turn them off , and unplug the power cord from the electrical...

User's Guide
Page 25
...; RS-232-C Serial ISP - Printer memory - Additional printer setup 25 Additional printer setup Installing internal options CAUTION-SHOCK HAZARD: If you are accessing the system board or installing optional hardware or memory devices sometime after setting up the printer, then turn them to locate a card for removal. MarkNet N8130 10/100...
...; RS-232-C Serial ISP - Printer memory - Additional printer setup 25 Additional printer setup Installing internal options CAUTION-SHOCK HAZARD: If you are accessing the system board or installing optional hardware or memory devices sometime after setting up the printer, then turn them to locate a card for removal. MarkNet N8130 10/100...

User's Guide
Page 26
... HAZARD: If you have any other devices attached to install internal options Note: This operation requires a flathead screwdriver. If you are accessing the system board or installing optional hardware or memory devices sometime after setting up the printer, then turn them off , and unplug the power cord from the wall... outlet before continuing. Additional printer setup 26 Accessing the system board to the printer, then turn the printer off as well, and unplug any cables going into the printer. 1 Open the system...
... HAZARD: If you have any other devices attached to install internal options Note: This operation requires a flathead screwdriver. If you are accessing the system board or installing optional hardware or memory devices sometime after setting up the printer, then turn them off , and unplug the power cord from the wall... outlet before continuing. Additional printer setup 26 Accessing the system board to the printer, then turn the printer off as well, and unplug any cables going into the printer. 1 Open the system...

User's Guide
Page 27
Additional printer setup 27 3 Remove the system board cover. 4 Use the illustration below to locate the appropriate connector. Warning-Potential Damage: System board electronic components are easily damaged by static electricity. Touch something metal on the printer before touching any system board electronic components or connectors. 1 2 4 3 1 Firmware and flash memory card connectors 2 Memory card connector 3 Lexmark Internal Solutions Port or printer hard disk connector 4 Fax card connector
Additional printer setup 27 3 Remove the system board cover. 4 Use the illustration below to locate the appropriate connector. Warning-Potential Damage: System board electronic components are easily damaged by static electricity. Touch something metal on the printer before touching any system board electronic components or connectors. 1 2 4 3 1 Firmware and flash memory card connectors 2 Memory card connector 3 Lexmark Internal Solutions Port or printer hard disk connector 4 Fax card connector

User's Guide
Page 28
... devices attached to the system board. If you are easily damaged by static electricity. An optional memory card can be purchased separately and attached to the printer, then turn the printer off as well, and unplug any system board electronic components or connectors. Warning...-Potential Damage: System board electronic components are accessing the system board or installing optional hardware or memory devices sometime after setting up the printer, then turn...
... devices attached to the system board. If you are easily damaged by static electricity. An optional memory card can be purchased separately and attached to the printer, then turn the printer off as well, and unplug any system board electronic components or connectors. Warning...-Potential Damage: System board electronic components are accessing the system board or installing optional hardware or memory devices sometime after setting up the printer, then turn...

User's Guide
Page 29
Additional printer setup 29 4 Align the notches on the memory card with the ridges on the connector. 1 2 1 Notches 2 Ridges 5 Push the memory card straight into the connector until it snaps into place. 6 Replace the system board cover and close the system board door. 1 2 3 Installing a flash memory or firmware card Note: This task requires a flathead screwdriver.
Additional printer setup 29 4 Align the notches on the memory card with the ridges on the connector. 1 2 1 Notches 2 Ridges 5 Push the memory card straight into the connector until it snaps into place. 6 Replace the system board cover and close the system board door. 1 2 3 Installing a flash memory or firmware card Note: This task requires a flathead screwdriver.

User's Guide
Page 30
...attached to the printer, then turn the printer off as well, and unplug any cables going into the printer. Warning-Potential Damage: System board electronic components are easily damaged by its sides, align the plastic pins on the card with the holes on the printer before continuing. ...Touch something metal on the system board. 1 Plastic pins 2 Metal pins Additional printer setup 30 The system board has two connections for an optional flash memory or firmware card. If you are interchangeable. Note: Avoid ...
...attached to the printer, then turn the printer off as well, and unplug any cables going into the printer. Warning-Potential Damage: System board electronic components are easily damaged by its sides, align the plastic pins on the card with the holes on the printer before continuing. ...Touch something metal on the system board. 1 Plastic pins 2 Metal pins Additional printer setup 30 The system board has two connections for an optional flash memory or firmware card. If you are interchangeable. Note: Avoid ...

User's Guide
Page 31
Additional printer setup 31 4 Push the card firmly into place. Notes: • The entire length of the connector on the card must touch and be flush against the system board. • Be careful not to damage the connectors. 5 Replace the system board cover and close the system board door. 1 2 3
Additional printer setup 31 4 Push the card firmly into place. Notes: • The entire length of the connector on the card must touch and be flush against the system board. • Be careful not to damage the connectors. 5 Replace the system board cover and close the system board door. 1 2 3

User's Guide
Page 32
... before touching any cables going into the printer. Install an ISP for additional connectivity options. Touch something metal on the system board. Note: If an optional printer hard disk is currently installed, then the printer hard disk must first be removed. If...1 Access the system board. 2 3 1 2 Unpack the ISP and plastic tee. Note: Avoid touching the components on the card. 3 Locate the appropriate connector on the printer before continuing. Additional printer setup 32 Installing an Internal Solutions Port The system board supports one optional Lexmark Internal Solutions Port (...
... before touching any cables going into the printer. Install an ISP for additional connectivity options. Touch something metal on the system board. Note: If an optional printer hard disk is currently installed, then the printer hard disk must first be removed. If...1 Access the system board. 2 3 1 2 Unpack the ISP and plastic tee. Note: Avoid touching the components on the card. 3 Locate the appropriate connector on the printer before continuing. Additional printer setup 32 Installing an Internal Solutions Port The system board supports one optional Lexmark Internal Solutions Port (...

User's Guide
Page 33
To unplug the cable, squeeze the paddle at the plug of the interface cable to the printer hard disk. Additional printer setup 33 a Unplug the printer hard disk interface cable from the system board, leaving the cable attached to disengage the latch before pulling the cable out. c Remove the printer hard disk by pulling it upward to unseat the standoffs. b Remove the screws holding the printer hard disk in place.
To unplug the cable, squeeze the paddle at the plug of the interface cable to the printer hard disk. Additional printer setup 33 a Unplug the printer hard disk interface cable from the system board, leaving the cable attached to disengage the latch before pulling the cable out. c Remove the printer hard disk by pulling it upward to unseat the standoffs. b Remove the screws holding the printer hard disk in place.

User's Guide
Page 35
Be sure each post of the plastic tee to the holes in the system board cage. Angle the ISP over the plastic tee, and then approach the plastic tee so that the tee is seated firmly onto the system board. 6 Install the ISP onto the plastic tee. Additional printer setup 35 5 Align the posts of the tee has latched completely, and that any overhanging connectors will pass through the ISP opening in the system board, and then press downward until the tee snaps into place.
Be sure each post of the plastic tee to the holes in the system board cage. Angle the ISP over the plastic tee, and then approach the plastic tee so that the tee is seated firmly onto the system board. 6 Install the ISP onto the plastic tee. Additional printer setup 35 5 Align the posts of the tee has latched completely, and that any overhanging connectors will pass through the ISP opening in the system board, and then press downward until the tee snaps into place.

User's Guide
Page 37
Additional printer setup 37 9 Attach the two provided screws to secure the ISP mounting bracket to the ISP. For more information, see "Installing a printer hard disk" on page 38. Note: Do not overtighten the thumbscrew. 11 Insert the plug of the ISP interface cable into the receptacle of the system board. Note: The plugs and receptacles are color coded. 12 If a printer hard disk was previously installed, then attach the printer hard disk to the system board cage. 10 Tighten the long thumbscrew.
Additional printer setup 37 9 Attach the two provided screws to secure the ISP mounting bracket to the ISP. For more information, see "Installing a printer hard disk" on page 38. Note: Do not overtighten the thumbscrew. 11 Insert the plug of the ISP interface cable into the receptacle of the system board. Note: The plugs and receptacles are color coded. 12 If a printer hard disk was previously installed, then attach the printer hard disk to the system board cage. 10 Tighten the long thumbscrew.

User's Guide
Page 38
... you are easily damaged by static electricity. Additional printer setup 38 13 Replace the system board cover and close the system board door. 1 2 3 Installing a printer hard disk The optional printer hard disk can be installed with or without a Lexmark Internal Solutions Port (ISP). CAUTION-SHOCK HAZARD: If you have any other devices attached...
... you are easily damaged by static electricity. Additional printer setup 38 13 Replace the system board cover and close the system board door. 1 2 3 Installing a printer hard disk The optional printer hard disk can be installed with or without a Lexmark Internal Solutions Port (ISP). CAUTION-SHOCK HAZARD: If you have any other devices attached...


