Fax Guide
Page 3
...receiving a fax automatically 37 Setting up Speed Dial...37 Printing fax activity reports...38 Ordering Cartridges 39 Ordering print cartridges...39 Troubleshooting 40 Setup Troubleshooting...40 Incorrect language appears on the display...40 Power button is not lit ...40 Software does not install...41 Removing and... reinstalling the software ...42 Fax troubleshooting...43 Cannot send or receive a fax...43 Can send but not receive faxes...45 Can receive but not send faxes...46 Printer receives a blank fax...47 Received fax has poor print quality...47 ...
...receiving a fax automatically 37 Setting up Speed Dial...37 Printing fax activity reports...38 Ordering Cartridges 39 Ordering print cartridges...39 Troubleshooting 40 Setup Troubleshooting...40 Incorrect language appears on the display...40 Power button is not lit ...40 Software does not install...41 Removing and... reinstalling the software ...42 Fax troubleshooting...43 Cannot send or receive a fax...43 Can send but not receive faxes...45 Can receive but not send faxes...46 Printer receives a blank fax...47 Received fax has poor print quality...47 ...
Fax Guide
Page 12
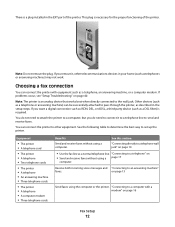
...: Do not remove the plug. Note: The printer is required. Choosing a fax connection You can be successfully attached to a computer with equipment such as a telephone, an answering machine, or a computer modem. If problems occur, see "Setup Troubleshooting" on page 16 Fax Setup 12 If you do... not need to attach the printer to a computer, but you remove it to a telephone line to connect it , other equipment. You do...
...: Do not remove the plug. Note: The printer is required. Choosing a fax connection You can be successfully attached to a computer with equipment such as a telephone, an answering machine, or a computer modem. If problems occur, see "Setup Troubleshooting" on page 16 Fax Setup 12 If you do... not need to attach the printer to a computer, but you remove it to a telephone line to connect it , other equipment. You do...

Fax Guide
Page 40
... change the selection: 1 Press or repeatedly until the language you want appears on the display. 10 Press to save . Try one of the following : CHANGE THE LANGUAGE SELECTION DURING INITIAL SETUP After you select a language, Language appears again on the display. ... until the language you want appears on the display. Power button is on the display These are possible solutions. Try one or more of the following : PRESS POWER BUTTON Make sure the printer is not lit These are possible solutions. Troubleshooting Setup Troubleshooting Incorrect language appears on by pressing...
... change the selection: 1 Press or repeatedly until the language you want appears on the display. 10 Press to save . Try one of the following : CHANGE THE LANGUAGE SELECTION DURING INITIAL SETUP After you select a language, Language appears again on the display. ... until the language you want appears on the display. Power button is on the display These are possible solutions. Try one or more of the following : PRESS POWER BUTTON Make sure the printer is not lit These are possible solutions. Troubleshooting Setup Troubleshooting Incorrect language appears on by pressing...

Fax Guide
Page 41
...one or more of the computer. The USB port is not on, press . Troubleshooting 41 Note: Windows 2000 users should use Service Pack 3 or later. CHECK USB CONNECTION 1 Check the USB cable for any obvious damage. 2 Firmly plug the square end of the USB cable into the back of the printer... electrical devices have been using. 4 If the light is marked with the USB symbol. RECONNECT POWER SUPPLY 1 Press to turn the printer off and then restart your computer meets the minimum system requirements listed on the computer screen to reinstall the software. DISCONNECT AND RECONNECT THE...
...one or more of the computer. The USB port is not on, press . Troubleshooting 41 Note: Windows 2000 users should use Service Pack 3 or later. CHECK USB CONNECTION 1 Check the USB cable for any obvious damage. 2 Firmly plug the square end of the USB cable into the back of the printer... electrical devices have been using. 4 If the light is marked with the USB symbol. RECONNECT POWER SUPPLY 1 Press to turn the printer off and then restart your computer meets the minimum system requirements listed on the computer screen to reinstall the software. DISCONNECT AND RECONNECT THE...
Fax Guide
Page 42
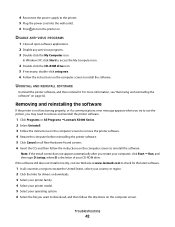
... file you want to reinstall the software. Troubleshooting 42 UNINSTALL AND REINSTALL SOFTWARE Uninstall the printer software, and then reinstall it. Note: If the install screen does not appear automatically after you may need to remove and reinstall the printer software. 1 Click Programs or All Programs ŒLexmark X5400 Series. 2 Select Uninstall. 3 Follow the...
... file you want to reinstall the software. Troubleshooting 42 UNINSTALL AND REINSTALL SOFTWARE Uninstall the printer software, and then reinstall it. Note: If the install screen does not appear automatically after you may need to remove and reinstall the printer software. 1 Click Programs or All Programs ŒLexmark X5400 Series. 2 Select Uninstall. 3 Follow the...

Fax Guide
Page 43
... make sure you are connecting to an analog connection on page 40. CHECK CABLE CONNECTIONS Make sure cable connections for the fax machine. Troubleshooting 43 Certain devices can be connected to the printer so that digital telephone services can be used. • If you hear a dial tone, connect the... printer to that will support analog use. For more of the following hardware are using DSL, connect to a DSL filter or router that wall jack. Try one or more information on faxing when using a PBX telephone service, see "...
... make sure you are connecting to an analog connection on page 40. CHECK CABLE CONNECTIONS Make sure cable connections for the fax machine. Troubleshooting 43 Certain devices can be connected to the printer so that digital telephone services can be used. • If you hear a dial tone, connect the... printer to that will support analog use. For more of the following hardware are using DSL, connect to a DSL filter or router that wall jack. Try one or more information on faxing when using a PBX telephone service, see "...
Fax Guide
Page 44
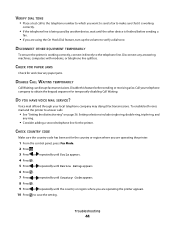
... COUNTRY CODE Make sure the country code has been set for temporarily disabling Call Waiting. Troubleshooting 44 Disable this feature before sending a fax. • If you are operating the printer appears. 10 Press to save the setting. Call your local telephone company may disrupt fax... 36. Disconnect any paper jams. DISABLE CALL WAITING TEMPORARILY Call Waiting can disrupt fax transmissions. DISCONNECT OTHER EQUIPMENT TEMPORARILY To ensure the printer is working correctly, connect it is working correctly. • If the telephone line is finished before sending or receiving a fax. ...
... COUNTRY CODE Make sure the country code has been set for temporarily disabling Call Waiting. Troubleshooting 44 Disable this feature before sending a fax. • If you are operating the printer appears. 10 Press to save the setting. Call your local telephone company may disrupt fax... 36. Disconnect any paper jams. DISABLE CALL WAITING TEMPORARILY Call Waiting can disrupt fax transmissions. DISCONNECT OTHER EQUIPMENT TEMPORARILY To ensure the printer is working correctly, connect it is working correctly. • If the telephone line is finished before sending or receiving a fax. ...
Fax Guide
Page 45
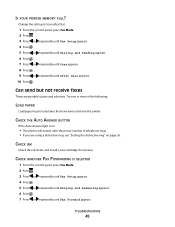
... send but not receive faxes These are using a distinctive ring, see "Setting the distinctive ring" on : • The printer will answer after the preset number of the following: LOAD PAPER Load paper to Scan after Dial. 1 From the control panel, press Fax Mode... Press . 7 Press or repeatedly until Scan appears. 8 Press . 9 Press or repeatedly until Fax Forward appears. Try one or more of telephone rings. • If you are possible causes and solutions. Troubleshooting 45 CHECK WHETHER FAX FORWARDING IS SELECTED 1 From the control panel, press Fax Mode. 2 Press . 3 Press or ...
... send but not receive faxes These are using a distinctive ring, see "Setting the distinctive ring" on : • The printer will answer after the preset number of the following: LOAD PAPER Load paper to Scan after Dial. 1 From the control panel, press Fax Mode... Press . 7 Press or repeatedly until Scan appears. 8 Press . 9 Press or repeatedly until Fax Forward appears. Try one or more of telephone rings. • If you are possible causes and solutions. Troubleshooting 45 CHECK WHETHER FAX FORWARDING IS SELECTED 1 From the control panel, press Fax Mode. 2 Press . 3 Press or ...
Fax Guide
Page 46
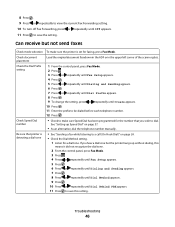
Troubleshooting 46 Check the Dial Prefix setting 1 From the control panel, press Fax Mode. 2 Press . 3 Press ...Enter the prefix to be dialed before each telephone number. 12 Press . Check Speed Dial number • Check to make sure the printer is detecting a dial tone • See "Sending a fax while listening to a call (On Hook Dial)" on page 37.... Press . 10 Press or repeatedly until Dial Behind PBX appears. 11 Press to save the setting. Can receive but the printer hangs up Speed Dial" on page 24. • Check the Dial Method setting. 1 Listen for the number that you...
Troubleshooting 46 Check the Dial Prefix setting 1 From the control panel, press Fax Mode. 2 Press . 3 Press ...Enter the prefix to be dialed before each telephone number. 12 Press . Check Speed Dial number • Check to make sure the printer is detecting a dial tone • See "Sending a fax while listening to a call (On Hook Dial)" on page 37.... Press . 10 Press or repeatedly until Dial Behind PBX appears. 11 Press to save the setting. Can receive but the printer hangs up Speed Dial" on page 24. • Check the Dial Method setting. 1 Listen for the number that you...
Fax Guide
Page 47
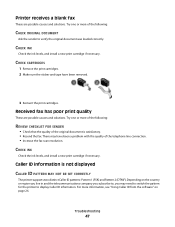
...PATTERN MAY NOT BE SET CORRECTLY The printer supports two distinct Caller ID patterns: Pattern 1 (FSK) and Pattern 2 (DTMF). Try one or more of the telephone line connection. • Increase the fax scan resolution. Troubleshooting 47 Depending on page 26. Printer receives a blank fax These are possible ...ID information is satisfactory. • Resend the fax. There may need to switch the pattern for the printer to , you subscribe to display Caller ID information. Try one or more information, see "Using Caller ID from the software" on the country or region you live ...
...PATTERN MAY NOT BE SET CORRECTLY The printer supports two distinct Caller ID patterns: Pattern 1 (FSK) and Pattern 2 (DTMF). Try one or more of the telephone line connection. • Increase the fax scan resolution. Troubleshooting 47 Depending on page 26. Printer receives a blank fax These are possible ...ID information is satisfactory. • Resend the fax. There may need to switch the pattern for the printer to , you subscribe to display Caller ID information. Try one or more information, see "Using Caller ID from the software" on the country or region you live ...
Fax Guide
Page 48
If it will take your fax to send. • This solution will reduce the speed for future faxes until you attempted to send. Try one or more of fax you reset the transmission speed. LOWER THE TRANSMISSION SPEED 1 From the control panel, press Fax Mode. 2 Press . 3 ... appears. 8 Press . 9 Press or repeatedly until a lower quality appears. 6 Press . • Legal-size paper-reformat the document on letter-size paper. Troubleshooting 48 Remote Fax Error These are possible causes and solutions. There may have been a problem with the quality of the telephone line connection. There may...
If it will take your fax to send. • This solution will reduce the speed for future faxes until you attempted to send. Try one or more of fax you reset the transmission speed. LOWER THE TRANSMISSION SPEED 1 From the control panel, press Fax Mode. 2 Press . 3 ... appears. 8 Press . 9 Press or repeatedly until a lower quality appears. 6 Press . • Legal-size paper-reformat the document on letter-size paper. Troubleshooting 48 Remote Fax Error These are possible causes and solutions. There may have been a problem with the quality of the telephone line connection. There may...

Fax Guide
Page 49
...SCHEDULE TO RESEND FAX AT A LATER TIME See "Sending a broadcast fax at intervals up to five times at a scheduled time" on page 24. Troubleshooting 49 You can change the default settings to redial up to 8 minutes. d Press . 8 To change the number of the following: CHANGE REDIAL SETTINGS The... redials three times at successively lower transmission speeds. Note: 2400 bps is the lowest transmission speed. Try one or more of times the printer will redial: a Press or repeatedly until Redial Time appears. Phone Line Busy These are possible causes and solutions. b Press . c Press or...
...SCHEDULE TO RESEND FAX AT A LATER TIME See "Sending a broadcast fax at intervals up to five times at a scheduled time" on page 24. Troubleshooting 49 You can change the default settings to redial up to 8 minutes. d Press . 8 To change the number of the following: CHANGE REDIAL SETTINGS The... redials three times at successively lower transmission speeds. Note: 2400 bps is the lowest transmission speed. Try one or more of times the printer will redial: a Press or repeatedly until Redial Time appears. Phone Line Busy These are possible causes and solutions. b Press . c Press or...

Fax Guide
Page 50
... the following : REVIEW DIGITAL PHONE SERVICE CHECKLIST The fax modem is an analog device. Try one or more information and to request an R-interface port, contact your DSL provider. • ...are using a PBX telephone service, make sure you are using an ISDN telephone service, connect the printer to an analog telephone port (an R-interface port) on an ISDN terminal adapter. For more of ...secure, if applicable: • Power supply • Telephone • Handset • Answering machine Troubleshooting 50 CHECK PHONE LINE If the telephone line is being used . • If you are possible ...
... the following : REVIEW DIGITAL PHONE SERVICE CHECKLIST The fax modem is an analog device. Try one or more information and to request an R-interface port, contact your DSL provider. • ...are using a PBX telephone service, make sure you are using an ISDN telephone service, connect the printer to an analog telephone port (an R-interface port) on an ISDN terminal adapter. For more of ...secure, if applicable: • Power supply • Telephone • Handset • Answering machine Troubleshooting 50 CHECK PHONE LINE If the telephone line is being used . • If you are possible ...
User's Guide
Page 6
...for editing...70 Scanning images for editing...70 Scanning a photo to the Library...71 Scanning multiple photos at one time using the computer 71 Creating a PDF from a scanned item...72 Canceling a scan job...72 Customizing...Lexmark print cartridges...80 Aligning print cartridges...81 Cleaning the print cartridge nozzles...81 Wiping the print cartridge nozzles and contacts...82 Preserving the print cartridges...83 Cleaning the scanner glass...83 Cleaning the exterior of the printer...83 Ordering supplies...84 Ordering print cartridges ...84 Ordering paper and other supplies...84 Troubleshooting...
...for editing...70 Scanning images for editing...70 Scanning a photo to the Library...71 Scanning multiple photos at one time using the computer 71 Creating a PDF from a scanned item...72 Canceling a scan job...72 Customizing...Lexmark print cartridges...80 Aligning print cartridges...81 Cleaning the print cartridge nozzles...81 Wiping the print cartridge nozzles and contacts...82 Preserving the print cartridges...83 Cleaning the scanner glass...83 Cleaning the exterior of the printer...83 Ordering supplies...84 Ordering print cartridges ...84 Ordering paper and other supplies...84 Troubleshooting...
User's Guide
Page 7
... ...86 Software does not install...87 Page does not print...88 Solving printer communication problems ...89 Understanding Warning levels ...89 Removing and reinstalling the software ...90 Enabling the USB port...90 Print troubleshooting...91 Improving print quality ...91 Poor text and graphic quality...92 Poor ... Vertical straight lines are not smooth ...100 White lines appear in graphics or solid black areas ...100 Checking the printer status...101 Checking printer readiness ...101 Settings are not saved...102 Checking the Spool Settings for banner printing ...102 Resolving font problems...102...
... ...86 Software does not install...87 Page does not print...88 Solving printer communication problems ...89 Understanding Warning levels ...89 Removing and reinstalling the software ...90 Enabling the USB port...90 Print troubleshooting...91 Improving print quality ...91 Poor text and graphic quality...92 Poor ... Vertical straight lines are not smooth ...100 White lines appear in graphics or solid black areas ...100 Checking the printer status...101 Checking printer readiness ...101 Settings are not saved...102 Checking the Spool Settings for banner printing ...102 Resolving font problems...102...
User's Guide
Page 8
... the computer 108 Problems when copying or scanning...108 Wrong printer is attached...108 Updating the printer software ...108 Bidirectional communication is not established...109 Experiencing poor quality or incorrect output ...109 Jams and misfeeds troubleshooting...110 How to clear and avoid paper jams...110 Paper ...jam in the Automatic Document Feeder (ADF)...110 Paper jam in the printer...111 Paper jam in the paper support...112 Paper or specialty...
... the computer 108 Problems when copying or scanning...108 Wrong printer is attached...108 Updating the printer software ...108 Bidirectional communication is not established...109 Experiencing poor quality or incorrect output ...109 Jams and misfeeds troubleshooting...110 How to clear and avoid paper jams...110 Paper ...jam in the Automatic Document Feeder (ADF)...110 Paper jam in the printer...111 Paper jam in the paper support...112 Paper or specialty...
User's Guide
Page 12
... faxing, paper jams, and misfeeds Run, and then type D:\setup, where D is not on the screen. Troubleshooting). 2 Double-click the printer Help icon. 4 Click Yes. such as: 1 Do one of the following : • In Windows Vista, click . • In Windows XP and earlier, click Start...All Programs Œ Run. You can also find this document on your printer) 3 Click User's Guide. • Making copies (if supported by The installation screen appears. To access the Lexmark Solution Center: 1 Do one of the following : • Using the software (on Windows operating systems...
... faxing, paper jams, and misfeeds Run, and then type D:\setup, where D is not on the screen. Troubleshooting). 2 Double-click the printer Help icon. 4 Click Yes. such as: 1 Do one of the following : • In Windows Vista, click . • In Windows XP and earlier, click Start...All Programs Œ Run. You can also find this document on your printer) 3 Click User's Guide. • Making copies (if supported by The installation screen appears. To access the Lexmark Solution Center: 1 Do one of the following : • Using the software (on Windows operating systems...

User's Guide
Page 30
... Print multiple photos in various sizes. From the bottom left corner of the Welcome Screen, there are two Settings choices: Click To Printer Status and Maintenance • Check ink levels. • Order print cartridges. • Find maintenance information. • Select other ...not be applicable. Click the Productivity Studio icon for more information, including how to change printer settings and troubleshooting. Depending on the printer you want to an e-mail message. Setting up the printer 30 Click To Scan Copy Details • Scan a photo or document. • Save...
... Print multiple photos in various sizes. From the bottom left corner of the Welcome Screen, there are two Settings choices: Click To Printer Status and Maintenance • Check ink levels. • Order print cartridges. • Find maintenance information. • Select other ...not be applicable. Click the Productivity Studio icon for more information, including how to change printer settings and troubleshooting. Depending on the printer you want to an e-mail message. Setting up the printer 30 Click To Scan Copy Details • Scan a photo or document. • Save...
User's Guide
Page 31
...photos, envelopes, cards, banners, iron-on the Solution Center icon. 2 Click Setup and diagnose printer. 1 Click Programs or All Programs ŒLexmark X5400 Series. 2 Select Solution Center. Setting up the printer 31 Method 1 Method 2 1 From the desktop, double-click on transfers, and transparencies. &#...: How To • Learn how to fix blurry edges. • View ink levels. • Troubleshoot other ink problems. Turning printing voice notification on or off The printer has a voice notification feature that tells you use one of the following methods. Print, scan, and copy. -
...photos, envelopes, cards, banners, iron-on the Solution Center icon. 2 Click Setup and diagnose printer. 1 Click Programs or All Programs ŒLexmark X5400 Series. 2 Select Solution Center. Setting up the printer 31 Method 1 Method 2 1 From the desktop, double-click on transfers, and transparencies. &#...: How To • Learn how to fix blurry edges. • View ink levels. • Troubleshoot other ink problems. Turning printing voice notification on or off The printer has a voice notification feature that tells you use one of the following methods. Print, scan, and copy. -

User's Guide
Page 86
... until the language you select a language, Language appears again on the display. 2 Press to factory default settings" on the display These are possible solutions. Try one or more of the following : PRESS POWER BUTTON Make sure the printer is not lit These are possible solutions. Troubleshooting Setup Troubleshooting Incorrect language appears on page 53.
... until the language you select a language, Language appears again on the display. 2 Press to factory default settings" on the display These are possible solutions. Try one or more of the following : PRESS POWER BUTTON Make sure the printer is not lit These are possible solutions. Troubleshooting Setup Troubleshooting Incorrect language appears on page 53.


