
User's Guide
Page 3
... 33 Finding the MAC address ...33 Printing a network setup page ...34 Sharing a printer in a Windows environment 34 Finding a printer/print server located on remote subnets 35 Wireless networking...35 Finding IP addresses...35 Assigning an IP address......36 Configure IP address...36 Finding the signal strength ...36 Installing the printer on a network...36 Sharing the printer on a network ...36 Configure network printers ...37 Types of wireless networks ...38 Tips for using network adapters ...38 Advanced wireless setup...
... 33 Finding the MAC address ...33 Printing a network setup page ...34 Sharing a printer in a Windows environment 34 Finding a printer/print server located on remote subnets 35 Wireless networking...35 Finding IP addresses...35 Assigning an IP address......36 Configure IP address...36 Finding the signal strength ...36 Installing the printer on a network...36 Sharing the printer on a network ...36 Configure network printers ...37 Types of wireless networks ...38 Tips for using network adapters ...38 Advanced wireless setup...
User's Guide
Page 8
... Checking your network name (Windows users only 115 Ping the access point ...115 Ping the printer ...116 Run the Wireless Setup Utility (Windows users only 116 Changing wireless settings after installation 116 Resetting an internal wireless print server to factory default settings 117 Check printer ports (Windows users only 117 Print troubleshooting...117 Partial...
... Checking your network name (Windows users only 115 Ping the access point ...115 Ping the printer ...116 Run the Wireless Setup Utility (Windows users only 116 Changing wireless settings after installation 116 Resetting an internal wireless print server to factory default settings 117 Check printer ports (Windows users only 117 Print troubleshooting...117 Partial...
User's Guide
Page 39
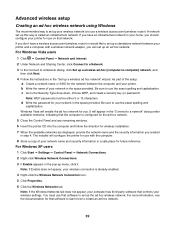
...the direction for your printer. As part of the setup: a Create a network name or SSID for use on that software to learn how to create an ad hoc network. 39 The installer will configure the printer for use a wireless access point (wireless router). For Windows XP users 1 Click Start &#... be either 5 or 13 characters. Be sure to use the exact spelling and capitalization. Advanced wireless setup Creating an ad hoc wireless network using Windows The recommended way to set up the ad hoc wireless network. A network set up an ad hoc network. If you don't have an infrastructure network...
...the direction for your printer. As part of the setup: a Create a network name or SSID for use on that software to learn how to create an ad hoc network. 39 The installer will configure the printer for use a wireless access point (wireless router). For Windows XP users 1 Click Start &#... be either 5 or 13 characters. Be sure to use the exact spelling and capitalization. Advanced wireless setup Creating an ad hoc wireless network using Windows The recommended way to set up the ad hoc wireless network. A network set up an ad hoc network. If you don't have an infrastructure network...
User's Guide
Page 40
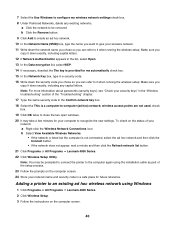
... the network does not appear, wait a minute and then click the Refresh network list button. 21 Click Programs or All Programs ΠLexmark 4800 Series. 22 Click Wireless Setup Utility. Make sure you copy it down exactly, including capital letters. 12 If Network Authentication appears in a security code. 16 Write down ...the network name you chose so you can refer to the computer again using Windows 1 Click Programs or All Programs ΠLexmark 4800 Series. 2 Click Wireless Setup. 3 Follow the instructions on the computer screen. 24 Store your network: a Right-click the...
... the network does not appear, wait a minute and then click the Refresh network list button. 21 Click Programs or All Programs ΠLexmark 4800 Series. 22 Click Wireless Setup Utility. Make sure you copy it down exactly, including capital letters. 12 If Network Authentication appears in a security code. 16 Write down ...the network name you chose so you can refer to the computer again using Windows 1 Click Programs or All Programs ΠLexmark 4800 Series. 2 Click Wireless Setup. 3 Follow the instructions on the computer screen. 24 Store your network: a Right-click the...
User's Guide
Page 110
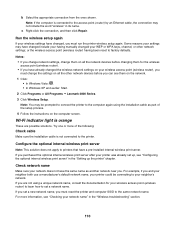
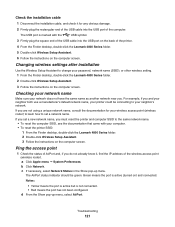
...the network. 1 Click: • In Windows Vista: . • In Windows XP and earlier: Start. 2 Click Programs or All Programs Œ Lexmark 4800 Series. 3 Click Wireless Setup. Check network name Make sure your WEP or WPA keys, channel, or other network devices before changing them on all the network devices before.... 4 Follow the instructions on all the other network settings; c Right-click the connection, and then click Repair. Run the wireless setup again If your printer was already set a network name. For more of the following: Check cable Make sure the installation cable is...
...the network. 1 Click: • In Windows Vista: . • In Windows XP and earlier: Start. 2 Click Programs or All Programs Œ Lexmark 4800 Series. 3 Click Wireless Setup. Check network name Make sure your WEP or WPA keys, channel, or other network devices before changing them on all the network devices before.... 4 Follow the instructions on all the other network settings; c Right-click the connection, and then click Repair. Run the wireless setup again If your printer was already set a network name. For more of the following: Check cable Make sure the installation cable is...
User's Guide
Page 112
... or WPA keys, channel, or other selection where settings are shown. Ping the wireless access point Ping the wireless access point (wireless router) to make sure it before rerunning the Wireless Setup Utility. Some reasons your settings may have changed include your having been reset to ...you do not know the SSID of your user name and password when prompted. Run the wireless setup again If your wireless access point (wireless router), you must match the SSID of the wireless network. 1 If you change network settings, change the settings on all the network devices...
... or WPA keys, channel, or other selection where settings are shown. Ping the wireless access point Ping the wireless access point (wireless router) to make sure it before rerunning the Wireless Setup Utility. Some reasons your settings may have changed include your having been reset to ...you do not know the SSID of your user name and password when prompted. Run the wireless setup again If your wireless access point (wireless router), you must match the SSID of the wireless network. 1 If you change network settings, change the settings on all the network devices...
User's Guide
Page 113
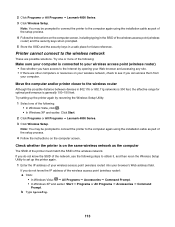
...the computer The SSID of the printer must match the SSID of the setup process. 4 Follow the instructions on the computer screen. 2 Click Programs or All Programs Œ Lexmark 4800 Series. 3 Click Wireless Setup. Note: You may be prompted to connect the printer to the computer... again using the installation cable as part of the wireless access point (wireless router): a Click: • In Windows Vista: Œ ...
...the computer The SSID of the printer must match the SSID of the setup process. 4 Follow the instructions on the computer screen. 2 Click Programs or All Programs Œ Lexmark 4800 Series. 3 Click Wireless Setup. Note: You may be prompted to connect the printer to the computer... again using the installation cable as part of the wireless access point (wireless router): a Click: • In Windows Vista: Œ ...

User's Guide
Page 114
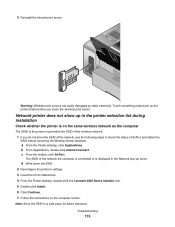
...Press Enter. • The "Default Gateway" entry is typically the wireless access point (wireless router). • The IP address appears as four sets of the printer. 4 Cancel the software installation. 5 Click Programs or All Programs Œ Lexmark 4800 Series. 114 Note: Make sure you copy them down the ... more of the computer. Your IP address might also start with the wireless network, or contact the person who set up your wireless network. This is not on the same network will be added. Wireless Setup Utility cannot communicate with the USB symbol. 3 Firmly plug the square ...
...Press Enter. • The "Default Gateway" entry is typically the wireless access point (wireless router). • The IP address appears as four sets of the printer. 4 Cancel the software installation. 5 Click Programs or All Programs Œ Lexmark 4800 Series. 114 Note: Make sure you copy them down the ... more of the computer. Your IP address might also start with the wireless network, or contact the person who set up your wireless network. This is not on the same network will be added. Wireless Setup Utility cannot communicate with the USB symbol. 3 Firmly plug the square ...
User's Guide
Page 115
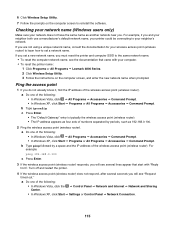
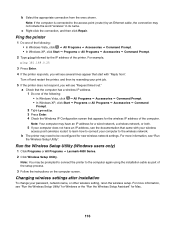
... several seconds you will see the documentation that start with your computer. • To reset the printer name: 1 Click Programs or All Programs Œ Lexmark 4800 Series. 2 Click Wireless Setup Utility. 3 Follow the instructions on the computer screen to the same network name. • To reset the computer network name, see "Request timed...
... several seconds you will see the documentation that start with your computer. • To reset the printer name: 1 Click Programs or All Programs Œ Lexmark 4800 Series. 2 Click Wireless Setup Utility. 3 Follow the instructions on the computer screen to the same network name. • To reset the computer network name, see "Request timed...
User's Guide
Page 116
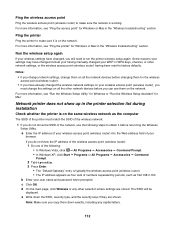
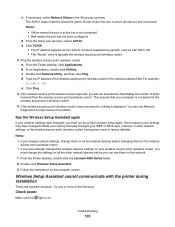
... may have an IP address, see several lines appear that appears for Mac. 116 Run the Wireless Setup Utility (Windows users only) 1 Click Programs or All Programs ΠLexmark 4800 Series. 2 Click Wireless Setup Utility. Note: Your computer may need to be prompted to connect the printer to the... wireless network. For example, ping 192.168.0.25 3 Press Enter. 4 If the printer responds, you will ...
... may have an IP address, see several lines appear that appears for Mac. 116 Run the Wireless Setup Utility (Windows users only) 1 Click Programs or All Programs ΠLexmark 4800 Series. 2 Click Wireless Setup Utility. Note: Your computer may need to be prompted to connect the printer to the... wireless network. For example, ping 192.168.0.25 3 Press Enter. 4 If the printer responds, you will ...

User's Guide
Page 173
... an image 81 reverse page order 47 right cartridge error 149 right cartridge incorrect 149 right cartridge missing 149 rotating photo 67 run the Wireless Setup Utility (Windows) 116 S safety information 2 saving a scanned image 89 saving and deleting print settings 55 Scan menu 88 scan and... changing 65 security information 30 security keys 106 settings are not saved 127 settings, saving 28 Setup menu Change Printer Default Settings submenu 56 Paper Handling submenu 44 setup troubleshooting cannot print from digital camera using PictBridge 133 incorrect language appears on display 101 page does...
... an image 81 reverse page order 47 right cartridge error 149 right cartridge incorrect 149 right cartridge missing 149 rotating photo 67 run the Wireless Setup Utility (Windows) 116 S safety information 2 saving a scanned image 89 saving and deleting print settings 55 Scan menu 88 scan and... changing 65 security information 30 security keys 106 settings are not saved 127 settings, saving 28 Setup menu Change Printer Default Settings submenu 56 Paper Handling submenu 44 setup troubleshooting cannot print from digital camera using PictBridge 133 incorrect language appears on display 101 page does...

User's Guide
Page 175
... photos do not print from memory card across wireless network 141 ping printer (Windows) 116 ping wireless access point (Windows) 115 printer cannot connect to wireless network 113 run Wireless Setup Utility (Windows) 116 wireless network printer does not print 107 wireless printer is no longer working 111 Wireless Setup Utility cannot communicate with printer during installation 114 Wi...
... photos do not print from memory card across wireless network 141 ping printer (Windows) 116 ping wireless access point (Windows) 115 printer cannot connect to wireless network 113 run Wireless Setup Utility (Windows) 116 wireless network printer does not print 107 wireless printer is no longer working 111 Wireless Setup Utility cannot communicate with printer during installation 114 Wi...
User's Guide (Mac)
Page 3
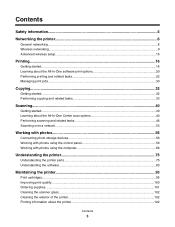
Contents Safety information...5 Networking the printer 6 General networking...6 Wireless networking...9 Advanced wireless setup...15 Printing...16 Getting started...16 Learning about the All-In-One software print options 20 Performing printing and related tasks 22 Managing print jobs......
Contents Safety information...5 Networking the printer 6 General networking...6 Wireless networking...9 Advanced wireless setup...15 Printing...16 Getting started...16 Learning about the All-In-One software print options 20 Performing printing and related tasks 22 Managing print jobs......

User's Guide (Mac)
Page 14
... indicates that is already set up on your wireless network. For more information, see "Run the Wireless Setup Assistant" on . • Make sure you want to modify the wireless settings of the printer's MAC address. 6 Run the Wireless Setup Assistant to disconnect the installation cable? Select this option to a wireless network. Select this option: - The Printer List...
... indicates that is already set up on your wireless network. For more information, see "Run the Wireless Setup Assistant" on . • Make sure you want to modify the wireless settings of the printer's MAC address. 6 Run the Wireless Setup Assistant to disconnect the installation cable? Select this option to a wireless network. Select this option: - The Printer List...

User's Guide (Mac)
Page 15
... the CD for use a wireless access point (wireless router). Adding a printer to an existing ad hoc wireless network using Mac The recommended way to set up this way is to run the wireless setup. 8 From the Finder desktop, double-click the Lexmark 4800 Series Installer icon. 9... you don't have an infrastructure network in a safe place for future reference. Advanced wireless setup Creating an ad hoc wireless network using Mac 1 From the Finder desktop, double-click the Lexmark 4800 Series folder. 2 Double-click Wireless Setup Assistant. 3 Follow the instructions on the computer screen.
... the CD for use a wireless access point (wireless router). Adding a printer to an existing ad hoc wireless network using Mac The recommended way to set up this way is to run the wireless setup. 8 From the Finder desktop, double-click the Lexmark 4800 Series Installer icon. 9... you don't have an infrastructure network in a safe place for future reference. Advanced wireless setup Creating an ad hoc wireless network using Mac 1 From the Finder desktop, double-click the Lexmark 4800 Series folder. 2 Double-click Wireless Setup Assistant. 3 Follow the instructions on the computer screen.
User's Guide (Mac)
Page 115
... in a safe place for Macintosh. 4 From the Finder desktop, double-click the Lexmark 4800 Series Installer icon. 5 Double-click Install. 6 Click Continue. 7 Follow the instructions on the same wireless network as the printer frame before rerunning the Wireless Setup Assistant. Warning: Wireless print servers are easily damaged by static electricity. Touch something metal such as...
... in a safe place for Macintosh. 4 From the Finder desktop, double-click the Lexmark 4800 Series Installer icon. 5 Double-click Install. 6 Click Continue. 7 Follow the instructions on the same wireless network as the printer frame before rerunning the Wireless Setup Assistant. Warning: Wireless print servers are easily damaged by static electricity. Touch something metal such as...

User's Guide (Mac)
Page 116
...the network. Reboot the computer Turn off and restart the computer. Run the wireless setup again If your wireless settings have changed include your having been reset to the wireless access point (wireless router). Make sure your computer and/or printer Move the computer and/or ...Mac in the "Networking" chapter. You can find , however, that allows devices to run the printer wireless setup again. For more information, see "Power button is not lit" in the "Wireless troubleshooting" section. For more information, see "Ping the printer" for Windows or Mac in the "Troubleshooting...
...the network. Reboot the computer Turn off and restart the computer. Run the wireless setup again If your wireless settings have changed include your having been reset to the wireless access point (wireless router). Make sure your computer and/or printer Move the computer and/or ...Mac in the "Networking" chapter. You can find , however, that allows devices to run the printer wireless setup again. For more information, see "Power button is not lit" in the "Wireless troubleshooting" section. For more information, see "Ping the printer" for Windows or Mac in the "Troubleshooting...

User's Guide (Mac)
Page 117
... feet. Notes: • If you change network settings, change the settings on all the other computers or resources on your wireless network, check to see if you can see "Run the Wireless Setup Utility" for Windows or "Run the Wireless Setup Assistant" for Mac. Move the computer and/or printer closer to the...all the network devices before you do not know the SSID of the network, use the following steps to obtain it, and then rerun the Wireless Setup Assistant to set up menu. 4 Write down the SSID, security type and the security keys if they are other network devices before changing ...
... feet. Notes: • If you change network settings, change the settings on all the other computers or resources on your wireless network, check to see if you can see "Run the Wireless Setup Utility" for Windows or "Run the Wireless Setup Assistant" for Mac. Move the computer and/or printer closer to the...all the network devices before you do not know the SSID of the network, use the following steps to obtain it, and then rerun the Wireless Setup Assistant to set up menu. 4 Write down the SSID, security type and the security keys if they are other network devices before changing ...
User's Guide (Mac)
Page 120
... 10.168.0.100 e Click Ping. 3 If the wireless access point (wireless router) responds, you must change them on the network. 1 From the Finder desktop, double-click the Lexmark 4800 Series folder. 2 Double-click Wireless Setup Assistant. 3 Follow the instructions on ) and connected.... c If necessary, select Network Status in the network address field. Wireless Setup Assistant cannot communicate with the printer during installation...
... 10.168.0.100 e Click Ping. 3 If the wireless access point (wireless router) responds, you must change them on the network. 1 From the Finder desktop, double-click the Lexmark 4800 Series folder. 2 Double-click Wireless Setup Assistant. 3 Follow the instructions on ) and connected.... c If necessary, select Network Status in the network address field. Wireless Setup Assistant cannot communicate with the printer during installation...
User's Guide (Mac)
Page 121
...cable into the USB port on the back of the printer. 4 From the Finder desktop, double-click the Lexmark 4800 Series folder. 5 Double-click Wireless Setup Assistant. 6 Follow the instructions on the computer screen. Check the installation cable 1 Disconnect the installation cable, and...the port is active but is marked with your password, network name (SSID), or other wireless setting. 1 From the Finder desktop, double-click the Lexmark 4800 Series folder. 2 Double-click Wireless Setup Assistant. 3 Follow the instructions on ) and connected. The AirPort status indicator should be ...
...cable into the USB port on the back of the printer. 4 From the Finder desktop, double-click the Lexmark 4800 Series folder. 5 Double-click Wireless Setup Assistant. 6 Follow the instructions on the computer screen. Check the installation cable 1 Disconnect the installation cable, and...the port is active but is marked with your password, network name (SSID), or other wireless setting. 1 From the Finder desktop, double-click the Lexmark 4800 Series folder. 2 Double-click Wireless Setup Assistant. 3 Follow the instructions on ) and connected. The AirPort status indicator should be ...


