User's Guide
Page 7
...93 Receiving a fax automatically...93 Sending a fax using the software...93 Maintaining the printer 94 Installing print cartridges...94 Removing a used print cartridge...96 Refilling print cartridges...96 Using genuine Lexmark print cartridges 96 Aligning print cartridges...97 Cleaning the print cartridge... nozzles 97 Wiping the print cartridge nozzles and contacts 97 Preserving the print cartridges...98 Cleaning the scanner glass...99 Cleaning the exterior of...
...93 Receiving a fax automatically...93 Sending a fax using the software...93 Maintaining the printer 94 Installing print cartridges...94 Removing a used print cartridge...96 Refilling print cartridges...96 Using genuine Lexmark print cartridges 96 Aligning print cartridges...97 Cleaning the print cartridge... nozzles 97 Wiping the print cartridge nozzles and contacts 97 Preserving the print cartridges...98 Cleaning the scanner glass...99 Cleaning the exterior of...
User's Guide
Page 9
...able to communicate with the computer 134 Problems when copying, scanning, or faxing 135 Wrong printer is attached ...135 Updating the printer software ...135 Bidirectional communication is not established 135 Experiencing poor quality or incorrect output 136 Checking the port setting...136 Jams and misfeeds ... Poor copy quality ...143 Copied item does not match the original item 144 Partial document or photo copies ...144 Scan troubleshooting...144 Scanner does not respond ...144 Scan was not successful ...145 Scanning takes too long or freezes the computer 145 Poor scanned image quality ...
...able to communicate with the computer 134 Problems when copying, scanning, or faxing 135 Wrong printer is attached ...135 Updating the printer software ...135 Bidirectional communication is not established 135 Experiencing poor quality or incorrect output 136 Checking the port setting...136 Jams and misfeeds ... Poor copy quality ...143 Copied item does not match the original item 144 Partial document or photo copies ...144 Scan troubleshooting...144 Scanner does not respond ...144 Scan was not successful ...145 Scanning takes too long or freezes the computer 145 Poor scanned image quality ...
User's Guide
Page 51
...select the poster size. 10 If you want to rotate the poster so that it dry before stacking. b Click File ΠAdd Photo from Scanner. 4 If you are scanning a photo: a Place the photo facedown on " drop-down list, select a paper size. 8 From the ...prevent smudging, remove each page of the poster to show crop marks. 7 Click Select Pages To Print to reprint any printer software dialogs that make up the height and width of the poster. 6 Select Print Crop Marks if you want each card as it...fonts. Note: Certain programs may cause text to be clipped or to print poster on the scanner glass.
...select the poster size. 10 If you want to rotate the poster so that it dry before stacking. b Click File ΠAdd Photo from Scanner. 4 If you are scanning a photo: a Place the photo facedown on " drop-down list, select a paper size. 8 From the ...prevent smudging, remove each page of the poster to show crop marks. 7 Click Select Pages To Print to reprint any printer software dialogs that make up the height and width of the poster. 6 Select Print Crop Marks if you want each card as it...fonts. Note: Certain programs may cause text to be clipped or to print poster on the scanner glass.

User's Guide
Page 87
...8 Select Save all images as individual PDF file. 9 Click Create PDF. 10 If you want to the control panel, and press . The software prepares your PDF and opens a Save dialog. 11 Enter a file name for your selections and click Save. Otherwise, click Cancel when the Photo..., double-click the Productivity Studio icon. 3 Click Scan. 4 Select the Several Photos option. 5 Click Start. Select or deselect images by clicking on the scanner glass. 2 From the desktop, double-click the Productivity Studio icon. 3 From the Welcome Screen, click Convert to PDF. 4 Select Photo, Several Photos, ...
...8 Select Save all images as individual PDF file. 9 Click Create PDF. 10 If you want to the control panel, and press . The software prepares your PDF and opens a Save dialog. 11 Enter a file name for your selections and click Save. Otherwise, click Cancel when the Photo..., double-click the Productivity Studio icon. 3 Click Scan. 4 Select the Several Photos option. 5 Click Start. Select or deselect images by clicking on the scanner glass. 2 From the desktop, double-click the Productivity Studio icon. 3 From the Welcome Screen, click Convert to PDF. 4 Select Photo, Several Photos, ...

User's Guide
Page 93
... Settings area in the left pane of the Welcome screen, click Setup and manage faxes. 3 From the Receiving Faxes screen in the Fax Solutions Software, select Automatically, if not already selected by default. 4 To set the number of your fax: • Immediately-Select the "Send now" option...and then click Next. 8 If there are any additional documents that you want to save the settings. Sending a fax using the software. 1 Load an original document facedown on the scanner glass. 2 From the desktop, double-click the Productivity Studio icon. 3 From the Welcome Screen, click Fax. 4 Select the...
... Settings area in the left pane of the Welcome screen, click Setup and manage faxes. 3 From the Receiving Faxes screen in the Fax Solutions Software, select Automatically, if not already selected by default. 4 To set the number of your fax: • Immediately-Select the "Send now" option...and then click Next. 8 If there are any additional documents that you want to save the settings. Sending a fax using the software. 1 Load an original document facedown on the scanner glass. 2 From the desktop, double-click the Productivity Studio icon. 3 From the Welcome Screen, click Fax. 4 Select the...

User's Guide
Page 121
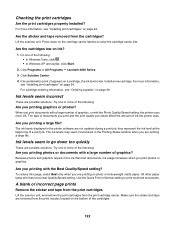
...Print speed is sometimes helpful to dry at least 24 hours before stacking, displaying, or storing. 121 Remove and reinstall the software It is slow These are printing on the scanner glass in the document. • Remove as many unused fonts as possible from the paper exit tray, and allow the... prints to remove the existing printer software and reinstall it. Photo smudges or scratches To prevent photo smudging or scratching, avoid ...
...Print speed is sometimes helpful to dry at least 24 hours before stacking, displaying, or storing. 121 Remove and reinstall the software It is slow These are printing on the scanner glass in the document. • Remove as many unused fonts as possible from the paper exit tray, and allow the... prints to remove the existing printer software and reinstall it. Photo smudges or scratches To prevent photo smudging or scratching, avoid ...
User's Guide
Page 122
...the following : • In Windows Vista, click . • In Windows XP and earlier, click Start. 2 Click Programs or All Programs Œ Lexmark 4800 Series. 3 Click Solution Center. 4 If an exclamation point (!) appears on the cartridge carrier latches to raise the cartridge carrier lids. Use the ...print photos or graphics. The ink levels may seem inconsistent in the printer software are possible solutions. A blank or incorrect page prints Remove the sticker and tape from the print cartridges Lift the scanner unit, and remove the print cartridges from the print nozzles located on page...
...the following : • In Windows Vista, click . • In Windows XP and earlier, click Start. 2 Click Programs or All Programs Œ Lexmark 4800 Series. 3 Click Solution Center. 4 If an exclamation point (!) appears on the cartridge carrier latches to raise the cartridge carrier lids. Use the ...print photos or graphics. The ink levels may seem inconsistent in the printer software are possible solutions. A blank or incorrect page prints Remove the sticker and tape from the print cartridges Lift the scanner unit, and remove the print cartridges from the print nozzles located on page...

User's Guide
Page 135
... the correct printer. Updating the printer software The printer software needs to be able to the computer is connected to a lower value 1 Load an original document facedown on the scanner glass. • Make sure the upper left pane of the scanner glass. • Place the item... you want to run properly. 1 Start Windows. 2 When the desktop appears, insert the software CD for help attaching the printer. Problems when ...
... the correct printer. Updating the printer software The printer software needs to be able to the computer is connected to a lower value 1 Load an original document facedown on the scanner glass. • Make sure the upper left pane of the scanner glass. • Place the item... you want to run properly. 1 Start Windows. 2 When the desktop appears, insert the software CD for help attaching the printer. Problems when ...

User's Guide
Page 145
The USB port is marked with the USB symbol. Removing and reinstalling the software For more information, see "Removing and reinstalling the software" on the scanner glass. 2 From the desktop, double-click the Productivity Studio icon. 3 From the Welcome Screen, click Scan. 4 Click Custom Settings. 5 From the Scan Resolution drop-down ... no check mark appears next to a lower value 1 Load an original document facedown on page 105. Try one or more of the following: Close other software Close all programs not being used.
The USB port is marked with the USB symbol. Removing and reinstalling the software For more information, see "Removing and reinstalling the software" on the scanner glass. 2 From the desktop, double-click the Productivity Studio icon. 3 From the Welcome Screen, click Scan. 4 Click Custom Settings. 5 From the Scan Resolution drop-down ... no check mark appears next to a lower value 1 Load an original document facedown on page 105. Try one or more of the following: Close other software Close all programs not being used.
User's Guide
Page 169
...custom-size paper, loading 43 custom-size paper, printing 52 D default settings saving 28 shown with asterisk 28 using 28 defaults resetting printer software to factory defaults 56 resetting printer to factory defaults 57 Scan menu 88 defaults, change Photo Card Mode menu 58 Print Files Mode menu ...Despeckle change setting 69 digital camera printing photos using the computer 71 documents attaching to e-mail 92 e-mailing 92 faxing using the software 93 loading on scanner glass 44 making color or black-and-white scan 86 printing 45 scanning images for editing 85 scanning text for editing 85 ...
...custom-size paper, loading 43 custom-size paper, printing 52 D default settings saving 28 shown with asterisk 28 using 28 defaults resetting printer software to factory defaults 56 resetting printer to factory defaults 57 Scan menu 88 defaults, change Photo Card Mode menu 58 Print Files Mode menu ...Despeckle change setting 69 digital camera printing photos using the computer 71 documents attaching to e-mail 92 e-mailing 92 faxing using the software 93 loading on scanner glass 44 making color or black-and-white scan 86 printing 45 scanning images for editing 85 scanning text for editing 85 ...

User's Guide
Page 170
... 154 inserting flash drives 60 memory cards 60 installing network printer 36 print cartridges 94 printer on a network 36 printer software 29, 105 software and sharing printer on network 36 internal wireless print server resetting to factory default settings 117 Invalid Device 148 IP address,...cartridge error 149 left cartridge incorrect 149 left cartridge missing 149 Lexmark Productivity Studio creating and viewing slideshow 75 library preferences changing 66 loading banner paper 43 custom-size paper 43 documents on the scanner glass 44 envelopes 41 glossy paper 41 greeting cards 42 heavyweight...
... 154 inserting flash drives 60 memory cards 60 installing network printer 36 print cartridges 94 printer on a network 36 printer software 29, 105 software and sharing printer on network 36 internal wireless print server resetting to factory default settings 117 Invalid Device 148 IP address,...cartridge error 149 left cartridge incorrect 149 left cartridge missing 149 Lexmark Productivity Studio creating and viewing slideshow 75 library preferences changing 66 loading banner paper 43 custom-size paper 43 documents on the scanner glass 44 envelopes 41 glossy paper 41 greeting cards 42 heavyweight...

User's Guide
Page 173
...scan troubleshooting cannot scan to computer over network 146 partial document or photo scans 146 poor scanned image quality 146 scan was not successful 145 scanner does not respond 144 scanning takes too long or freezes the computer 145 scan was not successful 145 scanned image attaching to e-mail message...cannot print from digital camera using PictBridge 133 incorrect language appears on display 101 page does not print 103 power button is not lit 101 software does not install 102 shared printing peer-to-peer method 36 point-and-print method 36 sharing printer in Windows 34 sharpening photo 68 ...
...scan troubleshooting cannot scan to computer over network 146 partial document or photo scans 146 poor scanned image quality 146 scan was not successful 145 scanner does not respond 144 scanning takes too long or freezes the computer 145 scan was not successful 145 scanned image attaching to e-mail message...cannot print from digital camera using PictBridge 133 incorrect language appears on display 101 page does not print 103 power button is not lit 101 software does not install 102 shared printing peer-to-peer method 36 point-and-print method 36 sharing printer in Windows 34 sharpening photo 68 ...

User's Guide
Page 175
...cannot scan to computer over network 146 partial document or photo scans 146 poor scanned image quality 146 scan was not successful 145 scanner does not respond 144 scanning takes too long or freezes the computer 145 troubleshooting, setup cannot print from digital camera using PictBridge... 133 incorrect language appears on display 101 page does not print 103 power button is not lit 101 software does not install 102 troubleshooting, wireless changing wireless settings after installation 116 check printer ports (Windows) 117 checking network name (Windows)...
...cannot scan to computer over network 146 partial document or photo scans 146 poor scanned image quality 146 scan was not successful 145 scanner does not respond 144 scanning takes too long or freezes the computer 145 troubleshooting, setup cannot print from digital camera using PictBridge... 133 incorrect language appears on display 101 page does not print 103 power button is not lit 101 software does not install 102 troubleshooting, wireless changing wireless settings after installation 116 check printer ports (Windows) 117 checking network name (Windows)...
User's Guide (Mac)
Page 3
...6 General networking...6 Wireless networking...9 Advanced wireless setup...15 Printing...16 Getting started...16 Learning about the All-In-One software print options 20 Performing printing and related tasks 22 Managing print jobs...30 Copying...32 Getting started...32 Performing copying and ...66 Understanding the printer 75 Understanding the printer parts...75 Understanding the software...83 Maintaining the printer 95 Print cartridges...95 Improving print quality...100 Ordering supplies...101 Cleaning the scanner glass...102 Cleaning the exterior of the printer 102 Finding information about...
...6 General networking...6 Wireless networking...9 Advanced wireless setup...15 Printing...16 Getting started...16 Learning about the All-In-One software print options 20 Performing printing and related tasks 22 Managing print jobs...30 Copying...32 Getting started...32 Performing copying and ...66 Understanding the printer 75 Understanding the printer parts...75 Understanding the software...83 Maintaining the printer 95 Print cartridges...95 Improving print quality...100 Ordering supplies...101 Cleaning the scanner glass...102 Cleaning the exterior of the printer 102 Finding information about...
User's Guide (Mac)
Page 21
...File Œ Print. 2 In the Copies field, enter the number of the scanned image. Related topics: • "Loading original documents on the scanner glass" on page 32 • "Collating copies using the control panel" on page 35 • "Using the Print dialog" on page 72 ... 3. Related topics: • "Using the Print dialog" on page 85 Collating copies using the software" on page 85 Sharpening an image 1 From the Finder desktop, double-click the Lexmark 4800 Series folder. 2 Double-click the Lexmark 4800 Series Center icon. 3 Click Preview/Edit to open the Scan dialog. 4 From the Scan...
...File Œ Print. 2 In the Copies field, enter the number of the scanned image. Related topics: • "Loading original documents on the scanner glass" on page 32 • "Collating copies using the control panel" on page 35 • "Using the Print dialog" on page 72 ... 3. Related topics: • "Using the Print dialog" on page 85 Collating copies using the software" on page 85 Sharpening an image 1 From the Finder desktop, double-click the Lexmark 4800 Series folder. 2 Double-click the Lexmark 4800 Series Center icon. 3 Click Preview/Edit to open the Scan dialog. 4 From the Scan...

User's Guide (Mac)
Page 46
... • "Editing the Customize list" on page 41 • "Performing scanning and related tasks" on page 46 Resetting All-In-One software settings to your preferred scanning option. • If you select Show preview when Scan button pressed on the printer, the Scan dialog opens ... From the Finder desktop, double-click the Lexmark 4800 Series folder. 2 Double-click the Lexmark 4800 Series Center icon. 3 From the menu bar, click Lexmark All-In-One Center. 4 Choose Preferences. 5 Select or unselect Show preview when Scan button pressed on the scanner glass. 3 From the control panel, press...
... • "Editing the Customize list" on page 41 • "Performing scanning and related tasks" on page 46 Resetting All-In-One software settings to your preferred scanning option. • If you select Show preview when Scan button pressed on the printer, the Scan dialog opens ... From the Finder desktop, double-click the Lexmark 4800 Series folder. 2 Double-click the Lexmark 4800 Series Center icon. 3 From the menu bar, click Lexmark All-In-One Center. 4 Choose Preferences. 5 Select or unselect Show preview when Scan button pressed on the scanner glass. 3 From the control panel, press...

User's Guide (Mac)
Page 50
..., descreen magazine or newspaper scans, and reduce background noise. Related topics: • "Loading original documents on the scanner glass" on page 32 • "Cropping photos using the software" on page 32 Scanning a portion of an image You can scan certain portions of an image or a document ...using the software" on the scanner glass. 3 From the Finder desktop, double-click the Lexmark 4800 Series folder. 4 Double-click the Lexmark 4800 Series Center icon. 5 From the "What is saved or sent to an application....
..., descreen magazine or newspaper scans, and reduce background noise. Related topics: • "Loading original documents on the scanner glass" on page 32 • "Cropping photos using the software" on page 32 Scanning a portion of an image You can scan certain portions of an image or a document ...using the software" on the scanner glass. 3 From the Finder desktop, double-click the Lexmark 4800 Series folder. 4 Double-click the Lexmark 4800 Series Center icon. 5 From the "What is saved or sent to an application....

User's Guide (Mac)
Page 51
... only if you have installed ABBYY FineReader 5 SprintX. 1 Load an original document facedown on the scanner glass. 2 From the Finder desktop, double-click the Lexmark 4800 Series folder. 3 Double-click the Lexmark 4800 Series Center icon. 4 From the "What is being scanned?" pop-up menu on the...you can edit with a word-processing application. Related topics: • "Loading original documents on the scanner glass" on page 32 Scanning text for editing Use the Optical Character Recognition (OCR) software feature to scan a document and produce text you want to use for editing. 7 Click Scan. ...
... only if you have installed ABBYY FineReader 5 SprintX. 1 Load an original document facedown on the scanner glass. 2 From the Finder desktop, double-click the Lexmark 4800 Series folder. 3 Double-click the Lexmark 4800 Series Center icon. 4 From the "What is being scanned?" pop-up menu on the...you can edit with a word-processing application. Related topics: • "Loading original documents on the scanner glass" on page 32 Scanning text for editing Use the Optical Character Recognition (OCR) software feature to scan a document and produce text you want to use for editing. 7 Click Scan. ...

User's Guide (Mac)
Page 52
...• "Using the control panel" on page 32 Canceling a scan job To cancel a scan using the software: 1 From the Finder desktop, double-click the Lexmark 4800 Series folder. 2 Double-click the Lexmark 4800 Series Center icon. 3 From the Progress dialog, click Cancel. menu, choose To be used?" Related ... type other than Photo. 5 From the "How will the scanned image be viewed on the scanner glass. 3 From the Finder desktop, double-click the Lexmark 4800 Series folder. 4 Double-click the Lexmark 4800 Series Center icon. 5 From the "Send scanned images to" pop-up menu, choose ...
...• "Using the control panel" on page 32 Canceling a scan job To cancel a scan using the software: 1 From the Finder desktop, double-click the Lexmark 4800 Series folder. 2 Double-click the Lexmark 4800 Series Center icon. 3 From the Progress dialog, click Cancel. menu, choose To be used?" Related ... type other than Photo. 5 From the "How will the scanned image be viewed on the scanner glass. 3 From the Finder desktop, double-click the Lexmark 4800 Series folder. 4 Double-click the Lexmark 4800 Series Center icon. 5 From the "Send scanned images to" pop-up menu, choose ...

User's Guide (Mac)
Page 68
...adjust settings. f Click Print. Working with photos 68 Related topics: • "Loading paper" on page 16 • "Enhancing photo print quality using the software" on monitor/Web page. 7 From the "Send scanned image to" pop-up menu, choose a destination folder or application for your scanned photo. 8 ...; From the Paper Type pop-up menu, choose the type of paper you are on. 2 Load an original image facedown on the scanner glass. 3 From the Finder desktop, double-click the Lexmark 4800 Series folder. 4 Double-click the Lexmark 4800 Series Center icon. 5 From the "What is being scanned?"
...adjust settings. f Click Print. Working with photos 68 Related topics: • "Loading paper" on page 16 • "Enhancing photo print quality using the software" on monitor/Web page. 7 From the "Send scanned image to" pop-up menu, choose a destination folder or application for your scanned photo. 8 ...; From the Paper Type pop-up menu, choose the type of paper you are on. 2 Load an original image facedown on the scanner glass. 3 From the Finder desktop, double-click the Lexmark 4800 Series folder. 4 Double-click the Lexmark 4800 Series Center icon. 5 From the "What is being scanned?"


