User's Guide
Page 3
... ...70 Adjusting Power Saver...71 Adjusting the brightness of the display ...72 Setting the standard exit bin light...72 Recycling...73 Recycling Lexmark products...73 Recycling Lexmark packaging...73 Returning Lexmark cartridges for reuse or recycling...74 Reducing printer noise...74 Loading paper and specialty media 76 Setting the Paper Size and Paper Type...
... ...70 Adjusting Power Saver...71 Adjusting the brightness of the display ...72 Setting the standard exit bin light...72 Recycling...73 Recycling Lexmark products...73 Recycling Lexmark packaging...73 Returning Lexmark cartridges for reuse or recycling...74 Reducing printer noise...74 Loading paper and specialty media 76 Setting the Paper Size and Paper Type...
User's Guide
Page 9
... Checking the status of supplies from the printer control panel 234 Checking the status of supplies from a network computer 234 Ordering supplies...235 Ordering toner cartridges...235 Ordering a photoconductor kit ...235 Ordering ADF replacement parts...236 Moving the printer to another location...236 Shipping the printer...237 Administrative support 238 Finding...
... Checking the status of supplies from the printer control panel 234 Checking the status of supplies from a network computer 234 Ordering supplies...235 Ordering toner cartridges...235 Ordering a photoconductor kit ...235 Ordering ADF replacement parts...236 Moving the printer to another location...236 Shipping the printer...237 Administrative support 238 Finding...

User's Guide
Page 10
... print faxes...258 Network/Network ...258 No analog phone line connected to ...255 Check tray connection ...255 Close front door...255 Close door or insert cartridge...255 Connect bps...255 Disk corrupted ...256 Disk Full - 233 paper jam ...246 234 paper jam ...246 235 paper jam ...247 240-249 paper jams...
... print faxes...258 Network/Network ...258 No analog phone line connected to ...255 Check tray connection ...255 Close front door...255 Close door or insert cartridge...255 Connect bps...255 Disk corrupted ...256 Disk Full - 233 paper jam ...246 234 paper jam ...246 235 paper jam ...247 240-249 paper jams...

User's Guide
Page 11
... disk ...260 Unsupported USB device, please remove ...260 Unsupported USB hub, please remove...260 USB/USB ...260 30 Invalid refill, change toner cartridge...260 31 Replace defective cartridge ...260 32 Cartridge part number unsupported by device ...260 34 Short paper ...260 35 Insufficient memory to support Resource Save feature 261 37 Insufficient memory...
... disk ...260 Unsupported USB device, please remove ...260 Unsupported USB hub, please remove...260 USB/USB ...260 30 Invalid refill, change toner cartridge...260 31 Replace defective cartridge ...260 32 Cartridge part number unsupported by device ...260 34 Short paper ...260 35 Insufficient memory to support Resource Save feature 261 37 Insufficient memory...
User's Guide
Page 12
80 Routine maintenance needed ...265 84 Replace PC Kit...265 84 PC Kit life warning...265 88 Cartridge low...265 88.yy Cartridge nearly low...266 88.yy Replace cartridge ...266 200-282.yy paper jam...266 290-295.yy scanner jam...266 293 Replace all originals if restarting job...266 293.02 Flatbed...
80 Routine maintenance needed ...265 84 Replace PC Kit...265 84 PC Kit life warning...265 88 Cartridge low...265 88.yy Cartridge nearly low...266 88.yy Replace cartridge ...266 200-282.yy paper jam...266 290-295.yy scanner jam...266 293 Replace all originals if restarting job...266 293.02 Flatbed...

User's Guide
Page 74
...setting supports the performance specifications for reuse or recycling, follow the instructions that came in Lexmark packaging is recyclable where foam recycling facilities exist. To return Lexmark cartridges for your printer has faxing capability, fax sounds are reduced or disabled, including those made...You can reuse the box that change when you return a cartridge to reduce the printer noise. Expanded polystyrene (EPS) foam used cartridges to return the cartridges are also recycled. One hundred percent of Lexmark cartridges from the list, and then click the links or use the...
...setting supports the performance specifications for reuse or recycling, follow the instructions that came in Lexmark packaging is recyclable where foam recycling facilities exist. To return Lexmark cartridges for your printer has faxing capability, fax sounds are reduced or disabled, including those made...You can reuse the box that change when you return a cartridge to reduce the printer noise. Expanded polystyrene (EPS) foam used cartridges to return the cartridges are also recycled. One hundred percent of Lexmark cartridges from the list, and then click the links or use the...
User's Guide
Page 97
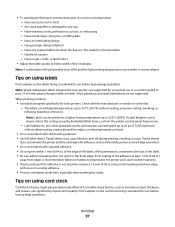
.... - Label adhesives, face sheet (printable stock), and topcoats can significantly impact print quality. Partial sheets also contaminate the printer and the cartridge with adhesive, and could void the warranty. • If zone coating of its variable characteristics, such as moisture content, thickness, and ... labels designed for laser printers. It is heavy, single-ply specialty media. Adhesive material contaminates the printer and could void the printer and cartridge warranties. • Do not use labels with exposed adhesive. • Do not print within 1 mm (0.04 in a jam. Many...
.... - Label adhesives, face sheet (printable stock), and topcoats can significantly impact print quality. Partial sheets also contaminate the printer and the cartridge with adhesive, and could void the warranty. • If zone coating of its variable characteristics, such as moisture content, thickness, and ... labels designed for laser printers. It is heavy, single-ply specialty media. Adhesive material contaminates the printer and could void the printer and cartridge warranties. • Do not use labels with exposed adhesive. • Do not print within 1 mm (0.04 in a jam. Many...
User's Guide
Page 186
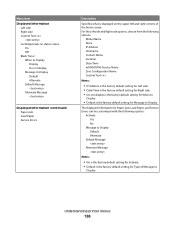
Menu item Displayed Information Left side Right side Custom Text Cartridge levels on the upper left and right corners of Message to Display. Understanding printer menus 186 The displayed information for Paper Jam, Load Paper, and ...
Menu item Displayed Information Left side Right side Custom Text Cartridge levels on the upper left and right corners of Message to Display. Understanding printer menus 186 The displayed information for Paper Jam, Load Paper, and ...

User's Guide
Page 188
... Allow Custom Job Scans On Off Scanner Jam Recovery Job level Page level Web Page Refresh Rate 30-300 Contact Name Location Alarms Alarm Control Cartridge Alarm Timeouts Standby Mode Disabled 2-240 Description Specifies whether image background removal is allowed during copy, fax, e-mail, FTP, or scan to USB Note: On...
... Allow Custom Job Scans On Off Scanner Jam Recovery Job level Page level Web Page Refresh Rate 30-300 Contact Name Location Alarms Alarm Control Cartridge Alarm Timeouts Standby Mode Disabled 2-240 Description Specifies whether image background removal is allowed during copy, fax, e-mail, FTP, or scan to USB Note: On...
User's Guide
Page 234
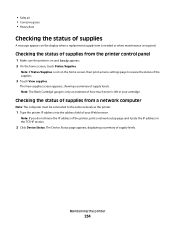
Note: The Black Cartridge gauge is only an estimate of how much toner is not on and Ready appears. 2 On the home screen, touch Status/Supplies. The View supplies ... IP address of supply levels. Checking the status of supplies from a network computer Note: The computer must be connected to review the status of your cartridge. Note: If Status/Supplies is left in the TCP/IP section. 2 Click Device Status. Checking the status of supplies from the printer control panel 1 Make...
Note: The Black Cartridge gauge is only an estimate of how much toner is not on and Ready appears. 2 On the home screen, touch Status/Supplies. The View supplies ... IP address of supply levels. Checking the status of supplies from a network computer Note: The computer must be connected to review the status of your cartridge. Note: If Status/Supplies is left in the TCP/IP section. 2 Click Device Status. Checking the status of supplies from the printer control panel 1 Make...
User's Guide
Page 235
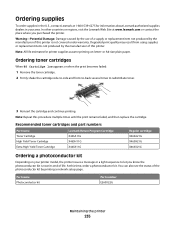
... supplies assume printing on your area. At this procedure multiple times until the print remains faded, and then replace the cartridge. Recommended toner cartridges and part numbers Part name Toner Cartridge High Yield Toner Cartridge Extra High Yield Toner Cartridge Lexmark Return Program Cartridge X463A11G X463H11G X463X11G Regular cartridge X463A21G X463H21G X463X21G Ordering a photoconductor kit Depending on letter-
... supplies assume printing on your area. At this procedure multiple times until the print remains faded, and then replace the cartridge. Recommended toner cartridges and part numbers Part name Toner Cartridge High Yield Toner Cartridge Extra High Yield Toner Cartridge Lexmark Return Program Cartridge X463A11G X463H11G X463X11G Regular cartridge X463A21G X463H21G X463X21G Ordering a photoconductor kit Depending on letter-
User's Guide
Page 238
...and Documentation CD and the Embedded Web Server Administrator's Guide on the Lexmark Web site at www.lexmark.com/publications. Administrative support 238 Using the Embedded Web Server If the printer is installed on the Lexmark Web site at www.lexmark.com. Checking the device status From the Device Status page of ...an e-mail when the supplies are getting low or when the paper needs to see paper tray settings, the level of toner in the toner cartridge, the percentage of certain printer parts. To view the device status: 1 Type the printer IP address in the TCP/IP section. 2 Click ...
...and Documentation CD and the Embedded Web Server Administrator's Guide on the Lexmark Web site at www.lexmark.com/publications. Administrative support 238 Using the Embedded Web Server If the printer is installed on the Lexmark Web site at www.lexmark.com. Checking the device status From the Device Status page of ...an e-mail when the supplies are getting low or when the paper needs to see paper tray settings, the level of toner in the toner cartridge, the percentage of certain printer parts. To view the device status: 1 Type the printer IP address in the TCP/IP section. 2 Click ...
User's Guide
Page 240
... Document Feeder (ADF) Clearing jams 240 If Jam Recovery is available. Open doors and remove trays to open the front door. Inside are the toner cartridge and photoconductor kit. 2 Standard exit bin 3 Front door 4 Manual or multipurpose feeder door 5 Standard 250-sheet tray (Tray 1) 6 Optional 250- Understanding jam messages and locations...
... Document Feeder (ADF) Clearing jams 240 If Jam Recovery is available. Open doors and remove trays to open the front door. Inside are the toner cartridge and photoconductor kit. 2 Standard exit bin 3 Front door 4 Manual or multipurpose feeder door 5 Standard 250-sheet tray (Tray 1) 6 Optional 250- Understanding jam messages and locations...
User's Guide
Page 242
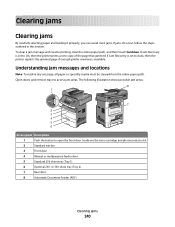
Clearing jams 242 2 Remove the jam if you see it here. 3 If you do not see the jam, open the front door, and then remove the photoconductor kit and toner cartridge. 4 Lift the flap at the front of the printer, and then remove any jammed sheets.
Clearing jams 242 2 Remove the jam if you see it here. 3 If you do not see the jam, open the front door, and then remove the photoconductor kit and toner cartridge. 4 Lift the flap at the front of the printer, and then remove any jammed sheets.
User's Guide
Page 243
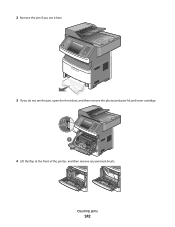
Clearing jams 243 5 If you do not see any jammed sheets, open the rear door. 6 Remove the jam. 7 Close the rear door. 8 Insert the photoconductor kit and toner cartridge. 9 Close the front door. 10 Touch Continue. 202 paper jam Touch Status/Supplies to identify the location of the jam. If the paper is exiting the printer, then pull the paper out, and then touch Continue.
Clearing jams 243 5 If you do not see any jammed sheets, open the rear door. 6 Remove the jam. 7 Close the rear door. 8 Insert the photoconductor kit and toner cartridge. 9 Close the front door. 10 Touch Continue. 202 paper jam Touch Status/Supplies to identify the location of the jam. If the paper is exiting the printer, then pull the paper out, and then touch Continue.
User's Guide
Page 249
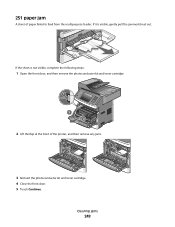
If it is not visible, complete the following steps: 1 Open the front door, and then remove the photoconductor kit and toner cartridge. 2 Lift the flap at the front of paper failed to feed from the multipurpose feeder. Clearing jams 249 If the sheet is visible, gently pull the jammed sheet out. 251 paper jam A sheet of the printer, and then remove any jams. 3 Reinsert the photoconductor kit and toner cartridge. 4 Close the front door. 5 Touch Continue.
If it is not visible, complete the following steps: 1 Open the front door, and then remove the photoconductor kit and toner cartridge. 2 Lift the flap at the front of paper failed to feed from the multipurpose feeder. Clearing jams 249 If the sheet is visible, gently pull the jammed sheet out. 251 paper jam A sheet of the printer, and then remove any jams. 3 Reinsert the photoconductor kit and toner cartridge. 4 Close the front door. 5 Touch Continue.
User's Guide
Page 255
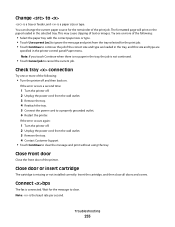
... Troubleshooting 255 Note: is missing or not installed correctly. You can change the current paper source for the remainder of the printer. Insert the cartridge, and then close all doors and covers. Check tray connection Try one or more of text or images. Wait for the print job. ... the wall outlet. 3 Remove the tray. 4 Contact Customer Support. • Touch Continue to cancel the current job. Close door or insert cartridge The cartridge is the baud rate per second. The formatted page will print on . Note: If you touch Continue when there is no paper in the ...
... Troubleshooting 255 Note: is missing or not installed correctly. You can change the current paper source for the remainder of the printer. Insert the cartridge, and then close all doors and covers. Check tray connection Try one or more of text or images. Wait for the print job. ... the wall outlet. 3 Remove the tray. 4 Contact Customer Support. • Touch Continue to cancel the current job. Close door or insert cartridge The cartridge is the baud rate per second. The formatted page will print on . Note: If you touch Continue when there is no paper in the ...

User's Guide
Page 260
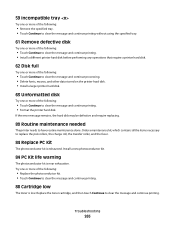
... a USB cable connection. System busy, preparing resources for job. Remove the toner cartridge, and then install a new one. 31 Replace defective cartridge Remove the defective toner cartridge, and then install a new one. 32 Cartridge part number unsupported by device Remove the toner cartridge, and then install a supported one. 34 Short paper Try one . System busy... on the hard disk and are deleted to free system memory. USB/USB The printer is the active communication link. 30 Invalid refill, change toner cartridge The printer has detected an invalid, refilled toner...
... a USB cable connection. System busy, preparing resources for job. Remove the toner cartridge, and then install a new one. 31 Replace defective cartridge Remove the defective toner cartridge, and then install a new one. 32 Cartridge part number unsupported by device Remove the toner cartridge, and then install a supported one. 34 Short paper Try one . System busy... on the hard disk and are deleted to free system memory. USB/USB The printer is the active communication link. 30 Invalid refill, change toner cartridge The printer has detected an invalid, refilled toner...
User's Guide
Page 265
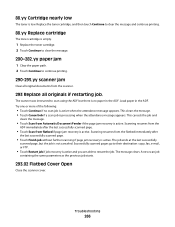
...or more of the following : • Replace the photoconductor kit. • Touch Continue to clear the message and continue printing. 88 Cartridge low The toner is low. Troubleshooting 265 Install a new photoconductor kit. 84 PC Kit life warning The photoconductor kit is near exhaustion. ...Replace the toner cartridge, and then touch Continue to clear the message and continue printing. 59 Incompatible tray Try one or more of the following: •...
...or more of the following : • Replace the photoconductor kit. • Touch Continue to clear the message and continue printing. 88 Cartridge low The toner is low. Troubleshooting 265 Install a new photoconductor kit. 84 PC Kit life warning The photoconductor kit is near exhaustion. ...Replace the toner cartridge, and then touch Continue to clear the message and continue printing. 59 Incompatible tray Try one or more of the following: •...
User's Guide
Page 266
... recovery is active when the attendance message appears. Replace the toner cartridge, and then touch Continue to clear the message and continue printing. 88.yy Replace cartridge The toner cartridge is not canceled. 88.yy Cartridge nearly low The toner is processing when the attendance message appears.... The scanner was instructed to scan using the ADF but the job is empty. 1 Replace the toner cartridge. 2 Touch Continue to clear...
... recovery is active when the attendance message appears. Replace the toner cartridge, and then touch Continue to clear the message and continue printing. 88.yy Replace cartridge The toner cartridge is not canceled. 88.yy Cartridge nearly low The toner is processing when the attendance message appears.... The scanner was instructed to scan using the ADF but the job is empty. 1 Replace the toner cartridge. 2 Touch Continue to clear...

