User's Guide
Page 2
...Finding information about the printer...6 Setting up the printer 9 Bypassing security warnings during software installation 9 Setting up the printer as a copier only...9 Understanding the parts of the printer...14 Using the printer control panel...16 Understanding the printer software 18 Installing printer software...18 Installing the optional XPS ... Collating printed copies...28 Printing the last page first (reverse page order)...29 Printing multiple pages on one sheet (N-Up)...29 Pausing print jobs...30 Canceling print jobs...31 Printing specialty documents...32 Choosing compatible specialty ...
...Finding information about the printer...6 Setting up the printer 9 Bypassing security warnings during software installation 9 Setting up the printer as a copier only...9 Understanding the parts of the printer...14 Using the printer control panel...16 Understanding the printer software 18 Installing printer software...18 Installing the optional XPS ... Collating printed copies...28 Printing the last page first (reverse page order)...29 Printing multiple pages on one sheet (N-Up)...29 Pausing print jobs...30 Canceling print jobs...31 Printing specialty documents...32 Choosing compatible specialty ...
User's Guide
Page 3
... Sending a fax...41 Receiving a fax automatically...41 Maintaining the printer 43 Maintaining print cartridges...43 Installing print cartridges...43 Removing a used print cartridge ...44 Refilling print cartridges...45 Using genuine Lexmark print cartridges...45 Cleaning the print cartridge nozzles...46 Wiping the......48 Ordering paper and other supplies...48 Recycling Lexmark products...49 Troubleshooting 50 Using the printer troubleshooting software (Windows only 50 Setup troubleshooting...50 Power button is not lit ...50 Software did not install...51 Page does not print...52 Removing and ...
... Sending a fax...41 Receiving a fax automatically...41 Maintaining the printer 43 Maintaining print cartridges...43 Installing print cartridges...43 Removing a used print cartridge ...44 Refilling print cartridges...45 Using genuine Lexmark print cartridges...45 Cleaning the print cartridge nozzles...46 Wiping the......48 Ordering paper and other supplies...48 Recycling Lexmark products...49 Troubleshooting 50 Using the printer troubleshooting software (Windows only 50 Setup troubleshooting...50 Power button is not lit ...50 Software did not install...51 Page does not print...52 Removing and ...
User's Guide
Page 6
... the Finder desktop, double-click the printer folder. 2 Double-click the application. 3 From the application, click Help on the menu bar to view the main page of the Help. Additional setup instructions. The Help installs automatically with the programs. 1 Do one of the following: • In ...Windows Vista, click . • In Windows XP and earlier, click Start. 2 Click All Programs or Programs, and then select the printer program folder from the list. 3 ...
... the Finder desktop, double-click the printer folder. 2 Double-click the application. 3 From the application, click Help on the menu bar to view the main page of the Help. Additional setup instructions. The Help installs automatically with the programs. 1 Do one of the following: • In ...Windows Vista, click . • In Windows XP and earlier, click Start. 2 Click All Programs or Programs, and then select the printer program folder from the list. 3 ...
User's Guide
Page 9
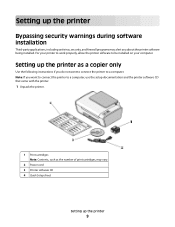
... setup documentation and the printer software CD that came with the printer. 1 Unpack the printer. 1 Print cartridges Note: Contents, such as a copier only Use the following instructions if you about the printer software being installed. Note: If you want to connect the printer to be installed on your printer to work properly, allow the printer software to a computer. For...
... setup documentation and the printer software CD that came with the printer. 1 Unpack the printer. 1 Print cartridges Note: Contents, such as a copier only Use the following instructions if you about the printer software being installed. Note: If you want to connect the printer to be installed on your printer to work properly, allow the printer software to a computer. For...
User's Guide
Page 15
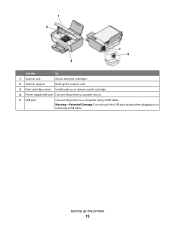
Setting up the scanner unit. 3 Print cartridge carrier Install, replace, or remove a print cartridge. 4 Power supply with port Connect the printer to a power source. 5 USB port Connect the printer to a computer using a USB cable. Warning-Potential Damage: Do not touch the USB port except when plugging in or removing a USB cable. Use the To 1 Scanner unit Access the print cartridges. 2 Scanner support Hold up the printer 15
Setting up the scanner unit. 3 Print cartridge carrier Install, replace, or remove a print cartridge. 4 Power supply with port Connect the printer to a power source. 5 USB port Connect the printer to a computer using a USB cable. Warning-Potential Damage: Do not touch the USB port except when plugging in or removing a USB cable. Use the To 1 Scanner unit Access the print cartridges. 2 Scanner support Hold up the printer 15
User's Guide
Page 18
... Using Windows 1 Close all open software programs. 2 Insert the printer software CD. 3 From the main installation screen, click Install. 4 Follow the instructions on the screens. Using the World Wide Web 1 Go to the Lexmark Web site at www.lexmark.com. 2 From the home page, navigate through the menu selection, ...and then click Drivers & Downloads. 3 Choose the printer and the printer driver for Windows Vista users. To install the patch, you must install the XPS driver as an ...
... Using Windows 1 Close all open software programs. 2 Insert the printer software CD. 3 From the main installation screen, click Install. 4 Follow the instructions on the screens. Using the World Wide Web 1 Go to the Lexmark Web site at www.lexmark.com. 2 From the home page, navigate through the menu selection, ...and then click Drivers & Downloads. 3 Choose the printer and the printer driver for Windows Vista users. To install the patch, you must install the XPS driver as an ...
User's Guide
Page 19
...install the XPS driver: 1 Click Control Panel. 2 Under Hardware and Sound, click Printer, and then click Add a Printer. 3 From the Add Printer dialog, click Add a local printer. 4 From the "Use an existing port" drop-down menu, select Virtual printer port for the printer. d Double-click xps, and then click Open. Use the LexmarkTM Productivity Studio or Lexmark... Microsoft XPS files are copied to the XPS driver files on the installation software CD. Understanding the printer software 19 The Install From Disk dialog appears. 6 Click Browse, and then navigate to your...
...install the XPS driver: 1 Click Control Panel. 2 Under Hardware and Sound, click Printer, and then click Add a Printer. 3 From the Add Printer dialog, click Add a local printer. 4 From the "Use an existing port" drop-down menu, select Virtual printer port for the printer. d Double-click xps, and then click Open. Use the LexmarkTM Productivity Studio or Lexmark... Microsoft XPS files are copied to the XPS driver files on the installation software CD. Understanding the printer software 19 The Install From Disk dialog appears. 6 Click Browse, and then navigate to your...
User's Guide
Page 20
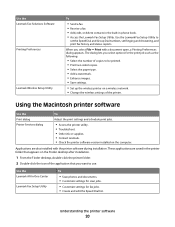
... are also installed with a document open, a Printing Preferences dialog appears. Use the Lexmark Fax Setup Utility to be printed. • Print two-sided copies. • Select the paper type. • Add a watermark. • Enhance images. • Save settings. • Set up the wireless printer on the computer. Use the Lexmark All-In-One Center Lexmark Fax...
... are also installed with a document open, a Printing Preferences dialog appears. Use the Lexmark Fax Setup Utility to be printed. • Print two-sided copies. • Select the paper type. • Add a watermark. • Enhance images. • Save settings. • Set up the wireless printer on the computer. Use the Lexmark All-In-One Center Lexmark Fax...

User's Guide
Page 21
...; Get help with these applications, depending on a wireless network. Understanding the printer software 21 Use the To Lexmark Network Card Reader • View the contents of the printer that you purchased. Note: Your printer may not come with cartridge installation. • Print a test page. • Print an alignment page. • Clean the print cartridge nozzles...
...; Get help with these applications, depending on a wireless network. Understanding the printer software 21 Use the To Lexmark Network Card Reader • View the contents of the printer that you purchased. Note: Your printer may not come with cartridge installation. • Print a test page. • Print an alignment page. • Clean the print cartridge nozzles...
User's Guide
Page 27
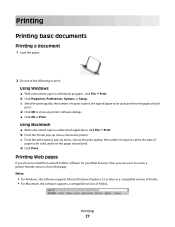
...Printing 27 b From the Printer pop-up menu, choose the print quality, the number of copies to print, the type of paper to be used , and how the pages should print. d Click Print. Printing Web pages If you chose to install the Lexmark Toolbar software for your Web... browser, then you can use it to create a printer-friendly version of any printer software dialogs. Printing Printing basic documents Printing a document 1 Load the paper. 2 Do one of the following to print: Using Windows a With...
...Printing 27 b From the Printer pop-up menu, choose the print quality, the number of copies to print, the type of paper to be used , and how the pages should print. d Click Print. Printing Web pages If you chose to install the Lexmark Toolbar software for your Web... browser, then you can use it to create a printer-friendly version of any printer software dialogs. Printing Printing basic documents Printing a document 1 Load the paper. 2 Do one of the following to print: Using Windows a With...
User's Guide
Page 33
...edit and print photos. g Click OK or Print. Note: This program may also view the Help associated with the printer software during installation. You may not appear in the printer. 2 Send the print job: Using Windows a With a document open , choose File Print. c ...Portrait or Landscape orientation. b From the Printer pop-up menu, choose Print Settings or Quality & Media, depending on your printer program folder, depending on the computer screen to close any printer software dialogs. h Click Print. Printing 33 c Select Lexmark Productivity Studio. d Open the photo ...
...edit and print photos. g Click OK or Print. Note: This program may also view the Help associated with the printer software during installation. You may not appear in the printer. 2 Send the print job: Using Windows a With a document open , choose File Print. c ...Portrait or Landscape orientation. b From the Printer pop-up menu, choose Print Settings or Quality & Media, depending on your printer program folder, depending on the computer screen to close any printer software dialogs. h Click Print. Printing 33 c Select Lexmark Productivity Studio. d Open the photo ...
User's Guide
Page 36
... Programs or All Programs, and then select the printer program folder from the list. 2 Click the program that you added in step 6c. 8 Click OK. 9 Click Print. Using Windows 1 Do one of the custom paper size you want to use . Saving...settings. 5 Select an empty location for your printer model. For information about printing these documents, see the Help installed with the programs or applications you installed the printer driver, some printer software was installed. b Choose Library Printers YYYY Lexmark, and then select your setting, and then assign...
... Programs or All Programs, and then select the printer program folder from the list. 2 Click the program that you added in step 6c. 8 Click OK. 9 Click Print. Using Windows 1 Do one of the custom paper size you want to use . Saving...settings. 5 Select an empty location for your printer model. For information about printing these documents, see the Help installed with the programs or applications you installed the printer driver, some printer software was installed. b Choose Library Printers YYYY Lexmark, and then select your setting, and then assign...
User's Guide
Page 41
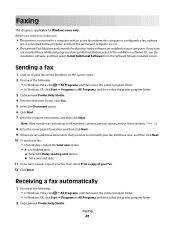
... Send. Note: A fax number can include up to the computer, and both the printer and computer are on. • The Lexmark Fax Solutions and Lexmark Productivity Studio software are installed on the scanner glass. 2 Do one of your computer. Receiving a fax automatically 1 Do one of the following : • In Windows Vista, click All Programs, and...
... Send. Note: A fax number can include up to the computer, and both the printer and computer are on. • The Lexmark Fax Solutions and Lexmark Productivity Studio software are installed on the scanner glass. 2 Do one of your computer. Receiving a fax automatically 1 Do one of the following : • In Windows Vista, click All Programs, and...

User's Guide
Page 43
Warning-Potential Damage: Do not touch the gold contact area on the back or the metal nozzles on the cartridge carrier levers. 2 Remove the used print cartridge or cartridges. 3 If you are installing new print cartridges, remove the tape from the back and bottom of the cartridge. Maintaining the printer Maintaining print cartridges Installing print cartridges 1 Open the printer, and then press down on the bottom of the black cartridge, insert the cartridge in the left carrier, and then close the black cartridge carrier lid. Maintaining the printer 43
Warning-Potential Damage: Do not touch the gold contact area on the back or the metal nozzles on the cartridge carrier levers. 2 Remove the used print cartridge or cartridges. 3 If you are installing new print cartridges, remove the tape from the back and bottom of the cartridge. Maintaining the printer Maintaining print cartridges Installing print cartridges 1 Open the printer, and then press down on the bottom of the black cartridge, insert the cartridge in the left carrier, and then close the black cartridge carrier lid. Maintaining the printer 43
User's Guide
Page 47
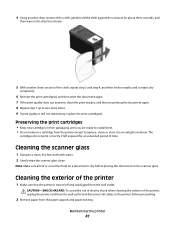
... shown. 5 With another clean section of the cloth, gently hold the cloth against the contacts for an extended period of the printer 1 Make sure that the printer is dry before proceeding. 2 Remove paper from the paper support and paper exit tray. Preserving the print cartridges • Keep ...new cartridges in an airtight container. Cleaning the exterior of time. Note: Make sure all cables to install them. • Do not remove a ...
... shown. 5 With another clean section of the cloth, gently hold the cloth against the contacts for an extended period of the printer 1 Make sure that the printer is dry before proceeding. 2 Remove paper from the paper support and paper exit tray. Preserving the print cartridges • Keep ...new cartridges in an airtight container. Cleaning the exterior of time. Note: Make sure all cables to install them. • Do not remove a ...
User's Guide
Page 51
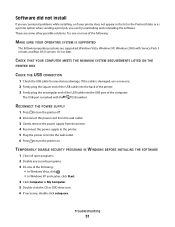
... USB symbol. Troubleshooting 51 The USB port is damaged, use a new one or more of the computer. Software did not install If you encountered problems while installing, or if your printer does not appear in the list in the Printers folder or as a printer option when sending a print job, you can try uninstalling and reinstalling the...
... USB symbol. Troubleshooting 51 The USB port is damaged, use a new one or more of the computer. Software did not install If you encountered problems while installing, or if your printer does not appear in the list in the Printers folder or as a printer option when sending a print job, you can try uninstalling and reinstalling the...
User's Guide
Page 52
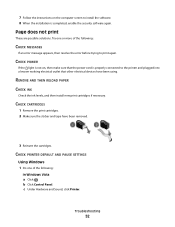
...PAPER CHECK INK Check the ink levels, and then install new print cartridges if necessary. c Under Hardware and Sound, click Printer. Page does not print These are possible solutions. CHECK PRINTER DEFAULT AND PAUSE SETTINGS Using Windows 1 Do one or more of the following : CHECK MESSAGES If an... trying to print again. Troubleshooting 52 Try one of the following : In Windows Vista a Click . CHECK POWER If the light is not on the computer screen to install the software. 8 When the installation is properly connected to the printer and plugged into a known working electrical outlet...
...PAPER CHECK INK Check the ink levels, and then install new print cartridges if necessary. c Under Hardware and Sound, click Printer. Page does not print These are possible solutions. CHECK PRINTER DEFAULT AND PAUSE SETTINGS Using Windows 1 Do one or more of the following : CHECK MESSAGES If an... trying to print again. Troubleshooting 52 Try one of the following : In Windows Vista a Click . CHECK POWER If the light is not on the computer screen to install the software. 8 When the installation is properly connected to the printer and plugged into a known working electrical outlet...
User's Guide
Page 54
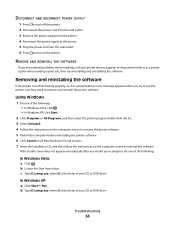
... reinstall the software. If the install screen does not appear automatically after you encountered problems while installing, or if your computer, do one of your CD or DVD drive. Troubleshooting 54 REMOVE AND REINSTALL THE SOFTWARE If you restart your printer does not appear in the printers folder or as a printer option when sending a print job...
... reinstall the software. If the install screen does not appear automatically after you encountered problems while installing, or if your computer, do one of your CD or DVD drive. Troubleshooting 54 REMOVE AND REINSTALL THE SOFTWARE If you restart your printer does not appear in the printers folder or as a printer option when sending a print job...
User's Guide
Page 55
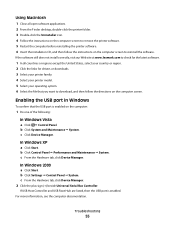
...and USB Root Hub are listed, then the USB port is enabled on the computer: 1 Do one of the following: In Windows Vista a Click Control Panel. c Click Device Manager. b...tab, click Device Manager. If the software still does not install correctly, visit our Web site at www.lexmark.com to download, and then follow the instructions on the computer...the printer folder. 3 Double-click the Uninstaller icon. 4 Follow the instructions on the computer screen to remove the printer software. 5 Restart the computer before reinstalling the printer software. 6 Insert the installation ...
...and USB Root Hub are listed, then the USB port is enabled on the computer: 1 Do one of the following: In Windows Vista a Click Control Panel. c Click Device Manager. b...tab, click Device Manager. If the software still does not install correctly, visit our Web site at www.lexmark.com to download, and then follow the instructions on the computer...the printer folder. 3 Double-click the Uninstaller icon. 4 Follow the instructions on the computer screen to remove the printer software. 5 Restart the computer before reinstalling the printer software. 6 Insert the installation ...
User's Guide
Page 58
...and (2) this device must accept any accompanying documentation provided under this agreement are the property of Lexmark International, Inc., registered in a particular installation. Directory \drivers\xps \Pubs \Install\Licenses File ZOpen.3.08.pdf FW_License.10.08.pdf Expat.txt Inst_lib.txt Instgui.txt/Instgui.zip... and on, the user is operated in accordance with the instructions, may cause harmful interference to correct the interference by one or more of the FCC Rules. All other countries. Notices 58 UNITED STATES GOVERNMENT RIGHTS This software and any interference ...
...and (2) this device must accept any accompanying documentation provided under this agreement are the property of Lexmark International, Inc., registered in a particular installation. Directory \drivers\xps \Pubs \Install\Licenses File ZOpen.3.08.pdf FW_License.10.08.pdf Expat.txt Inst_lib.txt Instgui.txt/Instgui.zip... and on, the user is operated in accordance with the instructions, may cause harmful interference to correct the interference by one or more of the FCC Rules. All other countries. Notices 58 UNITED STATES GOVERNMENT RIGHTS This software and any interference ...


