Embedded Web Server Administrator's Guide
Page 27
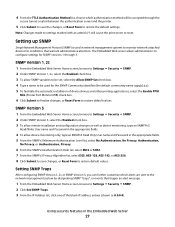
...the SNMP Community identifier (the default community name is used for SNMP versions 1 through the secure tunnel created between the authentication server and the printer. 5 Click Submit to save changes, or Reset Form to restore default values. SNMP Version 3 1 From the Embedded Web Server Home ... ª Security ª SNMP. 2 Click Set SNMP Traps. 3 From the IP Address list, click one of device drivers and other printing applications, select the Enable PPM Mib (Printer Port Monitor MIB) check box. 6 Click Submit to finalize changes, or Reset Form to restore the default settings.
...the SNMP Community identifier (the default community name is used for SNMP versions 1 through the secure tunnel created between the authentication server and the printer. 5 Click Submit to save changes, or Reset Form to restore default values. SNMP Version 3 1 From the Embedded Web Server Home ... ª Security ª SNMP. 2 Click Set SNMP Traps. 3 From the IP Address list, click one of device drivers and other printing applications, select the Enable PPM Mib (Printer Port Monitor MIB) check box. 6 Click Submit to finalize changes, or Reset Form to restore the default settings.

User's Guide
Page 11
...country can be found on the Support Web site or on the store receipt and the back of the printer), and have it here Lexmark Support Web site-support.lexmark.com Note: Select your region, and then select your product to view the appropriate support site. What ...US-See the Statement of Limited Warranty included with this printer, or at support.lexmark.com. • Rest of the world-See the printed warranty that came with your printer. The latest supplemental information, updates, and technical support: • Documentation • Driver downloads • Live chat support • E-mail...
...country can be found on the Support Web site or on the store receipt and the back of the printer), and have it here Lexmark Support Web site-support.lexmark.com Note: Select your region, and then select your product to view the appropriate support site. What ...US-See the Statement of Limited Warranty included with this printer, or at support.lexmark.com. • Rest of the world-See the printed warranty that came with your printer. The latest supplemental information, updates, and technical support: • Documentation • Driver downloads • Live chat support • E-mail...

User's Guide
Page 20
... Attaching cables 1 Connect the power cord to the printer first and then to a wall outlet. 2 Connect the printer to a computer or a network. • For a local connection, make sure to install the software after setup, follow these ...computer communicate with the printer. Additional printer setup 20 If you need to install the printer CD before connecting a USB cable. • For a network connection, connect an Ethernet cable before installing the printer CD. 3 1 2 1 Ethernet port 2 USB port 3 Printer power cord socket Installing printer software A printer driver is typically installed ...
... Attaching cables 1 Connect the power cord to the printer first and then to a wall outlet. 2 Connect the printer to a computer or a network. • For a local connection, make sure to install the software after setup, follow these ...computer communicate with the printer. Additional printer setup 20 If you need to install the printer CD before connecting a USB cable. • For a network connection, connect an Ethernet cable before installing the printer CD. 3 1 2 1 Ethernet port 2 USB port 3 Printer power cord socket Installing printer software A printer driver is typically installed ...

User's Guide
Page 21
... important information that aids network printing configuration. Additional printer setup 21 Using the World Wide Web 1 Go to the Lexmark Web site at www.lexmark.com. 2 From the Drivers & Downloads menu, click Driver Finder. 3 Select your printer, and then select your printer is a network model and is on and Ready... appears. 2 From the printer control panel, press . 3 Press the ...
... important information that aids network printing configuration. Additional printer setup 21 Using the World Wide Web 1 Go to the Lexmark Web site at www.lexmark.com. 2 From the Drivers & Downloads menu, click Driver Finder. 3 Select your printer, and then select your printer is a network model and is on and Ready... appears. 2 From the printer control panel, press . 3 Press the ...

User's Guide
Page 23
... desktop, choose Go > Applications. 2 Double-click Utilities. 3 Double-click Printer Setup Utility or Print Center. 4 From the Printer List, click Add. 5 Select the printer from the list. 5 Click Add. Additional printer setup 23 a Install a PPD file on the computer. 9 Click Restart when...menu, choose System Preferences. 2 Click Print & Fax. 3 Click +. 4 Select the printer from the list. 6 Click Add. 4 Install the drivers and add the printer. Contact your system support person for the printer. 3 From the Welcome screen, click Continue. 4 Click Continue again after viewing the Readme...
... desktop, choose Go > Applications. 2 Double-click Utilities. 3 Double-click Printer Setup Utility or Print Center. 4 From the Printer List, click Add. 5 Select the printer from the list. 5 Click Add. Additional printer setup 23 a Install a PPD file on the computer. 9 Click Restart when...menu, choose System Preferences. 2 Click Print & Fax. 3 Click +. 4 Select the printer from the list. 6 Click Add. 4 Install the drivers and add the printer. Contact your system support person for the printer. 3 From the Welcome screen, click Continue. 4 Click Continue again after viewing the Readme...
User's Guide
Page 45
... Use labels only in the ADF. • Use labels designed specifically for use before buying large quantities. Adhesive material contaminates the printer and could void the printer and cartridge warranties. • Do not use labels with the manufacturer or vendor to 225°C (437°F) without releasing ... with the manufacturer or vendor to ensure the card stock can withstand up to the sheet edge. When printing on the leading and driver edge, and use labels with chemicals that preprinting, perforation, and creasing may cause labels to 25 psi (172 kPa) pressure without ...
... Use labels only in the ADF. • Use labels designed specifically for use before buying large quantities. Adhesive material contaminates the printer and could void the printer and cartridge warranties. • Do not use labels with the manufacturer or vendor to 225°C (437°F) without releasing ... with the manufacturer or vendor to ensure the card stock can withstand up to the sheet edge. When printing on the leading and driver edge, and use labels with chemicals that preprinting, perforation, and creasing may cause labels to 25 psi (172 kPa) pressure without ...
User's Guide
Page 74
... want to send the fax. 10 Press . 11 Press Faxing 74 Place these items on your operating system. To install the fax driver, choose Add a printer, and then install the printer again with a different name, choosing the fax version of the fax recipient). 4 Click Fax. Note: In order to see your ...keypad, enter the time you want to send the fax. If the printer clock is set to 12 Hour format, then use the fax driver for example, the name and number of the driver. 3 Enter the fax information (for your printer. For specific instructions using other Macintosh OS versions, see the fax ...
... want to send the fax. 10 Press . 11 Press Faxing 74 Place these items on your operating system. To install the fax driver, choose Add a printer, and then install the printer again with a different name, choosing the fax version of the fax recipient). 4 Click Fax. Note: In order to see your ...keypad, enter the time you want to send the fax. If the printer clock is set to 12 Hour format, then use the fax driver for example, the name and number of the driver. 3 Enter the fax information (for your printer. For specific instructions using other Macintosh OS versions, see the fax ...

User's Guide
Page 99
... Settings Menu item Enable Fax Receive On Off Rings to Answer 1-25 Auto Answer Yes No Manual Answer Code 1-9 Description Allows driver to fax jobs to be received by the printer Note: Yes is the factory default setting. Specifies the contrast of a fax Note: 3 is the factory default setting. Specifies... scanned edge-to-edge Note: Off is the factory default setting. Description Allows fax jobs to be sent by the printer Note: On is the factory default setting. Menu item Driver to fax Yes No Dial Mode Tone Pulse Max Speed 2400 4800 9600 14400 33600 Background Removal -4 to +4 Contrast...
... Settings Menu item Enable Fax Receive On Off Rings to Answer 1-25 Auto Answer Yes No Manual Answer Code 1-9 Description Allows driver to fax jobs to be received by the printer Note: Yes is the factory default setting. Specifies the contrast of a fax Note: 3 is the factory default setting. Specifies... scanned edge-to-edge Note: Off is the factory default setting. Description Allows fax jobs to be sent by the printer Note: On is the factory default setting. Menu item Driver to fax Yes No Dial Mode Tone Pulse Max Speed 2400 4800 9600 14400 33600 Background Removal -4 to +4 Contrast...
User's Guide
Page 103
The printer chooses between portrait and landscape. • Long Edge uses landscape. • Short Edge uses portrait. Menu item ...for files such as architectural drawings, maps, electrical circuit diagrams, and flow charts Notes: • Off is the factory default setting. The printer driver default is the factory default setting. • The Fonts setting applies only to select a particular area. Enhances the printed quality of text ... output Notes: • 8 is the factory default setting. • Selecting a smaller number can help conserve toner. Understanding printer menus 103
The printer chooses between portrait and landscape. • Long Edge uses landscape. • Short Edge uses portrait. Menu item ...for files such as architectural drawings, maps, electrical circuit diagrams, and flow charts Notes: • Off is the factory default setting. The printer driver default is the factory default setting. • The Fonts setting applies only to select a particular area. Enhances the printed quality of text ... output Notes: • 8 is the factory default setting. • Selecting a smaller number can help conserve toner. Understanding printer menus 103
User's Guide
Page 128
...the scanner glass in the tray: 1 From the printer control panel, check the Paper Size setting from the Paper menu. 2 Before sending the job to the printer and the host computer, print server, or other network device. • The printer driver settings are possible solutions. If Performing Self Test ...and Ready do not appear, turn the printer off , wait for about 10 seconds, and then turn ...
...the scanner glass in the tray: 1 From the printer control panel, check the Paper Size setting from the Paper menu. 2 Before sending the job to the printer and the host computer, print server, or other network device. • The printer driver settings are possible solutions. If Performing Self Test ...and Ready do not appear, turn the printer off , wait for about 10 seconds, and then turn ...


