User's Guide
Page 4
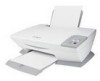
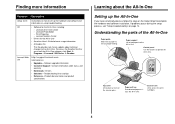
...Understanding the parts of the All-In-One Paper guide Slide next to paper to operate the All-In-One. Scanner unit Lift to the All-In-One. Lexmark Solution Center • Drivers for the All-In-One • An online User's Guide for the All-In-One, including: - Paper support Lift to ...hold paper as it exits the All-In-One. Finding more information Resource ...
...Understanding the parts of the All-In-One Paper guide Slide next to paper to operate the All-In-One. Scanner unit Lift to the All-In-One. Lexmark Solution Center • Drivers for the All-In-One • An online User's Guide for the All-In-One, including: - Paper support Lift to ...hold paper as it exits the All-In-One. Finding more information Resource ...
User's Guide
Page 11
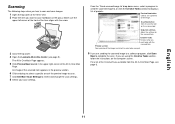
... image of the scanned item appears in the upper right corner of the All-In-One Main Page. Scan Now button Click to review and change the scan settings. 8 ...Tasks section, follow the instructions on the glass. For a list of the Creative Tasks available from the All-In-One Main Page, see a preview of the image. Make sure the upper left corner of the front of the item...the item you want to do with the arrow 3 Close the top cover. 4 Open the Lexmark All-In-One Center (see page 5). English 11 The All-In-One Main Page appears. 5 Click Preview Now located in the preview section. 6 Click and drag ...
... image of the scanned item appears in the upper right corner of the All-In-One Main Page. Scan Now button Click to review and change the scan settings. 8 ...Tasks section, follow the instructions on the glass. For a list of the Creative Tasks available from the All-In-One Main Page, see a preview of the image. Make sure the upper left corner of the front of the item...the item you want to do with the arrow 3 Close the top cover. 4 Open the Lexmark All-In-One Center (see page 5). English 11 The All-In-One Main Page appears. 5 Click Preview Now located in the preview section. 6 Click and drag ...
User's Guide
Page 13
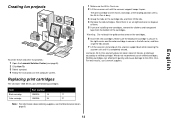
...Creating fun projects To create these and other fun projects: 1 Open the Lexmark Solution Center (see the Maintenance tab on page 8. 1 Make sure the All-In-One is on. 2 Lift the scanner unit until the scanner support keeps it is busy. 3 Grasp the tabs on the cartridge lids... cartridges. We do not recommend use Lexmark supplies. 13 Lexmark's All-In-One warranty does not cover repair of refilled cartridges. Replacing print cartridges The Lexmark 1200 Series uses the following cartridges: Item: Part number: Black cartridge 10N0016 16 17 Color cartridge 10N0026 26 27 Note: For ...
...Creating fun projects To create these and other fun projects: 1 Open the Lexmark Solution Center (see the Maintenance tab on page 8. 1 Make sure the All-In-One is on. 2 Lift the scanner unit until the scanner support keeps it is busy. 3 Grasp the tabs on the cartridge lids... cartridges. We do not recommend use Lexmark supplies. 13 Lexmark's All-In-One warranty does not cover repair of refilled cartridges. Replacing print cartridges The Lexmark 1200 Series uses the following cartridges: Item: Part number: Black cartridge 10N0016 16 17 Color cartridge 10N0026 26 27 Note: For ...
User's Guide
Page 20
parts of your All-In-One 4 photo paper 9 photos printing 7 scanning 11 poor quality printing 15 posters printing 7 Preview Now button 11 Preview section Preview Now button 11 Print/Copy preview 6 ... window changing appearance of 8 Q Quality/Copies tab 7 R reinstalling software 16 removing software 16 replacing print cartridges 13 S Save Settings menu 7 saved images viewing 6 scan settings 6 scanner unit 4 scanning 11 placing an item on or off 8 20 section 6 Print a Copy...section 6 voice notification turning on the glass 11 settings, saving for future...
parts of your All-In-One 4 photo paper 9 photos printing 7 scanning 11 poor quality printing 15 posters printing 7 Preview Now button 11 Preview section Preview Now button 11 Print/Copy preview 6 ... window changing appearance of 8 Q Quality/Copies tab 7 R reinstalling software 16 removing software 16 replacing print cartridges 13 S Save Settings menu 7 saved images viewing 6 scan settings 6 scanner unit 4 scanning 11 placing an item on or off 8 20 section 6 Print a Copy...section 6 voice notification turning on the glass 11 settings, saving for future...


