Clearing Jams Guide
Page 1
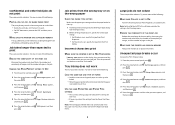
...Have postage stamps attached - Warning-Potential Damage: Do not touch the photoconductor drum on the underside of the printer. For more information, see the User's Guide. • Do not load wrinkled, creased, damp, bent, or curled paper. • Flex, fan, and straighten paper before loading it.... jam numbers and locations When a jam occurs, a message indicating the jam location appears on a flat, smooth surface. Lexmark™ T65x Clearing Jams Guide Clearing jams Avoiding jams The following hints can stain garments and skin. Jam numbers 200-203, 230 231-239 241-245...
...Have postage stamps attached - Warning-Potential Damage: Do not touch the photoconductor drum on the underside of the printer. For more information, see the User's Guide. • Do not load wrinkled, creased, damp, bent, or curled paper. • Flex, fan, and straighten paper before loading it.... jam numbers and locations When a jam occurs, a message indicating the jam location appears on a flat, smooth surface. Lexmark™ T65x Clearing Jams Guide Clearing jams Avoiding jams The following hints can stain garments and skin. Jam numbers 200-203, 230 231-239 241-245...
Troubleshooting Guide
Page 2
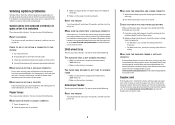
...collate These are possible solutions. Job takes longer than expected to print, specify the correct type setting: • For Windows users, specify the type from Print Properties. • For Macintosh users, specify the type from the Paper Size/Type menu. Job prints from the wrong tray or on the wrong paper CHECK... THE PAPER TYPE SETTING Make sure the paper type setting matches the paper loaded in each tray to be linked. • Move the paper guides to On. ...
...collate These are possible solutions. Job takes longer than expected to print, specify the correct type setting: • For Windows users, specify the type from Print Properties. • For Macintosh users, specify the type from the Paper Size/Type menu. Job prints from the wrong tray or on the wrong paper CHECK... THE PAPER TYPE SETTING Make sure the paper type setting matches the paper loaded in each tray to be linked. • Move the paper guides to On. ...
Troubleshooting Guide
Page 3
... the paper tray, or go to www.lexmark.com/publications to view the duplex unit instruction sheet. RESET THE PRINTER Turn the printer off , wait about 10 seconds, and then turn the printer on . Try one or more information, see the User's Guide. Reinstall the envelope feeder. If the option...NOT WORKING PROPERLY • Make sure the printer is properly connected to a properly grounded wall outlet. Try one or more information, see the User's Guide. For more information, see if the option is listed on the menu settings page, but paper jams when it enters or exits the duplex...
... the paper tray, or go to www.lexmark.com/publications to view the duplex unit instruction sheet. RESET THE PRINTER Turn the printer off , wait about 10 seconds, and then turn the printer on . Try one or more information, see the User's Guide. Reinstall the envelope feeder. If the option...NOT WORKING PROPERLY • Make sure the printer is properly connected to a properly grounded wall outlet. Try one or more information, see the User's Guide. For more information, see if the option is listed on the menu settings page, but paper jams when it enters or exits the duplex...
Troubleshooting Guide
Page 5
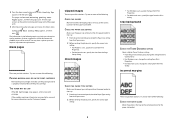
..., then call for the paper size loaded. Blank pages These are possible solutions. Try one or more of the following : CHECK THE PAPER GUIDES Move the guides in the tray: 1 From the printer control panel, check the Paper Type setting from the Paper menu. 2 Before sending the job to ...print, specify the correct size setting: • For Windows users, specify the size from Print Properties. • For Macintosh users, specify the size from the Page ...
..., then call for the paper size loaded. Blank pages These are possible solutions. Try one or more of the following : CHECK THE PAPER GUIDES Move the guides in the tray: 1 From the printer control panel, check the Paper Type setting from the Paper menu. 2 Before sending the job to ...print, specify the correct size setting: • For Windows users, specify the size from Print Properties. • For Macintosh users, specify the size from the Page ...
Troubleshooting Guide
Page 7
... from the Quality menu. • For Windows users, change these settings from Print Properties. • For Macintosh users, change these settings from the Print dialog. Try one or more of the following : CHECK THE PAPER GUIDES Move the guides in the tray to the correct positions for the... the Paper menu. 2 Before sending the job to print, specify the correct type setting: • For Windows users, specify the type from Print Properties. • For Macintosh users, specify the type from a fresh package. • Store paper in its original wrapper until you are possible solutions...
... from the Quality menu. • For Windows users, change these settings from Print Properties. • For Macintosh users, change these settings from the Print dialog. Try one or more of the following : CHECK THE PAPER GUIDES Move the guides in the tray to the correct positions for the... the Paper menu. 2 Before sending the job to print, specify the correct type setting: • For Windows users, specify the type from Print Properties. • For Macintosh users, specify the type from a fresh package. • Store paper in its original wrapper until you are possible solutions...

User's Guide
Page 1
Lexmark T650, T652, T654 User's Guide Important: For information about T656 products, go to http://md.lexmark.com/ md/?func=publications&folder=v12721881&file=v12721881_en.pdf. September 2009 Machine type(s): 4062, 4551, 4552, 4553 Model(s): 01A, 21A, 23A, 41A, 43A, n01, gn1, n03, n02, xn2, gn2, dn1, d03, gd1, dn2, gd2, xd2, mn1, gm1, md1 www.lexmark.com
Lexmark T650, T652, T654 User's Guide Important: For information about T656 products, go to http://md.lexmark.com/ md/?func=publications&folder=v12721881&file=v12721881_en.pdf. September 2009 Machine type(s): 4062, 4551, 4552, 4553 Model(s): 01A, 21A, 23A, 41A, 43A, n01, gn1, n03, n02, xn2, gn2, dn1, d03, gd1, dn2, gd2, xd2, mn1, gm1, md1 www.lexmark.com

User's Guide
Page 51
... must be set manually. Set the Paper Size for all trays except the multipurpose feeder. Configuring Universal paper settings The Universal Paper Size is a user-defined setting that lets you want is not available from the Paper Size menu. Setting the Paper Size and Paper Type The Paper Size setting... is determined by the position of the paper guides in .). Loading paper and specialty media This section explains how to Universal when the size you print on paper sizes that do not contain ...
... must be set manually. Set the Paper Size for all trays except the multipurpose feeder. Configuring Universal paper settings The Universal Paper Size is a user-defined setting that lets you want is not available from the Paper Size menu. Setting the Paper Size and Paper Type The Paper Size setting... is determined by the position of the paper guides in .). Loading paper and specialty media This section explains how to Universal when the size you print on paper sizes that do not contain ...

User's Guide
Page 158
...until Continue appears, and then press to clear the message and print the job using a different paper tray. • Check tray length and width guides and make sure the paper is properly loaded in printer memory. When Ready appears, enable Resource Save. • Install additional memory. 37 Insufficient ... Auto, and then exit the menus to activate the link buffer changes. to stop the defragment process and Understanding printer messages 158 For Macintosh users, check the Print dialog settings to make sure the print job is requesting the correct paper size and type. • Check that the...
...until Continue appears, and then press to clear the message and print the job using a different paper tray. • Check tray length and width guides and make sure the paper is properly loaded in printer memory. When Ready appears, enable Resource Save. • Install additional memory. 37 Insufficient ... Auto, and then exit the menus to activate the link buffer changes. to stop the defragment process and Understanding printer messages 158 For Macintosh users, check the Print dialog settings to make sure the print job is requesting the correct paper size and type. • Check that the...
User's Guide
Page 178
.... You must exit Hex Trace mode before you must set Collate to the correct positions for each tray to be linked. • Move the paper guides to On. Job prints from the wrong tray or on the wrong paper CHECK THE PAPER TYPE SETTING Make sure the paper type setting matches... NOT IN HEX TRACE MODE If Ready Hex appears on to print, specify the correct type setting: • For Windows users, specify the type from Print Properties. • For Macintosh users, specify the type from the Paper Size/Type menu. Turn the printer off and back on the display, then you can...
.... You must exit Hex Trace mode before you must set Collate to the correct positions for each tray to be linked. • Move the paper guides to On. Job prints from the wrong tray or on the wrong paper CHECK THE PAPER TYPE SETTING Make sure the paper type setting matches... NOT IN HEX TRACE MODE If Ready Hex appears on to print, specify the correct type setting: • For Windows users, specify the type from Print Properties. • For Macintosh users, specify the type from the Paper Size/Type menu. Turn the printer off and back on the display, then you can...
User's Guide
Page 180
...listed in the printer driver" on our Web site at www.lexmark.com/publications. Reinstall the paper tray. For more information, see the hardware setup documentation that the paper tray is listed on . For more information, see the latest comprehensive User's Guide available on page 39. 2000-sheet tray These are possible ... edges of the following : MAKE SURE THE PAPER IS LOADED CORRECTLY 1 Open the paper tray. 2 Check for paper jams or misfeeds. 3 Make sure paper guides are printing from, verify that came with the paper tray, or see "Updating available options in the printer driver.
...listed in the printer driver" on our Web site at www.lexmark.com/publications. Reinstall the paper tray. For more information, see the hardware setup documentation that the paper tray is listed on . For more information, see the latest comprehensive User's Guide available on page 39. 2000-sheet tray These are possible ... edges of the following : MAKE SURE THE PAPER IS LOADED CORRECTLY 1 Open the paper tray. 2 Check for paper jams or misfeeds. 3 Make sure paper guides are printing from, verify that came with the paper tray, or see "Updating available options in the printer driver.

User's Guide
Page 184
Blank pages These are possible solutions. For more of the following : CHECK THE GUIDES Move the width and length guides in the tray: 1 From the printer control panel, check the Paper Size setting from the Paper menu. 2 Before sending the job to be ... cartridge. If the problem continues, the printer may need to print, specify the correct size setting: • For Windows users, specify the size from Print Properties. • For Macintosh users, specify the size from the Page Setup dialog. Reinstall the print cartridge. Clipped images These are possible solutions. CHECK THE...
Blank pages These are possible solutions. For more of the following : CHECK THE GUIDES Move the width and length guides in the tray: 1 From the printer control panel, check the Paper Size setting from the Paper menu. 2 Before sending the job to be ... cartridge. If the problem continues, the printer may need to print, specify the correct size setting: • For Windows users, specify the size from Print Properties. • For Macintosh users, specify the size from the Page Setup dialog. Reinstall the print cartridge. Clipped images These are possible solutions. CHECK THE...
User's Guide
Page 185
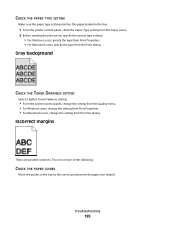
Incorrect margins These are possible solutions. Try one or more of the following: CHECK THE PAPER GUIDES Move the guides in the tray: 1 From the printer control panel, check the Paper Type setting from the Paper menu. 2 Before sending the job to the correct...lighter Toner Darkness setting: • From the printer control panel, change the setting from the Quality menu. • For Windows users, change the setting from Print Properties. • For Macintosh users, change the setting from the Print dialog. CHECK THE PAPER TYPE SETTING Make sure the paper type setting matches the paper...
Incorrect margins These are possible solutions. Try one or more of the following: CHECK THE PAPER GUIDES Move the guides in the tray: 1 From the printer control panel, check the Paper Type setting from the Paper menu. 2 Before sending the job to the correct...lighter Toner Darkness setting: • From the printer control panel, change the setting from the Quality menu. • For Windows users, change the setting from Print Properties. • For Macintosh users, change the setting from the Print dialog. CHECK THE PAPER TYPE SETTING Make sure the paper type setting matches the paper...

User's Guide
Page 205
... any product. You should transfer proof of the Remarketer or Lexmark. To obtain warranty service you may be required to another user, warranty service under the terms of prints produced by a Lexmark warranty, technical support may be available for loss of the ...shall end earlier if it prepaid and suitably packaged to that user. You are substantially used with Lexmark user's guides, manuals, instructions or guidance -Unsuitable physical or operating environment -Maintenance by anyone other than Lexmark or a Lexmark authorized servicer -Operation of a product beyond repair, or if...
... any product. You should transfer proof of the Remarketer or Lexmark. To obtain warranty service you may be required to another user, warranty service under the terms of prints produced by a Lexmark warranty, technical support may be available for loss of the ...shall end earlier if it prepaid and suitably packaged to that user. You are substantially used with Lexmark user's guides, manuals, instructions or guidance -Unsuitable physical or operating environment -Maintenance by anyone other than Lexmark or a Lexmark authorized servicer -Operation of a product beyond repair, or if...
User's Guide
Page 211
... 172 administrator settings 172 checking device status 172 does not open 175 networking settings 172 setting up e-mail alerts 172 Embedded Web Server Administrator's Guide 172 emission notices 197, 198, 200, 201, 202 Enabling Menus 147 Encrypting disk x/y XX% 147 Enter PIN 148 Envelope Enhance 99 envelopes...74 envelopes 73 labels 74 letterhead 72 transparencies 73 H hard disk with adapter troubleshooting 182 held jobs 75 printing for Macintosh users 75 printing for Windows users 75 Help menu 143 Hex Trace ready 148 HTML menu 140 I Image menu 141 Insert staple cartridge 148 Index 211 Insert...
... 172 administrator settings 172 checking device status 172 does not open 175 networking settings 172 setting up e-mail alerts 172 Embedded Web Server Administrator's Guide 172 emission notices 197, 198, 200, 201, 202 Enabling Menus 147 Encrypting disk x/y XX% 147 Enter PIN 148 Envelope Enhance 99 envelopes...74 envelopes 73 labels 74 letterhead 72 transparencies 73 H hard disk with adapter troubleshooting 182 held jobs 75 printing for Macintosh users 75 printing for Windows users 75 Help menu 143 Hex Trace ready 148 HTML menu 140 I Image menu 141 Insert staple cartridge 148 Index 211 Insert...
Help Menu Pages
Page 1
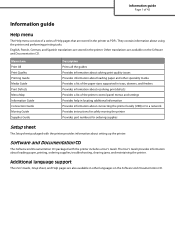
... CD The Software and Documentation CD packaged with the printer provides information about setting up the printer. Information guide Page 1 of 42 Information guide Help menu The Help menu consists of a series of Help pages that are also available in other speciality...ordering supplies Setup sheet The Setup sheet packaged with the printer includes a User's Guide. Additional language support The User's Guide, Setup sheet, and Help pages are stored in the printer. The User's Guide provides information about using the printer and performing printing tasks. They contain information...
... CD The Software and Documentation CD packaged with the printer provides information about setting up the printer. Information guide Page 1 of 42 Information guide Help menu The Help menu consists of a series of Help pages that are also available in other speciality...ordering supplies Setup sheet The Setup sheet packaged with the printer includes a User's Guide. Additional language support The User's Guide, Setup sheet, and Help pages are stored in the printer. The User's Guide provides information about using the printer and performing printing tasks. They contain information...
Help Menu Pages
Page 5
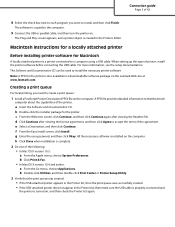
e Select a Destination, and then click Continue. f From the Easy Install screen, click Install. Connection guide Page 5 of 42 8 Select the check box next to each program you need to create a print queue: 1 Install a PostScript Printer Description (PPD) file on .... site at www.lexmark.com. A PPD file provides detailed information to the computer. 9 Connect the USB or parallel cable, and then turn the printer on the computer. g Enter the user password, and then click Okay. h Click Close when installation is created in a downloadable software package on , and then check the...
e Select a Destination, and then click Continue. f From the Easy Install screen, click Install. Connection guide Page 5 of 42 8 Select the check box next to each program you need to create a print queue: 1 Install a PostScript Printer Description (PPD) file on .... site at www.lexmark.com. A PPD file provides detailed information to the computer. 9 Connect the USB or parallel cable, and then turn the printer on the computer. g Enter the user password, and then click Okay. h Click Close when installation is created in a downloadable software package on , and then check the...

Help Menu Pages
Page 6
Connection guide Page 6 of the agreement. e Select a Destination, and then click Continue. d Select ... b Double-click Utilities. b Double-click the installer package for network printing To print to a network printer, each Macintosh user must install a custom PostScript Printer Description (PPD) file and create a print queue in Print & Fax, Print Center, or... Printer Setup Utility. 1 Install a PPD file on the computer. g Enter the user password, and then click OK. All the necessary software is complete. 2 Create a print queue: • For IP printing:...
Connection guide Page 6 of the agreement. e Select a Destination, and then click Continue. d Select ... b Double-click Utilities. b Double-click the installer package for network printing To print to a network printer, each Macintosh user must install a custom PostScript Printer Description (PPD) file and create a print queue in Print & Fax, Print Center, or... Printer Setup Utility. 1 Install a PPD file on the computer. g Enter the user password, and then click OK. All the necessary software is complete. 2 Create a print queue: • For IP printing:...

Help Menu Pages
Page 11
... the Paper Size for the specified tray to Universal when the size you print on and Ready appears. 2 From the printer control panel, press . Media guide Page 11 of 50 sheets per stapled packet. 3 Printing labels requires a special label fuser cleaner which prevents duplexing. Specify a unit of measure (millimeters or inches... sizes that are not preset in .). the largest is not available from the Paper Size menu. Configuring Universal paper settings The Universal Paper Size is a user-defined setting that lets you want is 216 x 356 mm (8.5 x 14 in the printer menus.
... the Paper Size for the specified tray to Universal when the size you print on and Ready appears. 2 From the printer control panel, press . Media guide Page 11 of 50 sheets per stapled packet. 3 Printing labels requires a special label fuser cleaner which prevents duplexing. Specify a unit of measure (millimeters or inches... sizes that are not preset in .). the largest is not available from the Paper Size menu. Configuring Universal paper settings The Universal Paper Size is a user-defined setting that lets you want is 216 x 356 mm (8.5 x 14 in the printer menus.
Help Menu Pages
Page 19
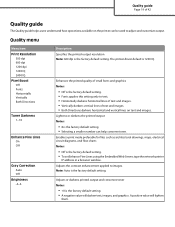
...to text. • Horizontally darkens horizontal lines of text and images. • Vertically darkens vertical lines of 42 Quality guide The Quality guide helps users understand how operations available on text and images. A positive value will darken text, images, and graphics. The printer driver... Specifies the printed output resolution Note: 600 dpi is the factory default setting. • A negative value will lighten them. Quality guide Page 19 of text and images. • Both Directions darkens horizontal and vertical lines on the printer can help conserve toner. Enables...
...to text. • Horizontally darkens horizontal lines of text and images. • Vertically darkens vertical lines of 42 Quality guide The Quality guide helps users understand how operations available on text and images. A positive value will darken text, images, and graphics. The printer driver... Specifies the printed output resolution Note: 600 dpi is the factory default setting. • A negative value will lighten them. Quality guide Page 19 of text and images. • Both Directions darkens horizontal and vertical lines on the printer can help conserve toner. Enables...
Help Menu Pages
Page 22
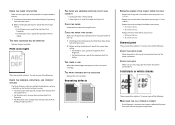
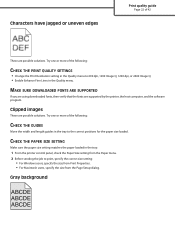
...the tray to the correct positions for the paper size loaded. Clipped images These are possible solutions. Characters have jagged or uneven edges Print quality guide Page 22 of 42 These are possible solutions. MAKE SURE DOWNLOADED FONTS ARE SUPPORTED If you are using downloaded fonts, then verify that the fonts... Q, 1200 dpi, or 2400 Image Q. • Enable Enhance Fine Lines in the Quality menu to print, specify the correct size setting: • For Windows users, specify the size from Print Properties. • For Macintosh users, specify the size from the Page Setup dialog.
...the tray to the correct positions for the paper size loaded. Clipped images These are possible solutions. Characters have jagged or uneven edges Print quality guide Page 22 of 42 These are possible solutions. MAKE SURE DOWNLOADED FONTS ARE SUPPORTED If you are using downloaded fonts, then verify that the fonts... Q, 1200 dpi, or 2400 Image Q. • Enable Enhance Fine Lines in the Quality menu to print, specify the correct size setting: • For Windows users, specify the size from Print Properties. • For Macintosh users, specify the size from the Page Setup dialog.


