Embedded Web Server Administrator's Guide
Page 3
Contents Using security features in the Embedded Web Server 5 Understanding the basics...5 Authentication and Authorization ...5 Groups ...6 Access Controls...6 Security Templates...6 Configuring building blocks...7 Creating a password ...7 Creating a PIN...7 Setting up internal accounts ...8 Using LDAP ...9 Using LDAP+GSSAPI ...11 Configuring Kerberos 5 for use with LDAP+GSSAPI ...13 Using NTLM authentication ... the hard disk ...24 Configuring security audit log settings ...25 Configuring 802.1x authentication ...26 Setting up SNMP ...27 Enabling the security reset jumper ...28 Contents 3
Contents Using security features in the Embedded Web Server 5 Understanding the basics...5 Authentication and Authorization ...5 Groups ...6 Access Controls...6 Security Templates...6 Configuring building blocks...7 Creating a password ...7 Creating a PIN...7 Setting up internal accounts ...8 Using LDAP ...9 Using LDAP+GSSAPI ...11 Configuring Kerberos 5 for use with LDAP+GSSAPI ...13 Using NTLM authentication ... the hard disk ...24 Configuring security audit log settings ...25 Configuring 802.1x authentication ...26 Setting up SNMP ...27 Enabling the security reset jumper ...28 Contents 3

Embedded Web Server Administrator's Guide
Page 14
...server rather than manage date and time settings manually, click the Enable NTP check box, and then type the IP address or hostname of a user's password across a network in a security template only after a supported device has registered with the NTLM domain. • The NTLM building block cannot be deleted... set to use the "Install auth keys" link to browse to the file containing the NTP authentication credentials. 7 Click Submit to save changes, or Reset Form to Settings ª Security ª Set Date and Time. 2 To manage the settings manually, type the correct date and time in the ...
...server rather than manage date and time settings manually, click the Enable NTP check box, and then type the IP address or hostname of a user's password across a network in a security template only after a supported device has registered with the NTLM domain. • The NTLM building block cannot be deleted... set to use the "Install auth keys" link to browse to the file containing the NTP authentication credentials. 7 Click Submit to save changes, or Reset Form to Settings ª Security ª Set Date and Time. 2 To manage the settings manually, type the correct date and time in the ...
Embedded Web Server Administrator's Guide
Page 16
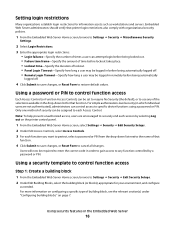
...Step 1: Create a building block 1 From the Embedded Web Server Home screen, browse to specific device functions using a password or PIN. Using a password or PIN to control function access Each Access Control (or Function Access Control), can be assigned to use any function ...Setups. 2 Under Edit Access Controls, select Access Controls. 3 For each session by a password or PIN. Embedded Web Server administrators should verify that function. 4 Click Submit to save changes, or Reset Form to cancel all changes. Using security features in remotely before being automatically logged off ....
...Step 1: Create a building block 1 From the Embedded Web Server Home screen, browse to specific device functions using a password or PIN. Using a password or PIN to control function access Each Access Control (or Function Access Control), can be assigned to use any function ...Setups. 2 Under Edit Access Controls, select Access Controls. 3 For each session by a password or PIN. Embedded Web Server administrators should verify that function. 4 Click Submit to save changes, or Reset Form to cancel all changes. Using security features in remotely before being automatically logged off ....
Embedded Web Server Administrator's Guide
Page 17
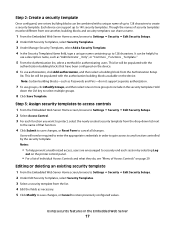
... support separate authorization. 7 To use authorization, click Add authorization, and then select a building block from the list. 4 Edit the fields as Passwords and Pins-do , see "Menu of that have been configured on the device. 6 To use groups, click Modify Groups, and then select ...Template. Using security features in the Embedded Web Server 17 Note: Certain building blocks-such as necessary. 5 Click Modify to save changes, or Reset Form to cancel all changes. Step 2: Create a security template Once configured, one or more groups to include in the security template. This ...
... support separate authorization. 7 To use authorization, click Add authorization, and then select a building block from the list. 4 Edit the fields as Passwords and Pins-do , see "Menu of that have been configured on the device. 6 To use groups, click Modify Groups, and then select ...Template. Using security features in the Embedded Web Server 17 Note: Certain building blocks-such as necessary. 5 Click Modify to save changes, or Reset Form to cancel all changes. Step 2: Create a security template Once configured, one or more groups to include in the security template. This ...
Embedded Web Server Administrator's Guide
Page 19
... _ Only", or "Common _ Functions _ Template." 5 From the Authentication list, select a method for passwords) • Location of that function. 4 Click Submit to save changes, or Reset Form to the printer Using security features in the Embedded Web Server 19 User credentials and group designations can ...building blocks which have been configured on the device. This list will be helpful to use a descriptive name, such as PINs and Passwords-do not support separate authorization. 7 To use authorization, click Add authorization, and then select a building block from the existing network...
... _ Only", or "Common _ Functions _ Template." 5 From the Authentication list, select a method for passwords) • Location of that function. 4 Click Submit to save changes, or Reset Form to the printer Using security features in the Embedded Web Server 19 User credentials and group designations can ...building blocks which have been configured on the device. This list will be helpful to use a descriptive name, such as PINs and Passwords-do not support separate authorization. 7 To use authorization, click Add authorization, and then select a building block from the existing network...
Embedded Web Server Administrator's Guide
Page 27
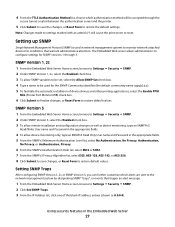
...facilitate the automatic installation of the blank IP address entries (shown as device monitoring, type an SNMPPv3 Read/Write User name and Password in network management systems to monitor network-attached devices for the SNMP Community identifier (the default community name is used for conditions ... other printing applications, select the Enable PPM Mib (Printer Port Monitor MIB) check box. 6 Click Submit to finalize changes, or Reset Form to restore default values. The Embedded Web server allows administrators to configure settings for SNMP versions 1 through the secure tunnel created...
...facilitate the automatic installation of the blank IP address entries (shown as device monitoring, type an SNMPPv3 Read/Write User name and Password in network management systems to monitor network-attached devices for the SNMP Community identifier (the default community name is used for conditions ... other printing applications, select the Enable PPM Mib (Printer Port Monitor MIB) check box. 6 Click Submit to finalize changes, or Reset Form to restore default values. The Embedded Web server allows administrators to configure settings for SNMP versions 1 through the secure tunnel created...
Embedded Web Server Administrator's Guide
Page 28
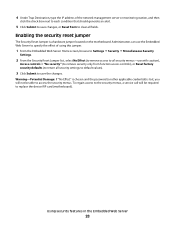
... return all security settings to default values). 3 Click Submit to save changes, or Reset Form to clear all fields. Using security features in the Embedded Web Server 28 Warning-Potential Damage: If "No Effect" is chosen and the password (or other applicable credential) is a hardware jumper located on the motherboard. To regain...
... return all security settings to default values). 3 Click Submit to save changes, or Reset Form to clear all fields. Using security features in the Embedded Web Server 28 Warning-Potential Damage: If "No Effect" is chosen and the password (or other applicable credential) is a hardware jumper located on the motherboard. To regain...
Embedded Web Server Administrator's Guide
Page 40
...6 authenticating using Kerberos 13 using LDAP 9 using LDAP+GSSAPI 11 using NTLM authentication 14 Authentication understanding 5 Authorization understanding 5 B backup password creating 15 using 15 building blocks adding to security templates 16 internal accounts 8 Kerberos 5 13 LDAP 9 LDAP+GSSAPI 11 NTLM authentication... accounts 8 Kerberos authentication 13 LDAP authentication 9 LDAP+GSSAPI authentication 11 login restrictions 16 NTLM authentication 14 password 7 PIN 7 reset jumper on motherboard 28 security audit log 25 security templates 16 SNMP 27 USB devices 23 security audit log configuring ...
...6 authenticating using Kerberos 13 using LDAP 9 using LDAP+GSSAPI 11 using NTLM authentication 14 Authentication understanding 5 Authorization understanding 5 B backup password creating 15 using 15 building blocks adding to security templates 16 internal accounts 8 Kerberos 5 13 LDAP 9 LDAP+GSSAPI 11 NTLM authentication... accounts 8 Kerberos authentication 13 LDAP authentication 9 LDAP+GSSAPI authentication 11 login restrictions 16 NTLM authentication 14 password 7 PIN 7 reset jumper on motherboard 28 security audit log 25 security templates 16 SNMP 27 USB devices 23 security audit log configuring ...


