
Embedded Web Server Administrator's Guide
Page 15
A status screen will display "Status....Not Registeted." To create a backup password 1 From the Embedded Web Server Home screen, browse to access security menus regardless of the type of the ... policies. A backup password can be able to register your device with the message "Registering." • If registration is successful, the Manage NTLM Setup screen will display "Status....Registered." • If registration is a network communication problem, or an authentication server fails. Specifying the default user domain for example, if there is not...
A status screen will display "Status....Not Registeted." To create a backup password 1 From the Embedded Web Server Home screen, browse to access security menus regardless of the type of the ... policies. A backup password can be able to register your device with the message "Registering." • If registration is successful, the Manage NTLM Setup screen will display "Status....Registered." • If registration is a network communication problem, or an authentication server fails. Specifying the default user domain for example, if there is not...
Embedded Web Server Administrator's Guide
Page 21
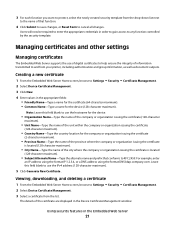
... the city where the company or organization issuing the certificate is located (128-character maximum). • City Name-Type the name of the certificate are displayed in the Device Certificate Management window. Note: Leave this field blank to cancel all changes. For example, enter an IP address using the format IP...
... the city where the company or organization issuing the certificate is located (128-character maximum). • City Name-Type the name of the certificate are displayed in the Device Certificate Management window. Note: Leave this field blank to cancel all changes. For example, enter an IP address using the format IP...

Embedded Web Server Administrator's Guide
Page 24
..., choose Single Pass, or Multi-pass for disk wiping, select Scheduled Disk Wiping. 4 Use the Time and Day(s) lists to designate when disk wiping should display a list of functions, instead of standard home screen icons such as needed , and then click Modify to set up , the printer touch screen should occur...
..., choose Single Pass, or Multi-pass for disk wiping, select Scheduled Disk Wiping. 4 Use the Time and Day(s) lists to designate when disk wiping should display a list of functions, instead of standard home screen icons such as needed , and then click Modify to set up , the printer touch screen should occur...
Embedded Web Server Administrator's Guide
Page 33
... License, each Contributor hereby grants to You a perpetual, worldwide, non-exclusive, no -charge, royalty-free, irrevocable copyright license to reproduce, prepare Derivative Works of, publicly display, publicly perform, sublicense, and distribute the Work and such Derivative Works in writing by the copyright owner as a whole, an original work of authorship, including...
... License, each Contributor hereby grants to You a perpetual, worldwide, non-exclusive, no -charge, royalty-free, irrevocable copyright license to reproduce, prepare Derivative Works of, publicly display, publicly perform, sublicense, and distribute the Work and such Derivative Works in writing by the copyright owner as a whole, an original work of authorship, including...
Embedded Web Server Administrator's Guide
Page 34
... IS" BASIS, WITHOUT WARRANTIES OR CONDITIONS OF ANY KIND, either express or implied, including, without any risks associated with Licensor regarding such Contributions. 6 Trademarks. within a display generated by reason of your accepting any warranties or conditions of the Derivative Works; You may add Your own copyright statement to Your modifications and...
... IS" BASIS, WITHOUT WARRANTIES OR CONDITIONS OF ANY KIND, either express or implied, including, without any risks associated with Licensor regarding such Contributions. 6 Trademarks. within a display generated by reason of your accepting any warranties or conditions of the Derivative Works; You may add Your own copyright statement to Your modifications and...
Embedded Web Server Administrator's Guide
Page 36
... imply warranties or conditions or impose obligations on which the Software Program (if any) is furnished is copyrighted and owned by Lexmark International, Inc. b Copying. Notwithstanding the terms and conditions of download. This limited warranty applies only to Software Program media ... by the terms and conditions of Rights. The term "Use" means storing, loading, installing, executing, or displaying the Software Program. If Lexmark has licensed the Software Program to one copy of the software license agreement accompanying such Freeware, whether in this License...
... imply warranties or conditions or impose obligations on which the Software Program (if any) is furnished is copyrighted and owned by Lexmark International, Inc. b Copying. Notwithstanding the terms and conditions of download. This limited warranty applies only to Software Program media ... by the terms and conditions of Rights. The term "Use" means storing, loading, installing, executing, or displaying the Software Program. If Lexmark has licensed the Software Program to one copy of the software license agreement accompanying such Freeware, whether in this License...
Clearing Jams Guide
Page 1
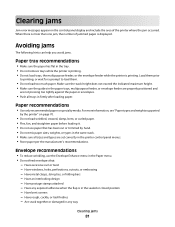
... appears on the underside of the printer. Have excessive curl or twist - Warning-Potential Damage: Do not touch the photoconductor drum on the display. Paper recommendations • Use only recommended paper or specialty media. For more information, see the User's Guide. • Do not load... the cartridge exposed to access jam locations. Have an interlocking design - Load them prior to printing, or wait for extended periods. Lexmark™ T65x Clearing Jams Guide Clearing jams Avoiding jams The following hints can stain garments and skin. Envelope recommendations • To reduce...
... appears on the underside of the printer. Have excessive curl or twist - Warning-Potential Damage: Do not touch the photoconductor drum on the display. Paper recommendations • Use only recommended paper or specialty media. For more information, see the User's Guide. • Do not load... the cartridge exposed to access jam locations. Have an interlocking design - Load them prior to printing, or wait for extended periods. Lexmark™ T65x Clearing Jams Guide Clearing jams Avoiding jams The following hints can stain garments and skin. Envelope recommendations • To reduce...
Clearing Jams Guide
Page 4
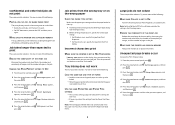
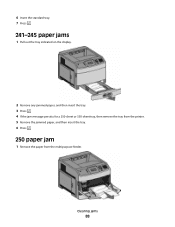
Straighten the edges on the display. 250 paper jam 1 Remove the paper from the multipurpose feeder. 4 Remove the jammed paper. 5 Replace the duplex jam access tray. 6 Insert the standard tray. 7 Press . 2 ...
Straighten the edges on the display. 250 paper jam 1 Remove the paper from the multipurpose feeder. 4 Remove the jammed paper. 5 Replace the duplex jam access tray. 6 Insert the standard tray. 7 Press . 2 ...
Troubleshooting Guide
Page 1
... site at www.lexmark.com. CHECK TO SEE IF THE PAPER TRAY IS EMPTY Load paper in Adobe Acrobat. 2 Click the printer icon. Printer control panel display is Not Connected, check the network cables, and then try printing the network setup page again. For information ...regarding tested and approved USB flash memory devices, visit the Lexmark Web site at www.lexmark.com. CHECK TO SEE IF THE STANDARD...
... site at www.lexmark.com. CHECK TO SEE IF THE PAPER TRAY IS EMPTY Load paper in Adobe Acrobat. 2 Click the printer icon. Printer control panel display is Not Connected, check the network cables, and then try printing the network setup page again. For information ...regarding tested and approved USB flash memory devices, visit the Lexmark Web site at www.lexmark.com. CHECK TO SEE IF THE STANDARD...
Troubleshooting Guide
Page 2
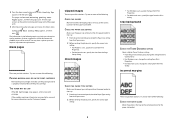
... do not print These are possible solutions. Try one or more of pages in the Finishing menu. Turn the printer off and back on the display, then you must set Collate to On. Unexpected page breaks occur Increase the Print Timeout value: 1 From the printer control panel, press . 2 Press the arrow...
... do not print These are possible solutions. Try one or more of pages in the Finishing menu. Turn the printer off and back on the display, then you must set Collate to On. Unexpected page breaks occur Increase the Print Timeout value: 1 From the printer control panel, press . 2 Press the arrow...
Troubleshooting Guide
Page 5
The message remains on the printer control panel display until all the pages print. 5 After the print quality test pages print, press the down arrow button until Exit Config Menu appears, and then press . ...
The message remains on the printer control panel display until all the pages print. 5 After the print quality test pages print, press the down arrow button until Exit Config Menu appears, and then press . ...
Troubleshooting Guide
Page 9
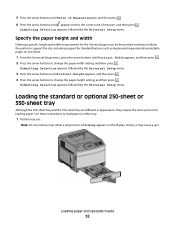
... users, specify the type from the Print dialog. Contacting Customer Support When you call (1-800-539-6275). For other countries/regions, visit the Lexmark Web site at www.lexmark.com. 9 or Canada, call Customer Support, describe the problem you have already taken to print, specify the correct type setting: • For Windows... DEFECTIVE Replace the print cartridge. For more of the printer. The serial number is poor Try one or more information, see the label on the display, and the troubleshooting steps you are possible solutions.
... users, specify the type from the Print dialog. Contacting Customer Support When you call (1-800-539-6275). For other countries/regions, visit the Lexmark Web site at www.lexmark.com. 9 or Canada, call Customer Support, describe the problem you have already taken to print, specify the correct type setting: • For Windows... DEFECTIVE Replace the print cartridge. For more of the printer. The serial number is poor Try one or more information, see the label on the display, and the troubleshooting steps you are possible solutions.
User's Guide
Page 6
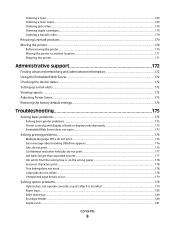
......169 Ordering a fuser wiper ...169 Ordering pick rollers ...170 Ordering staple cartridges...170 Ordering a transfer roller...170 Recycling Lexmark products...170 Moving the printer...170 Before moving the printer...170 Moving the printer to another location...171 Shipping the printer ... Restoring the factory default settings...174 Troubleshooting 175 Solving basic problems...175 Solving basic printer problems...175 Printer control panel display is blank or displays only diamonds 175 Embedded Web Server does not open...175 Solving printing problems...176 Multiple-language PDFs do not print...
......169 Ordering a fuser wiper ...169 Ordering pick rollers ...170 Ordering staple cartridges...170 Ordering a transfer roller...170 Recycling Lexmark products...170 Moving the printer...170 Before moving the printer...170 Moving the printer to another location...171 Shipping the printer ... Restoring the factory default settings...174 Troubleshooting 175 Solving basic problems...175 Solving basic printer problems...175 Printer control panel display is blank or displays only diamonds 175 Embedded Web Server does not open...175 Solving printing problems...176 Multiple-language PDFs do not print...
User's Guide
Page 15
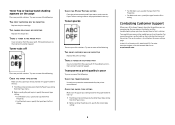
... up or down arrow buttons to scroll through text that communicate the status of options is indicated by an asterisk (*). • Saves a displayed menu item as the user default setting, it remains in effect until factory defaults are restored. • Settings chosen from a software program ... Notes: • When a new setting is saved as the new user default setting. The current setting is offered once Stopped appears on the display. Stops all printer activity A list of the printer Navigation buttons Press the up , processing data, or printing. • Solid green-The printer ...
... up or down arrow buttons to scroll through text that communicate the status of options is indicated by an asterisk (*). • Saves a displayed menu item as the user default setting, it remains in effect until factory defaults are restored. • Settings chosen from a software program ... Notes: • When a new setting is saved as the new user default setting. The current setting is offered once Stopped appears on the display. Stops all printer activity A list of the printer Navigation buttons Press the up , processing data, or printing. • Solid green-The printer ...
User's Guide
Page 52
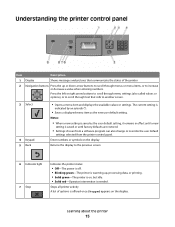
... 550-sheet tray are different in appearance, they require the same process for standard features such as duplex printing and printing multiple pages on the display. Submitting Selection appears, followed by the Universal Setup menu. Submitting Selection appears, followed by the Universal Setup menu. 3 Press the arrow buttons until Portrait Height...
... 550-sheet tray are different in appearance, they require the same process for standard features such as duplex printing and printing multiple pages on the display. Submitting Selection appears, followed by the Universal Setup menu. Submitting Selection appears, followed by the Universal Setup menu. 3 Press the arrow buttons until Portrait Height...

User's Guide
Page 64
When a Custom Type name is changed, the menus display the new name instead of the custom paper types that are loaded. 6 Press the arrow buttons until Configure Bins appears, and then press . 7 Press the ...
When a Custom Type name is changed, the menus display the new name instead of the custom paper types that are loaded. 6 Press the arrow buttons until Configure Bins appears, and then press . 7 Press the ...
User's Guide
Page 79
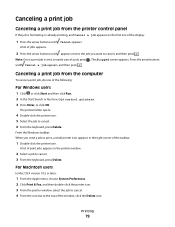
... Run box, type control printers. 3 Press Enter, or click OK. The Stopped screen appears. A list of print jobs appears in the right corner of the display: 1 Press the arrow buttons until Cancel appears. A list of jobs appears. 2 Press the arrow buttons until Cancel a job appears, and then press . For Macintosh users...
... Run box, type control printers. 3 Press Enter, or click OK. The Stopped screen appears. A list of print jobs appears in the right corner of the display: 1 Press the arrow buttons until Cancel appears. A list of jobs appears. 2 Press the arrow buttons until Cancel a job appears, and then press . For Macintosh users...
User's Guide
Page 81
... more than one jam, the number of jammed pages is more information, see "Paper types and weights supported by the printer" on the control panel display and include the area of the printer where the jam occurred. Have metal clasps, string ties, or folding bars - When there is... displayed. Load them prior to printing, or wait for a prompt to load them. • Do not load too much paper. Have an interlocking design - Are stuck ...
... more than one jam, the number of jammed pages is more information, see "Paper types and weights supported by the printer" on the control panel display and include the area of the printer where the jam occurred. Have metal clasps, string ties, or folding bars - When there is... displayed. Load them prior to printing, or wait for a prompt to load them. • Do not load too much paper. Have an interlocking design - Are stuck ...
User's Guide
Page 82
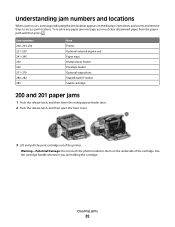
... open the front cover. 3 Lift and pull the print cartridge out of the cartridge. Warning-Potential Damage: Do not touch the photoconductor drum on the display. Open doors and covers and remove trays to access jam locations. Understanding jam numbers and locations When a jam occurs, a message indicating the jam location appears...
... open the front cover. 3 Lift and pull the print cartridge out of the cartridge. Warning-Potential Damage: Do not touch the photoconductor drum on the display. Open doors and covers and remove trays to access jam locations. Understanding jam numbers and locations When a jam occurs, a message indicating the jam location appears...
User's Guide
Page 88
Clearing jams 88 6 Insert the standard tray. 7 Press . 241-245 paper jams 1 Pull out the tray indicated on the display. 2 Remove any jammed paper, and then insert the tray. 3 Press . 4 If the jam message persists for a 250-sheet or 550-sheet tray, then remove the tray from the printer. 5 Remove the jammed paper, and then insert the tray. 6 Press . 250 paper jam 1 Remove the paper from the multipurpose feeder.
Clearing jams 88 6 Insert the standard tray. 7 Press . 241-245 paper jams 1 Pull out the tray indicated on the display. 2 Remove any jammed paper, and then insert the tray. 3 Press . 4 If the jam message persists for a 250-sheet or 550-sheet tray, then remove the tray from the printer. 5 Remove the jammed paper, and then insert the tray. 6 Press . 250 paper jam 1 Remove the paper from the multipurpose feeder.


