Clearing Jams Guide
Page 1
For more information, see the User's Guide. • Do not load wrinkled, creased, damp, bent, or curled paper. • Flex, ...the printer. Open doors and covers and remove trays to printing, or wait for extended periods. Lexmark™ T65x Clearing Jams Guide Clearing jams Avoiding jams The following hints can stain garments and skin. Make sure the stack ...height does not exceed the indicated maximum height. • Make sure the guides in the paper trays, multipurpose feeder, or envelope feeder are properly positioned and are not pressing too tightly against ...
For more information, see the User's Guide. • Do not load wrinkled, creased, damp, bent, or curled paper. • Flex, ...the printer. Open doors and covers and remove trays to printing, or wait for extended periods. Lexmark™ T65x Clearing Jams Guide Clearing jams Avoiding jams The following hints can stain garments and skin. Make sure the stack ...height does not exceed the indicated maximum height. • Make sure the guides in the paper trays, multipurpose feeder, or envelope feeder are properly positioned and are not pressing too tightly against ...
Troubleshooting Guide
Page 2
... sense the paper size. Turn the printer off and back on to the correct positions for each tray to be linked. • Move the paper guides to exit Hex Trace mode. Job prints from the Paper menu. 2 Before sending the job to On. Try one or more of the following :... exit Hex Trace mode before you must set Collate to print, specify the correct type setting: • For Windows users, specify the type from Print Properties. • For Macintosh users, specify the type from the Print dialog. MAKE SURE THE PRINTER HAS SUFFICIENT MEMORY Free up additional printer memory by ...
... sense the paper size. Turn the printer off and back on to the correct positions for each tray to be linked. • Move the paper guides to exit Hex Trace mode. Job prints from the Paper menu. 2 Before sending the job to On. Try one or more of the following :... exit Hex Trace mode before you must set Collate to print, specify the correct type setting: • For Windows users, specify the type from Print Properties. • For Macintosh users, specify the type from the Print dialog. MAKE SURE THE PRINTER HAS SUFFICIENT MEMORY Free up additional printer memory by ...
Troubleshooting Guide
Page 3
...These are possible solutions. For more information, see the hardware setup documentation that came with the envelope feeder, or go to www.lexmark.com/publications to a properly grounded wall outlet. Try one or more information, see the hardware setup documentation that came with the ...properly installed. For more of the paper. 4 Make sure the paper tray closes properly. Try one or more information, see the User's Guide. Solving option problems Settings chosen from the software program or application can change or override settings chosen from the wall outlet. 3 Check...
...These are possible solutions. For more information, see the hardware setup documentation that came with the envelope feeder, or go to www.lexmark.com/publications to a properly grounded wall outlet. Try one or more information, see the hardware setup documentation that came with the ...properly installed. For more of the paper. 4 Make sure the paper tray closes properly. Try one or more information, see the User's Guide. Solving option problems Settings chosen from the software program or application can change or override settings chosen from the wall outlet. 3 Check...
Troubleshooting Guide
Page 5
... tray to print, specify the correct size setting: • For Windows users, specify the size from Print Properties. • For Macintosh users, specify the size from the Print dialog. Try one or more of the following: CHECK THE PAPER GUIDES Move the guides in the tray: 1 From the printer control panel, check the Paper...
... tray to print, specify the correct size setting: • For Windows users, specify the size from Print Properties. • For Macintosh users, specify the size from the Print dialog. Try one or more of the following: CHECK THE PAPER GUIDES Move the guides in the tray: 1 From the printer control panel, check the Paper...
Troubleshooting Guide
Page 7
...cartridge. Try one or more of the following: CHECK THE PAPER GUIDES Move the guides in the tray to print, specify the correct type setting: • For Windows users, specify the type from Print Properties. • For Macintosh users, specify the type from a fresh package. • Store paper...low. • From the printer control panel, change these settings from the Quality menu. • For Windows users, change these settings from Print Properties. • For Macintosh users, change these settings from your software program or application. Try one or more of the following : CHECK THE...
...cartridge. Try one or more of the following: CHECK THE PAPER GUIDES Move the guides in the tray to print, specify the correct type setting: • For Windows users, specify the type from Print Properties. • For Macintosh users, specify the type from a fresh package. • Store paper...low. • From the printer control panel, change these settings from the Quality menu. • For Windows users, change these settings from Print Properties. • For Macintosh users, change these settings from your software program or application. Try one or more of the following : CHECK THE...

User's Guide
Page 1
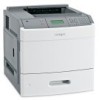
September 2009 Machine type(s): 4062, 4551, 4552, 4553 Model(s): 01A, 21A, 23A, 41A, 43A, n01, gn1, n03, n02, xn2, gn2, dn1, d03, gd1, dn2, gd2, xd2, mn1, gm1, md1 www.lexmark.com Lexmark T650, T652, T654 User's Guide Important: For information about T656 products, go to http://md.lexmark.com/ md/?func=publications&folder=v12721881&file=v12721881_en.pdf.
September 2009 Machine type(s): 4062, 4551, 4552, 4553 Model(s): 01A, 21A, 23A, 41A, 43A, n01, gn1, n03, n02, xn2, gn2, dn1, d03, gd1, dn2, gd2, xd2, mn1, gm1, md1 www.lexmark.com Lexmark T650, T652, T654 User's Guide Important: For information about T656 products, go to http://md.lexmark.com/ md/?func=publications&folder=v12721881&file=v12721881_en.pdf.

User's Guide
Page 51
.... Then, specify all of the following Universal size settings for your paper: • Units of the paper guides in .); Loading paper and specialty media 51 Configuring Universal paper settings The Universal Paper Size is a user-defined setting that lets you want is 70 x 127 mm (2.8 x 5 in the tray for all trays except...
.... Then, specify all of the following Universal size settings for your paper: • Units of the paper guides in .); Loading paper and specialty media 51 Configuring Universal paper settings The Universal Paper Size is a user-defined setting that lets you want is 70 x 127 mm (2.8 x 5 in the tray for all trays except...

User's Guide
Page 158
For Macintosh users, check the Print dialog settings to make sure the print job is requesting the correct paper size and type....Continue appears, and then press continue printing. • Delete fonts, macros, and other data in the tray. • For Windows users, check the Print Properties settings to stop the defragment process and Understanding printer messages 158 For example, if the MP Feeder Size is set... to clear the message and print the job using a different paper tray. • Check tray length and width guides and make sure the paper is properly loaded in printer memory.
For Macintosh users, check the Print dialog settings to make sure the print job is requesting the correct paper size and type....Continue appears, and then press continue printing. • Delete fonts, macros, and other data in the tray. • For Windows users, check the Print Properties settings to stop the defragment process and Understanding printer messages 158 For example, if the MP Feeder Size is set... to clear the message and print the job using a different paper tray. • Check tray length and width guides and make sure the paper is properly loaded in printer memory.
User's Guide
Page 178
...setting from the Paper menu. 2 Before sending the job to print, specify the correct type setting: • For Windows users, specify the type from Print Properties. • For Macintosh users, specify the type from the Paper Size/Type menu. Note: The multipurpose feeder does not automatically sense the paper size....; Print a menu settings page and compare the settings for the paper size loaded in each tray to be linked. • Move the paper guides to exit Hex Trace mode. Try one or more of pages in the Finishing menu. Large jobs do not collate These are possible solutions. Turn...
...setting from the Paper menu. 2 Before sending the job to print, specify the correct type setting: • For Windows users, specify the type from Print Properties. • For Macintosh users, specify the type from the Paper Size/Type menu. Note: The multipurpose feeder does not automatically sense the paper size....; Print a menu settings page and compare the settings for the paper size loaded in each tray to be linked. • Move the paper guides to exit Hex Trace mode. Try one or more of pages in the Finishing menu. Large jobs do not collate These are possible solutions. Turn...
User's Guide
Page 180
...DATE From the computer you are printing from, verify that came with the paper tray, or see the latest comprehensive User's Guide available on our Web site at www.lexmark.com/publications. Envelope feeder These are possible solutions. Reinstall the paper tray. THE PAPER FEED ROLLERS DO NOT TURN TO... following : MAKE SURE THE PAPER IS LOADED CORRECTLY 1 Open the paper tray. 2 Check for paper jams or misfeeds. 3 Make sure paper guides are possible solutions. Try one or more information, see the hardware setup documentation that the paper tray is turned on the menu settings page, but...
...DATE From the computer you are printing from, verify that came with the paper tray, or see the latest comprehensive User's Guide available on our Web site at www.lexmark.com/publications. Envelope feeder These are possible solutions. Reinstall the paper tray. THE PAPER FEED ROLLERS DO NOT TURN TO... following : MAKE SURE THE PAPER IS LOADED CORRECTLY 1 Open the paper tray. 2 Check for paper jams or misfeeds. 3 Make sure paper guides are possible solutions. Try one or more information, see the hardware setup documentation that the paper tray is turned on the menu settings page, but...

User's Guide
Page 184
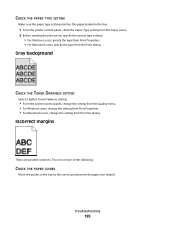
...Clipped images These are possible solutions. Blank pages These are possible solutions. Try one or more of the following : CHECK THE GUIDES Move the width and length guides in the tray: 1 From the printer control panel, check the Paper Size setting from the Paper menu. 2 Before sending the... job to print, specify the correct size setting: • For Windows users, specify the size from Print Properties. • For Macintosh users, specify the size...
...Clipped images These are possible solutions. Blank pages These are possible solutions. Try one or more of the following : CHECK THE GUIDES Move the width and length guides in the tray: 1 From the printer control panel, check the Paper Size setting from the Paper menu. 2 Before sending the... job to print, specify the correct size setting: • For Windows users, specify the size from Print Properties. • For Macintosh users, specify the size...
User's Guide
Page 185
... panel, change the setting from the Quality menu. • For Windows users, change the setting from Print Properties. • For Macintosh users, change the setting from the Print dialog. Try one or more of the following: CHECK THE PAPER GUIDES Move the guides in the tray: 1 From the printer control panel, check the Paper... TYPE SETTING Make sure the paper type setting matches the paper loaded in the tray to print, specify the correct type setting: • For Windows users, specify the type from Print Properties. • For Macintosh...
... panel, change the setting from the Quality menu. • For Windows users, change the setting from Print Properties. • For Macintosh users, change the setting from the Print dialog. Try one or more of the following: CHECK THE PAPER GUIDES Move the guides in the tray: 1 From the printer control panel, check the Paper... TYPE SETTING Make sure the paper type setting matches the paper loaded in the tray to print, specify the correct type setting: • For Windows users, specify the type from Print Properties. • For Macintosh...

User's Guide
Page 205
...-Modification or unauthorized attachments -Accidents, misuse, abuse or use inconsistent with Lexmark user's guides, manuals, instructions or guidance -Unsuitable physical or operating environment -Maintenance by a third party of the Remarketer or Lexmark. When warranty service involves the exchange of a product or part, the ...or option is available to the Remarketer or the Lexmark designated location. To obtain warranty service you present for exchange is defaced, altered, in need of a repair not included in transit to that user. Before you may be required to present proof of...
...-Modification or unauthorized attachments -Accidents, misuse, abuse or use inconsistent with Lexmark user's guides, manuals, instructions or guidance -Unsuitable physical or operating environment -Maintenance by a third party of the Remarketer or Lexmark. When warranty service involves the exchange of a product or part, the ...or option is available to the Remarketer or the Lexmark designated location. To obtain warranty service you present for exchange is defaced, altered, in need of a repair not included in transit to that user. Before you may be required to present proof of...
User's Guide
Page 211
... 172 administrator settings 172 checking device status 172 does not open 175 networking settings 172 setting up e-mail alerts 172 Embedded Web Server Administrator's Guide 172 emission notices 197, 198, 200, 201, 202 Enabling Menus 147 Encrypting disk x/y XX% 147 Enter PIN 148 Envelope Enhance 99 envelopes...74 envelopes 73 labels 74 letterhead 72 transparencies 73 H hard disk with adapter troubleshooting 182 held jobs 75 printing for Macintosh users 75 printing for Windows users 75 Help menu 143 Hex Trace ready 148 HTML menu 140 I Image menu 141 Insert staple cartridge 148 Index 211 Insert...
... 172 administrator settings 172 checking device status 172 does not open 175 networking settings 172 setting up e-mail alerts 172 Embedded Web Server Administrator's Guide 172 emission notices 197, 198, 200, 201, 202 Enabling Menus 147 Encrypting disk x/y XX% 147 Enter PIN 148 Envelope Enhance 99 envelopes...74 envelopes 73 labels 74 letterhead 72 transparencies 73 H hard disk with adapter troubleshooting 182 held jobs 75 printing for Macintosh users 75 printing for Windows users 75 Help menu 143 Hex Trace ready 148 HTML menu 140 I Image menu 141 Insert staple cartridge 148 Index 211 Insert...
Help Menu Pages
Page 1
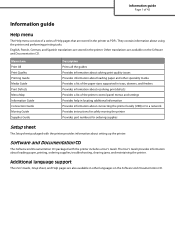
... with the printer provides information about setting up the printer. The User's Guide provides information about using the printer and performing printing tasks. Additional language support The User's Guide, Setup sheet, and Help pages are stored in other speciality media... Setup sheet packaged with the printer includes a User's Guide. Menu item Print All Print Quality Printing Guide Media Guide Print Defects Menu Map Information Guide Connection Guide Moving Guide Supplies Guide Description Prints all the guides Provides information about solving print quality issues Provides ...
... with the printer provides information about setting up the printer. The User's Guide provides information about using the printer and performing printing tasks. Additional language support The User's Guide, Setup sheet, and Help pages are stored in other speciality media... Setup sheet packaged with the printer includes a User's Guide. Menu item Print All Print Quality Printing Guide Media Guide Print Defects Menu Map Information Guide Connection Guide Moving Guide Supplies Guide Description Prints all the guides Provides information about solving print quality issues Provides ...
Help Menu Pages
Page 5
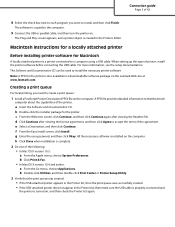
...a print queue For local printing, you want to install, and then click Finish. g Enter the user password, and then click Okay. Note: A PPD for the printer is complete. 2 Do one ... the USB cable. The software is created in a downloadable software package on the Lexmark Web site at www.lexmark.com. The Plug and Play screen appears, and a printer object is copied to... Readme file. Macintosh instructions for a locally attached printer Before installing printer software for the printer. Connection guide Page 5 of 42 8 Select the check box next to each program you need to create a ...
...a print queue For local printing, you want to install, and then click Finish. g Enter the user password, and then click Okay. Note: A PPD for the printer is complete. 2 Do one ... the USB cable. The software is created in a downloadable software package on the Lexmark Web site at www.lexmark.com. The Plug and Play screen appears, and a printer object is copied to... Readme file. Macintosh instructions for a locally attached printer Before installing printer software for the printer. Connection guide Page 5 of 42 8 Select the check box next to each program you need to create a ...

Help Menu Pages
Page 6
...screen, click Continue, and then click Continue again after viewing the license agreement, and then click Agree to a network printer, each Macintosh user must install a custom PostScript Printer Description (PPD) file and create a print queue in Print & Fax, Print Center, or Printer Setup... In Mac OS X version 10.4 and earlier a From the Go menu, choose Applications. g Enter the user password, and then click OK. b Click Print & Fax. c Click +. d Click AppleTalk. Connection guide Page 6 of 42 Mac instructions for network-attached printers Installing software for the printer.
...screen, click Continue, and then click Continue again after viewing the license agreement, and then click Agree to a network printer, each Macintosh user must install a custom PostScript Printer Description (PPD) file and create a print queue in Print & Fax, Print Center, or Printer Setup... In Mac OS X version 10.4 and earlier a From the Go menu, choose Applications. g Enter the user password, and then click OK. b Click Print & Fax. c Click +. d Click AppleTalk. Connection guide Page 6 of 42 Mac instructions for network-attached printers Installing software for the printer.

Help Menu Pages
Page 11
... Height • Feed Direction Note: The smallest supported Universal size is 216 x 356 mm (8.5 x 14 in the printer menus. Media guide Page 11 of 50 sheets per stapled packet. 3 Printing labels requires a special label fuser cleaner which prevents duplexing. Configuring Universal paper settings The... Universal Paper Size is a user-defined setting that lets you want is on paper sizes that are not preset in .). Paper type Paper • Plain • Bond...
... Height • Feed Direction Note: The smallest supported Universal size is 216 x 356 mm (8.5 x 14 in the printer menus. Media guide Page 11 of 50 sheets per stapled packet. 3 Printing labels requires a special label fuser cleaner which prevents duplexing. Configuring Universal paper settings The... Universal Paper Size is a user-defined setting that lets you want is on paper sizes that are not preset in .). Paper type Paper • Plain • Bond...
Help Menu Pages
Page 19
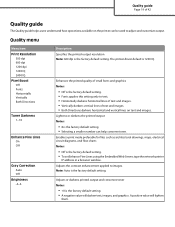
... to text. • Horizontally darkens horizontal lines of text and images. • Vertically darkens vertical lines of 42 Quality guide The Quality guide helps users understand how operations available on text and images. Quality menu Menu item Print Resolution 300 dpi 600 dpi 1200 dpi 1200 IQ...IQ. Adjusts the contrast enhancement applied to adjust and customize output. A positive value will darken text, images, and graphics. Quality guide Page 19 of text and images. • Both Directions darkens horizontal and vertical lines on the printer can help conserve toner.
... to text. • Horizontally darkens horizontal lines of text and images. • Vertically darkens vertical lines of 42 Quality guide The Quality guide helps users understand how operations available on text and images. Quality menu Menu item Print Resolution 300 dpi 600 dpi 1200 dpi 1200 IQ...IQ. Adjusts the contrast enhancement applied to adjust and customize output. A positive value will darken text, images, and graphics. Quality guide Page 19 of text and images. • Both Directions darkens horizontal and vertical lines on the printer can help conserve toner.
Help Menu Pages
Page 22
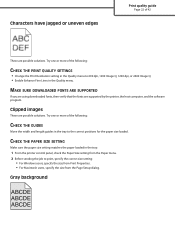
...8226; Change the Print Resolution setting in the Quality menu to print, specify the correct size setting: • For Windows users, specify the size from Print Properties. • For Macintosh users, specify the size from the Paper menu. 2 Before sending the job to 600 dpi, 1200 Image Q, 1200 dpi, ...or 2400 Image Q. • Enable Enhance Fine Lines in the tray to the correct positions for the paper size loaded. Characters have jagged or uneven edges Print quality guide Page...
...8226; Change the Print Resolution setting in the Quality menu to print, specify the correct size setting: • For Windows users, specify the size from Print Properties. • For Macintosh users, specify the size from the Paper menu. 2 Before sending the job to 600 dpi, 1200 Image Q, 1200 dpi, ...or 2400 Image Q. • Enable Enhance Fine Lines in the tray to the correct positions for the paper size loaded. Characters have jagged or uneven edges Print quality guide Page...


