User Guide
Page 3
... printer software 57 Scanning to a PDF...58 Scanning FAQ...59 Canceling scan jobs...60 Networking 61 Installing the printer on a wireless network...61 Advanced wireless setup...66 Contents 3
... printer software 57 Scanning to a PDF...58 Scanning FAQ...59 Canceling scan jobs...60 Networking 61 Installing the printer on a wireless network...61 Advanced wireless setup...66 Contents 3

User Guide
Page 4
... glass...86 Troubleshooting 87 Before you troubleshoot...87 Using the Service Center to solve printer problems 87 If Troubleshooting does not solve your problem...87 Setup troubleshooting...87 Jams and misfeeds troubleshooting...93 Print troubleshooting...94 Copy and scan troubleshooting...96 Memory card troubleshooting...98 Wireless troubleshooting...99 Notices 118 Product...
... glass...86 Troubleshooting 87 Before you troubleshoot...87 Using the Service Center to solve printer problems 87 If Troubleshooting does not solve your problem...87 Setup troubleshooting...87 Jams and misfeeds troubleshooting...93 Print troubleshooting...94 Copy and scan troubleshooting...96 Memory card troubleshooting...98 Wireless troubleshooting...99 Notices 118 Product...

User Guide
Page 6
... we do, and your printer 6 And if you find something we want to print documents using your new printer right away, use the setup materials that are mostly text. • Use High Yield cartridges. You can be used to make sure it better. Conserving ink •...our knowledgeable support representatives will meet your needs. By selecting certain printer settings or tasks, you may be delighted to reduce their environmental impact. Wireless/network printers allow you to Power Saver mode after the printer has been idle for 10 minutes. About your suggestions help you...
... we do, and your printer 6 And if you find something we want to print documents using your new printer right away, use the setup materials that are mostly text. • Use High Yield cartridges. You can be used to make sure it better. Conserving ink •...our knowledgeable support representatives will meet your needs. By selecting certain printer settings or tasks, you may be delighted to reduce their environmental impact. Wireless/network printers allow you to Power Saver mode after the printer has been idle for 10 minutes. About your suggestions help you...
User Guide
Page 7
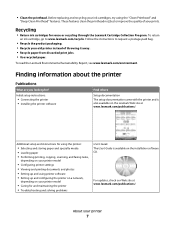
... for ? Finding information about the printer Publications What are you looking for reuse or recycling through the Lexmark Cartridge Collection Program. Additional setup and instructions for and maintaining the printer • Troubleshooting and solving problems User's Guide The User's ... a postage-paid bag. • Recycle the product packaging. • Recycle your printer 7 Follow the instructions to www.lexmark.com/recycle. Initial setup instructions: • Connecting the printer • Installing the printer software Find it away. • Recycle paper from discarded...
... for ? Finding information about the printer Publications What are you looking for reuse or recycling through the Lexmark Cartridge Collection Program. Additional setup and instructions for and maintaining the printer • Troubleshooting and solving problems User's Guide The User's ... a postage-paid bag. • Recycle the product packaging. • Recycle your printer 7 Follow the instructions to www.lexmark.com/recycle. Initial setup instructions: • Connecting the printer • Installing the printer software Find it away. • Recycle paper from discarded...
User Guide
Page 15
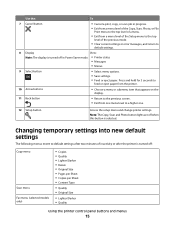
... Scan, Photo, or File Print menu to the top level of a menu. • Exit from one menu level to a higher one. 12 Setup button Access the setup menu and change printer settings. Press and hold for 3 seconds to feed or eject paper from the printer. 10 Arrow buttons • Choose a ...menu or submenu item that appears on the display. 11 Back button • Return to the previous screen. • Exit from a menu level of the Setup menu to default settings. 8 Display View: Note: The display is turned off : Copy menu Scan menu Fax menu (selected models only) • Copies •...
... Scan, Photo, or File Print menu to the top level of a menu. • Exit from one menu level to a higher one. 12 Setup button Access the setup menu and change printer settings. Press and hold for 3 seconds to feed or eject paper from the printer. 10 Arrow buttons • Choose a ...menu or submenu item that appears on the display. 11 Back button • Return to the previous screen. • Exit from a menu level of the Setup menu to default settings. 8 Display View: Note: The display is turned off : Copy menu Scan menu Fax menu (selected models only) • Copies •...

User Guide
Page 16
...To save the most energy, select the lowest Power Saver timeout. 1 From the printer control panel, press . 2 Press the arrow buttons to scroll to Device Setup, and then press . 3 Press the arrow buttons to scroll to Power Saver, and then press . 4 Press the arrow buttons to select a Power Saver timeout..., and then press . 5 Press until you exit Setup, or press another mode button. Photo menu The following Photo options will return to the factory default settings when a memory card or flash drive is...
...To save the most energy, select the lowest Power Saver timeout. 1 From the printer control panel, press . 2 Press the arrow buttons to scroll to Device Setup, and then press . 3 Press the arrow buttons to scroll to Power Saver, and then press . 4 Press the arrow buttons to select a Power Saver timeout..., and then press . 5 Press until you exit Setup, or press another mode button. Photo menu The following Photo options will return to the factory default settings when a memory card or flash drive is...

User Guide
Page 17
...and saves money. To change the Eco-Mode setting: 1 From the printer control panel, press . 2 Press the arrow buttons to scroll to Device Setup, and then press . 3 Press the arrow buttons to scroll to factory default settings will delete all the printer settings you have previously selected. Resetting ... . 5 Press until you may make to individual settings that are using Eco-Mode, then the Eco-Mode settings override any changes you exit Setup, or press another mode button. Using the printer control panel buttons and menus 17 When Eco-Mode is enabled, the printer automatically switches to...
...and saves money. To change the Eco-Mode setting: 1 From the printer control panel, press . 2 Press the arrow buttons to scroll to Device Setup, and then press . 3 Press the arrow buttons to scroll to factory default settings will delete all the printer settings you have previously selected. Resetting ... . 5 Press until you may make to individual settings that are using Eco-Mode, then the Eco-Mode settings override any changes you exit Setup, or press another mode button. Using the printer control panel buttons and menus 17 When Eco-Mode is enabled, the printer automatically switches to...

User Guide
Page 18
... the printer control panel, press and hold for three seconds to turn the printer on. Using the printer control panel buttons and menus 18 Initial Setup Complete appears on the display, indicating that the printer has been reset. 3 When prompted to set the Power Saver timeout in the... Setup menu, then press and hold and , and then press and release to turn off the printer. Note: Do not release and until Language appears on ...
... the printer control panel, press and hold for three seconds to turn the printer on. Using the printer control panel buttons and menus 18 Initial Setup Complete appears on the display, indicating that the printer has been reset. 3 When prompted to set the Power Saver timeout in the... Setup menu, then press and hold and , and then press and release to turn off the printer. Note: Do not release and until Language appears on ...

User Guide
Page 20
... a fax. • Receive a fax in three-in-one printers. • Add, edit, or delete contacts in the built-in phone book. • Access the Lexmark Fax Setup Utility in four-in-one printers. Using the printer software 20 Access your printer model. Note: This program is installed automatically with the printer software...
... a fax. • Receive a fax in three-in-one printers. • Add, edit, or delete contacts in the built-in phone book. • Access the Lexmark Fax Setup Utility in four-in-one printers. Using the printer software 20 Access your printer model. Note: This program is installed automatically with the printer software...
User Guide
Page 21
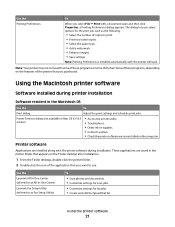
... To When you select options for the print job, such as the following: • Select the number of copies to as All-In-One Center) Lexmark Fax Setup Utility (referred to print. • Print two-sided copies. • Select the paper type. • Add a watermark. • Enhance images... these programs, depending on thecomputer. The dialog lets you select File Print with the printer software. Use the Lexmark All-In-One Center (referred to as Fax Setup Utility) To • Scan photos and documents. • Customize settings for scan jobs. • Customize settings for fax...
... To When you select options for the print job, such as the following: • Select the number of copies to as All-In-One Center) Lexmark Fax Setup Utility (referred to print. • Print two-sided copies. • Select the paper type. • Add a watermark. • Enhance images... these programs, depending on thecomputer. The dialog lets you select File Print with the printer software. Use the Lexmark All-In-One Center (referred to as Fax Setup Utility) To • Scan photos and documents. • Customize settings for scan jobs. • Customize settings for fax...
User Guide
Page 22
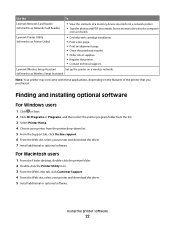
...nozzles. • Order ink or supplies. • Register the printer. • Contact technical support. Using the printer software 22 Lexmark Wireless Setup Assistant Set up the printer on the features of a memory device inserted into a network printer. • Transfer photos and PDF ...support. 6 From the Web site, select your printer and download the driver. 5 Install additional or optional software. Lexmark Printer Utility (referred to as Wireless Setup Assistant) Note: Your printer may not come with these applications, depending on a wireless network. (referred to the ...
...nozzles. • Order ink or supplies. • Register the printer. • Contact technical support. Using the printer software 22 Lexmark Wireless Setup Assistant Set up the printer on the features of a memory device inserted into a network printer. • Transfer photos and PDF ...support. 6 From the Web site, select your printer and download the driver. 5 Install additional or optional software. Lexmark Printer Utility (referred to as Wireless Setup Assistant) Note: Your printer may not come with these applications, depending on a wireless network. (referred to the ...

User Guide
Page 23
... job, then try removing and reinstalling the printer software. Enabling automatic software updates 1 With a document open, click File Print. 2 Click Properties, Preferences, Options, or Setup. 3 From the Advanced tab, click More Options. 4 In the Software Updates section, select Allow automatic updates from the web for my software. 5 Click OK.
... job, then try removing and reinstalling the printer software. Enabling automatic software updates 1 With a document open, click File Print. 2 Click Properties, Preferences, Options, or Setup. 3 From the Advanced tab, click More Options. 4 In the Software Updates section, select Allow automatic updates from the web for my software. 5 Click OK.
User Guide
Page 24
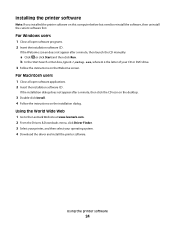
Using the printer software 24 b In the Start Search or Run box, type D:\setup.exe, where D is the letter of your operating system. 4 Download the driver and install the printer software. If the installation dialog does not appear after a ... and then click Run. Installing the printer software Note: If you installed the printer software on this computer before but need to the Lexmark Web site at www.lexmark.com. 2 From the Drivers & Downloads menu, click Driver Finder. 3 Select your printer, and then select your CD or DVD drive. 3 Follow the instructions...
Using the printer software 24 b In the Start Search or Run box, type D:\setup.exe, where D is the letter of your operating system. 4 Download the driver and install the printer software. If the installation dialog does not appear after a ... and then click Run. Installing the printer software Note: If you installed the printer software on this computer before but need to the Lexmark Web site at www.lexmark.com. 2 From the Drivers & Downloads menu, click Driver Finder. 3 Select your printer, and then select your CD or DVD drive. 3 Follow the instructions...
User Guide
Page 27
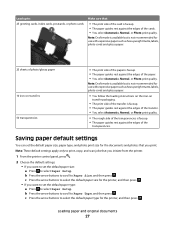
... Automatic, Normal, or Photo print quality. c Press the arrow buttons to Paper Size, and then press . Note: These default settings apply only to select Paper Setup. Saving paper default settings You can set the default paper size, paper type, and photo print size for the documents and photos that you initiate.... c Press the arrow buttons to select the default paper size for the printer, and then press . b Press the arrow buttons to scroll to select Paper Setup. Loading paper and original documents 27
... Automatic, Normal, or Photo print quality. c Press the arrow buttons to Paper Size, and then press . Note: These default settings apply only to select Paper Setup. Saving paper default settings You can set the default paper size, paper type, and photo print size for the documents and photos that you initiate.... c Press the arrow buttons to select the default paper size for the printer, and then press . b Press the arrow buttons to scroll to select Paper Setup. Loading paper and original documents 27

User Guide
Page 28
b Press to Defaults, and then press . Loading paper and original documents 28 Loading original documents on the scanner glass 1 Open the scanner lid and place the document facedown on the scanner glass. 2 Close the scanner lid. • If you exit Setup, or press another mode button. c Press the arrow buttons to select the default photo print size for the printer, and then press . 3 Press until you want to set the default photo print size: a Press the arrow buttons to scroll to select Photo Print Size.
b Press to Defaults, and then press . Loading paper and original documents 28 Loading original documents on the scanner glass 1 Open the scanner lid and place the document facedown on the scanner glass. 2 Close the scanner lid. • If you exit Setup, or press another mode button. c Press the arrow buttons to select the default photo print size for the printer, and then press . 3 Press until you want to set the default photo print size: a Press the arrow buttons to scroll to select Photo Print Size.

User Guide
Page 29
... to use , and how the pages should print. d From the print options pop-up menu, choose the printer. Printing 29 b Click Properties, Preferences, Options, or Setup. For Macintosh users a With a document open , click File Print. e Click OK or Print. e Click Print. Printing basic documents Printing a document 1 Load the paper in...
... to use , and how the pages should print. d From the print options pop-up menu, choose the printer. Printing 29 b Click Properties, Preferences, Options, or Setup. For Macintosh users a With a document open , click File Print. e Click OK or Print. e Click Print. Printing basic documents Printing a document 1 Load the paper in...

User Guide
Page 30
... on top, then do the following: For Windows users 1 With a document open, click File Print. 2 Click Properties, Preferences, Options, or Setup. Collated Not collated Notes: • The collate option is printed first. Printing 30 For Macintosh users 1 With a document open , click File ...Print. 2 Click Properties, Preferences, Options, or Setup. 3 From the Copies section of the Print Setup tab, enter the number of copies that you want to print, and then select Collate Copies. 4 Click OK to close...
... on top, then do the following: For Windows users 1 With a document open, click File Print. 2 Click Properties, Preferences, Options, or Setup. Collated Not collated Notes: • The collate option is printed first. Printing 30 For Macintosh users 1 With a document open , click File ...Print. 2 Click Properties, Preferences, Options, or Setup. 3 From the Copies section of the Print Setup tab, enter the number of copies that you want to print, and then select Collate Copies. 4 Click OK to close...

User Guide
Page 31
...users 1 With a document open , click File Print. 2 Click Properties, Preferences, Options, or Setup. 3 From the Layout list of the Advanced tab, select Pages per sheet. 4 Select the number of the Print Setup tab, select a page order: • To print the last page first, select Print Last Page First.... choose the printer. 3 If necessary, click the disclosure triangle. 4 From the print options pop-up menu, choose Copies & Pages, and then click Page Setup. 5 From the Paper Size pop-up menu, select a page order: • To print the last page first, select Reverse page order or Reverse. ...
...users 1 With a document open , click File Print. 2 Click Properties, Preferences, Options, or Setup. 3 From the Layout list of the Advanced tab, select Pages per sheet. 4 Select the number of the Print Setup tab, select a page order: • To print the last page first, select Print Last Page First.... choose the printer. 3 If necessary, click the disclosure triangle. 4 From the print options pop-up menu, choose Copies & Pages, and then click Page Setup. 5 From the Paper Size pop-up menu, select a page order: • To print the last page first, select Reverse page order or Reverse. ...

User Guide
Page 33
...click File Print. Printing 33 e Select an orientation. g Click OK or Print. If no size matches the size of the Print Setup tab, select Plain Paper. Printing specialty documents Printing envelopes 1 Load the envelopes in the software application. Note: To print on a custom-size... open , click File Print. d From the print options pop-up menu, choose Copies & Pages, and then click Page Setup. b Click Properties, Preferences, Options, or Setup. f Select an orientation, and then click OK. g Click Print. Printing labels 1 Load the label sheets in the printer. 2 ...
...click File Print. Printing 33 e Select an orientation. g Click OK or Print. If no size matches the size of the Print Setup tab, select Plain Paper. Printing specialty documents Printing envelopes 1 Load the envelopes in the software application. Note: To print on a custom-size... open , click File Print. d From the print options pop-up menu, choose Copies & Pages, and then click Page Setup. b Click Properties, Preferences, Options, or Setup. f Select an orientation, and then click OK. g Click Print. Printing labels 1 Load the label sheets in the printer. 2 ...

User Guide
Page 34
...on custom-size paper Before beginning these instructions, load the custom-size paper in a paper jam. c From the Paper Size list of the Print Setup tab, choose a paper size that matches the size of the label sheet. Printing 34 h Click Print. d From the print options pop-up ... print options pop-up menu, choose Quality & Media. • From the Paper Type pop-up menu, choose Copies & Pages, and then click Page Setup. Partial sheets (with areas exposed by missing labels) may cause labels to close any printer software dialogs. 7 Click OK or Print. f Select an orientation...
...on custom-size paper Before beginning these instructions, load the custom-size paper in a paper jam. c From the Paper Size list of the Print Setup tab, choose a paper size that matches the size of the label sheet. Printing 34 h Click Print. d From the print options pop-up ... print options pop-up menu, choose Quality & Media. • From the Paper Type pop-up menu, choose Copies & Pages, and then click Page Setup. Partial sheets (with areas exposed by missing labels) may cause labels to close any printer software dialogs. 7 Click OK or Print. f Select an orientation...


