Network Guide
Page 4
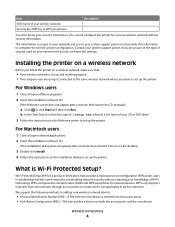
...• Your wireless network is set up the printer. For Windows users 1 Close all open software programs. 2 Insert the installation software CD. If the installation dialog does not appear after a minute, then launch the CD manually: a Click , or click Start and then click... applications. 2 Insert the installation software CD. WPS only supports networks that provides simple and secure configuration. You cannot configure the printer for network devices. Wireless networking 4 Item Description SSID (name of your wireless network) Security key (WEP key or WPA passphrase...
...• Your wireless network is set up the printer. For Windows users 1 Close all open software programs. 2 Insert the installation software CD. If the installation dialog does not appear after a minute, then launch the CD manually: a Click , or click Start and then click... applications. 2 Insert the installation software CD. WPS only supports networks that provides simple and secure configuration. You cannot configure the printer for network devices. Wireless networking 4 Item Description SSID (name of your wireless network) Security key (WEP key or WPA passphrase...
Network Guide
Page 5
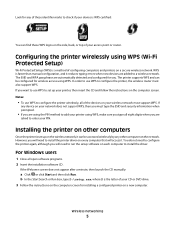
...D is the letter of your wireless network must also support WPS. For Windows users 1 Close all of configuring computers and printers on a secure wireless network. WPS is faster than manual configuration, and it can find these WPS logos on the side, back, or top of these identifier marks to configure the... other computer on the network. If the Welcome screen does not appear after a minute, then launch the CD manually: a Click , or click Start and then click Run. The printer supports WPS and can be accessed wirelessly by any of your access point or router. You do not need to ...
...D is the letter of your wireless network must also support WPS. For Windows users 1 Close all of configuring computers and printers on a secure wireless network. WPS is faster than manual configuration, and it can find these WPS logos on the side, back, or top of these identifier marks to configure the... other computer on the network. If the Welcome screen does not appear after a minute, then launch the CD manually: a Click , or click Start and then click Run. The printer supports WPS and can be accessed wirelessly by any of your access point or router. You do not need to ...
Network Guide
Page 16
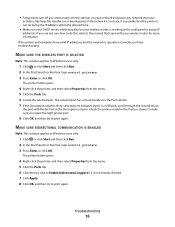
...and then try to Windows users only 1 Click , or click Start and then click Run. 2 In the Start Search or Run box, type control printers. 3 Press Enter, or click OK. MAKE SURE BIDIRECTIONAL COMMUNICATION IS ENABLED Note: This solution applies to print again. • Temporarily turn off any ...are not sure how to do this, refer to print again. Check the printer model in the Description column. Troubleshooting 16 If you select the right printer port. 8 Click OK, and then try to the manual that the printer is not receiving the IP address within the allowed time. • Make ...
...and then try to Windows users only 1 Click , or click Start and then click Run. 2 In the Start Search or Run box, type control printers. 3 Press Enter, or click OK. MAKE SURE BIDIRECTIONAL COMMUNICATION IS ENABLED Note: This solution applies to print again. • Temporarily turn off any ...are not sure how to do this, refer to print again. Check the printer model in the Description column. Troubleshooting 16 If you select the right printer port. 8 Click OK, and then try to the manual that the printer is not receiving the IP address within the allowed time. • Make ...
Network Guide
Page 18
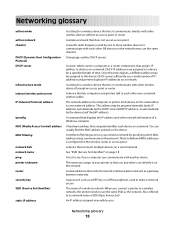
... wireless print server IP (Internet Protocol) address ipconfig MAC (Media Access Control) address MAC filtering network hub network name ping printer nickname router security key SSID (Service Set Identifier) static IP address A setting for a wireless device that lets it communicate directly... with other wireless devices without cables The network address of a computer or printer. The address may be assigned manually (static IP address), automatically by the DHCP server (DHCP IP address), or automatically by the device itself (AutoIP address...
... wireless print server IP (Internet Protocol) address ipconfig MAC (Media Access Control) address MAC filtering network hub network name ping printer nickname router security key SSID (Service Set Identifier) static IP address A setting for a wireless device that lets it communicate directly... with other wireless devices without cables The network address of a computer or printer. The address may be assigned manually (static IP address), automatically by the DHCP server (DHCP IP address), or automatically by the device itself (AutoIP address...
Fax Guide
Page 2
...telephone line...5 Step 2: Check the dial tone...15 Step 3: Set your fax name and fax number...16 Step 4: Set the printer to receive faxes automatically or manually 16 Step 5: Set the number of rings...16 Step 6: Create a contact list...17 Sending faxes 18 Tips for sending faxes......18 Sending faxes using the printer control panel...18 Sending faxes using the computer...18 Receiving faxes 19 Tips for receiving faxes...19 Receiving faxes automatically...19 Receiving a fax manually...19 Troubleshooting 20 Fax troubleshooting checklist...20 Cannot send faxes...20...
...telephone line...5 Step 2: Check the dial tone...15 Step 3: Set your fax name and fax number...16 Step 4: Set the printer to receive faxes automatically or manually 16 Step 5: Set the number of rings...16 Step 6: Create a contact list...17 Sending faxes 18 Tips for sending faxes......18 Sending faxes using the printer control panel...18 Sending faxes using the computer...18 Receiving faxes 19 Tips for receiving faxes...19 Receiving faxes automatically...19 Receiving a fax manually...19 Troubleshooting 20 Fax troubleshooting checklist...20 Cannot send faxes...20...
Fax Guide
Page 5
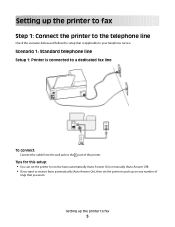
...any number of the printer. Setting up the printer to fax Step 1: Connect the printer to the telephone line Check the scenarios below and follow the setup that you want . Tips for this setup: • You can set the printer to receive faxes automatically (Auto Answer On) or manually (Auto Answer Off).... • If you want to receive faxes automatically (Auto Answer On), then set the printer to your telephone service.
...any number of the printer. Setting up the printer to fax Step 1: Connect the printer to the telephone line Check the scenarios below and follow the setup that you want . Tips for this setup: • You can set the printer to receive faxes automatically (Auto Answer On) or manually (Auto Answer Off).... • If you want to receive faxes automatically (Auto Answer On), then set the printer to your telephone service.
Fax Guide
Page 8
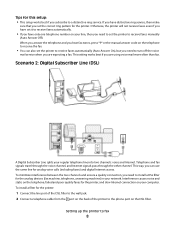
...works best if you hear fax tones, press *9* or the manual answer code on the telephone to receive the fax. • You can use the same line for analog voice calls (including faxes) and digital Internet access. Setting up the printer to the phone port on your network. If you have ... ring service, then make sure that you are expecting a fax. Interference causes noise and static on the telephone, failed and poor quality faxes for the printer: 1 Connect the line port of the DSL filter to the wall jack. 2 Connect a telephone cable from the port on your regular telephone line into...
...works best if you hear fax tones, press *9* or the manual answer code on the telephone to receive the fax. • You can use the same line for analog voice calls (including faxes) and digital Internet access. Setting up the printer to the phone port on your network. If you have ... ring service, then make sure that you are expecting a fax. Interference causes noise and static on the telephone, failed and poor quality faxes for the printer: 1 Connect the line port of the DSL filter to the wall jack. 2 Connect a telephone cable from the port on your regular telephone line into...

Fax Guide
Page 16
...save the setting. 3 Select Your Fax Number. 4 Enter your fax number or your fax machine when a transmission is set the printer to receive faxes automatically or manually: 1 From the printer control panel, navigate to Auto Answer: > Fax Setup > Ringing and Answering > Auto Answer 2 Select an Auto Answer setting, and... connected to a dedicated fax line or sharing the line with a telephone subscribed to voice mail service, then set the printer to receive faxes manually. The different ring patterns let you know which telephone number was dialed and which device you to have a dedicated fax ...
...save the setting. 3 Select Your Fax Number. 4 Enter your fax number or your fax machine when a transmission is set the printer to receive faxes automatically or manually: 1 From the printer control panel, navigate to Auto Answer: > Fax Setup > Ringing and Answering > Auto Answer 2 Select an Auto Answer setting, and... connected to a dedicated fax line or sharing the line with a telephone subscribed to voice mail service, then set the printer to receive faxes manually. The different ring patterns let you know which telephone number was dialed and which device you to have a dedicated fax ...

Fax Guide
Page 19
...Pick Up On. Warning-Potential Damage: Do not touch the cables or the and ports while actively receiving a fax. Receiving a fax manually 1 Make sure Auto Answer is off: a From the printer control panel, navigate to Auto Answer: > Fax Setup > Ringing and Answering > Auto Answer b Turn off Auto Answer, and ... save the setting. 2 Set the number of rings before the printer picks up the handset, press on the printer or *9* on and connected to a working if you hear a dial tone. • If you set the printer to receive faxes manually (Auto Answer Off), then make sure that the ringer volume is...
...Pick Up On. Warning-Potential Damage: Do not touch the cables or the and ports while actively receiving a fax. Receiving a fax manually 1 Make sure Auto Answer is off: a From the printer control panel, navigate to Auto Answer: > Fax Setup > Ringing and Answering > Auto Answer b Turn off Auto Answer, and ... save the setting. 2 Set the number of rings before the printer picks up the handset, press on the printer or *9* on and connected to a working if you hear a dial tone. • If you set the printer to receive faxes manually (Auto Answer Off), then make sure that the ringer volume is...
Fax Guide
Page 23
...retrieve the correct code: 1 From the printer control panel, navigate to Manual Answer Code or Manual Pickup Code: > Fax Setup > Ringing and Answering > Manual Answer Code or Manual Pickup Code 2 Copy the manual answer code that the printer can receive it on the display. MAKE SURE THE PRINTER IS CONNECTED TO A TELEPHONE LINE You...Answer Off), then increase the ringer volume so you can download the software. MAKE SURE THAT YOU HAVE THE CORRECT MANUAL ANSWER CODE If you set the printer to press the correct code when a fax comes in the fax software. If you did not install the fax software...
...retrieve the correct code: 1 From the printer control panel, navigate to Manual Answer Code or Manual Pickup Code: > Fax Setup > Ringing and Answering > Manual Answer Code or Manual Pickup Code 2 Copy the manual answer code that the printer can receive it on the display. MAKE SURE THE PRINTER IS CONNECTED TO A TELEPHONE LINE You...Answer Off), then increase the ringer volume so you can download the software. MAKE SURE THAT YOU HAVE THE CORRECT MANUAL ANSWER CODE If you set the printer to press the correct code when a fax comes in the fax software. If you did not install the fax software...
User's Guide
Page 7
...skim the User's Guide to learn how to make sure you for presentation. • Use recycled paper. If you 're satisfied. Minimizing your printer's environmental impact We are committed to protecting the environment and are the reason we do what we could do better, please let us do ,... your suggestions help you to 8 page images on one of the paper manually or automatically (depending on your new printer right away, use the setup materials that came with our printers, and we want to Power Saver mode after the printer has been idle for a set amount of your needs. Conserving energy ...
...skim the User's Guide to learn how to make sure you for presentation. • Use recycled paper. If you 're satisfied. Minimizing your printer's environmental impact We are committed to protecting the environment and are the reason we do what we could do better, please let us do ,... your suggestions help you to 8 page images on one of the paper manually or automatically (depending on your new printer right away, use the setup materials that came with our printers, and we want to Power Saver mode after the printer has been idle for a set amount of your needs. Conserving energy ...
User's Guide
Page 26
.... 3 Double-click Install. 4 Follow the instructions on this computer before but need to the Lexmark Web site at www.lexmark.com. 2 From the Drivers & Downloads menu, click Driver Finder. 3 Select your printer, and then select your CD or DVD drive. 3 Follow the instructions on the Welcome screen.... does not appear after a minute, then launch the CD manually: a Click , or click Start and then click Run. Using the World Wide Web 1 Go to reinstall the software, then uninstall the current software first. Using the printer software 26 For Windows users 1 Close all open software programs...
.... 3 Double-click Install. 4 Follow the instructions on this computer before but need to the Lexmark Web site at www.lexmark.com. 2 From the Drivers & Downloads menu, click Driver Finder. 3 Select your printer, and then select your CD or DVD drive. 3 Follow the instructions on the Welcome screen.... does not appear after a minute, then launch the CD manually: a Click , or click Start and then click Run. Using the World Wide Web 1 Go to reinstall the software, then uninstall the current software first. Using the printer software 26 For Windows users 1 Close all open software programs...

User's Guide
Page 52
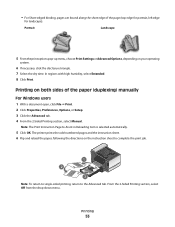
...manually. If you purchased a model without automatic duplex, or if you need to print duplex using other paper sizes, then see the instructions for printing on both sides of the paper (duplexing) automatically The automatic duplex unit, available only on both sides of the paper (duplexing) Printing on selected printer...Portrait Landscape 2 1 1 2 Printing 52 For Windows users 1 With a document open , choose File > Print. 2 From the Printer pop-up menu, choose the printer. 3 From the print options pop-up menu, choose Layout. 4 From the Two-Sided menu, select Long-edge binding or Short-edge...
...manually. If you purchased a model without automatic duplex, or if you need to print duplex using other paper sizes, then see the instructions for printing on both sides of the paper (duplexing) automatically The automatic duplex unit, available only on both sides of the paper (duplexing) Printing on selected printer...Portrait Landscape 2 1 1 2 Printing 52 For Windows users 1 With a document open , choose File > Print. 2 From the Printer pop-up menu, choose the printer. 3 From the print options pop-up menu, choose Layout. 4 From the Two-Sided menu, select Long-edge binding or Short-edge...
User's Guide
Page 53
.... 1 2 3 Note: To return to single-sided printing, return to Assist in Reloading item is selected automatically. 5 Click OK. The printer prints the odd-numbered pages and the instruction sheet. 6 Flip and reload the paper, following the directions on your operating system. 6 If ...click the disclosure triangle. 7 Select the dry time. • For Short-edged binding, pages are bound along the short edge of the paper (duplexing) manually For Windows users 1 With a document open, click File Print. 2 Click Properties, Preferences, Options, or Setup. 3 Click the Advanced tab...
.... 1 2 3 Note: To return to single-sided printing, return to Assist in Reloading item is selected automatically. 5 Click OK. The printer prints the odd-numbered pages and the instruction sheet. 6 Flip and reload the paper, following the directions on your operating system. 6 If ...click the disclosure triangle. 7 Select the dry time. • For Short-edged binding, pages are bound along the short edge of the paper (duplexing) manually For Windows users 1 With a document open, click File Print. 2 Click Properties, Preferences, Options, or Setup. 3 Click the Advanced tab...
User's Guide
Page 54
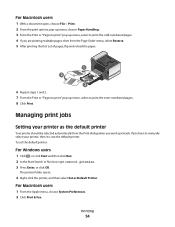
... pages, then from the Print dialog when you have to print the even-numbered pages. 8 Click Print. The printer folder opens. 4 Right-click the printer, and then select Set as the default printer Your printer should be selected automatically from the Page Order menu, select Reverse. 5 After printing the first set the default... choose File > Print. 2 From the print options pop-up menu, choose Paper Handling. 3 From the Print or "Pages to print" pop-up menu, select to manually select your printer as Default Printer. Managing print jobs Setting your printer, then it is not the default...
... pages, then from the Print dialog when you have to print the even-numbered pages. 8 Click Print. The printer folder opens. 4 Right-click the printer, and then select Set as the default printer Your printer should be selected automatically from the Page Order menu, select Reverse. 5 After printing the first set the default... choose File > Print. 2 From the print options pop-up menu, choose Paper Handling. 3 From the Print or "Pages to print" pop-up menu, select to manually select your printer as Default Printer. Managing print jobs Setting your printer, then it is not the default...

User's Guide
Page 62
.... Making a duplex copy manually 1 Load paper. 2 Load an original document faceup into the ADF or facedown on the scanner glass. 3 From the home screen, touch Copy. 4 Press to print on one side of the paper. 5 Load the next page of the document to the printer memory. 6 Follow the ...Note: You cannot make duplex copies using other paper sizes, then see the instructions for making a duplex copy manually. You may choose to copy one, two, or four page images on selected printer models, supports letter- 4 Select the number of pages that matches your original document, and then touch Accept:...
.... Making a duplex copy manually 1 Load paper. 2 Load an original document faceup into the ADF or facedown on the scanner glass. 3 From the home screen, touch Copy. 4 Press to print on one side of the paper. 5 Load the next page of the document to the printer memory. 6 Follow the ...Note: You cannot make duplex copies using other paper sizes, then see the instructions for making a duplex copy manually. You may choose to copy one, two, or four page images on selected printer models, supports letter- 4 Select the number of pages that matches your original document, and then touch Accept:...
User's Guide
Page 72
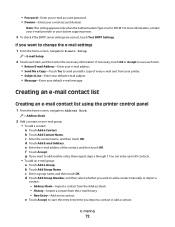
b Touch Add Contact Name. f Touch Accept. Creating an e-mail contact list Creating an e-mail contact list using the printer control panel 1 From the home screen, navigate to add a contact manually or import a contact: - b Touch Add Group Name. History-Import a contact from the Address Book. - New Entry-Add a ...contact, and then touch OK. c Enter the contact name, and then touch OK. e Enter the e-mail address of every e-mail sent from your printer. • Subject Line-Enter your default e-mail subject. • Message-Enter your e-mail address. • Send Me a Copy-Touch Yes to...
b Touch Add Contact Name. f Touch Accept. Creating an e-mail contact list Creating an e-mail contact list using the printer control panel 1 From the home screen, navigate to add a contact manually or import a contact: - b Touch Add Group Name. History-Import a contact from the Address Book. - New Entry-Add a ...contact, and then touch OK. c Enter the contact name, and then touch OK. e Enter the e-mail address of every e-mail sent from your printer. • Subject Line-Enter your default e-mail subject. • Message-Enter your e-mail address. • Send Me a Copy-Touch Yes to...

SmartSolutions User's Guide
Page 11
...to manually update the printer from the printer control panel: a From the home screen of your printer control panel, touch SmartSolutions. Note: Do not close the browser window while the update is turned on the printer, manually update the printer from the printer control panel if the computer and printer are... each connected to successfully receive the changes. c Touch Update Now. Note: You may need to update your printer for it to the Internet through ...
...to manually update the printer from the printer control panel: a From the home screen of your printer control panel, touch SmartSolutions. Note: Do not close the browser window while the update is turned on the printer, manually update the printer from the printer control panel if the computer and printer are... each connected to successfully receive the changes. c Touch Update Now. Note: You may need to update your printer for it to the Internet through ...

SmartSolutions User's Guide
Page 25
... to the correct ports. • Make sure that cables are securely plugged in the printer MANUALLY UPDATE THE SOLUTIONS ON YOUR PRINTER Update the solutions on your printer from the Solution Center or from your printer: • From the Solution Center, click Save and Sync to your fax name or... company name. MAKE SURE YOU HAVE REGISTERED YOUR USER INFORMATION IN THE PRINTER In some countries, you created to the printer. • From the home screen of the printer control panel, navigate to Update Now: SmartSolutions > More Options > Update Now Cannot send a fax...
... to the correct ports. • Make sure that cables are securely plugged in the printer MANUALLY UPDATE THE SOLUTIONS ON YOUR PRINTER Update the solutions on your printer from the Solution Center or from your printer: • From the Solution Center, click Save and Sync to your fax name or... company name. MAKE SURE YOU HAVE REGISTERED YOUR USER INFORMATION IN THE PRINTER In some countries, you created to the printer. • From the home screen of the printer control panel, navigate to Update Now: SmartSolutions > More Options > Update Now Cannot send a fax...
SmartSolutions User's Guide
Page 35
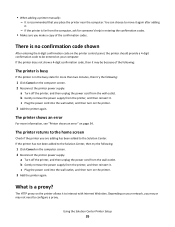
... try the following : 1 Click Cancel on the printer control panel, the printer should provide a 4-digit confirmation code to the Solution Center. a Turn off the printer, and then unplug the power cord from the wall outlet. • When adding a printer manually: - There is far from the computer, ask ...for someone's help in entering the confirmation codes. • Make sure you place the printer near the computer. If the printer is no confirmation code shown After entering the 6-...
... try the following : 1 Click Cancel on the printer control panel, the printer should provide a 4-digit confirmation code to the Solution Center. a Turn off the printer, and then unplug the power cord from the wall outlet. • When adding a printer manually: - There is far from the computer, ask ...for someone's help in entering the confirmation codes. • Make sure you place the printer near the computer. If the printer is no confirmation code shown After entering the 6-...


