

Service Manual
Page 4
sensor test 3-11 Printer setup 3-12 EP setup 3-13 Event log 3-14 Exit Diagnostics 3-15 Printhead assembly electronic adjustment 3-16 Printhead assembly mechanical adjustment 3-17 Repair information 4-1 Handling ESD-sensitive parts 4-1 Removal procedures 4-2 ACM pick tire roller removal 4-3 Bezel... Media feed clutch with cable removal 4-40 Media manual input sensor 4-42 Multipurpose feeder (MPF) removal 4-45 iv Lexmark™ E360d, E360dn 4513-420, -430 Diagnostic aids 3-1 Accessing service menus 3-1 Printing menus 3-1 Configuration menu (CONFIG MENU 3-2 Entering Configuration...
sensor test 3-11 Printer setup 3-12 EP setup 3-13 Event log 3-14 Exit Diagnostics 3-15 Printhead assembly electronic adjustment 3-16 Printhead assembly mechanical adjustment 3-17 Repair information 4-1 Handling ESD-sensitive parts 4-1 Removal procedures 4-2 ACM pick tire roller removal 4-3 Bezel... Media feed clutch with cable removal 4-40 Media manual input sensor 4-42 Multipurpose feeder (MPF) removal 4-45 iv Lexmark™ E360d, E360dn 4513-420, -430 Diagnostic aids 3-1 Accessing service menus 3-1 Printing menus 3-1 Configuration menu (CONFIG MENU 3-2 Entering Configuration...
Service Manual
Page 16
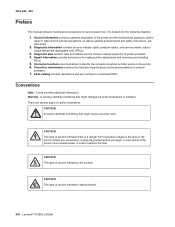
... A warning identifies something that might cause a servicer harm. Connector locations uses illustrations to locate or repeat symptoms of printer problems. 4. Preventive maintenance contains the lubrication specifications and recommendations to isolate failing field replaceable units (FRUs). 3. CAUTION This... must receive power in the area of the printer and the maintenance approach used to prevent problems. 7. Parts catalog contains illustrations and part numbers for individual FRUs. xvi Lexmark™ E360d, E360dn CAUTION This type of caution indicates a hot surface...
... A warning identifies something that might cause a servicer harm. Connector locations uses illustrations to locate or repeat symptoms of printer problems. 4. Preventive maintenance contains the lubrication specifications and recommendations to isolate failing field replaceable units (FRUs). 3. CAUTION This... must receive power in the area of the printer and the maintenance approach used to prevent problems. 7. Parts catalog contains illustrations and part numbers for individual FRUs. xvi Lexmark™ E360d, E360dn CAUTION This type of caution indicates a hot surface...

Service Manual
Page 17
... information on E460dn and E460dw, see the 4513-220,-230 service manual. Maintenance approach The diagnostic information in this manual leads to help identify parts. General information The Lexmark™ E360d and E360dn are monochrome laser printers designed for more information. This book contains information on page 4-1 to the correct field replaceable unit (FRU) or...
... information on E460dn and E460dw, see the 4513-220,-230 service manual. Maintenance approach The diagnostic information in this manual leads to help identify parts. General information The Lexmark™ E360d and E360dn are monochrome laser printers designed for more information. This book contains information on page 4-1 to the correct field replaceable unit (FRU) or...

Service Manual
Page 38
... Exit sensor never broke from sheet ahead of page heading toward the exit sensor. The flag is located behind the fuser exit rollers, about mid printer. Open the rear door, and inspect the flag on the exit sensor. See "Rear exit guide assembly with the rear door open the reat ... needed. Page at the fuser, rear door, exit guide, and top cover. See "Fuser removal" on page 4-48. 2-12 Lexmark™ E360d, E360dn if the media continues to isolate the fuser from the other parts. 202.01 Exit sensor never broke on page 4-20. 202.32 Long media or shingled multi feed stopped before...
... Exit sensor never broke from sheet ahead of page heading toward the exit sensor. The flag is located behind the fuser exit rollers, about mid printer. Open the rear door, and inspect the flag on the exit sensor. See "Rear exit guide assembly with the rear door open the reat ... needed. Page at the fuser, rear door, exit guide, and top cover. See "Fuser removal" on page 4-48. 2-12 Lexmark™ E360d, E360dn if the media continues to isolate the fuser from the other parts. 202.01 Exit sensor never broke on page 4-20. 202.32 Long media or shingled multi feed stopped before...

Service Manual
Page 44
...the next level of 45Hz-64Hz Replace the LVPS/HVPS. occurred. 953.xx NVRAM chip failure with system part. Install a new note. See "Controller board service check" on page 2-22. 2-18 Lexmark™ E360d, E360dn See "LVPS/HVPS service check" on page 2-25. 940.02 Line frequency below 43Hz 940.03 No..." on page 2-22. 956.00 RIP card failure: processor failure 956.01 Processor overtemp 957.xx RIP card failure: ASIC failure 958.xx Printer has performed more than 100 "shift and reflash" operations as a result of ECC bit corrections Firmware or controller board errors 959.01 959.02...
...the next level of 45Hz-64Hz Replace the LVPS/HVPS. occurred. 953.xx NVRAM chip failure with system part. Install a new note. See "Controller board service check" on page 2-22. 2-18 Lexmark™ E360d, E360dn See "LVPS/HVPS service check" on page 2-25. 940.02 Line frequency below 43Hz 940.03 No..." on page 2-22. 956.00 RIP card failure: processor failure 956.01 Processor overtemp 957.xx RIP card failure: ASIC failure 958.xx Printer has performed more than 100 "shift and reflash" operations as a result of ECC bit corrections Firmware or controller board errors 959.01 959.02...
Service Manual
Page 84
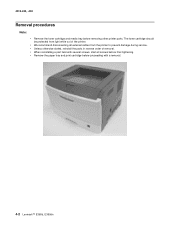
.... • Unless otherwise stated, reinstall the parts in reverse order of removal. • When reinstalling a part held with a removal. 4-2 Lexmark™ E360d, E360dn The toner cartridge should be protected from light while out of the printer. • We recommend disconnecting all screws before final tightening. • Remove the paper tray and print cartridge before removing other printer parts.
.... • Unless otherwise stated, reinstall the parts in reverse order of removal. • When reinstalling a part held with a removal. 4-2 Lexmark™ E360d, E360dn The toner cartridge should be protected from light while out of the printer. • We recommend disconnecting all screws before final tightening. • Remove the paper tray and print cartridge before removing other printer parts.

Service Manual
Page 166
...POST 2-27 paper never picks 2-28 paper picks but stops 2-27 paper picks sheets 2-28 paper trees, curls 2-29 I-2 Lexmark™ E360d, E360dn parallel port 2-29 print quality 2-30 black page 2-31 blank page 2-30 heavy background 2-31 image density 2-32 light print ... 1-3 operating systems 1-4 photoconductor capacity 1-5 print media 1-6 toner capacity 1-5 start 2-1 strobe adjustment 3-13 symptom tables 2-20 POST 2-20 printer 2-21 T tools 1-8 Top Margin 3-6 Transfer 3-13 transfer roll parts catalog 7-7 service check 2-37 U user attendance messages 2-6 4513-420, -430 O operator panel LCD- 2-2 LED-
...POST 2-27 paper never picks 2-28 paper picks but stops 2-27 paper picks sheets 2-28 paper trees, curls 2-29 I-2 Lexmark™ E360d, E360dn parallel port 2-29 print quality 2-30 black page 2-31 blank page 2-30 heavy background 2-31 image density 2-32 light print ... 1-3 operating systems 1-4 photoconductor capacity 1-5 print media 1-6 toner capacity 1-5 start 2-1 strobe adjustment 3-13 symptom tables 2-20 POST 2-20 printer 2-21 T tools 1-8 Top Margin 3-6 Transfer 3-13 transfer roll parts catalog 7-7 service check 2-37 U user attendance messages 2-6 4513-420, -430 O operator panel LCD- 2-2 LED-


