
User Guide
Page 2
Contents 2 Contents Safety information 5 Conventions...5 Learning about the printer 8 Finding information about the printer...8 Selecting a location for the printer...9 Printer configurations...10 Attaching cables...11 Using the control panel...12 Understanding the status of the power button and indicator light 13 Using the ...
Contents 2 Contents Safety information 5 Conventions...5 Learning about the printer 8 Finding information about the printer...8 Selecting a location for the printer...9 Printer configurations...10 Attaching cables...11 Using the control panel...12 Understanding the status of the power button and indicator light 13 Using the ...

User Guide
Page 3
... print job...25 Securing the printer 26 Locating the security slot...26 Erasing printer memory...26 Erasing printer hard disk memory...26 Configuring printer hard disk encryption...27 Restoring factory default settings...27 Statement of Volatility...27 Maintaining the printer 29 Networking...29 Setting up ...serial printing (Windows only)...30 Cleaning the printer...31 Ordering parts and supplies...31 Replacing parts and supplies...34 Moving the printer...61 Saving energy and paper...62 Recycling......
... print job...25 Securing the printer 26 Locating the security slot...26 Erasing printer memory...26 Erasing printer hard disk memory...26 Configuring printer hard disk encryption...27 Restoring factory default settings...27 Statement of Volatility...27 Maintaining the printer 29 Networking...29 Setting up ...serial printing (Windows only)...30 Cleaning the printer...31 Ordering parts and supplies...31 Replacing parts and supplies...34 Moving the printer...61 Saving energy and paper...62 Recycling......

User Guide
Page 5
... To avoid the risk of accessories can be used with this product or the manufacturer's authorized replacement. CAUTION-POTENTIAL INJURY: Only a Lexmark Inline Surge Protector that is properly connected between moving parts. Do not subject the power cord to an appropriately rated and properly grounded ...connect the power cord to abrasion or stress. CAUTION-POTENTIAL INJURY: To avoid the risk of fire, property damage, or poor printer performance. CAUTION-SHOCK HAZARD: To avoid the risk of electrical shock, make any of these types of electrical shock, do not set ...
... To avoid the risk of accessories can be used with this product or the manufacturer's authorized replacement. CAUTION-POTENTIAL INJURY: Only a Lexmark Inline Surge Protector that is properly connected between moving parts. Do not subject the power cord to an appropriately rated and properly grounded ...connect the power cord to abrasion or stress. CAUTION-POTENTIAL INJURY: To avoid the risk of fire, property damage, or poor printer performance. CAUTION-SHOCK HAZARD: To avoid the risk of electrical shock, make any of these types of electrical shock, do not set ...

User Guide
Page 6
...where children are likely to be replaced. CAUTION-POTENTIAL INJURY: The printer weight is not intended to be hot. There is not suitable for use the handholds on supported configurations, see www.lexmark.com/multifunctionprinters. Pinch injuries may require a caster base, furniture, ...or other trays closed . • Turn off the printer, and then unplug the power cord from the electrical outlet. • ...
...where children are likely to be replaced. CAUTION-POTENTIAL INJURY: The printer weight is not intended to be hot. There is not suitable for use the handholds on supported configurations, see www.lexmark.com/multifunctionprinters. Pinch injuries may require a caster base, furniture, ...or other trays closed . • Turn off the printer, and then unplug the power cord from the electrical outlet. • ...
User Guide
Page 8
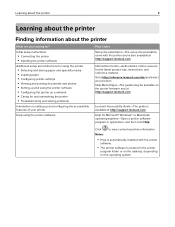
Go to view context‑sensitive information. Lexmark Accessibility Guide-The guide is available at http://support.lexmark.com. Click to http://infoserve.lexmark.com/ids/ and select your printer Help using the printer software Find it here Setup documentation-The setup documentation came with the printer software. • The printer software is also available at http://support...
Go to view context‑sensitive information. Lexmark Accessibility Guide-The guide is available at http://support.lexmark.com. Click to http://infoserve.lexmark.com/ids/ and select your printer Help using the printer software Find it here Setup documentation-The setup documentation came with the printer software. • The printer software is also available at http://support...

User Guide
Page 9
... on the printed warranty that came with the printer. Product Information Guide-This document contains basic safety, environmental, and regulatory information for the printer, leave enough room to open trays, covers, and doors and to http://support.lexmark.com. • In other countries and regions... Note: Select your country or region, and then select your product. Selecting a location for the printer When selecting a location for your product to http://support.lexmark.com. Away from direct sunlight and humidity extremes. For more information, see the documentation that airfl...
... on the printed warranty that came with the printer. Product Information Guide-This document contains basic safety, environmental, and regulatory information for the printer, leave enough room to open trays, covers, and doors and to http://support.lexmark.com. • In other countries and regions... Note: Select your country or region, and then select your product. Selecting a location for the printer When selecting a location for your product to http://support.lexmark.com. Away from direct sunlight and humidity extremes. For more information, see the documentation that airfl...

User Guide
Page 10
... -40 to 43.3°C (-40 to prevent instability causing possible injury. For more options on supported configurations, see www.lexmark.com/multifunctionprinters. You can configure your printer or MFP may require a caster base, furniture, or other feature to 110°F) • Allow the following recommended amount of space...
... -40 to 43.3°C (-40 to prevent instability causing possible injury. For more options on supported configurations, see www.lexmark.com/multifunctionprinters. You can configure your printer or MFP may require a caster base, furniture, or other feature to 110°F) • Allow the following recommended amount of space...

User Guide
Page 11
...risk of fire or electrical shock, use only the power cord provided with this product or make any wireless network adapter, or the printer in the area shown while actively printing. Make sure to match the following: • The USB cable to the USB port •... occur. CAUTION-POTENTIAL INJURY: To avoid the risk of electrical shock, do not set up this product or the manufacturer's authorized replacement. Learning about the printer 11 1 Control panel 2 Staple finisher 3 Standard bin 4 Standard 550‑sheet tray 5 Optional 550‑sheet trays 6 Optional 2200‑...
...risk of fire or electrical shock, use only the power cord provided with this product or make any wireless network adapter, or the printer in the area shown while actively printing. Make sure to match the following: • The USB cable to the USB port •... occur. CAUTION-POTENTIAL INJURY: To avoid the risk of electrical shock, do not set up this product or the manufacturer's authorized replacement. Learning about the printer 11 1 Control panel 2 Staple finisher 3 Standard bin 4 Standard 550‑sheet tray 5 Optional 550‑sheet trays 6 Optional 2200‑...

User Guide
Page 12
Using the control panel 1 2 3 4 Use the 1 Display 9 87 5 6 To • View the printer messages and supply status. • Set up and operate the printer. Learning about the printer 12 Use the To 1 USB printer port Connect the printer to a computer. 2 Ethernet port Connect the printer to an Ethernet network. 3 USB ports Attach a keyboard. 4 Printer power cord socket Connect the printer to a properly grounded electrical outlet.
Using the control panel 1 2 3 4 Use the 1 Display 9 87 5 6 To • View the printer messages and supply status. • Set up and operate the printer. Learning about the printer 12 Use the To 1 USB printer port Connect the printer to a computer. 2 Ethernet port Connect the printer to an Ethernet network. 3 USB ports Attach a keyboard. 4 Printer power cord socket Connect the printer to a properly grounded electrical outlet.

User Guide
Page 13
... on , the display shows the home screen. Using the home screen When the printer is off the printer. Use the home screen buttons and icons to Sleep or Hibernate mode. • Wake the printer from Sleep or Hibernate mode. 5 Stop or Cancel button Stop the current job.... 6 Indicator light Check the status of the printer. 7 Volume buttons Adjust the volume of the power button and indicator light Indicator light Off Blue Red Printer status The printer is turned on your home screen customization settings, administrative setup, and active embedded ...
... on , the display shows the home screen. Using the home screen When the printer is off the printer. Use the home screen buttons and icons to Sleep or Hibernate mode. • Wake the printer from Sleep or Hibernate mode. 5 Stop or Cancel button Stop the current job.... 6 Indicator light Check the status of the printer. 7 Volume buttons Adjust the volume of the power button and indicator light Indicator light Off Blue Red Printer status The printer is turned on your home screen customization settings, administrative setup, and active embedded ...

User Guide
Page 14
...touching the top section of the home screen. 2 Job Queue Show all the current held print jobs. Lock Device Prevent users from accessing any printer functions from a flash drive. 6 Held Jobs Show all the current print jobs. App Profiles Access application profiles...You can also access this setting by touching the top section of the home screen. 3 Change Language Change the language on the printer display. 4 Settings Access the printer menus. 5 USB Drive View, select, or print photos and documents from the home screen. These settings may also appear on ...
...touching the top section of the home screen. 2 Job Queue Show all the current held print jobs. Lock Device Prevent users from accessing any printer functions from a flash drive. 6 Held Jobs Show all the current print jobs. App Profiles Access application profiles...You can also access this setting by touching the top section of the home screen. 3 Change Language Change the language on the printer display. 4 Settings Access the printer menus. 5 USB Drive View, select, or print photos and documents from the home screen. These settings may also appear on ...

User Guide
Page 15
... Logic Description Job Accounting Suppressing Duplicate Alerts Image Power Management XPS Information Sent to Lexmark PDF Accessibility HTML Restore Factory Defaults PostScript Maintenance PCL Remote Operator Panel PPDS Visible Home Screen Icons Site Map Update Firmware About This Printer Paper Network/Ports USB Drive Tray Configuration Network Overview Flash Drive...
... Logic Description Job Accounting Suppressing Duplicate Alerts Image Power Management XPS Information Sent to Lexmark PDF Accessibility HTML Restore Factory Defaults PostScript Maintenance PCL Remote Operator Panel PPDS Visible Home Screen Icons Site Map Update Firmware About This Printer Paper Network/Ports USB Drive Tray Configuration Network Overview Flash Drive...

User Guide
Page 16
...in the address field. Setting up and using the home screen applications Customizing the home screen 1 Open a Web browser, and then type the printer IP address in the address field. Using Display Customization 1 From the home screen, touch Change Background. 2 Select a background to appear on the...correct, type the IP address of the host computer where the bookmark is located. 4 Apply the changes. Notes: • View the printer IP address on the printer home screen. The IP address appears as four sets of numbers separated by periods, such as 123.123.123.123. • If...
...in the address field. Setting up and using the home screen applications Customizing the home screen 1 Open a Web browser, and then type the printer IP address in the address field. Using Display Customization 1 From the home screen, touch Change Background. 2 Select a background to appear on the...correct, type the IP address of the host computer where the bookmark is located. 4 Apply the changes. Notes: • View the printer IP address on the printer home screen. The IP address appears as four sets of numbers separated by periods, such as 123.123.123.123. • If...

User Guide
Page 18
..., navigate to position the guides. Note: Use the indicators on the bottom of the paper you are loading. Note: Do not remove trays while the printer is busy. 2 Adjust the guides to match the size of the tray to : Settings > Paper > Tray Configuration > select a tray 2 Configure the...
..., navigate to position the guides. Note: Use the indicators on the bottom of the paper you are loading. Note: Do not remove trays while the printer is busy. 2 Adjust the guides to match the size of the tray to : Settings > Paper > Tray Configuration > select a tray 2 Configure the...

User Guide
Page 20
Loading paper and specialty media 20 Loading the multipurpose feeder 1 Open the multipurpose feeder. 2 Adjust the guide to match the size of the paper you are loading. 3 Flex, fan, and align the paper edges before loading. 4 Load the paper. • Load paper, card stock, and transparencies with the printable side facedown and the top edge entering the printer first.
Loading paper and specialty media 20 Loading the multipurpose feeder 1 Open the multipurpose feeder. 2 Adjust the guide to match the size of the paper you are loading. 3 Flex, fan, and align the paper edges before loading. 4 Load the paper. • Load paper, card stock, and transparencies with the printable side facedown and the top edge entering the printer first.

User Guide
Page 21
...and type to the specified paper type. Linking trays 1 Open a Web browser, and then type the printer IP address in the tray. Notes: • View the printer IP address on the printer home screen. Loading paper and specialty media 21 • Load envelopes with the flap side up and ...;rst. Note: You can also change the paper size and type settings from the printer control panel. To avoid printing issues, match the paper type settings in the printer with the flap side up and against the left side of the paper guide. Warning-Potential Damage: The temperature of numbers...
...and type to the specified paper type. Linking trays 1 Open a Web browser, and then type the printer IP address in the tray. Notes: • View the printer IP address on the printer home screen. Loading paper and specialty media 21 • Load envelopes with the flap side up and ...;rst. Note: You can also change the paper size and type settings from the printer control panel. To avoid printing issues, match the paper type settings in the printer with the flap side up and against the left side of the paper guide. Warning-Potential Damage: The temperature of numbers...

User Guide
Page 22
... • If you insert the flash drive when an error message appears, then the printer ignores the flash drive. • If you insert the flash drive while the printer is processing other print jobs, then Busy appears on the display. Pinch injuries may occur around ... media such as gears, doors, trays, and covers. Printing 22 Printing CAUTION-PINCH HAZARD: To avoid the risk of a pinch injury, use caution in the printer before sending the print job. 1 With a document open, click File > Print. 2 If necessary, adjust the settings. 3 Send the print job. Printing from ...
... • If you insert the flash drive when an error message appears, then the printer ignores the flash drive. • If you insert the flash drive while the printer is processing other print jobs, then Busy appears on the display. Pinch injuries may occur around ... media such as gears, doors, trays, and covers. Printing 22 Printing CAUTION-PINCH HAZARD: To avoid the risk of a pinch injury, use caution in the printer before sending the print job. 1 With a document open, click File > Print. 2 If necessary, adjust the settings. 3 Send the print job. Printing from ...

User Guide
Page 23
To print another document, touch USB Drive. The printer supports high‑speed USB flash drives with full‑speed standard. - Loss of data or a malfunction can occur. USB flash drives must ... .docx • .xls or .xlsx • .ppt or .pptx • .pdf • .xps Images: • .dcx • .gif Warning-Potential Damage: Do not touch the printer or the flash drive in the area shown while actively printing, reading, or writing from the memory device.
To print another document, touch USB Drive. The printer supports high‑speed USB flash drives with full‑speed standard. - Loss of data or a malfunction can occur. USB flash drives must ... .docx • .xls or .xlsx • .ppt or .pptx • .pdf • .xps Images: • .dcx • .gif Warning-Potential Damage: Do not touch the printer or the flash drive in the area shown while actively printing, reading, or writing from the memory device.

User Guide
Page 24
...Note: Repeat held jobs are deleted without being printed. Note: Reserve held jobs 1 With a document open, select File > Print. 2 Select the printer, and then do the following: • For Windows users, click Properties or Preferences, and then click Print and Hold. • For Macintosh users..., select Print and Hold. 3 Select the print job type. 4 If necessary, assign a user name. 5 Send the print job. 6 From the printer home screen, touch Held Jobs. 7 Send the print job. Printing held jobs are deleted. Confidential Job Expiration Set the amount of times an...
...Note: Repeat held jobs are deleted without being printed. Note: Reserve held jobs 1 With a document open, select File > Print. 2 Select the printer, and then do the following: • For Windows users, click Properties or Preferences, and then click Print and Hold. • For Macintosh users..., select Print and Hold. 3 Select the print job type. 4 If necessary, assign a user name. 5 Send the print job. 6 From the printer home screen, touch Held Jobs. 7 Send the print job. Printing held jobs are deleted. Confidential Job Expiration Set the amount of times an...

User Guide
Page 25
... setting by touching the top section of the following: • Open the printers folder, and then select your printer. • From the System Preferences in the Apple menu, navigate to your printer. 2 Select the job to cancel. Canceling a print job From the printer control panel 1 From the home screen, touch Job Queue. From the...
... setting by touching the top section of the following: • Open the printers folder, and then select your printer. • From the System Preferences in the Apple menu, navigate to your printer. 2 Select the job to cancel. Canceling a print job From the printer control panel 1 From the home screen, touch Job Queue. From the...

