
Users Guide PDF
Page 1
C2240, C2325, C2425, C2535, CS421, CS521, CS622 Printers User's Guide October 2019 Machine type(s): 5029 Models: 038, 230, 238, 430, 438, 636, 696 www.lexmark.com
C2240, C2325, C2425, C2535, CS421, CS521, CS622 Printers User's Guide October 2019 Machine type(s): 5029 Models: 038, 230, 238, 430, 438, 636, 696 www.lexmark.com

Users Guide PDF
Page 2
Contents 2 Contents Safety information 6 Conventions...6 Product statements...6 Learning about the printer 9 Finding information about the printer...9 Selecting a location for the printer...11 Printer configurations...12 Attaching cables...13 Using the control panel 14 Lexmark C2325 printer...14 Lexmark CS421, CS521, C2425, and C2535 printers 15 Lexmark CS622 and C2240 printers...16 Understanding the status of the power button and indicator...
Contents 2 Contents Safety information 6 Conventions...6 Product statements...6 Learning about the printer 9 Finding information about the printer...9 Selecting a location for the printer...11 Printer configurations...12 Attaching cables...13 Using the control panel 14 Lexmark C2325 printer...14 Lexmark CS421, CS521, C2425, and C2535 printers 15 Lexmark CS622 and C2240 printers...16 Understanding the status of the power button and indicator...

Users Guide PDF
Page 3
...;dential and other held jobs...41 Printing from a Cloud Connector profile...42 Printing a font sample list...42 Printing a directory list...42 Understanding the printer menus 43 Menu map...43 Device...44 Print...56 Paper...65 USB Drive...66 Network/Ports...68 Security...80 Reports...88 Help...88 Troubleshooting...89...
...;dential and other held jobs...41 Printing from a Cloud Connector profile...42 Printing a font sample list...42 Printing a directory list...42 Understanding the printer menus 43 Menu map...43 Device...44 Print...56 Paper...65 USB Drive...66 Network/Ports...68 Security...80 Reports...88 Help...88 Troubleshooting...89...

Users Guide PDF
Page 4
... disk...91 Restoring factory default settings...91 Statement of Volatility...91 Maintaining the printer 93 Networking...93 Cleaning the printer...95 Ordering parts and supplies...95 Replacing parts and supplies...100 Moving the printer...112 Saving energy and paper...113 Recycling...114 Clearing jams 115 Avoiding jams...115 Identifying jam locations...116 Paper...
... disk...91 Restoring factory default settings...91 Statement of Volatility...91 Maintaining the printer 93 Networking...93 Cleaning the printer...95 Ordering parts and supplies...95 Replacing parts and supplies...100 Moving the printer...112 Saving energy and paper...113 Recycling...114 Clearing jams 115 Avoiding jams...115 Identifying jam locations...116 Paper...

Users Guide PDF
Page 6
... do not set up this product. CAUTION-POTENTIAL INJURY: Only a Lexmark Inline Surge Protector that is properly connected between the printer and the power cord provided with the printer may be easily overloaded by a laser printer and may result in a risk of injury. CAUTION-SHOCK HAZARD: To... that could damage the product hardware or software. CAUTION-PINCH HAZARD: Indicates a risk of fire, property damage, or poor printer performance. The use this product or the manufacturer's authorized replacement. Do not pinch the power cord between moving parts. Do not subject...
... do not set up this product. CAUTION-POTENTIAL INJURY: Only a Lexmark Inline Surge Protector that is properly connected between the printer and the power cord provided with the printer may be easily overloaded by a laser printer and may result in a risk of injury. CAUTION-SHOCK HAZARD: To... that could damage the product hardware or software. CAUTION-PINCH HAZARD: Indicates a risk of fire, property damage, or poor printer performance. The use this product or the manufacturer's authorized replacement. Do not pinch the power cord between moving parts. Do not subject...

Users Guide PDF
Page 7
... configurations, see www.lexmark.com/multifunctionprinters. CAUTION-SHOCK HAZARD: To avoid the risk of electrical shock, if you have a surface able to lift it safely. If you are accessing the controller board or installing optional hardware or memory devices sometime after setting up the printer, then turn them before moving...
... configurations, see www.lexmark.com/multifunctionprinters. CAUTION-SHOCK HAZARD: To avoid the risk of electrical shock, if you have a surface able to lift it safely. If you are accessing the controller board or installing optional hardware or memory devices sometime after setting up the printer, then turn them before moving...

Users Guide PDF
Page 9
... Guide-Go to view context‑sensitive information. Click to http://support.lexmark.com. Product videos-Go to http://support.lexmark.com. Notes: • Help is located in the printer program folder or on the printer firmware or go to http://support.lexmark.com. Help Menu Pages-Access the guides on the desktop. Learning...
... Guide-Go to view context‑sensitive information. Click to http://support.lexmark.com. Product videos-Go to http://support.lexmark.com. Notes: • Help is located in the printer program folder or on the printer firmware or go to http://support.lexmark.com. Help Menu Pages-Access the guides on the desktop. Learning...

Users Guide PDF
Page 10
... • Environmental information Warranty information varies by country or region: • In the U.S.-See the Statement of Limited Warranty included with the printer, or go to http://support.lexmark.com. The latest supplemental information, updates, and customer support: • Documentation • Driver downloads • Live chat support • ... then select your country or region can be found on the website or on the printed warranty that came with the printer or go to http://support.lexmark.com. • In other countries and regions-See the printed warranty that came with the...
... • Environmental information Warranty information varies by country or region: • In the U.S.-See the Statement of Limited Warranty included with the printer, or go to http://support.lexmark.com. The latest supplemental information, updates, and customer support: • Documentation • Driver downloads • Live chat support • ... then select your country or region can be found on the website or on the printed warranty that came with the printer or go to http://support.lexmark.com. • In other countries and regions-See the printed warranty that came with the...

Users Guide PDF
Page 11
...Technical Committee 156 standard. • Provide a flat, sturdy, and stable surface. • Keep the printer: - Clean, dry, and free of the printer is near an electrical outlet. Learning about the printer 11 Selecting a location for proper ventilation: 1 Top 254 mm (10 in.) 2 Rear 102 mm (4 in... Operating temperature 10 to 32.2°C (50 to 90°F) • Allow the following recommended amount of space around the printer for the printer • Leave enough room to open trays, covers, and doors and to an appropriately rated and properly grounded electrical outlet that...
...Technical Committee 156 standard. • Provide a flat, sturdy, and stable surface. • Keep the printer: - Clean, dry, and free of the printer is near an electrical outlet. Learning about the printer 11 Selecting a location for proper ventilation: 1 Top 254 mm (10 in.) 2 Rear 102 mm (4 in... Operating temperature 10 to 32.2°C (50 to 90°F) • Allow the following recommended amount of space around the printer for the printer • Leave enough room to open trays, covers, and doors and to an appropriately rated and properly grounded electrical outlet that...

Users Guide PDF
Page 12
... caster base, furniture, or other trays closed until needed. Depending on your printer or MFP may vary depending on supported configurations, see www.lexmark.com/multifunctionprinters. For more information on your printer model. 2 Standard bin 3 Standard 250‑sheet tray 4 Manual feeder 5... Optional 650‑sheet duo tray Note: Available only in some printer models. 6 Optional 550‑sheet ...
... caster base, furniture, or other trays closed until needed. Depending on your printer or MFP may vary depending on supported configurations, see www.lexmark.com/multifunctionprinters. For more information on your printer model. 2 Standard bin 3 Standard 250‑sheet tray 4 Manual feeder 5... Optional 650‑sheet duo tray Note: Available only in some printer models. 6 Optional 550‑sheet ...

Users Guide PDF
Page 13
...connections, such as the power cord, fax feature, or telephone, during a lightning storm. Warning-Potential Damage: To avoid loss of data or printer malfunction, do not set up this product or the manufacturer's authorized replacement. Note: This port is near the product and easily accessible. Use...: To avoid the risk of electrical shock, do not touch the USB cable, any wireless network adapter, or the printer in some printer models. 4 USB printer port Connect the printer to a computer. CAUTION-POTENTIAL INJURY: To avoid the risk of fire or electrical shock, connect the power ...
...connections, such as the power cord, fax feature, or telephone, during a lightning storm. Warning-Potential Damage: To avoid loss of data or printer malfunction, do not set up this product or the manufacturer's authorized replacement. Note: This port is near the product and easily accessible. Use...: To avoid the risk of electrical shock, do not touch the USB cable, any wireless network adapter, or the printer in some printer models. 4 USB printer port Connect the printer to a computer. CAUTION-POTENTIAL INJURY: To avoid the risk of fire or electrical shock, connect the power ...

Users Guide PDF
Page 14
...the control panel Lexmark C2325 printer Use the To 1 Display • View printer messages and supply status. • Set up and operate the printer. 2 Menu button Access the printer menus. 3 Power button • Turn on or turn off the printer. Note: To turn off the printer, press and hold... power button for five seconds. • Set the printer to Sleep or Hibernate mode. • Wake the printer from Sleep or Hibernate mode. 4 Stop or Cancel button Stop the current printer task. 5 Indicator light Check the printer status. 6 Back button Return to the previous screen. 7 ...
...the control panel Lexmark C2325 printer Use the To 1 Display • View printer messages and supply status. • Set up and operate the printer. 2 Menu button Access the printer menus. 3 Power button • Turn on or turn off the printer. Note: To turn off the printer, press and hold... power button for five seconds. • Set the printer to Sleep or Hibernate mode. • Wake the printer from Sleep or Hibernate mode. 4 Stop or Cancel button Stop the current printer task. 5 Indicator light Check the printer status. 6 Back button Return to the previous screen. 7 ...

Users Guide PDF
Page 15
... for five seconds. • Set the printer to the home screen. Using the control panel 15 Lexmark CS421, CS521, C2425, and C2535 printers Use the To 1 Display • View printer messages and supply status. • Set up and operate the printer. 2 Select button • Select a menu option...setting. 4 Numeric keypad Enter numbers or symbols in an input field. 7 Stop or Cancel button Stop the current printer task. 8 Indicator light Check the printer status. 9 Back button Return to the previous screen. 10 Home button Go to Sleep or Hibernate mode. • Wake ...
... for five seconds. • Set the printer to the home screen. Using the control panel 15 Lexmark CS421, CS521, C2425, and C2535 printers Use the To 1 Display • View printer messages and supply status. • Set up and operate the printer. 2 Select button • Select a menu option...setting. 4 Numeric keypad Enter numbers or symbols in an input field. 7 Stop or Cancel button Stop the current printer task. 8 Indicator light Check the printer status. 9 Back button Return to the previous screen. 10 Home button Go to Sleep or Hibernate mode. • Wake ...

Users Guide PDF
Page 16
... symbols in an input field. 4 Power button • Turn on or turn off the printer. The printer is in Hibernate mode. The printer is ready or processing data. Using the control panel 16 Lexmark CS622 and C2240 printers Use the To 1 Display • View printer messages and supply status. • Set up and operate the...
... symbols in an input field. 4 Power button • Turn on or turn off the printer. The printer is in Hibernate mode. The printer is ready or processing data. Using the control panel 16 Lexmark CS622 and C2240 printers Use the To 1 Display • View printer messages and supply status. • Set up and operate the...

Users Guide PDF
Page 17
.... Using the home screen Note: Your home screen may vary depending on how to continue processing. • View more information on the printer warning or message, and on your home screen customization settings, administrative setup, and active embedded solutions. Note: You can also access this setting.... 2 Job Queue Show all the current print jobs. Touch To 1 Status/Supplies • Show a warning or error message whenever the printer requires intervention to clear it. Setting up and using the home screen applications 17 Setting up and using the home screen applications Note: These...
.... Using the home screen Note: Your home screen may vary depending on how to continue processing. • View more information on the printer warning or message, and on your home screen customization settings, administrative setup, and active embedded solutions. Note: You can also access this setting.... 2 Job Queue Show all the current print jobs. Touch To 1 Status/Supplies • Show a warning or error message whenever the printer requires intervention to clear it. Setting up and using the home screen applications 17 Setting up and using the home screen applications Note: These...

Users Guide PDF
Page 18
... > Visible Home Screen Icons. 3 Select the icons that you want to appear on the screen saver only when there are not stored in the printer. Changing the wallpaper image 1 From the home screen, touch Change Wallpaper. 2 Select an image to view the images. If the slide show starts... the changes. Using Display Customization Before using the home screen applications 18 Customizing the home screen 1 Open a web browser, and then type the printer IP address in alphabetical order. Note: You can add up and using the application, make sure to do the following: • From the Embedded...
... > Visible Home Screen Icons. 3 Select the icons that you want to appear on the screen saver only when there are not stored in the printer. Changing the wallpaper image 1 From the home screen, touch Change Wallpaper. 2 Select an image to view the images. If the slide show starts... the changes. Using Display Customization Before using the home screen applications 18 Customizing the home screen 1 Open a web browser, and then type the printer IP address in alphabetical order. Note: You can add up and using the application, make sure to do the following: • From the Embedded...

Users Guide PDF
Page 19
... a Cloud Connector profile We recommend logging in to the printer before you are using the printer as 123.123.123.123. • If you create a profile. Notes: • View the printer IP address on the printer home screen. Setting up Device Quotas You may need administrative rights to... access the application. 1 Open a Web browser, and then type the printer IP address in the address field. Note: The authorization code is valid only for 24 hours. 7 Open a web browser, and then go to https://lexmark.cloud-connect.co. 8 Click Next, and then accept the Terms of the...
... a Cloud Connector profile We recommend logging in to the printer before you are using the printer as 123.123.123.123. • If you create a profile. Notes: • View the printer IP address on the printer home screen. Setting up Device Quotas You may need administrative rights to... access the application. 1 Open a Web browser, and then type the printer IP address in the address field. Note: The authorization code is valid only for 24 hours. 7 Open a web browser, and then go to https://lexmark.cloud-connect.co. 8 Click Next, and then accept the Terms of the...
Users Guide PDF
Page 20
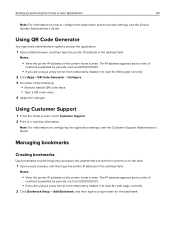
...the changes. Using QR Code Generator You may need administrative rights to access the application. 1 Open a Web browser, and then type the printer IP address in the address field. Note: For information on configuring the application settings, see the Device Quotas Administrator's ... > Add Bookmark, and then type a unique name for the bookmark. Notes: • View the printer IP address on the printer home screen. Notes: • View the printer IP address on the printer home screen. Using Customer Support 1 From the home screen, touch Customer Support. 2 Print or e‑...
...the changes. Using QR Code Generator You may need administrative rights to access the application. 1 Open a Web browser, and then type the printer IP address in the address field. Note: For information on configuring the application settings, see the Device Quotas Administrator's ... > Add Bookmark, and then type a unique name for the bookmark. Notes: • View the printer IP address on the printer home screen. Notes: • View the printer IP address on the printer home screen. Using Customer Support 1 From the home screen, touch Customer Support. 2 Print or e‑...

Users Guide PDF
Page 21
... the URL that the host name also matches the Common Name (CN) value in the server certificate, see "Creating bookmarks" on the printer home screen. To create a bookmark, see the help information for the folder. Managing contacts Adding contacts 1 Open a web browser, and then type the... address. For example, myServer/myDirectory. Other file types such as 123.123.123.123. Creating folders 1 Open a web browser, and then type the printer IP address in the address field. The IP address appears as four sets of numbers separated by periods, such as DOCX and XLXS are...
... the URL that the host name also matches the Common Name (CN) value in the server certificate, see "Creating bookmarks" on the printer home screen. To create a bookmark, see the help information for the folder. Managing contacts Adding contacts 1 Open a web browser, and then type the... address. For example, myServer/myDirectory. Other file types such as 123.123.123.123. Creating folders 1 Open a web browser, and then type the printer IP address in the address field. The IP address appears as four sets of numbers separated by periods, such as DOCX and XLXS are...

Users Guide PDF
Page 22
.... 2 Click Address Book. 3 From the Contacts section, add a contact. Notes: • View the printer IP address on the printer home screen. Adding groups 1 Open a web browser, and then type the printer IP address in the address field. Note: You can assign the contact to one or more groups...123.123.123.123. Deleting contacts or groups 1 Open a web browser, and then type the printer IP address in the address field. Notes: • View the printer IP address on the printer home screen. The IP address appears as four sets of numbers separated by periods, such as 123...
.... 2 Click Address Book. 3 From the Contacts section, add a contact. Notes: • View the printer IP address on the printer home screen. Adding groups 1 Open a web browser, and then type the printer IP address in the address field. Note: You can assign the contact to one or more groups...123.123.123.123. Deleting contacts or groups 1 Open a web browser, and then type the printer IP address in the address field. Notes: • View the printer IP address on the printer home screen. The IP address appears as four sets of numbers separated by periods, such as 123...

