User's Guide
Page 3
...panel ...37 Saving settings...40 Installing another language control panel...41 Installing the printer software...42 Installing the optional XPS driver (Windows Vista users only 42 Understanding the printer software...43 Turning printing voice notification on or off...46 Security Information...46 General ...networking 47 Finding your MAC address...47 Assigning an IP address...47 Configure IP address...47 Finding a printer/print server located on remote...
...panel ...37 Saving settings...40 Installing another language control panel...41 Installing the printer software...42 Installing the optional XPS driver (Windows Vista users only 42 Understanding the printer software...43 Turning printing voice notification on or off...46 Security Information...46 General ...networking 47 Finding your MAC address...47 Assigning an IP address...47 Configure IP address...47 Finding a printer/print server located on remote...
User's Guide
Page 5
...printer software to factory default settings ...65 Resetting the printer to factory default settings...66 Working with photos 67 Retrieving and managing photos...67 Inserting a memory card ...67 Inserting a flash drive ...68 Understanding the Photo Card menu...69 Understanding the PictBridge menu...71 Transferring photos ...72 Changing the Lexmark...of a photo or image...77 Despeckling a photo...78 Changing the Brightness / Contrast settings of a photo 78 Applying a color effect to a photo...78 Changing the Exposure setting of a photo ...78 Removing wavy patterns from scanned photos, magazines,...
...printer software to factory default settings ...65 Resetting the printer to factory default settings...66 Working with photos 67 Retrieving and managing photos...67 Inserting a memory card ...67 Inserting a flash drive ...68 Understanding the Photo Card menu...69 Understanding the PictBridge menu...71 Transferring photos ...72 Changing the Lexmark...of a photo or image...77 Despeckling a photo...78 Changing the Brightness / Contrast settings of a photo 78 Applying a color effect to a photo...78 Changing the Exposure setting of a photo ...78 Removing wavy patterns from scanned photos, magazines,...
User's Guide
Page 9
... not able to communicate with the computer 151 Problems when copying, scanning, or faxing ...151 Wrong printer is attached...151 Updating the printer software ...151 Bidirectional communication is not established...152 Experiencing poor quality or incorrect output ...152 Cannot print from digital camera using PictBridge ...153 Partial...jams...154 Paper jam in the Automatic Document Feeder (ADF)...154 Paper jam in the printer...155 Paper jam in the paper support...156 Paper or specialty media misfeeds...156 Printer does not feed paper, envelopes, or specialty media 157 Banner paper jams ...157 ...
... not able to communicate with the computer 151 Problems when copying, scanning, or faxing ...151 Wrong printer is attached...151 Updating the printer software ...151 Bidirectional communication is not established...152 Experiencing poor quality or incorrect output ...152 Cannot print from digital camera using PictBridge ...153 Partial...jams...154 Paper jam in the Automatic Document Feeder (ADF)...154 Paper jam in the printer...155 Paper jam in the paper support...156 Paper or specialty media misfeeds...156 Printer does not feed paper, envelopes, or specialty media 157 Banner paper jams ...157 ...
User's Guide
Page 14
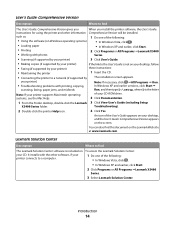
... When you install the printer software, the User's Guide: instructions for using the printer and other software, if your printer) these instructions: • Maintaining the printer 1 Insert the CD. • Connecting the printer to a network (if supported by The installation screen appears. User's Guide: Comprehensive Version Description Where to find this document on the Lexmark Web site at...
... When you install the printer software, the User's Guide: instructions for using the printer and other software, if your printer) these instructions: • Maintaining the printer 1 Insert the CD. • Connecting the printer to a network (if supported by The installation screen appears. User's Guide: Comprehensive Version Description Where to find this document on the Lexmark Web site at...
User's Guide
Page 16
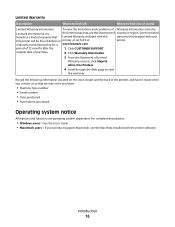
...-If your this limited warranty, see the Mac Help installed with the printer software. Limited Warranty Description Where to find (US) Where to view the warranty. materials and workmanship for a www.lexmark.com. See the printed furnishes a limited warranty that Limited Warranty included ...system-dependent. original date of purchase. 2 Click Warranty Information. 3 From the Statement of Limited Warranty section, click Inkjet & All-In-One Printers. 4 Scroll through the Web page to find (rest of world) Limited Warranty Information To view the limitations and conditions...
...-If your this limited warranty, see the Mac Help installed with the printer software. Limited Warranty Description Where to find (US) Where to view the warranty. materials and workmanship for a www.lexmark.com. See the printed furnishes a limited warranty that Limited Warranty included ...system-dependent. original date of purchase. 2 Click Warranty Information. 3 From the Statement of Limited Warranty section, click Inkjet & All-In-One Printers. 4 Scroll through the Web page to find (rest of world) Limited Warranty Information To view the limitations and conditions...
User's Guide
Page 42
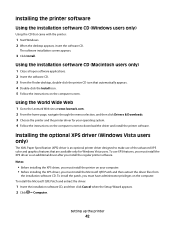
...lexmark.com. 2 From the home page, navigate through the menu selection, and then click Drivers & Downloads. 3 Choose the printer and the printer driver for Windows Vista users. Notes: • Before installing the XPS driver, you must install the printer on the computer screen to make use XPS features, you install the regular printer software...To use of the advanced XPS color and graphics features that came with the printer: 1 Start Windows. 2 When the desktop appears, insert the software CD. Installing the printer software Using the installation software CD (Windows users only) ...
...lexmark.com. 2 From the home page, navigate through the menu selection, and then click Drivers & Downloads. 3 Choose the printer and the printer driver for Windows Vista users. Notes: • Before installing the XPS driver, you must install the printer on the computer screen to make use XPS features, you install the regular printer software...To use of the advanced XPS color and graphics features that came with the printer: 1 Start Windows. 2 When the desktop appears, insert the software CD. Installing the printer software Using the installation software CD (Windows users only) ...
User's Guide
Page 43
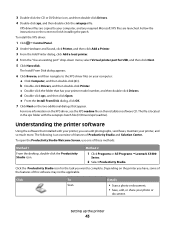
... file (D:\Drivers\xps\readme). d Double-click xps, and then click Open. Understanding the printer software Using the software that has your printer, you have, some of the features of Productivity Studio and Solution Center. Method 2 1 Click Programs or All Programs ŒLexmark X5400 Series. 2 Select Productivity Studio. Click the Productivity Studio icon for USB, and...
... file (D:\Drivers\xps\readme). d Double-click xps, and then click Open. Understanding the printer software Using the software that has your printer, you have, some of the features of Productivity Studio and Solution Center. Method 2 1 Click Programs or All Programs ŒLexmark X5400 Series. 2 Select Productivity Studio. Click the Productivity Studio icon for USB, and...
User's Guide
Page 46
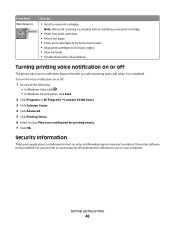
... to fix horizontal streaks. • Align print cartridges to run on your computer. Setting up the printer 46 For your printer to work properly, allow the printer software to fix blurry edges. • View ink levels. • Troubleshoot other ink problems. Turning printing...printer software being installed. From here Maintenance You can: • Install a new print cartridge. To turn the voice notification on or off : 1 Do one of the following: • In Windows Vista, click . • In Windows XP and earlier, click Start. 2 Click Programs or All Programs ŒLexmark...
... to fix horizontal streaks. • Align print cartridges to run on your computer. Setting up the printer 46 For your printer to work properly, allow the printer software to fix blurry edges. • View ink levels. • Troubleshoot other ink problems. Turning printing...printer software being installed. From here Maintenance You can: • Install a new print cartridge. To turn the voice notification on or off : 1 Do one of the following: • In Windows Vista, click . • In Windows XP and earlier, click Start. 2 Click Programs or All Programs ŒLexmark...
User's Guide
Page 47
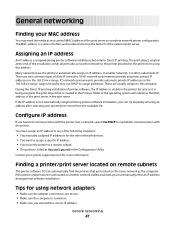
...of the print server to assign addresses. You must manually enter an IP address during printer software installation, you have the ability to automatically assign an IP address. If the printer and print server are secure. • Make sure the computer is being assigned. Configure...Make sure the adapter connections are located on the same network as it is assigned during printer software installation, but only for more information. During the Direct IP printing installation of printer software, the IP address is a series of the installation, sends all print jobs across ...
...of the print server to assign addresses. You must manually enter an IP address during printer software installation, you have the ability to automatically assign an IP address. If the printer and print server are secure. • Make sure the computer is being assigned. Configure...Make sure the adapter connections are located on the same network as it is assigned during printer software installation, but only for more information. During the Direct IP printing installation of printer software, the IP address is a series of the installation, sends all print jobs across ...
User's Guide
Page 48
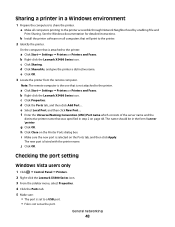
...Vista users only 1 Click Œ Control Panel Œ Printers. 2 Right-click the Lexmark X5400 Series icon. 3 From the sidebar menu, select Properties. 4 Click the Ports tab. 5 Make sure: • The port is set as the port. b Install the printer software on all computers printing to a USB port. •... File is selected on the Ports tab, and then click Apply. d Click Shared As, and give the printer a distinctive name. b Right-click the Lexmark X5400 Series icon. i Make sure the new ...
...Vista users only 1 Click Œ Control Panel Œ Printers. 2 Right-click the Lexmark X5400 Series icon. 3 From the sidebar menu, select Properties. 4 Click the Ports tab. 5 Make sure: • The port is set as the port. b Install the printer software on all computers printing to a USB port. •... File is selected on the Ports tab, and then click Apply. d Click Shared As, and give the printer a distinctive name. b Right-click the Lexmark X5400 Series icon. i Make sure the new ...
User's Guide
Page 58
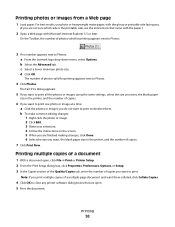
... you are finished making changes, click Done. 6 Select the size you want, the blank paper size in the printer, and the number of copies. 7 Click Print Now. Printing 58 d Click OK. The Fast Pics dialog appears...multiple-page document and want to deselect them collated, click Collate Copies. 4 Click OK to close any printer software dialog boxes that came with the paper.) 2 Open a Web page with the glossy or printable side facing...of photos valid for printing appears next to Photos: a From the Lexmark logo drop-down menu, select Options. Note: If you want to print to print.
... you are finished making changes, click Done. 6 Select the size you want, the blank paper size in the printer, and the number of copies. 7 Click Print Now. Printing 58 d Click OK. The Fast Pics dialog appears...multiple-page document and want to deselect them collated, click Collate Copies. 4 Click OK to close any printer software dialog boxes that came with the paper.) 2 Open a Web page with the glossy or printable side facing...of photos valid for printing appears next to Photos: a From the Lexmark logo drop-down menu, select Options. Note: If you want to print to print.
User's Guide
Page 59
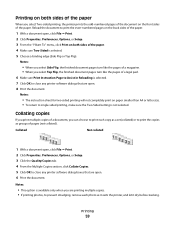
...Preferences, Options, or Setup. 3 Click the Quality/Copies tab. 4 From the Multiple Copies section, click Collate Copies. 5 Click OK to close any printer software dialog boxes that are open. 8 Print the document. Notes: • This option is not selected. Printing 59 Notes: • The instruction sheet for...Side Flip or Top Flip). Printing on both sides of the paper. 4 Make sure Two-Sided is selected. 7 Click OK to close any printer software dialogs that are open. 6 Print the document. Notes: • When you select Side Flip, the finished document pages turn like the pages of...
...Preferences, Options, or Setup. 3 Click the Quality/Copies tab. 4 From the Multiple Copies section, click Collate Copies. 5 Click OK to close any printer software dialog boxes that are open. 8 Print the document. Notes: • This option is not selected. Printing 59 Notes: • The instruction sheet for...Side Flip or Top Flip). Printing on both sides of the paper. 4 Make sure Two-Sided is selected. 7 Click OK to close any printer software dialogs that are open. 6 Print the document. Notes: • When you select Side Flip, the finished document pages turn like the pages of...
User's Guide
Page 61
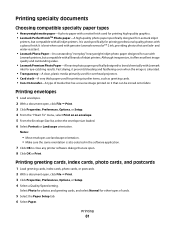
... drying, it offers excellent image quality and outstanding value. • Lexmark Premium Photo Paper-A heavier photo paper specifically designed to close any printer software dialogs that are open. 8 Click OK or Print. and water-resistant. • Lexmark Photo Paper-An outstanding "everyday" heavyweight inkjet photo paper designed for use landscape orientation. • Make sure the...
... drying, it offers excellent image quality and outstanding value. • Lexmark Premium Photo Paper-A heavier photo paper specifically designed to close any printer software dialogs that are open. 8 Click OK or Print. and water-resistant. • Lexmark Photo Paper-An outstanding "everyday" heavyweight inkjet photo paper designed for use landscape orientation. • Make sure the...
User's Guide
Page 62
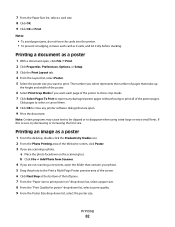
... 4 If you want to disappear when using extra-large or extra-small fonts. Click pages to select or cancel them. 8 Click OK to close any printer software dialogs that contains your photo. 5 Drag the photo to the Print a Multi-Page Poster preview area of the screen. 6 Click Next Step at the .... Printing a document as it exits, and let it dry before stacking. Notes: • To avoid paper jams, do not force the cards into the printer. • To prevent smudging, remove each page of the poster to show crop marks. 7 Click Select Pages To Print to reprint any damaged poster pages...
... 4 If you want to disappear when using extra-large or extra-small fonts. Click pages to select or cancel them. 8 Click OK to close any printer software dialogs that contains your photo. 5 Drag the photo to the Print a Multi-Page Poster preview area of the screen. 6 Click Next Step at the .... Printing a document as it exits, and let it dry before stacking. Notes: • To avoid paper jams, do not force the cards into the printer. • To prevent smudging, remove each page of the poster to show crop marks. 7 Click Select Pages To Print to reprint any damaged poster pages...

User's Guide
Page 63
... 1 Flip the printed stack of papers over in the paper exit tray. 2 Take the first bundle from the program. Printing a booklet 1 Before you change any printer software dialog boxes that it with the front page down on top of the first bundle. 4 Stack the rest of the bundles with a heavier paper stock...
... 1 Flip the printed stack of papers over in the paper exit tray. 2 Take the first bundle from the program. Printing a booklet 1 Before you change any printer software dialog boxes that it with the front page down on top of the first bundle. 4 Stack the rest of the bundles with a heavier paper stock...

User's Guide
Page 64
... if you have a program that automatically flips the image. 5 Click OK to dry. Transparencies may require up to 15 minutes to close any printer software dialogs that are open. 6 Print the iron-on transfers. Printing 64 Printing iron-on transfers 1 Load up to 10 iron-on transfers. 2...: To prevent smudging, remove each transparency as it exits, and then let it dry before stacking. Note: Do not force paper into the printer. Note: After you want the printer software to 25 transparencies. 2 With a document open, click File ΠPrint. 3 Click OK or Print. Printing a banner 1 With a ...
... if you have a program that automatically flips the image. 5 Click OK to dry. Transparencies may require up to 15 minutes to close any printer software dialogs that are open. 6 Print the iron-on transfers. Printing 64 Printing iron-on transfers 1 Load up to 10 iron-on transfers. 2...: To prevent smudging, remove each transparency as it exits, and then let it dry before stacking. Note: Do not force paper into the printer. Note: After you want the printer software to 25 transparencies. 2 With a document open, click File ΠPrint. 3 Click OK or Print. Printing a banner 1 With a ...
User's Guide
Page 65
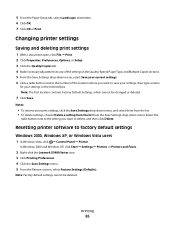
...contains Factory Default Settings, which cannot be deleted. In Windows 2000 and Windows XP, click Start Œ Settings Œ Printers or Printers and Faxes. 2 Right-click the Lexmark X5400 Series icon. 3 Click Printing Preferences. 4 Click the Save Settings menu. 5 From the Restore section, select Factory ...• To retrieve your settings in the selected box. Note: Factory default settings cannot be changed or deleted. 7 Click Save. Resetting printer software to save your settings, then type a name for your print settings, click the Save Settings drop-down menu, and select them from ...
...contains Factory Default Settings, which cannot be deleted. In Windows 2000 and Windows XP, click Start Œ Settings Œ Printers or Printers and Faxes. 2 Right-click the Lexmark X5400 Series icon. 3 Click Printing Preferences. 4 Click the Save Settings menu. 5 From the Restore section, select Factory ...• To retrieve your settings in the selected box. Note: Factory default settings cannot be changed or deleted. 7 Click Save. Resetting printer software to save your settings, then type a name for your print settings, click the Save Settings drop-down menu, and select them from ...
User's Guide
Page 130
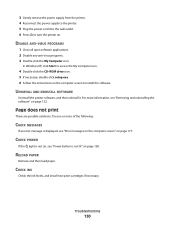
... 128. RELOAD PAPER Remove and then load paper. CHECK INK Check the ink levels, and install new print cartridges if necessary. UNINSTALL AND REINSTALL SOFTWARE Uninstall the printer software, and then reinstall it. Page does not print These are possible solutions. In Windows XP, click Start to access the My Computer icon. 4 Double...
... 128. RELOAD PAPER Remove and then load paper. CHECK INK Check the ink levels, and install new print cartridges if necessary. UNINSTALL AND REINSTALL SOFTWARE Uninstall the printer software, and then reinstall it. Page does not print These are possible solutions. In Windows XP, click Start to access the My Computer icon. 4 Double...
User's Guide
Page 131
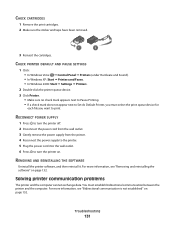
REMOVING AND REINSTALLING THE SOFTWARE Uninstall the printer software, and then reinstall it. Solving printer communication problems The printer and the computer cannot exchange data. Troubleshooting 131 RECONNECT POWER SUPPLY 1 Press to turn the printer off. 2 Disconnect the power cord from the wall outlet. 3 Gently remove the power supply from the printer. 4 Reconnect the power supply to the...
REMOVING AND REINSTALLING THE SOFTWARE Uninstall the printer software, and then reinstall it. Solving printer communication problems The printer and the computer cannot exchange data. Troubleshooting 131 RECONNECT POWER SUPPLY 1 Press to turn the printer off. 2 Disconnect the power cord from the wall outlet. 3 Gently remove the power supply from the printer. 4 Reconnect the power supply to the...
User's Guide
Page 132
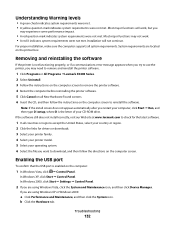
... not continue. Most major functions may need to remove and reinstall the printer software. 1 Click Programs or All Programs ŒLexmark X5400 Series. 2 Select Uninstall. 3 Follow the instructions on the computer screen to remove the printer software. 4 Restart the computer before reinstalling the printer software. 5 Click Cancel on all New Hardware Found screens. 6 Insert the CD, and...
... not continue. Most major functions may need to remove and reinstall the printer software. 1 Click Programs or All Programs ŒLexmark X5400 Series. 2 Select Uninstall. 3 Follow the instructions on the computer screen to remove the printer software. 4 Restart the computer before reinstalling the printer software. 5 Click Cancel on all New Hardware Found screens. 6 Insert the CD, and...


