
Troubleshooting Guide
Page 2
...and then reconnect it back and forth. or Click Start Control Panel Printers and Other Hardware Printers and Faxes. 2 Double-click the Lexmark X340/X340n/ X342n icon. 3 Click Printer, and make sure the guides are scanning a document, wait until Toner Dark appears. 5 Press . 6 ... slow. • Close all applications not in use. • Minimize the number and size of paper into the MFP. Print and copy troubleshooting MFP does not print or respond • Remove and reinstall the software. Straighten the edges on both sides of the envelope. For more ...
...and then reconnect it back and forth. or Click Start Control Panel Printers and Other Hardware Printers and Faxes. 2 Double-click the Lexmark X340/X340n/ X342n icon. 3 Click Printer, and make sure the guides are scanning a document, wait until Toner Dark appears. 5 Press . 6 ... slow. • Close all applications not in use. • Minimize the number and size of paper into the MFP. Print and copy troubleshooting MFP does not print or respond • Remove and reinstall the software. Straighten the edges on both sides of the envelope. For more ...

Troubleshooting Guide
Page 4
... the computer. • Remove and reinstall the software. If there is an error message, see whether Fax Forwarding is an error message, see the User's Guide. • The MFP may need to the telephone line. Answering machine • Check the telephone wall jack. 1 Plug a...; Control Panel Printers and Other Hardware Printers and Faxes. 2 Double-click the Lexmark X340/X340n/ X342n icon. 3 Click Printer, and make sure that it directly to be serviced. If you are printing a document, wait until FAX DEFAULTS appears. Scans very slowly • Close all applications not in...
... the computer. • Remove and reinstall the software. If there is an error message, see whether Fax Forwarding is an error message, see the User's Guide. • The MFP may need to the telephone line. Answering machine • Check the telephone wall jack. 1 Plug a...; Control Panel Printers and Other Hardware Printers and Faxes. 2 Double-click the Lexmark X340/X340n/ X342n icon. 3 Click Printer, and make sure that it directly to be serviced. If you are printing a document, wait until FAX DEFAULTS appears. Scans very slowly • Close all applications not in...
User's Guide
Page 3
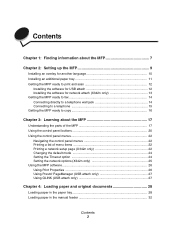
... overlay for another language 10 Installing an additional paper tray 11 Getting the MFP ready to print and scan 12 Installing the software for USB attach 12 Installing the software for network attach (X342n only 13 Getting the MFP ready to fax 14 Connecting directly to a telephone wall jack 14 Connecting to a telephone 15 Getting...
... overlay for another language 10 Installing an additional paper tray 11 Getting the MFP ready to print and scan 12 Installing the software for USB attach 12 Installing the software for network attach (X342n only 13 Getting the MFP ready to fax 14 Connecting directly to a telephone wall jack 14 Connecting to a telephone 15 Getting...
User's Guide
Page 22
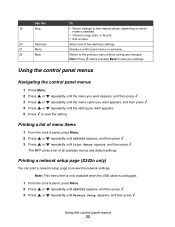
Printing a network setup page (X342n only) You can print a network setup page to the previous menu without saving ...Press or repeatedly until REPORTS appears, and then press . 3 Press or repeatedly until Network Setup appears, and then press . Printing a list of menu items 1 From the control panel, press Menu. 2 Press or repeatedly until REPORTS appears, and then press... Press or repeatedly until the menu option you want appears, and then press . 4 Press or repeatedly until Print Menus appears, and then press . Select one of all available menus and default settings. Note: This menu ...
Printing a network setup page (X342n only) You can print a network setup page to the previous menu without saving ...Press or repeatedly until REPORTS appears, and then press . 3 Press or repeatedly until Network Setup appears, and then press . Printing a list of menu items 1 From the control panel, press Menu. 2 Press or repeatedly until REPORTS appears, and then press... Press or repeatedly until the menu option you want appears, and then press . 4 Press or repeatedly until Print Menus appears, and then press . Select one of all available menus and default settings. Note: This menu ...
User's Guide
Page 84
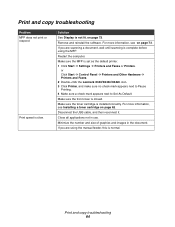
...or Click Start Æ Control Panel Æ Printers and Other Hardware Æ Printers and Faxes. 2 Double-click the Lexmark X340/X340n/X342n icon. 3 Click Printer, and make sure no check mark appears next to Pause Printing. 4 Make sure a check mark appears next to Set As Default. For more information, ...the number and size of graphics and images in use. Remove and reinstall the software. If you are using the MFP. Print and copy troubleshooting 84 Print and copy troubleshooting Problem MFP does not print or respond Print speed is installed correctly. Solution See Display is normal.
...or Click Start Æ Control Panel Æ Printers and Other Hardware Æ Printers and Faxes. 2 Double-click the Lexmark X340/X340n/X342n icon. 3 Click Printer, and make sure no check mark appears next to Pause Printing. 4 Make sure a check mark appears next to Set As Default. For more information, ...the number and size of graphics and images in use. Remove and reinstall the software. If you are using the MFP. Print and copy troubleshooting 84 Print and copy troubleshooting Problem MFP does not print or respond Print speed is installed correctly. Solution See Display is normal.

User's Guide
Page 88
... 88 or Click Start Æ Control Panel Æ Printers and Other Hardware Æ Printers and Faxes. 2 Double-click the Lexmark X340/X340n/X342n icon. 3 Click Printer, and make sure no check mark appears next to Pause Printing. 4 Make sure a check mark appears next to a lower value: 1 From the control panel,... press Scan. 2 From the QLINK dialog on page 74. If you want to use . Make sure the MFP...
... 88 or Click Start Æ Control Panel Æ Printers and Other Hardware Æ Printers and Faxes. 2 Double-click the Lexmark X340/X340n/X342n icon. 3 Click Printer, and make sure no check mark appears next to Pause Printing. 4 Make sure a check mark appears next to a lower value: 1 From the control panel,... press Scan. 2 From the QLINK dialog on page 74. If you want to use . Make sure the MFP...


