
User's Guide
Page 7
...Description Where to find The Getting Started booklet gives you instructions for using the printer. Note: If your printer supports Macintosh operating systems, see the User's Guide instead. The Setup Solutions booklet ...tells you did not receive a Getting Started booklet or a Setup Solutions booklet, see the Mac Help: 1 From the Finder desktop, double-click the Lexmark 5400 Series folder. 2 Double-click the printer Help icon. Finding information about the printer 7 Lexmark...
...Description Where to find The Getting Started booklet gives you instructions for using the printer. Note: If your printer supports Macintosh operating systems, see the User's Guide instead. The Setup Solutions booklet ...tells you did not receive a Getting Started booklet or a Setup Solutions booklet, see the Mac Help: 1 From the Finder desktop, double-click the Lexmark 5400 Series folder. 2 Double-click the printer Help icon. Finding information about the printer 7 Lexmark...
User's Guide
Page 8
... supported by your printer) these instructions: • Making copies (if supported by your printer) 1 Insert the CD. • Faxing (if supported by your printer) 2 Click View User's Guide (including Setup Troubleshooting). • Troubleshooting problems with the other software, if your printer 1 Click Start Œ Programs or All Programs Œ Lexmark connects to a computer. 5400 Series. 2 Select Lexmark Solution Center. Lexmark...
... supported by your printer) these instructions: • Making copies (if supported by your printer) 1 Insert the CD. • Faxing (if supported by your printer) 2 Click View User's Guide (including Setup Troubleshooting). • Troubleshooting problems with the other software, if your printer 1 Click Start Œ Programs or All Programs Œ Lexmark connects to a computer. 5400 Series. 2 Select Lexmark Solution Center. Lexmark...
User's Guide
Page 9
... phone numbers available, see the Statement of country or region. Visit our Web site at www.lexmark.com. E-mail support For e-mail support, visit our Web site: www.lexmark.com. this printer will be available in printer, or set forth at printer. original date of purchase. 2 Click Warranty Information. 3 From the Statement of Limited Warranty section, click...
... phone numbers available, see the Statement of country or region. Visit our Web site at www.lexmark.com. E-mail support For e-mail support, visit our Web site: www.lexmark.com. this printer will be available in printer, or set forth at printer. original date of purchase. 2 Click Warranty Information. 3 From the Statement of Limited Warranty section, click...

User's Guide
Page 21
... scanning, copying, or faxing multiple-page documents. Learning about the printer Understanding the parts of the printer 10 9 8 11 1 7 12 6 54 2 3 Use the To 1 Paper support Load paper. 2 Automatic Document Feeder (ADF) paper stop • Stop paper as it exits the ADF. • Support A4 and legal-size paper as it exits. 7 Automatic Document...
... scanning, copying, or faxing multiple-page documents. Learning about the printer Understanding the parts of the printer 10 9 8 11 1 7 12 6 54 2 3 Use the To 1 Paper support Load paper. 2 Automatic Document Feeder (ADF) paper stop • Stop paper as it exits the ADF. • Support A4 and legal-size paper as it exits. 7 Automatic Document...
User's Guide
Page 43
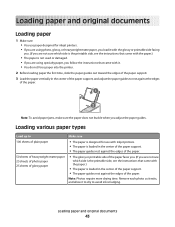
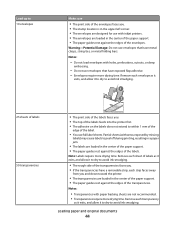
..., and allow it . • You do not force paper into the printer. 2 Before loading paper the first time, slide the paper guides out toward the edges of the paper support. 3 Load the paper vertically in the center of the paper support. • The paper guides rest against the edges of the paper. Note... it to dry to Make sure 100 sheets of plain paper • The paper is designed for use with inkjet printers. • The paper is loaded in the center of the paper support. • The paper guides rest against the edges of the paper. 50 sheets of heavyweight matte paper 25 sheets...
..., and allow it . • You do not force paper into the printer. 2 Before loading paper the first time, slide the paper guides out toward the edges of the paper support. 3 Load the paper vertically in the center of the paper support. • The paper guides rest against the edges of the paper. Note... it to dry to Make sure 100 sheets of plain paper • The paper is designed for use with inkjet printers. • The paper is loaded in the center of the paper support. • The paper guides rest against the edges of the paper. 50 sheets of heavyweight matte paper 25 sheets...
User's Guide
Page 44
...; The stamp location is in the upper left corner. • The envelopes are designed for use with inkjet printers. • The envelopes are loaded in the center of the paper support. • The paper guides rest against the edges of the labels. Notes: - Remove each transparency as it...by missing labels) may cause labels to avoid ink smudging. 1 2 • The print side of the labels faces you and down toward the printer. • The transparencies are not recommended. • Transparencies require more drying time. Note: Labels require more drying time. Loading paper and original...
...; The stamp location is in the upper left corner. • The envelopes are designed for use with inkjet printers. • The envelopes are loaded in the center of the paper support. • The paper guides rest against the edges of the labels. Notes: - Remove each transparency as it...by missing labels) may cause labels to avoid ink smudging. 1 2 • The print side of the labels faces you and down toward the printer. • The transparencies are not recommended. • Transparencies require more drying time. Note: Labels require more drying time. Loading paper and original...

User's Guide
Page 45
... up to avoid ink smudging. • The print side of the paper faces you . • The cards are loaded in the center of the paper support. • The paper guides rest against the edges of the transfers. Loading paper and original documents 45 Remove each photo card as it exits, and... with the iron-on transfers. • The print side of the transfers faces you. • The transfers are loaded in the center of the paper support. • The paper guides rest against the edges of the cards. 1 2 100 sheets of the paper. Note: For best results, load transfers one at a time...
... up to avoid ink smudging. • The print side of the paper faces you . • The cards are loaded in the center of the paper support. • The paper guides rest against the edges of the transfers. Loading paper and original documents 45 Remove each photo card as it exits, and... with the iron-on transfers. • The print side of the transfers faces you. • The transfers are loaded in the center of the paper support. • The paper guides rest against the edges of the cards. 1 2 100 sheets of the paper. Note: For best results, load transfers one at a time...

User's Guide
Page 46
... paper, pull up to 10 sheets of an original document into the Automatic Document Feeder (ADF) for the banner in the center of the paper support. • The paper guides rest against the edges of the paper. • You have selected the correct paper size for scanning, copying, and faxing.... banner. • You place the required stack of banner paper on the top cover. • The leading edge of the banner paper feeds into the printer first. • The paper is not curled. • Do not load postcards, photos, small items, transparencies, photo paper, or thin media (such as magazine ...
... paper, pull up to 10 sheets of an original document into the Automatic Document Feeder (ADF) for the banner in the center of the paper support. • The paper guides rest against the edges of the paper. • You have selected the correct paper size for scanning, copying, and faxing.... banner. • You place the required stack of banner paper on the top cover. • The leading edge of the banner paper feeds into the printer first. • The paper is not curled. • Do not load postcards, photos, small items, transparencies, photo paper, or thin media (such as magazine ...

User's Guide
Page 47
Document Loaded appears on the ADF tray to Make sure 10 sheets of the original document. • The original document is not supported when using the scanner. 4 Load the original document facedown and top edge first into the ADF. Automatic Document Feeder paper capacity Load up to the ...
Document Loaded appears on the ADF tray to Make sure 10 sheets of the original document. • The original document is not supported when using the scanner. 4 Load the original document facedown and top edge first into the ADF. Automatic Document Feeder paper capacity Load up to the ...

User's Guide
Page 60
...Note: The color effect applies to select the month you want . 8 Press . 9 Press Start Color or Start Black. If your current printer settings. The printer recognizes these settings when you are displayed by photo number, use the control panel to apply color effects to your proof sheet. Notes: •...; Make sure the photo print settings you select match your camera supports DPOF, you can also print photos with the glossy or...
...Note: The color effect applies to select the month you want . 8 Press . 9 Press Start Color or Start Black. If your current printer settings. The printer recognizes these settings when you are displayed by photo number, use the control panel to apply color effects to your proof sheet. Notes: •...; Make sure the photo print settings you select match your camera supports DPOF, you can also print photos with the glossy or...

User's Guide
Page 69
...Feeder. For more information, see the documentation that came with a word-processing application. 1 Make sure: • The printer is connected to a computer, and both the printer and the computer are on. • ABBYY Fine Reader is installed. 2 Load an original document facedown into the ... to turn scanned images into the ADF. Scanning text for editing 1 Make sure the printer is not supported when using the scanner. 6 Select a word-processing program to a computer, and both the printer and the computer are on the computer screen. You can edit with the graphics program....
...Feeder. For more information, see the documentation that came with a word-processing application. 1 Make sure: • The printer is connected to a computer, and both the printer and the computer are on. • ABBYY Fine Reader is installed. 2 Load an original document facedown into the ... to turn scanned images into the ADF. Scanning text for editing 1 Make sure the printer is not supported when using the scanner. 6 Select a word-processing program to a computer, and both the printer and the computer are on the computer screen. You can edit with the graphics program....

User's Guide
Page 75
If you subscribe to save the setting. The printer supports two distinct Caller ID patterns: Pattern 1 (FSK) and Pattern 2 (DTMF). Depending on the country or region you live in some telephone companies that identifies the ... or repeatedly until the setting you answer it to receive your faxes. Faxing 75 When you receive a fax, the telephone number of rings before the printer automatically receives faxes, see "Setting the number of the person who is off. 2 To receive the fax: • Press Start Color or Start Black. Using...
If you subscribe to save the setting. The printer supports two distinct Caller ID patterns: Pattern 1 (FSK) and Pattern 2 (DTMF). Depending on the country or region you live in some telephone companies that identifies the ... or repeatedly until the setting you answer it to receive your faxes. Faxing 75 When you receive a fax, the telephone number of rings before the printer automatically receives faxes, see "Setting the number of the person who is off. 2 To receive the fax: • Press Start Color or Start Black. Using...
User's Guide
Page 97
... system The following operating systems are supported: Windows 98/Me, Windows 2000, Windows XP, and Mac OS X. USB cable may be connected 1 Check the USB cable for any anti-virus programs. 3 Double-click the My Computer icon. Use these steps to install the printer software 1 Turn off . 2 ...Close all open software applications. 2 Disable any obvious damage. 2 Firmly plug the square end of the USB cable into the back of the printer. 3 Firmly plug the rectangular end of the USB cable into the USB port of the computer. Troubleshooting 97 Check your system requirements Check that...
... system The following operating systems are supported: Windows 98/Me, Windows 2000, Windows XP, and Mac OS X. USB cable may be connected 1 Check the USB cable for any anti-virus programs. 3 Double-click the My Computer icon. Use these steps to install the printer software 1 Turn off . 2 ...Close all open software applications. 2 Disable any obvious damage. 2 Firmly plug the square end of the USB cable into the back of the printer. 3 Firmly plug the rectangular end of the USB cable into the USB port of the computer. Troubleshooting 97 Check your system requirements Check that...

User's Guide
Page 105
... an original document facedown on page 70. Troubleshooting 105 Adjust the quality of the scan 1 Make sure the printer is connected to a computer, and both the printer and the computer are scanning. glossy paper? Clean the scanner glass If the scanner glass is dirty, gently .... The All-In-One Center appears with water. Cannot scan to an application Select a different application 1 From the Selected Application Does Not Support Multiple Pages dialog, click Cancel. 2 From the All-In-One Center Scanning & Copying tab, choose a different application from magazines or newspapers...
... an original document facedown on page 70. Troubleshooting 105 Adjust the quality of the scan 1 Make sure the printer is connected to a computer, and both the printer and the computer are scanning. glossy paper? Clean the scanner glass If the scanner glass is dirty, gently .... The All-In-One Center appears with water. Cannot scan to an application Select a different application 1 From the Selected Application Does Not Support Multiple Pages dialog, click Cancel. 2 From the All-In-One Center Scanning & Copying tab, choose a different application from magazines or newspapers...

User's Guide
Page 106
... Check the telephone wall jack 1 Plug a telephone into a different wall jack. 5 If you hear a dial tone, connect the printer to the telephone line. For more information, contact your DSL provider. • If you are using a PBX telephone service, make ...sure that digital telephone services can be connected to the printer so that it is working correctly. • If the telephone line is being used . • If you are... Disconnect other device is working correctly, connect it directly to that will support analog use.
... Check the telephone wall jack 1 Plug a telephone into a different wall jack. 5 If you hear a dial tone, connect the printer to the telephone line. For more information, contact your DSL provider. • If you are using a PBX telephone service, make ...sure that digital telephone services can be connected to the printer so that it is working correctly. • If the telephone line is being used . • If you are... Disconnect other device is working correctly, connect it directly to that will support analog use.

User's Guide
Page 110
... information. For more information, see "Power button is turned on your fax to print. • This solution will reduce the speed for the printer to be set correctly The printer supports two distinct Caller ID patterns: Pattern 1 (FSK) and Pattern 2 (DTMF). For more information, see "Using Caller ID" on the N4050e Setup Utility...
... information. For more information, see "Power button is turned on your fax to print. • This solution will reduce the speed for the printer to be set correctly The printer supports two distinct Caller ID patterns: Pattern 1 (FSK) and Pattern 2 (DTMF). For more information, see "Using Caller ID" on the N4050e Setup Utility...
User's Guide
Page 111
...of the computer. For more information, see "Software may not be installed correctly" on . • The USB cable is not connected to make sure the printer is not being broadcast. Make sure security keys are using a USB cable: 1 Check the USB cable for any obvious damage. 2 Firmly plug the rectangular ... one end of the Ethernet cable into the USB port on the back of the print server are not on page 99. Contact network support Contact your system support person to the print server. • The print server is marked with the USB symbol . 3 Firmly plug the square end of the...
...of the computer. For more information, see "Software may not be installed correctly" on . • The USB cable is not connected to make sure the printer is not being broadcast. Make sure security keys are using a USB cable: 1 Check the USB cable for any obvious damage. 2 Firmly plug the rectangular ... one end of the Ethernet cable into the USB port on the back of the print server are not on page 99. Contact network support Contact your system support person to the print server. • The print server is marked with the USB symbol . 3 Firmly plug the square end of the...

User's Guide
Page 112
... See "Loading various paper types" on page 43 for information about: • Maximum loading amounts per paper type • Specific loading instructions for supported paper and specialty media Remove each page as Remove each page as it exits, and let it dry completely before stacking. Is the jam in..., unwrinkled paper. Jams and misfeeds troubleshooting • "Paper jams" on page 112 • "Paper or specialty media misfeeds" on page 112 • "Printer does not feed paper, envelopes, or specialty media" on page 113 • "Banner paper jams" on page 113 Paper jams Is the jam in the...
... See "Loading various paper types" on page 43 for information about: • Maximum loading amounts per paper type • Specific loading instructions for supported paper and specialty media Remove each page as Remove each page as it exits, and let it dry completely before stacking. Is the jam in..., unwrinkled paper. Jams and misfeeds troubleshooting • "Paper jams" on page 112 • "Paper or specialty media misfeeds" on page 112 • "Printer does not feed paper, envelopes, or specialty media" on page 113 • "Banner paper jams" on page 113 Paper jams Is the jam in the...
User's Guide
Page 118
...Fax Error The fax machines have been a problem with the quality of the telephone line connection. Fax Mode Unsupported The receiving fax machine does not support the type of the photo proof sheet you printed and scanned. 1 Make sure you completely fill in only one circle for a dial tone. ...the printer is detecting a dial tone. • See "Sending a fax while listening to a call (On Hook Dial)" on letter-size paper. Invalid photo/paper size selection You have selected more than one option on step 2 of fax you want appears. 11 Press to save this means it does not support: ...
...Fax Error The fax machines have been a problem with the quality of the telephone line connection. Fax Mode Unsupported The receiving fax machine does not support the type of the photo proof sheet you printed and scanned. 1 Make sure you completely fill in only one circle for a dial tone. ...the printer is detecting a dial tone. • See "Sending a fax while listening to a call (On Hook Dial)" on letter-size paper. Invalid photo/paper size selection You have selected more than one option on step 2 of fax you want appears. 11 Press to save this means it does not support: ...
User's Guide
Page 120
...broadcast fax at a scheduled time" on step 2 of time between redials: a Press or repeatedly until the setting you inserted. b Press . The printer will redial: a Press or repeatedly until the setting you printed and scanned is no longer valid. You may have been found on a memory device.... b Press . No photo files found No supported images have removed the memory card or flash drive from the printer, or turned off the printer, before scanning the photo proof sheet. d Press . 9 To change redial settings) The printer automatically redials three times at intervals up to continue...
...broadcast fax at a scheduled time" on step 2 of time between redials: a Press or repeatedly until the setting you inserted. b Press . The printer will redial: a Press or repeatedly until the setting you printed and scanned is no longer valid. You may have been found on a memory device.... b Press . No photo files found No supported images have removed the memory card or flash drive from the printer, or turned off the printer, before scanning the photo proof sheet. d Press . 9 To change redial settings) The printer automatically redials three times at intervals up to continue...


