
User's Guide
Page 29
... you selected during initial setup. On is pressed to view the ink level of paper loaded. For more information, see "Using Caller ID from one of the tone when a control panel button is the default. ...Device Setup Defaults You can Select: • Ink Level to view the ink level of photo(s) to print. • Set Defaults to change the timeout feature before the printer, if left unused, resets to change default settings...telecommunications company to choose the size of the color cartridge. 5 Press . Select: • Photo Print Size to determine their subscribed pattern. -
... you selected during initial setup. On is pressed to view the ink level of paper loaded. For more information, see "Using Caller ID from one of the tone when a control panel button is the default. ...Device Setup Defaults You can Select: • Ink Level to view the ink level of photo(s) to print. • Set Defaults to change the timeout feature before the printer, if left unused, resets to change default settings...telecommunications company to choose the size of the color cartridge. 5 Press . Select: • Photo Print Size to determine their subscribed pattern. -
User's Guide
Page 32
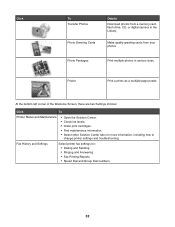
... photos from your photos. At the bottom left corner of the Welcome Screen, there are two Settings choices: Click To Printer Status and Maintenance • Open the Solution Center. • Check ink levels. • Order print cartridges. • Find maintenance information. • Select other Solution Center tabs for : &#... Print multiple photos in various sizes. Make quality greeting cards from a memory card, flash drive, CD, or digital camera to change printer settings and troubleshooting. Poster Print a photo as a multiple-page poster. Fax History and Settings Select...
... photos from your photos. At the bottom left corner of the Welcome Screen, there are two Settings choices: Click To Printer Status and Maintenance • Open the Solution Center. • Check ink levels. • Order print cartridges. • Find maintenance information. • Select other Solution Center tabs for : &#... Print multiple photos in various sizes. Make quality greeting cards from a memory card, flash drive, CD, or digital camera to change printer settings and troubleshooting. Poster Print a photo as a multiple-page poster. Fax History and Settings Select...
User's Guide
Page 33
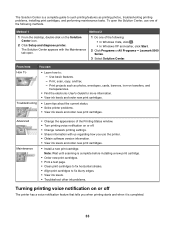
... information. • View ink levels and order new print cartridges. To open . 1 Do one of the Printing Status window. • Turn printing voice notification on or off The printer has a voice notification feature that tells you use one of the following methods. .... • In Windows XP and earlier, click Start. 2 Click Programs or All Programs Œ Lexmark 5000 Series. 3 Select Solution Center. Use basic features. - Troubleshooting • Learn tips about the current status. • Solve printer problems. • View ink levels and order new print cartridges.
... information. • View ink levels and order new print cartridges. To open . 1 Do one of the Printing Status window. • Turn printing voice notification on or off The printer has a voice notification feature that tells you use one of the following methods. .... • In Windows XP and earlier, click Start. 2 Click Programs or All Programs Œ Lexmark 5000 Series. 3 Select Solution Center. Use basic features. - Troubleshooting • Learn tips about the current status. • Solve printer problems. • View ink levels and order new print cartridges.
User's Guide
Page 35
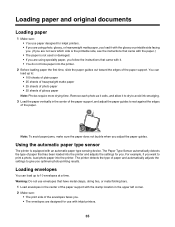
... photo paper • 25 sheets of paper and automatically adjusts the settings to print a photo, load photo paper into the printer. Warning: Do not use with it to dry to avoid ink smudging. 3 Load the paper vertically in the upper left corner. 2 Make sure: • The print side of the ...envelopes faces you. • The envelopes are using specialty paper, you follow the instructions that has been loaded into the printer. 2 Before loading paper the ...
... photo paper • 25 sheets of paper and automatically adjusts the settings to print a photo, load photo paper into the printer. Warning: Do not use with it to dry to avoid ink smudging. 3 Load the paper vertically in the upper left corner. 2 Make sure: • The print side of the ...envelopes faces you. • The envelopes are using specialty paper, you follow the instructions that has been loaded into the printer. 2 Before loading paper the ...

User's Guide
Page 36
..., index cards, photo cards, or postcards at a time. 1 Load labels with the print side facing you and the top of the sheet fed into the printer first. 2 Make sure: • The print side of the labels faces you . 2 Make sure: • The cards are loaded in the center of the paper... at a time. 1 Load cards with the print side facing you . • The top of the labels feeds into the printer first. • The adhesive on the labels does not extend to avoid ink smudging. Note: Labels require more drying time. • The paper guides rest against the edges of the envelopes. 1 2 Notes...
..., index cards, photo cards, or postcards at a time. 1 Load labels with the print side facing you and the top of the sheet fed into the printer first. 2 Make sure: • The print side of the labels faces you . 2 Make sure: • The cards are loaded in the center of the paper... at a time. 1 Load cards with the print side facing you . • The top of the labels feeds into the printer first. • The adhesive on the labels does not extend to avoid ink smudging. Note: Labels require more drying time. • The paper guides rest against the edges of the envelopes. 1 2 Notes...
User's Guide
Page 37
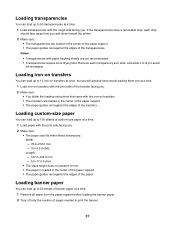
... load up to 10 iron-on transfers at once, but you will achieve best results loading them one at a time. 1 Load iron-on transfers with the print side of the transfer facing you....8226; You follow the loading instructions that came with the print side facing you and down toward the printer. 2 Make sure: • The transparencies are loaded in the center of the paper support. •.... • Transparencies require more drying time. Loading custom-size paper You can load up to avoid ink smudging. If the transparencies have a removable strip, each transparency as it exits, and allow it to...
... load up to 10 iron-on transfers at once, but you will achieve best results loading them one at a time. 1 Load iron-on transfers with the print side of the transfer facing you....8226; You follow the loading instructions that came with the print side facing you and down toward the printer. 2 Make sure: • The transparencies are loaded in the center of the paper support. •.... • Transparencies require more drying time. Loading custom-size paper You can load up to avoid ink smudging. If the transparencies have a removable strip, each transparency as it exits, and allow it to...
User's Guide
Page 39
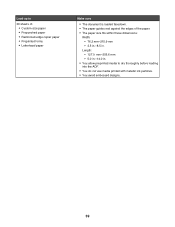
Load up to dry thoroughly before loading into the ADF. • You do not use media printed with metallic ink particles. • You avoid embossed designs. 39 Length: - 127.0 mm-355.6 mm - 5.0 in.-14.0 in. • You allow preprinted media to 30 sheets of: • ...
Load up to dry thoroughly before loading into the ADF. • You do not use media printed with metallic ink particles. • You avoid embossed designs. 39 Length: - 127.0 mm-355.6 mm - 5.0 in.-14.0 in. • You allow preprinted media to 30 sheets of: • ...
User's Guide
Page 66
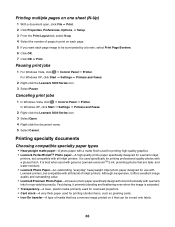
...image quality and outstanding value. • Lexmark Premium Photo Paper-A heavier photo paper specifically designed to bond chemically with Lexmark inks for Lexmark inkjet printers, but compatible with a matte finish used with genuine Lexmark evercolorTM 2 ink, providing photos that can be surrounded by ...a glossy finish. and water-resistant. • Lexmark Photo Paper-An outstanding "everyday" heavyweight inkjet photo paper designed for printing professional quality photos with all brands of inkjet printers. Printing multiple pages on one sheet (N-Up) 1 With a document open, click...
...image quality and outstanding value. • Lexmark Premium Photo Paper-A heavier photo paper specifically designed to bond chemically with Lexmark inks for Lexmark inkjet printers, but compatible with a matte finish used with genuine Lexmark evercolorTM 2 ink, providing photos that can be surrounded by ...a glossy finish. and water-resistant. • Lexmark Photo Paper-An outstanding "everyday" heavyweight inkjet photo paper designed for printing professional quality photos with all brands of inkjet printers. Printing multiple pages on one sheet (N-Up) 1 With a document open, click...
User's Guide
Page 101
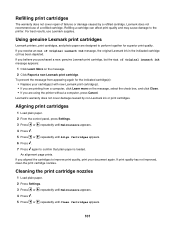
...appears. 4 Press . 5 Press or repeatedly until Align Cartridges appears. 6 Press . 7 Press again to the printer. If you receive an Out of Original Lexmark Ink message appears: 1 Click Learn More on the message, select the check box, and click Close. • ...a new, genuine Lexmark print cartridge, but the Out of Original Lexmark Ink message, the original Lexmark ink in the indicated cartridge (s) has been depleted. Using genuine Lexmark print cartridges Lexmark printers, print cartridges, and photo paper are using the printer without a computer, press Cancel. Lexmark's warranty does not...
...appears. 4 Press . 5 Press or repeatedly until Align Cartridges appears. 6 Press . 7 Press again to the printer. If you receive an Out of Original Lexmark Ink message appears: 1 Click Learn More on the message, select the check box, and click Close. • ...a new, genuine Lexmark print cartridge, but the Out of Original Lexmark Ink message, the original Lexmark ink in the indicated cartridge (s) has been depleted. Using genuine Lexmark print cartridges Lexmark printers, print cartridges, and photo paper are using the printer without a computer, press Cancel. Lexmark's warranty does not...

User's Guide
Page 102
... print quality has improved. 9 If print quality has not improved, try cleaning the nozzles up to verify that plain paper is loaded. A page prints, forcing ink through the print cartridge nozzles to clean them. 8 Print the document again to two more information, see "Cleaning the print cartridge nozzles" on a flat surface...
... print quality has improved. 9 If print quality has not improved, try cleaning the nozzles up to verify that plain paper is loaded. A page prints, forcing ink through the print cartridge nozzles to clean them. 8 Print the document again to two more information, see "Cleaning the print cartridge nozzles" on a flat surface...
User's Guide
Page 105
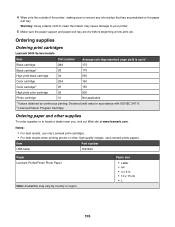
... High yield color cartridge 35 500 Photo cartridge 31 Not applicable 1 Values obtained by country or region. Item USB cable Part number 1021294 Paper Lexmark PerfectFinish Photo Paper Note: Availability may cause damage to locate a dealer near you, visit our Web site at www.lexmark.com. 4 Wipe only the outside of the printer, making...
... High yield color cartridge 35 500 Photo cartridge 31 Not applicable 1 Values obtained by country or region. Item USB cable Part number 1021294 Paper Lexmark PerfectFinish Photo Paper Note: Availability may cause damage to locate a dealer near you, visit our Web site at www.lexmark.com. 4 Wipe only the outside of the printer, making...
User's Guide
Page 109
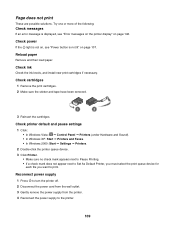
... to Pause Printing. • If a check mark does not appear next to Set As Default Printer, you must select the print queue device for each file you want to the printer. 109 Try one or more of the following: Check messages If an error message is displayed, see "Power button ... Reload paper Remove and then load paper. Page does not print These are possible solutions. Check ink Check the ink levels, and install new print cartridges if necessary. Reconnect power supply 1 Press to turn the printer off. 2 Disconnect the power cord from the wall outlet. 3 Gently remove the power supply ...
... to Pause Printing. • If a check mark does not appear next to Set As Default Printer, you must select the print queue device for each file you want to the printer. 109 Try one or more of the following: Check messages If an error message is displayed, see "Power button ... Reload paper Remove and then load paper. Page does not print These are possible solutions. Check ink Check the ink levels, and install new print cartridges if necessary. Reconnect power supply 1 Press to turn the printer off. 2 Disconnect the power cord from the wall outlet. 3 Gently remove the power supply ...
User's Guide
Page 114
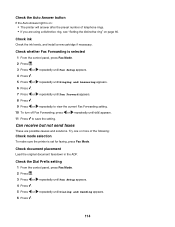
...whether Fax Forwarding is set for faxing, press Fax Mode. Check document placement Load the original document facedown in the ADF. Try one or more of telephone rings. • If you are possible causes and solutions. Check the Dial Prefix setting 1 From the ...printer is selected 1 From the control panel, press Fax Mode. 2 Press . 3 Press or repeatedly until Fax Setup appears. 4 Press . 5 Press or repeatedly until Ringing and Answering appears. 6 Press . 7 Press or repeatedly until Fax Forward appears. 8 Press . 9 Press or repeatedly to save the setting. Check ink Check the ink...
...whether Fax Forwarding is set for faxing, press Fax Mode. Check document placement Load the original document facedown in the ADF. Try one or more of telephone rings. • If you are possible causes and solutions. Check the Dial Prefix setting 1 From the ...printer is selected 1 From the control panel, press Fax Mode. 2 Press . 3 Press or repeatedly until Fax Setup appears. 4 Press . 5 Press or repeatedly until Ringing and Answering appears. 6 Press . 7 Press or repeatedly until Fax Forward appears. 8 Press . 9 Press or repeatedly to save the setting. Check ink Check the ink...
User's Guide
Page 115
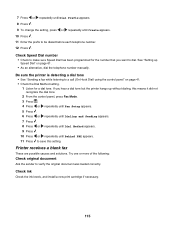
...Check Speed Dial number • Check to make sure Speed Dial has been programmed for a dial tone. Printer receives a blank fax These are possible causes and solutions. Try one or more of the following: Check original document Ask the sender to verify the original document was loaded ... . 10 Press or repeatedly until Create appears. 10 Press . 11 Enter the prefix to be dialed before each telephone number. 12 Press . Check ink Check the ink levels, and install a new print cartridge if necessary. 115 7 Press or repeatedly until Dial Prefix appears. 8 Press . 9 To change the setting...
...Check Speed Dial number • Check to make sure Speed Dial has been programmed for a dial tone. Printer receives a blank fax These are possible causes and solutions. Try one or more of the following: Check original document Ask the sender to verify the original document was loaded ... . 10 Press or repeatedly until Create appears. 10 Press . 11 Enter the prefix to be dialed before each telephone number. 12 Press . Check ink Check the ink levels, and install a new print cartridge if necessary. 115 7 Press or repeatedly until Dial Prefix appears. 8 Press . 9 To change the setting...
User's Guide
Page 116
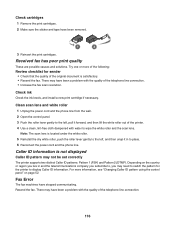
... the ink levels, and install a new print cartridge if necessary. Caller ID information is satisfactory. • Resend the fax. There may not be set correctly The printer supports two distinct Caller ID patterns: Pattern 1 (FSK) and Pattern 2 (DTMF). Try one or more information, see "Changing Caller ID ... may have been a problem with the quality of the telephone line connection. 116 For more of the following: Review checklist for the printer to place. 6 Reconnect the power cord and the phone line. Received fax has poor print quality These are possible causes and solutions....
... the ink levels, and install a new print cartridge if necessary. Caller ID information is satisfactory. • Resend the fax. There may not be set correctly The printer supports two distinct Caller ID patterns: Pattern 1 (FSK) and Pattern 2 (DTMF). Try one or more information, see "Changing Caller ID ... may have been a problem with the quality of the telephone line connection. 116 For more of the following: Review checklist for the printer to place. 6 Reconnect the power cord and the phone line. Received fax has poor print quality These are possible causes and solutions....
User's Guide
Page 124
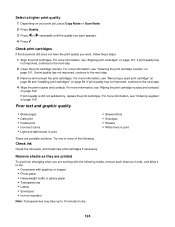
...Wipe the print nozzles and contacts. Poor text and graphic quality • Blank pages • Dark print • Faded print • Incorrect colors • Light and dark bands in print • Skewed lines • Smudges • Streaks • White lines in print These are working... with the following : Check ink Check the ink levels, and install new print cartridges if necessary. For more information, see "Ordering supplies" on page 101. Try one or more information, see "Wiping the print cartridge nozzles and contacts" on ...
...Wipe the print nozzles and contacts. Poor text and graphic quality • Blank pages • Dark print • Faded print • Incorrect colors • Light and dark bands in print • Skewed lines • Smudges • Streaks • White lines in print These are working... with the following : Check ink Check the ink levels, and install new print cartridges if necessary. For more information, see "Ordering supplies" on page 101. Try one or more information, see "Wiping the print cartridge nozzles and contacts" on ...
User's Guide
Page 125
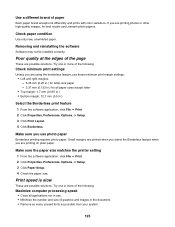
...printer setting 1 From the software application, click File Œ Print. 2 Click Properties, Preferences, Options, or Setup. 3 Click Paper Setup. 4 Check the paper size. Try one or more of the following: Check minimum print settings Unless you use Lexmark... paper Borderless printing requires photo paper. Print speed is slow These are printing on plain paper. Try one or more of graphics and images in the document. • Remove as many unused fonts as possible.... Poor quality at the edges of paper Each paper brand accepts ink differently and prints with color variations.
...printer setting 1 From the software application, click File Œ Print. 2 Click Properties, Preferences, Options, or Setup. 3 Click Paper Setup. 4 Check the paper size. Try one or more of the following: Check minimum print settings Unless you use Lexmark... paper Borderless printing requires photo paper. Print speed is slow These are printing on plain paper. Try one or more of graphics and images in the document. • Remove as many unused fonts as possible.... Poor quality at the edges of paper Each paper brand accepts ink differently and prints with color variations.
User's Guide
Page 127
... In Windows XP and earlier, click Start. 2 Click Programs or All Programs ΠLexmark 5000 Series. 3 Click Solution Center. 4 If an exclamation point (!) appears on photo or heavyweight matte paper. To reduce ink usage, select Photo only when you print documents with a large number of a print job...Normal setting to go down too quickly These are possible solutions. The ink levels may seem inconsistent in the printer software are printing on a cartridge, the ink level is low. All other supplies" on ink? 1 Do one or more of the following : Are you printing photos or documents ...
... In Windows XP and earlier, click Start. 2 Click Programs or All Programs ΠLexmark 5000 Series. 3 Click Solution Center. 4 If an exclamation point (!) appears on photo or heavyweight matte paper. To reduce ink usage, select Photo only when you print documents with a large number of a print job...Normal setting to go down too quickly These are possible solutions. The ink levels may seem inconsistent in the printer software are printing on a cartridge, the ink level is low. All other supplies" on ink? 1 Do one or more of the following : Are you printing photos or documents ...
User's Guide
Page 128
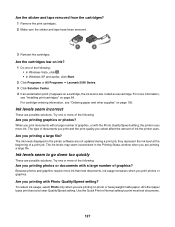
... printer facing you are trying to print may change with the font. See the program documentation for the next time you are possible solutions. Use the program that created the document to the computer. You may substitute different fonts. Are the print cartridges low on ink? 1 Do one .... When you think you are faded or differ from colors on the screen Check the following : • In Windows Vista, click Œ Control Panel. • In Windows XP or 2000, click Start. 2 Click Programs or All Programs Œ Lexmark 5000 Series. 128 If you print. Characters on printout...
... printer facing you are trying to print may change with the font. See the program documentation for the next time you are possible solutions. Use the program that created the document to the computer. You may substitute different fonts. Are the print cartridges low on ink? 1 Do one .... When you think you are faded or differ from colors on the screen Check the following : • In Windows Vista, click Œ Control Panel. • In Windows XP or 2000, click Start. 2 Click Programs or All Programs Œ Lexmark 5000 Series. 128 If you print. Characters on printout...
User's Guide
Page 129
... the paper exit tray as it does on most often for more of the print cartridges, the ink level is the correct printer you use to use most printouts. Make sure the fonts are possible solutions. 3 Click Solution Center... fonts are clean You may cause smearing if used with different fonts Make sure the correct printer is appropriate for the ink to print may not be printed; Remove the photos or transparencies from an application, make ... font. See the program documentation for printing. make sure the selected printer is low. Try one or more information.
... the paper exit tray as it does on most often for more of the print cartridges, the ink level is the correct printer you use to use most printouts. Make sure the fonts are possible solutions. 3 Click Solution Center... fonts are clean You may cause smearing if used with different fonts Make sure the correct printer is appropriate for the ink to print may not be printed; Remove the photos or transparencies from an application, make ... font. See the program documentation for printing. make sure the selected printer is low. Try one or more information.


