

Setup Guide
Page 6
... media, for transparencies, labels, envelopes, and card stock. Load a single sheet of paper/other media. vi Preface Increase your printer. Paper support Top output bin Tray 1 Paper support Manual feed Paper guide Front output door Optional tray 2 Operator panel lights Use this feature: Tray 1 Paper... support Manual feed Paper guides Operator panel lights Top output bin Front output door Optional tray 2 When you want to: Load up to 150 sheets of paper or 10 sheets of other media. Support media in tray 1 and the manual feed.
... media, for transparencies, labels, envelopes, and card stock. Load a single sheet of paper/other media. vi Preface Increase your printer. Paper support Top output bin Tray 1 Paper support Manual feed Paper guide Front output door Optional tray 2 Operator panel lights Use this feature: Tray 1 Paper... support Manual feed Paper guides Operator panel lights Top output bin Front output door Optional tray 2 When you want to: Load up to 150 sheets of paper or 10 sheets of other media. Support media in tray 1 and the manual feed.

Setup Guide
Page 9
... updates to get your desktop and then click START.PDF if you need. Viewing the Lexmark Publications CD Insert the Lexmark Publications CD into your printer, it may also contain MarkVision Professional, other printer utilities, worldwide customer support phone numbers, screen fonts, and additional documentation. Preface ix Depending on which version of Adobe...
... updates to get your desktop and then click START.PDF if you need. Viewing the Lexmark Publications CD Insert the Lexmark Publications CD into your printer, it may also contain MarkVision Professional, other printer utilities, worldwide customer support phone numbers, screen fonts, and additional documentation. Preface ix Depending on which version of Adobe...

Setup Guide
Page 25
A drawer consists of a paper tray and a support unit. 1 Remove the tray from the support unit. 2 Remove all packing material and tape from the tray and the support unit. 3 Place the support unit in the location you have chosen for your printer. Install the tray 2 option 15 Step 4: Install the tray 2 option Support unit Paper tray You can increase paper capacity with the optional 250-sheet drawer, which attaches underneath the printer.
A drawer consists of a paper tray and a support unit. 1 Remove the tray from the support unit. 2 Remove all packing material and tape from the tray and the support unit. 3 Place the support unit in the location you have chosen for your printer. Install the tray 2 option 15 Step 4: Install the tray 2 option Support unit Paper tray You can increase paper capacity with the optional 250-sheet drawer, which attaches underneath the printer.

Setup Guide
Page 26
Make sure the support unit is listed under Installed Features (see page 30). 5 Insert the tray. 16 Install the tray 2 option When you install the 250-sheet drawer at a later time, be sure to verify the 250-sheet drawer is firmly in place. Note: If you complete setting up the printer, print a menu settings page to turn off the printer before installing the drawer. 4 Align the printer with the front of the support unit and place it on top of the support unit.
Make sure the support unit is listed under Installed Features (see page 30). 5 Insert the tray. 16 Install the tray 2 option When you install the 250-sheet drawer at a later time, be sure to verify the 250-sheet drawer is firmly in place. Note: If you complete setting up the printer, print a menu settings page to turn off the printer before installing the drawer. 4 Align the printer with the front of the support unit and place it on top of the support unit.

Setup Guide
Page 31
..., 10 sheets of the printer holds up to 150 sheets of plain paper, and a single-sheet manual feed. Step 6: Load paper Paper support Top output bin Tray 1 Paper support Manual feed Front output door Tray 2 Your printer has two standard paper sources: tray 1, which is behind the manual feed, to feed paper...
..., 10 sheets of the printer holds up to 150 sheets of plain paper, and a single-sheet manual feed. Step 6: Load paper Paper support Top output bin Tray 1 Paper support Manual feed Front output door Tray 2 Your printer has two standard paper sources: tray 1, which is behind the manual feed, to feed paper...

Setup Guide
Page 32
1 Extend the rear paper support until you hear a click. 2 Flex the sheets back and forth to loosen them, then fan them. 22 Load paper
1 Extend the rear paper support until you hear a click. 2 Flex the sheets back and forth to loosen them, then fan them. 22 Load paper

Setup Guide
Page 34
... the paper output bin until you hear a click. 5 If you are printing on legal size paper, completely extend the front paper support. 6 Open the front output door for a straight-through paper path if you're printing on special media. 7 Slide the paper guides against the edges of ...
... the paper output bin until you hear a click. 5 If you are printing on legal size paper, completely extend the front paper support. 6 Open the front output door for a straight-through paper path if you're printing on special media. 7 Slide the paper guides against the edges of ...

Setup Guide
Page 35
... - If you experience problems feeding envelopes or card stock in tray 1, try printing them one at a time from the manual feed. 1 Extend the front paper support on the paper output bin until you hear a click. 2 If you are loading legal paper, extend the front paper... support all the way up. 3 Open the front output door if you're printing on special media. 4 If loading: • letterhead paper, insert one sheet of ...
... - If you experience problems feeding envelopes or card stock in tray 1, try printing them one at a time from the manual feed. 1 Extend the front paper support on the paper output bin until you hear a click. 2 If you are loading legal paper, extend the front paper... support all the way up. 3 Open the front output door if you're printing on special media. 4 If loading: • letterhead paper, insert one sheet of ...

Setup Guide
Page 38
overfilling the tray may cause paper jams. 7 Make sure the paper is under both corner bucklers and lying flat in the tray. 28 Load paper Corner bucklers 4 Flex the sheets back and forth to loosen them, then fan them. 5 If loading letterhead paper, insert letterhead face down with the top of the tray. 3 If loading A4 or legal size paper, extend the paper support on the front of the page entering the printer first. 6 Do not exceed the stack height indicator;
overfilling the tray may cause paper jams. 7 Make sure the paper is under both corner bucklers and lying flat in the tray. 28 Load paper Corner bucklers 4 Flex the sheets back and forth to loosen them, then fan them. 5 If loading letterhead paper, insert letterhead face down with the top of the tray. 3 If loading A4 or legal size paper, extend the paper support on the front of the page entering the printer first. 6 Do not exceed the stack height indicator;

Setup Guide
Page 48
... systems. Custom drivers are available at www.lexmark.com. Installation instructions Read the detailed online instructions on a printer attached to a computer using a parallel or USB connection. Windows Supported connections The following printer connections are supported: • Parallel (Windows 95/98/Me..., Windows NT 4.0, and Windows 2000) • USB (Windows 98/Me and Windows 2000) Printer drivers ...
... systems. Custom drivers are available at www.lexmark.com. Installation instructions Read the detailed online instructions on a printer attached to a computer using a parallel or USB connection. Windows Supported connections The following printer connections are supported: • Parallel (Windows 95/98/Me..., Windows NT 4.0, and Windows 2000) • USB (Windows 98/Me and Windows 2000) Printer drivers ...
Setup Guide
Page 49
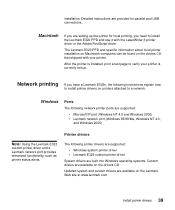
...the LaserWriter 8 printer driver or the Adobe PostScript driver. The following network printer ports are available on printers attached to install the Lexmark E320 PPD and use it with your printer is installed, print a test page to verify your printer. Network printing If you need to...printer drivers 39 After the printer is correctly set up the printer for parallel and USB connections. Updated system and custom drivers are supported: • Microsoft IP port (Windows NT 4.0 and Windows 2000) • Lexmark network port (Windows 95/98/Me, Windows NT 4.0, and Windows 2000) Printer ...
...the LaserWriter 8 printer driver or the Adobe PostScript driver. The following network printer ports are available on printers attached to install the Lexmark E320 PPD and use it with your printer is installed, print a test page to verify your printer. Network printing If you need to...printer drivers 39 After the printer is correctly set up the printer for parallel and USB connections. Updated system and custom drivers are supported: • Microsoft IP port (Windows NT 4.0 and Windows 2000) • Lexmark network port (Windows 95/98/Me, Windows NT 4.0, and Windows 2000) Printer ...

Setup Guide
Page 50
...network printer installation. Macintosh Your printer connects automatically to AppleTalk networks and becomes readily visible to other network clients. NetWare The Lexmark E322n works with your AppleTalk network can be found in adding new network ports. Specific information about the capabilities of a ... you may also find this utility and follow the instructions to install the PPDs. Printing methods The following network printing methods are supported: • Direct IP printing • Shared printing (point and print, peer-to-peer) Creating ports and installing drivers Read...
...network printer installation. Macintosh Your printer connects automatically to AppleTalk networks and becomes readily visible to other network clients. NetWare The Lexmark E322n works with your AppleTalk network can be found in adding new network ports. Specific information about the capabilities of a ... you may also find this utility and follow the instructions to install the PPDs. Printing methods The following network printing methods are supported: • Direct IP printing • Shared printing (point and print, peer-to-peer) Creating ports and installing drivers Read...

Setup Guide
Page 51
The gateway tightly integrates your printer. Additional information about Lexmark support for non-NDPS (queue-based) environments, click View Documentation on the Web at www.lexmark.com/networking/ndps.html. Install printer drivers 41 Novell Distributed Print Services (NDPS) If you have an NDPS environment, we recommend you can easily ...for network printer installation. Non-NDPS (queue-based) For the latest information about network printer installation can get the gateway, the snap-ins, the support files and a white paper with NDPS so you install the Lexmark NDPS IP Gateway.
The gateway tightly integrates your printer. Additional information about Lexmark support for non-NDPS (queue-based) environments, click View Documentation on the Web at www.lexmark.com/networking/ndps.html. Install printer drivers 41 Novell Distributed Print Services (NDPS) If you have an NDPS environment, we recommend you can easily ...for network printer installation. Non-NDPS (queue-based) For the latest information about network printer installation can get the gateway, the snap-ins, the support files and a white paper with NDPS so you install the Lexmark NDPS IP Gateway.
Setup Guide
Page 55
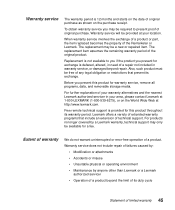
...by: • Modification or attachments • Accidents or misuse • Unsuitable physical or operating environment • Maintenance by a Lexmark warranty, technical support may only be available for warranty service, remove all programs, data, and removable storage media. Before you present this product throughout... to present proof of original purchase. The replacement item assumes the remaining warranty period of the Remarketer or Lexmark. Free remote technical support is provided for exchange is 12 months and starts on the date of original purchase as shown on the...
...by: • Modification or attachments • Accidents or misuse • Unsuitable physical or operating environment • Maintenance by a Lexmark warranty, technical support may only be available for warranty service, remove all programs, data, and removable storage media. Before you present this product throughout... to present proof of original purchase. The replacement item assumes the remaining warranty period of the Remarketer or Lexmark. Free remote technical support is provided for exchange is 12 months and starts on the date of original purchase as shown on the...

User's Guide
Page 5
... 107 Troubleshooting 108 Print server light patterns 109 Normal conditions 109 Error conditions 110 iii Chapter 22: Setting up the network printer 90 Environments we support 90 Connect the hardware 90 Print a network setup page 90 Configure and print 91 TCP/IP ...91 Step 1: Set the IP address, netmask and gateway...
... 107 Troubleshooting 108 Print server light patterns 109 Normal conditions 109 Error conditions 110 iii Chapter 22: Setting up the network printer 90 Environments we support 90 Connect the hardware 90 Print a network setup page 90 Configure and print 91 TCP/IP ...91 Step 1: Set the IP address, netmask and gateway...

User's Guide
Page 8
...of paper or 10 sheets of the media in the top output bin. Support media in tray 1. Increase your printer. Use for example, card stock or labels. Top output bin Tray 1 Paper support Paper support Manual feed Paper guide Front output door Tray 2 Operator panel lights Use... this feature: Tray 1 Rear paper support Front paper support Manual feed Paper guides Operator panel lights Top output bin Front output door ...
...of paper or 10 sheets of the media in the top output bin. Support media in tray 1. Increase your printer. Use for example, card stock or labels. Top output bin Tray 1 Paper support Paper support Manual feed Paper guide Front output door Tray 2 Operator panel lights Use... this feature: Tray 1 Rear paper support Front paper support Manual feed Paper guides Operator panel lights Top output bin Front output door ...

User's Guide
Page 17
... output bin Paper support Tray 1 Manual feed Front output door Tray 2 An exit output bin on top of the printer holds up to 100 sheets. The single-sheet front ...
... output bin Paper support Tray 1 Manual feed Front output door Tray 2 An exit output bin on top of the printer holds up to 100 sheets. The single-sheet front ...

User's Guide
Page 19
7 Loading paper In tray 1 1 Extend the rear paper support until you hear a click. 2 Flex the sheets back and forth to loosen them, then fan them. 17
7 Loading paper In tray 1 1 Extend the rear paper support until you hear a click. 2 Flex the sheets back and forth to loosen them, then fan them. 17

User's Guide
Page 21
Manual feed 2 If loading letterhead paper, insert one sheet of the page pointing down, facing you hear a click. 5 Extend the front paper support on legal-sized paper, completely extend the front paper support. 6 Select the paper size and type from your software application. 7 Start your print job. In the manual feed Use the manual feed to print one sheet of letterhead with the top of paper at a time. 1 Extend the front paper support on the paper output bin until you . 19 If you are printing on the paper output bin until you hear a click.
Manual feed 2 If loading letterhead paper, insert one sheet of the page pointing down, facing you hear a click. 5 Extend the front paper support on legal-sized paper, completely extend the front paper support. 6 Select the paper size and type from your software application. 7 Start your print job. In the manual feed Use the manual feed to print one sheet of letterhead with the top of paper at a time. 1 Extend the front paper support on the paper output bin until you . 19 If you are printing on the paper output bin until you hear a click.

User's Guide
Page 23
In the optional tray 2 1 Grasp the tabs on either side of the tray and pull it completely out of the printer. 2 Before loading paper, push down on the metal plate until it locks into place. 3 If loading A4 or legal sized paper, extend the paper support. 21
In the optional tray 2 1 Grasp the tabs on either side of the tray and pull it completely out of the printer. 2 Before loading paper, push down on the metal plate until it locks into place. 3 If loading A4 or legal sized paper, extend the paper support. 21


