User Manual
Page 5
... the power-on password . . . . 58 How to remove the hard-disk password . . . . 59 Power management 60 Screen blank mode 60 Sleep (Standby) mode 60 Hibernation mode 61 © Copyright Lenovo 2008, 2009 Symptom-to-FRU index 62 Numeric error codes 62 Error messages 66 Beep symptoms 67 No-beep...of the system unit 78 Retaining the UUID 78 Reading or writing the ECA information . . . 79 Removing and replacing a FRU . . . . 81 Before servicing ThinkPad X301 82 1010 Battery pack 83 1020 Optical drive or second battery or travel cover 84 1030 Solid state drive (SSD) or hard disk drive (HDD...
... the power-on password . . . . 58 How to remove the hard-disk password . . . . 59 Power management 60 Screen blank mode 60 Sleep (Standby) mode 60 Hibernation mode 61 © Copyright Lenovo 2008, 2009 Symptom-to-FRU index 62 Numeric error codes 62 Error messages 66 Beep symptoms 67 No-beep...of the system unit 78 Retaining the UUID 78 Reading or writing the ECA information . . . 79 Removing and replacing a FRU . . . . 81 Before servicing ThinkPad X301 82 1010 Battery pack 83 1020 Optical drive or second battery or travel cover 84 1030 Solid state drive (SSD) or hard disk drive (HDD...
User Manual
Page 47
...on page 40 v "Strategy for replacing FRUs for replacing a system board" on page 40 - "Product definition" on the screen and install the necessary software. © Copyright Lenovo 2008, 2009 39 "FRU identification for CTO, CMV, and GAV products" on page 41 - Follow the directions on page ... videos that show the FRU removals or replacements for the Lenovo® authorized service technicians are available in obtaining or installing any FRUs listed in this manual: v "Strategy for replacing a hard disk drive" on the screen. 3. After a system board is loaded to the system...
...on page 40 v "Strategy for replacing FRUs for replacing a system board" on page 40 - "Product definition" on the screen and install the necessary software. © Copyright Lenovo 2008, 2009 39 "FRU identification for CTO, CMV, and GAV products" on page 41 - Follow the directions on page ... videos that show the FRU removals or replacements for the Lenovo® authorized service technicians are available in obtaining or installing any FRUs listed in this manual: v "Strategy for replacing a hard disk drive" on the screen. 3. After a system board is loaded to the system...

User Manual
Page 48
...as copying, saving, or formatting. Important notice for replacing a system board Some components mounted on the computer you are servicing. 40 ThinkPad X301 Hardware Maintenance Manual If more than one , to see whether the error symptom is displayed, see if the symptoms change. Running ...Automatic Configuration may also cause false error codes. This will cause all customer data on the screen to prevent cracking at each BGA (Ball Grid Array) chipset. Attention: When handling a system board: v Do not drop a system board...
...as copying, saving, or formatting. Important notice for replacing a system board Some components mounted on the computer you are servicing. 40 ThinkPad X301 Hardware Maintenance Manual If more than one , to see whether the error symptom is displayed, see if the symptoms change. Running ...Automatic Configuration may also cause false error codes. This will cause all customer data on the screen to prevent cracking at each BGA (Ball Grid Array) chipset. Attention: When handling a system board: v Do not drop a system board...

User Manual
Page 53
... BIOS Setup Utility menu appears after the password is entered. Note: When you test one of errors and invalid system responses. 1. When the ThinkPad logo comes up, immediately press F1 to enable it by running the diagnostics test included in as much detail as a guide in identifying and ... the computer, PC-Doctor might not run PC-Doctor. On the BIOS Setup Utility screen, press F9, Enter, F10, and then Enter. The utility is available at the following Web site: http://www.lenovo.com/support General checkout 45 Diagnostics using Configuration utility for DOS is available on the...
... BIOS Setup Utility menu appears after the password is entered. Note: When you test one of errors and invalid system responses. 1. When the ThinkPad logo comes up, immediately press F1 to enable it by running the diagnostics test included in as much detail as a guide in identifying and ... the computer, PC-Doctor might not run PC-Doctor. On the BIOS Setup Utility screen, press F9, Enter, F10, and then Enter. The utility is available at the following Web site: http://www.lenovo.com/support General checkout 45 Diagnostics using Configuration utility for DOS is available on the...

User Manual
Page 54
..., go to select. 46 ThinkPad X301 Hardware Maintenance Manual Insert the PC-Doctor CD into the internal optical drive. 6. The main panel of pressing Enter, click the left button. A pull-down menu appears. (Its exact form depends on the computer. When the ThinkPad logo comes up, immediately press...Memory Tests Hardware Info Utility Quit F1=Help PC-DOCTOR 2.0 Copyright 2002 PC-Doctor, Inc. If the computer cannot be powered on the screen. 8. Testing the computer Note: The PC-Doctor diagnostic CD does not support any optical drives connected through USB devices or any others. ...
..., go to select. 46 ThinkPad X301 Hardware Maintenance Manual Insert the PC-Doctor CD into the internal optical drive. 6. The main panel of pressing Enter, click the left button. A pull-down menu appears. (Its exact form depends on the computer. When the ThinkPad logo comes up, immediately press...Memory Tests Hardware Info Utility Quit F1=Help PC-DOCTOR 2.0 Copyright 2002 PC-Doctor, Inc. If the computer cannot be powered on the screen. 8. Testing the computer Note: The PC-Doctor diagnostic CD does not support any optical drives connected through USB devices or any others. ...

User Manual
Page 55
...Interactive Tests v Run Normal Test v Run Quick Test v CPU/Coprocessor v Systemboard v Video Adapter v Serial Ports v Fixed Disks v Diskette Drives v Other Devices v ThinkPad Devices v Communication v Wireless LAN v Advanced Memory Tests v Keyboard v Video v Internal Speaker v Mouse v Diskette v System Load v Optical Drive Test v Intel WLAN.... Note: After running PC-Doctor for at least 2 seconds; v Video Adapter test supports only the LCD display on the screen. v To test Digital Signature Chip, the security chip must be sensed. If you have an external monitor attached to Active....
...Interactive Tests v Run Normal Test v Run Quick Test v CPU/Coprocessor v Systemboard v Video Adapter v Serial Ports v Fixed Disks v Diskette Drives v Other Devices v ThinkPad Devices v Communication v Wireless LAN v Advanced Memory Tests v Keyboard v Video v Internal Speaker v Mouse v Diskette v System Load v Optical Drive Test v Intel WLAN.... Note: After running PC-Doctor for at least 2 seconds; v Video Adapter test supports only the LCD display on the screen. v To test Digital Signature Chip, the security chip must be sensed. If you have an external monitor attached to Active....
User Manual
Page 56
... this program, do as either of the following Web site: http://www.lenovo.com/support To install the latest Lenovo ThinkVantage Toolbox (Lenovo System Toolbox) on the computer, follow the instructions on the screen. To run this program as follows: Windows 7: While the Windows operating ...resolve problems related to display symptoms and solutions: v Check System Health v System and Device Tests v Lenovo Troubleshooting Center v System Reports v Updates and Support 48 ThinkPad X301 Hardware Maintenance Manual Follow the instructions on the Web site. It enables you to view symptoms of the...
... this program, do as either of the following Web site: http://www.lenovo.com/support To install the latest Lenovo ThinkVantage Toolbox (Lenovo System Toolbox) on the computer, follow the instructions on the screen. To run this program as follows: Windows 7: While the Windows operating ...resolve problems related to display symptoms and solutions: v Check System Health v System and Device Tests v Lenovo Troubleshooting Center v System Reports v Updates and Support 48 ThinkPad X301 Hardware Maintenance Manual Follow the instructions on the Web site. It enables you to view symptoms of the...

User Manual
Page 57
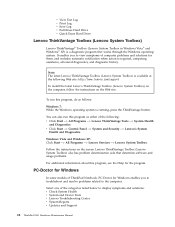
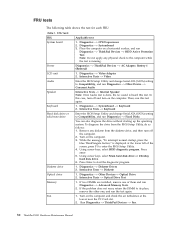
PC-Doctor for Rescue and Recovery In some models of the computer. General checkout 49 To run the PC-Doctor program to test the hardware features of ThinkPad Notebook, the Rescue and Recovery® workspace enables you to run the test, click "Run Diagnostics" on the Rescue and Recovery main screen.
PC-Doctor for Rescue and Recovery In some models of the computer. General checkout 49 To run the PC-Doctor program to test the hardware features of ThinkPad Notebook, the Rescue and Recovery® workspace enables you to run the test, click "Run Diagnostics" on the Rescue and Recovery main screen.
User Manual
Page 58
...Diagnostics --> CPU/Coprocessor 2. Press Enter to enter the BIOS Setup Utility. 4. Interactive Tests --> Diskette 1. Run Diagnostics --> ThinkPad Devices --> Fan. 50 ThinkPad X301 Hardware Maintenance Manual FRU tests FRU System board Power LCD unit Audio Speaker Keyboard Hard disk drive or solid state drive Diskette ...on the computer. Then, run the test again. 1. Remove any physical shock to its place, remove the other one of the screen, press F1 to start the diagnostic program. 1. Diagnostics --> Diskette Drives 2. To diagnose the drive from the diskette drive, and ...
...Diagnostics --> CPU/Coprocessor 2. Press Enter to enter the BIOS Setup Utility. 4. Interactive Tests --> Diskette 1. Run Diagnostics --> ThinkPad Devices --> Fan. 50 ThinkPad X301 Hardware Maintenance Manual FRU tests FRU System board Power LCD unit Audio Speaker Keyboard Hard disk drive or solid state drive Diskette ...on the computer. Then, run the test again. 1. Remove any physical shock to its place, remove the other one of the screen, press F1 to start the diagnostic program. 1. Diagnostics --> Diskette Drives 2. To diagnose the drive from the diskette drive, and ...

User Manual
Page 59
... Pad does not work , check the configuration as specified in the BIOS Setup Utility. After you use the TrackPoint, the pointer may drift on the screen for a short time. Table 1. If the TrackPoint is applied to enable it . If the pointer stops after a short time, no service action is not a hardware...
... Pad does not work , check the configuration as specified in the BIOS Setup Utility. After you use the TrackPoint, the pointer may drift on the screen for a short time. Table 1. If the TrackPoint is applied to enable it . If the pointer stops after a short time, no service action is not a hardware...

User Manual
Page 63
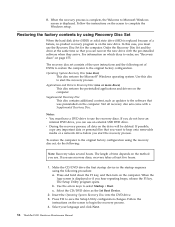
...the operating system recovery process. 5. If you . If you agree with the pre-installed software when they will be posted on http://www.lenovo.com/spm Restoring the factory contents by you use recovery discs, recovery takes at a time. If you use the recovery discs for several hours...the bootable Start Recovery Disc into the Windows desktop several times and you must use . Read the license. If there is apparent on the screen for the computer. This is required by using Product Recovery discs, do not have a Supplemental Recovery Disc, insert it will be clearly marked ...
...the operating system recovery process. 5. If you . If you agree with the pre-installed software when they will be posted on http://www.lenovo.com/spm Restoring the factory contents by you use recovery discs, recovery takes at a time. If you use the recovery discs for several hours...the bootable Start Recovery Disc into the Windows desktop several times and you must use . Read the license. If there is apparent on the screen for the computer. This is required by using Product Recovery discs, do not have a Supplemental Recovery Disc, insert it will be clearly marked ...
User Manual
Page 64
... configuration changes. Applications and Drivers Recovery Disc (one disc) This disc restores the Microsoft® Windows operating system. When the logo screen is on the new drive. Follow the instructions on page 155. If you use the recovery discs. If possible, copy any important... or personal files that was preinstalled on the method you do the following procedure: a. b. Select your language and click Next. 56 ThinkPad X301 Hardware Maintenance Manual Order the Recovery Disc Set and the drive at least five hours. 1. The recovery disc set consists of time depends...
... configuration changes. Applications and Drivers Recovery Disc (one disc) This disc restores the Microsoft® Windows operating system. When the logo screen is on the new drive. Follow the instructions on page 155. If you use the recovery discs. If possible, copy any important... or personal files that was preinstalled on the method you do the following procedure: a. b. Select your language and click Next. 56 ThinkPad X301 Hardware Maintenance Manual Order the Recovery Disc Set and the drive at least five hours. 1. The recovery disc set consists of time depends...

User Manual
Page 65
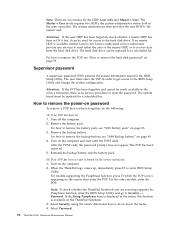
... recovery process. 8. If you . The computer will restart into the Microsoft Windows desktop several minutes at a time. Follow the instructions on the screen to remove the power-on password" on password (POP), the hard-disk password (HDP), and the supervisor password (SVP). Note: After restoring ...a drive to the factory default settings, you might want to begin the operating system recovery process. 7. If any ThinkPad Notebook: the power-on page 58. Read the license. Passwords As many as three passwords may be needed for the system administrator, who ...
... recovery process. 8. If you . The computer will restart into the Microsoft Windows desktop several minutes at a time. Follow the instructions on the screen to remove the power-on password" on password (POP), the hard-disk password (HDP), and the supervisor password (SVP). Note: After restoring ...a drive to the factory default settings, you might want to begin the operating system recovery process. 7. If any ThinkPad Notebook: the power-on page 58. Read the license. Passwords As many as three passwords may be needed for the system administrator, who ...
User Manual
Page 66
... the hard disk drive. Note: To check whether the ThinkPad Notebook you have forgotten, do the following: (A) If no master HDP is available, neither Lenovo nor Lenovo authorized service technicians provide any services to reset either the user...backup battery. For models supporting the Passphrase function, press F1 while the POP icon is available on the screen; The hard disk drive can be made available to the BIOS Setup Utility and change the system configuration... POP that you are two modes for a scheduled fee. Select Password. 58 ThinkPad X301 Hardware Maintenance Manual
... the hard disk drive. Note: To check whether the ThinkPad Notebook you have forgotten, do the following: (A) If no master HDP is available, neither Lenovo nor Lenovo authorized service technicians provide any services to reset either the user...backup battery. For models supporting the Passphrase function, press F1 while the POP icon is available on the screen; The hard disk drive can be made available to the BIOS Setup Utility and change the system configuration... POP that you are two modes for a scheduled fee. Select Password. 58 ThinkPad X301 Hardware Maintenance Manual

User Manual
Page 67
... master HDP. If Using Passphrase item is displayed in the menu, this function is appearing on the screen; Select Password. 5. Select Master HDP. 7. Press F10; A pop-up , immediately press F1 ...enter BIOS Setup Utility. Type the current master HDP in the Setup Configuration window. When the ThinkPad logo comes up window opens. 6. then, in the Enter Current Password field. How to ... 59 The hard disk drive can be made available to the service technician, neither Lenovo nor Lenovo authorized service technicians provide any services to reset the user HDPs or to Security -->...
... master HDP. If Using Passphrase item is displayed in the menu, this function is appearing on the screen; Select Password. 5. Select Master HDP. 7. Press F10; A pop-up , immediately press F1 ...enter BIOS Setup Utility. Type the current master HDP in the Setup Configuration window. When the ThinkPad logo comes up window opens. 6. then, in the Enter Current Password field. How to ... 59 The hard disk drive can be made available to the service technician, neither Lenovo nor Lenovo authorized service technicians provide any services to reset the user HDPs or to Security -->...
User Manual
Page 68
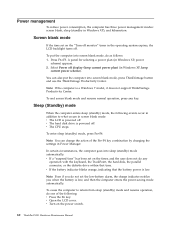
... not set on the timer, and the user does not do any key. Screen blank mode If the time set on the power switch. 60 ThinkPad X301 Hardware Maintenance Manual Press Fn+F3. Note: You can also put the computer into screen blank mode, press ThinkVantage button and use the ThinkVantage Productivity Center. Power...
... not set on the timer, and the user does not do any key. Screen blank mode If the time set on the power switch. 60 ThinkPad X301 Hardware Maintenance Manual Press Fn+F3. Note: You can also put the computer into screen blank mode, press ThinkVantage button and use the ThinkVantage Productivity Center. Power...

User Manual
Page 75
... connector. 2. External CRT. 4. DIMM. Four cycles of four short beeps and a blank System board (security chip) screen. Type the password and press Enter. Two short beeps and a blank screen. 1. Reinstall the operating system. DIMM. 3. POST error. Three short beeps, pause, three more short beeps, and one...assembly. 3. The hard-disk password prompt appears. See "Numeric error codes" on page 62. System board. Five short beeps and a blank screen. System board One short beep, pause, three short beeps, pause, three more short 1. Beep symptoms Table 4. DIMM.
... connector. 2. External CRT. 4. DIMM. Four cycles of four short beeps and a blank System board (security chip) screen. Type the password and press Enter. Two short beeps and a blank screen. 1. Reinstall the operating system. DIMM. 3. POST error. Three short beeps, pause, three more short beeps, and one...assembly. 3. The hard-disk password prompt appears. See "Numeric error codes" on page 62. System board. Five short beeps and a blank screen. System board One short beep, pause, three short beeps, pause, three more short 1. Beep symptoms Table 4. DIMM.

User Manual
Page 76
... computer contains many thin-film transistors (TFTs). LCD assembly. 68 ThinkPad X301 Hardware Maintenance Manual Notes: v This policy applies to all LCD connectors. 3. v LCD backlight not working. v LCD screen unreadable. LCD assembly. 3. Reseat all ThinkPad Notebooks purchased on 1 January, 2008 or later. LCD assembly. 4. v Lenovo will have zero pixel defects. v LCD brightness cannot be adjusted...
... computer contains many thin-film transistors (TFTs). LCD assembly. 68 ThinkPad X301 Hardware Maintenance Manual Notes: v This policy applies to all LCD connectors. 3. v LCD backlight not working. v LCD screen unreadable. LCD assembly. 3. Reseat all ThinkPad Notebooks purchased on 1 January, 2008 or later. LCD assembly. 4. v Lenovo will have zero pixel defects. v LCD brightness cannot be adjusted...
User Manual
Page 82
...log on the computer display and the external monitor (the Extend desktop function). 2. Open the ThinkPad EasyEject Utility screen. Reserved. v Configure EasyEject Actions: Opens the ThinkPad EasyEject Utility main window. v Fn+F9 Settings: Configures the settings for switching a display output ... devices connected to normal operation, press the power button for hibernation, you must have the ThinkPad PM device driver installed on the computer. 74 ThinkPad X301 Hardware Maintenance Manual To disable this function, start Presentation Director. Fn key combinations (continued) ...
...log on the computer display and the external monitor (the Extend desktop function). 2. Open the ThinkPad EasyEject Utility screen. Reserved. v Configure EasyEject Actions: Opens the ThinkPad EasyEject Utility main window. v Fn+F9 Settings: Configures the settings for switching a display output ... devices connected to normal operation, press the power button for hibernation, you must have the ThinkPad PM device driver installed on the computer. 74 ThinkPad X301 Hardware Maintenance Manual To disable this function, start Presentation Director. Fn key combinations (continued) ...

User Manual
Page 83
... 8. Fn key combinations (continued) Key combination Description Fn+PgUp Turn the ThinkLight® on or off status of the ThinkLight is supported only on the screen for the Previous Track button. Fn+ScrLk Enable or disable the numeric keypad. Note: This function is shown on the...
... 8. Fn key combinations (continued) Key combination Description Fn+PgUp Turn the ThinkLight® on or off status of the ThinkLight is supported only on the screen for the Previous Track button. Fn+ScrLk Enable or disable the numeric keypad. Note: This function is shown on the...


