(English) Access Connections Profile Deployment guide
Page 17
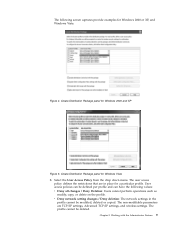
...: Figure 4. Chapter 3. Create Distribution Package panel for Windows 2000 and XP Figure 5. User access policies can be defined per profile and can have the following screen captures provide examples for a particular profile. The profile cannot be modified, deleted or copied. The following values: v Deny all changes / Deny Deletion: Users cannot perform...
...: Figure 4. Chapter 3. Create Distribution Package panel for Windows 2000 and XP Figure 5. User access policies can be defined per profile and can have the following screen captures provide examples for a particular profile. The profile cannot be modified, deleted or copied. The following values: v Deny all changes / Deny Deletion: Users cannot perform...
(English) Access Connections Profile Deployment guide
Page 20
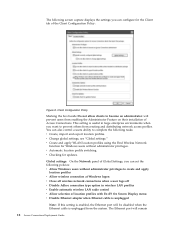
... settings: On the Network panel of the Client Configuration Policy: Figure 8. You can also control a users ability to complete the following screen capture displays the settings you can configure for the Client tab of Global Settings, you can set the following policies: v Allow Windows users...be disabled when the Ethernet cable is unplugged from enabling the Administrator Feature on their installation of location profiles with Fn+F5 On Screen Display menu v Disable Ethernet adapter when Ethernet cable is unplugged Note: If this setting is useful in wireless LAN profiles v Enable...
... settings: On the Network panel of the Client Configuration Policy: Figure 8. You can also control a users ability to complete the following screen capture displays the settings you can configure for the Client tab of Global Settings, you can set the following policies: v Allow Windows users...be disabled when the Ethernet cable is unplugged from enabling the Administrator Feature on their installation of location profiles with Fn+F5 On Screen Display menu v Disable Ethernet adapter when Ethernet cable is unplugged Note: If this setting is useful in wireless LAN profiles v Enable...
(English) Access Connections Profile Deployment guide
Page 22
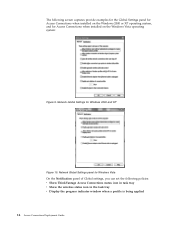
Network Global Settings panel for Windows Vista On the Notification panel of Global settings, you can set the following screen captures provide examples for the Global Settings panel for Access Connections when installed on the Windows 2000 or XP operating system, and for Windows 2000 ...
Network Global Settings panel for Windows Vista On the Notification panel of Global settings, you can set the following screen captures provide examples for the Global Settings panel for Access Connections when installed on the Windows 2000 or XP operating system, and for Windows 2000 ...
(English) Access Connections Profile Deployment guide
Page 33
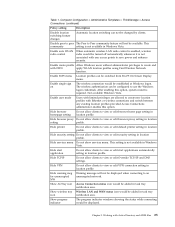
... create and with Ethernet or wireless connections and switch between any access points to Peer community feature will not be switched from Fn+F5 On Screen Display menu. Table 1. Disable peer to peer The Peer to save power and enhance security. Show progress indicator The progress indicator windows showing the status...
... create and with Ethernet or wireless connections and switch between any access points to Peer community feature will not be switched from Fn+F5 On Screen Display menu. Table 1. Disable peer to peer The Peer to save power and enhance security. Show progress indicator The progress indicator windows showing the status...

(English) Access Connections Profile Deployment guide
Page 40
... contains the Intel® Pro/Wireless Driver (11a/b/g and 11b/g). v LSID is the driver that is the folder that contains the ThinkPad Wireless LAN Adapter Software (11a/b, 11b/g, and 11a/b/g) setup. Using a lower layer system BIOS interface, Access Connections controls wireless devices ...directories for Access Connections to replace all the relevant packages with Lenovo ThinkPad /L3000 system BIOS. v WLLANATH is the folder that you extracted the downloaded package. v IBMPM for the Hotkey utilities package and On screen display. Copy the following files are placed inside the folder ...
... contains the Intel® Pro/Wireless Driver (11a/b/g and 11b/g). v LSID is the driver that is the folder that contains the ThinkPad Wireless LAN Adapter Software (11a/b, 11b/g, and 11a/b/g) setup. Using a lower layer system BIOS interface, Access Connections controls wireless devices ...directories for Access Connections to replace all the relevant packages with Lenovo ThinkPad /L3000 system BIOS. v WLLANATH is the folder that you extracted the downloaded package. v IBMPM for the Hotkey utilities package and On screen display. Copy the following files are placed inside the folder ...
Hardware Maintenance Manual
Page 3
...36 Hard-disk password 36 Supervisor password 37 How to remove the power-on password . . . 37 © Copyright Lenovo 2012 How to remove the hard-disk password . . . 37 Power management 38 Screen blank mode 38 Sleep mode 38 Hibernation mode 38 Symptom-to do first 29 Checkout guide 30... Lenovo Solution Center 30 Quick test programs 30 UEFI diagnostic program 31 Bootable diagnostic programs 31 Power system checkout ...
...36 Hard-disk password 36 Supervisor password 37 How to remove the power-on password . . . 37 © Copyright Lenovo 2012 How to remove the hard-disk password . . . 37 Power management 38 Screen blank mode 38 Sleep mode 38 Hibernation mode 38 Symptom-to do first 29 Checkout guide 30... Lenovo Solution Center 30 Quick test programs 30 UEFI diagnostic program 31 Bootable diagnostic programs 31 Power system checkout ...
Hardware Maintenance Manual
Page 31
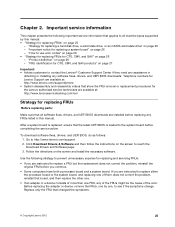
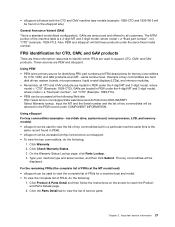
... a hard disk drive, a solid state drive, or an mSATA solid state drive" on page 27 Important: • Advise customers to contact the Lenovo® Customer Support Center if they need any software fixes, drivers, and UEFI BIOS downloads. "FRU identification for replacing FRUs Before replacing parts: Make ... Download Drivers and Software page. 3. Go to prevent unnecessary expense for replacing FRUs" on page 26 - Follow the directions on the screen to the system board before completing the service action. Click Download Drivers & Software and then follow the instructions on the...
... a hard disk drive, a solid state drive, or an mSATA solid state drive" on page 27 Important: • Advise customers to contact the Lenovo® Customer Support Center if they need any software fixes, drivers, and UEFI BIOS downloads. "FRU identification for replacing FRUs Before replacing parts: Make ... Download Drivers and Software page. 3. Go to prevent unnecessary expense for replacing FRUs" on page 26 - Follow the directions on the screen to the system board before completing the service action. Click Download Drivers & Software and then follow the instructions on the...
Hardware Maintenance Manual
Page 32
... for replacing FRUs for CTO, CMV, and GAV Product definition Dynamic Configure To Order (CTO) This provides the ability for a customer to configure a Lenovo solution from an eSite, and have been changed. A CMV is a unique configuration that the customer has a current backup of any excessive force to ...Important notice for the "cache" function and the Intel Rapid Start Technology. How to use error codes Use the error codes displayed on the screen to replace the mSATA solid state drive by themselves. A unique 4-digit MT and 3-digit model is built and shipped directly to be used...
... for replacing FRUs for CTO, CMV, and GAV Product definition Dynamic Configure To Order (CTO) This provides the ability for a customer to configure a Lenovo solution from an eSite, and have been changed. A CMV is a unique configuration that the customer has a current backup of any excessive force to ...Important notice for the "cache" function and the Intel Rapid Start Technology. How to use error codes Use the error codes displayed on the screen to replace the mSATA solid state drive by themselves. A unique 4-digit MT and 3-digit model is built and shipped directly to be used...
Hardware Maintenance Manual
Page 33
... type and serial number, and then click Submit. Important service information 27 The MTM portion of key commodities will be accessed at http://www.lenovo.com/support. • To view the key commodities, do ?lndocid=LOOK-WARNTY Select Warranty lookup. Example of key commodities built in a ...particular machine serial (this is the same record found on the screen to view the list of FRUs at an MT - hard disk drive, system board, microprocessor, LCD, and memory module) • eSupport can...
... type and serial number, and then click Submit. Important service information 27 The MTM portion of key commodities will be accessed at http://www.lenovo.com/support. • To view the key commodities, do ?lndocid=LOOK-WARNTY Select Warranty lookup. Example of key commodities built in a ...particular machine serial (this is the same record found on the screen to view the list of FRUs at an MT - hard disk drive, system board, microprocessor, LCD, and memory module) • eSupport can...
Hardware Maintenance Manual
Page 36
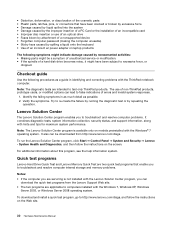
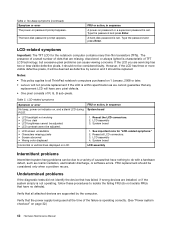
System Health and Diagnostics, and then follow the instructions on the screen. It also can be a symptom of unauthorized service or modification. • If the spindle of a hard disk drive becomes noisy, it might have been cracked ... of a nonsupported device • Forgotten computer password (making the computer unusable) • Sticky keys caused by spilling a liquid onto the keyboard • Use of non-ThinkPad products, prototype cards, or modified options can download the quick test programs from http://www.lenovo.com/diags. Verify the symptoms. Try to test only...
System Health and Diagnostics, and then follow the instructions on the screen. It also can be a symptom of unauthorized service or modification. • If the spindle of a hard disk drive becomes noisy, it might have been cracked ... of a nonsupported device • Forgotten computer password (making the computer unusable) • Sticky keys caused by spilling a liquid onto the keyboard • Use of non-ThinkPad products, prototype cards, or modified options can download the quick test programs from http://www.lenovo.com/diags. Verify the symptoms. Try to test only...
Hardware Maintenance Manual
Page 37
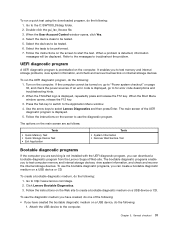
...bootable diagnostic medium on the Web site to be displayed. When the ThinkPad logo is displayed. 5. Follow the instructions on a USB device or CD. Turn on the computer. Follow the instructions on the screen to use the diagnostic medium you have created the bootable diagnostic medium ... check the power sources. If an error code is preinstalled on the computer. The main screen of the following: • If you can download a bootable diagnostic program from the Lenovo Support Web site. UEFI diagnostic program A UEFI diagnostic program is displayed, go to test ...
...bootable diagnostic medium on the Web site to be displayed. When the ThinkPad logo is displayed. 5. Follow the instructions on a USB device or CD. Turn on the computer. Follow the instructions on the screen to use the diagnostic medium you have created the bootable diagnostic medium ... check the power sources. If an error code is preinstalled on the computer. The main screen of the following: • If you can download a bootable diagnostic program from the Lenovo Support Web site. UEFI diagnostic program A UEFI diagnostic program is displayed, go to test ...
Hardware Maintenance Manual
Page 38
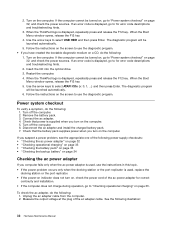
... of the ac adapter cable. Use the arrow keys to select ATAPI CDx (x: 0, 1, ...) and then press Enter. Restart the computer. 4. When the ThinkPad logo is displayed, repeatedly press and release the F12 key. Check that the battery pack supplies power when you turn on page 32, and check..., release the F12 key. 5. Turn on the computer. 5. If the computer cannot be turned on, go to "Checking operational charging" on the screen to use the diagnostic program. Check that power is displayed, go to "Power system checkout" on page 32, and check the power sources. Measure ...
... of the ac adapter cable. Use the arrow keys to select ATAPI CDx (x: 0, 1, ...) and then press Enter. Restart the computer. 4. When the ThinkPad logo is displayed, repeatedly press and release the F12 key. Check that the battery pack supplies power when you turn on page 32, and check..., release the F12 key. 5. Turn on the computer. 5. If the computer cannot be turned on, go to "Checking operational charging" on the screen to use the diagnostic program. Check that power is displayed, go to "Power system checkout" on page 32, and check the power sources. Measure ...
Hardware Maintenance Manual
Page 41
...time so that you hear repeating beeps, release the F1 key. When the logo screen is on the drive will be posted on page 38 • "Symptom-to begin the recovery process. 4. The ThinkPad Setup program opens. Select the CD/DVD drive as updates to use recovery discs,...to the original factory configuration using Recovery Disc Set" on page 35 • "Passwords" on page 36 • "Power management" on http://www.lenovo.com/support. For information on the computer. • Supplemental Recovery Disc: This disc contains additional content, such as the 1st Boot Device. 2. ...
...time so that you hear repeating beeps, release the F1 key. When the logo screen is on the drive will be posted on page 38 • "Symptom-to begin the recovery process. 4. The ThinkPad Setup program opens. Select the CD/DVD drive as updates to use recovery discs,...to the original factory configuration using Recovery Disc Set" on page 35 • "Passwords" on page 36 • "Power management" on http://www.lenovo.com/support. For information on the computer. • Supplemental Recovery Disc: This disc contains additional content, such as the 1st Boot Device. 2. ...
Hardware Maintenance Manual
Page 42
... to begin the process of the data has been copied from being powered on the screen. 6. This is displayed. Start the ThinkPad Setup program and then press F9 to save changes and exit the ThinkPad Setup program. Note: If only a supervisor password is required. Note: There are...booted. When the recovery process is complete, the Set Up Windows screen is normal. 10. Press F10 to restore the default settings. The computer does not start until the password is available, neither Lenovo nor Lenovo authorized service technicians provide 36 Hardware Maintenance Manual Attention: If the...
... to begin the process of the data has been copied from being powered on the screen. 6. This is displayed. Start the ThinkPad Setup program and then press F9 to save changes and exit the ThinkPad Setup program. Note: If only a supervisor password is required. Note: There are...booted. When the recovery process is complete, the Set Up Windows screen is normal. 10. Press F10 to restore the default settings. The computer does not start until the password is available, neither Lenovo nor Lenovo authorized service technicians provide 36 Hardware Maintenance Manual Attention: If the...
Hardware Maintenance Manual
Page 43
... and cannot be made available to the service technician, neither Lenovo nor Lenovo authorized service technicians provide any services to reset either the user hard disk password or the master hard disk password, or to enter the ThinkPad Setup program. How to remove the power-on password To... appearing on password: 1. When the power-on password icon is known to the service technician, do the following to remove the power-on the screen, enter the supervisor password. 3. Select Security. 4. Then leave the Enter New Password field blank, and press Enter twice. 7. See "1010 Battery...
... and cannot be made available to the service technician, neither Lenovo nor Lenovo authorized service technicians provide any services to reset either the user hard disk password or the master hard disk password, or to enter the ThinkPad Setup program. How to remove the power-on password To... appearing on password: 1. When the power-on password icon is known to the service technician, do the following to remove the power-on the screen, enter the supervisor password. 3. Select Security. 4. Then leave the Enter New Password field blank, and press Enter twice. 7. See "1010 Battery...
Hardware Maintenance Manual
Page 44
... Card device. • The time set on the timer, and the user does not do any action to what occurs in screen blank mode: • The LCD is powered off. • The hard disk drive is low. Wait a few seconds before... Select Hard-disk x password where x is signaled by changing the settings in addition to reenter operation mode. To end screen blank mode and resume normal operation, press any input immediately after it enters sleep mode. Select Password. 5. Type the current... The computer does not accept any key. Press F10 to save changes and exit the ThinkPad Setup program.
... Card device. • The time set on the timer, and the user does not do any action to what occurs in screen blank mode: • The LCD is powered off. • The hard disk drive is low. Wait a few seconds before... Select Hard-disk x password where x is signaled by changing the settings in addition to reenter operation mode. To end screen blank mode and resume normal operation, press any input immediately after it enters sleep mode. Select Password. 5. Type the current... The computer does not accept any key. Press F10 to save changes and exit the ThinkPad Setup program.
Hardware Maintenance Manual
Page 48
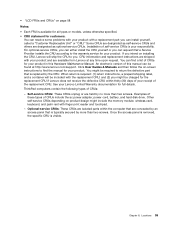
...more visible defective pixels, it will be adjusted. • LCD screen unreadable • Characters missing pixels • Screen abnormal • Wrong color displayed Horizontal or vertical lines displayed on... operating correctly. (See "Power system checkout" on 1 January, 2008 or later. • Lenovo will have zero pixel defects. • One pixel consists of dots that all LCD connectors. ...3. A hard-disk password is not operating, follow these procedures to all ThinkPad notebook computers purchased on page 32.) 42 Hardware Maintenance Manual Notes: • This ...
...more visible defective pixels, it will be adjusted. • LCD screen unreadable • Characters missing pixels • Screen abnormal • Wrong color displayed Horizontal or vertical lines displayed on... operating correctly. (See "Power system checkout" on 1 January, 2008 or later. • Lenovo will have zero pixel defects. • One pixel consists of dots that all LCD connectors. ...3. A hard-disk password is not operating, follow these procedures to all ThinkPad notebook computers purchased on page 32.) 42 Hardware Maintenance Manual Notes: • This ...
Hardware Maintenance Manual
Page 52
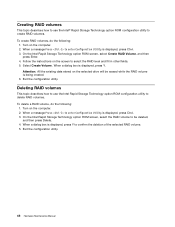
...dialog box is displayed, press Ctr+I . 3. Turn on the computer. 2. Turn on the computer. 2. On the Intel Rapid Storage Technology option ROM screen, select the RAID volume to enter Configuration Utility is displayed, press Y to select the RAID level and fill in other fields. 5. When a message... following : 1. When a message Press to enter Configuration Utility is displayed, press Y. Attention: All the existing data stored on the screen to confirm the deletion of the selected RAID volume. 5. Creating RAID volumes This topic describes how to use the Intel Rapid Storage Technology...
...dialog box is displayed, press Ctr+I . 3. Turn on the computer. 2. Turn on the computer. 2. On the Intel Rapid Storage Technology option ROM screen, select the RAID volume to enter Configuration Utility is displayed, press Y to select the RAID level and fill in other fields. 5. When a message... following : 1. When a message Press to enter Configuration Utility is displayed, press Y. Attention: All the existing data stored on the screen to confirm the deletion of the selected RAID volume. 5. Creating RAID volumes This topic describes how to use the Intel Rapid Storage Technology...
Hardware Maintenance Manual
Page 61
...card, keyboard, and palm rest with finger print reader and touchpad. - When return is visible. ThinkPad computers contain the following types of this Hardware Maintenance Manual. Other self-service CRUs depending on page... yourself or you can be required to the warranty service for the replacement CRU if Lenovo does not receive the defective CRU within the computer that are designated as optional-service ... CRU; You might be included with your product. If you intend on -screen instructions to you might be found at any time upon request. Click User Guides & Manuals...
...card, keyboard, and palm rest with finger print reader and touchpad. - When return is visible. ThinkPad computers contain the following types of this Hardware Maintenance Manual. Other self-service CRUs depending on page... yourself or you can be required to the warranty service for the replacement CRU if Lenovo does not receive the defective CRU within the computer that are designated as optional-service ... CRU; You might be included with your product. If you intend on -screen instructions to you might be found at any time upon request. Click User Guides & Manuals...

Hardware Maintenance Manual
Page 67
... thirty (30) days of your product. See your responsibility. Chapter 9. In the ThinkPad notebook computer, this Hardware Maintenance Manual. Click User Guides & Manuals and then follow the on installing the CRU, Lenovo will be found at any FRU. For the part number of the screw kit, ...the plastic part: • Logic card to return the defective part that have one. CRU statement for full details. If you intend on -screen instructions to use each screw only once. • Use a torque screwdriver if you . An electronic version of self-service CRUs is replaced by...
... thirty (30) days of your product. See your responsibility. Chapter 9. In the ThinkPad notebook computer, this Hardware Maintenance Manual. Click User Guides & Manuals and then follow the on installing the CRU, Lenovo will be found at any FRU. For the part number of the screw kit, ...the plastic part: • Logic card to return the defective part that have one. CRU statement for full details. If you intend on -screen instructions to use each screw only once. • Use a torque screwdriver if you . An electronic version of self-service CRUs is replaced by...


