
Lenovo G770 Userguide V1.0
Page 3
... 1. OneKey Rescue system 26 OneKey Rescue system 26 Chapter 5. Troubleshooting...29 Frequently asked questions........ 29 Troubleshooting 31 Appendix A. Learning the basics 7 First use 7 Using AC adapter and battery .....9 Using the touchpad 11 Using the keyboard 12 Connecting external devices.......14 Special keys and buttons 17 System status indicators 18 Securing your...
... 1. OneKey Rescue system 26 OneKey Rescue system 26 Chapter 5. Troubleshooting...29 Frequently asked questions........ 29 Troubleshooting 31 Appendix A. Learning the basics 7 First use 7 Using AC adapter and battery .....9 Using the touchpad 11 Using the keyboard 12 Connecting external devices.......14 Special keys and buttons 17 System status indicators 18 Securing your...
Lenovo G770 Userguide V1.0
Page 8
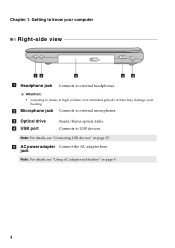
Attention: • Listening to external microphones. c Optical drive d USB port Reads/Burns optical disks. Note: For details, see "Using AC adapter and battery" on page 15. e AC power adapter Connect the AC adapter here. b Microphone jack Connects to music at high volume over extended periods of time may damage your computer Right-side view 12 3 4 5 a Headphone jack Connects to USB devices. Connects to external headphones. Getting to know your hearing. Chapter 1. jack Note: For details, see "Connecting USB devices" on page 9. 4
Attention: • Listening to external microphones. c Optical drive d USB port Reads/Burns optical disks. Note: For details, see "Using AC adapter and battery" on page 15. e AC power adapter Connect the AC adapter here. b Microphone jack Connects to music at high volume over extended periods of time may damage your computer Right-side view 12 3 4 5 a Headphone jack Connects to USB devices. Connects to external headphones. Getting to know your hearing. Chapter 1. jack Note: For details, see "Connecting USB devices" on page 9. 4

Lenovo G770 Userguide V1.0
Page 10
Getting to keep the battery pack secured in place. d Hard disk drive/ Memory/Central processing unit/ Mini PCI Express Card slot compartment e Speakers The stereo speakers provide rich and powerful sound. 6 Chapter 1. c Battery latch spring loaded The spring-loaded battery latch keeps the battery pack secured in place. b Battery latch manual The manual battery latch is used to know your computer Bottom view 1 2 3 4 5 a Battery pack For details, see "Using AC adapter and battery" on page 9.
Getting to keep the battery pack secured in place. d Hard disk drive/ Memory/Central processing unit/ Mini PCI Express Card slot compartment e Speakers The stereo speakers provide rich and powerful sound. 6 Chapter 1. c Battery latch spring loaded The spring-loaded battery latch keeps the battery pack secured in place. b Battery latch manual The manual battery latch is used to know your computer Bottom view 1 2 3 4 5 a Battery pack For details, see "Using AC adapter and battery" on page 9.

Lenovo G770 Userguide V1.0
Page 11
... The supplied battery pack is first used. Chapter 2. Connecting the computer to an electrical outlet 1 Connect the power cord to the AC adapter. 2 Connect the AC adapter to the AC power adapter jack of the computer firmly. 3 Plug the power cord into an electrical outlet. „ Turning on the computer Press the power...
... The supplied battery pack is first used. Chapter 2. Connecting the computer to an electrical outlet 1 Connect the power cord to the AC adapter. 2 Connect the AC adapter to the AC power adapter jack of the computer firmly. 3 Plug the power cord into an electrical outlet. „ Turning on the computer Press the power...

Lenovo G770 Userguide V1.0
Page 13
You need to charge the battery or replace it with a fully charged one. Learning the basics Using AC adapter and battery „ Checking battery status You can determine the percentage of the battery pack, the computer does not start recharging the battery immediately after ...
You need to charge the battery or replace it with a fully charged one. Learning the basics Using AC adapter and battery „ Checking battery status You can determine the percentage of the battery pack, the computer does not start recharging the battery immediately after ...
Lenovo G770 Userguide V1.0
Page 20
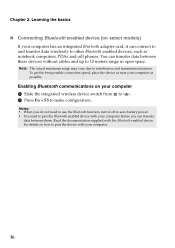
..., PDAs and cell phones. Read the documentation supplied with the Bluetooth enabled device for details on select models) If your computer has an integrated Bluetooth adapter card, it off to save battery power. • You need to use the Bluetooth function, turn it can connect to and transfer data wirelessly to...
..., PDAs and cell phones. Read the documentation supplied with the Bluetooth enabled device for details on select models) If your computer has an integrated Bluetooth adapter card, it off to save battery power. • You need to use the Bluetooth function, turn it can connect to and transfer data wirelessly to...
Lenovo G770 Userguide V1.0
Page 30
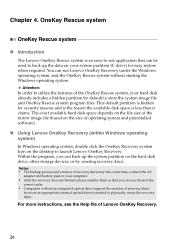
... them in the correct order. • Computers without starting the Windows operating system. Chapter 4. Within the program, you can run Lenovo OneKey Recovery under the Windows operating system, and the OneKey Rescue system without an integrated optical drive support the creation of recovery discs may... take some time, connect the AC adapter and battery pack to physically create the recovery discs. Notes: • The backup process and creation of recovery discs; however an ...
... them in the correct order. • Computers without starting the Windows operating system. Chapter 4. Within the program, you can run Lenovo OneKey Recovery under the Windows operating system, and the OneKey Rescue system without an integrated optical drive support the creation of recovery discs may... take some time, connect the AC adapter and battery pack to physically create the recovery discs. Notes: • The backup process and creation of recovery discs; however an ...
Lenovo G770 Userguide V1.0
Page 35
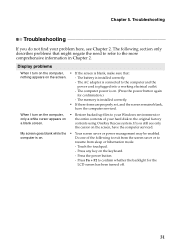
... screen saver or power management may be enabled. computer is on the screen. - Touch the touchpad. - Troubleshooting Troubleshooting If you still see Chapter 2. The AC adapter is connected to the computer and the power cord is installed correctly. • If these items are properly set, and the screen remains blank, have...
... screen saver or power management may be enabled. computer is on the screen. - Touch the touchpad. - Troubleshooting Troubleshooting If you still see Chapter 2. The AC adapter is connected to the computer and the power cord is installed correctly. • If these items are properly set, and the screen remains blank, have...
Lenovo G770 Userguide V1.0
Page 36
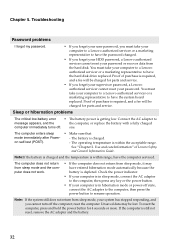
...is getting low. Sleep or hibernation problems The critical low-battery error • The battery power is still not reset, remove the AC adapter and the battery. 32 See "Chapter 2. Proof of purchase is depleted. The battery is within the acceptable range. Note: If the ...range, have the password changed. • If you cannot turn off the computer; Use and care Information" of Lenovo Safety and General Information Guide. Connect the AC adapter to message appears, and the the computer, or replace the battery with a fully charged computer immediately turns off state,...
...is getting low. Sleep or hibernation problems The critical low-battery error • The battery power is still not reset, remove the AC adapter and the battery. 32 See "Chapter 2. Proof of purchase is depleted. The battery is within the acceptable range. Note: If the ...range, have the password changed. • If you cannot turn off the computer; Use and care Information" of Lenovo Safety and General Information Guide. Connect the AC adapter to message appears, and the the computer, or replace the battery with a fully charged computer immediately turns off state,...
Lenovo G770 Userguide V1.0
Page 37
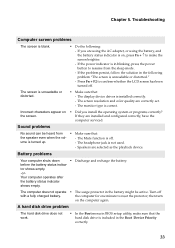
... sound can be active. The Mute function is turned up. - Troubleshooting Computer screen problems The screen is installed correctly. - If they are using the AC adapter, or using the battery, and the battery status indicator is included in BIOS setup utility, make sure that : - tor shows empty. -or- The display device...
... sound can be active. The Mute function is turned up. - Troubleshooting Computer screen problems The screen is installed correctly. - If they are using the AC adapter, or using the battery, and the battery status indicator is included in BIOS setup utility, make sure that : - tor shows empty. -or- The display device...
Lenovo G770 Userguide V1.0
Page 38
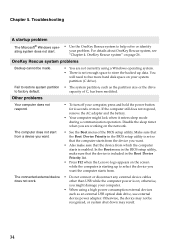
... and hold the power button for 4 seconds or more hard disk space on page 26. If the computer still does not respond, remove the AC adapter and the battery. • Your computer might damage your problem. otherwise, you want. • Also make sure that the device is included in the... BIOS setup utility is set so that the Boot Device Priority in the Boot Device Priority list. • Press F12 when the Lenovo logo appears on the network. Disable the sleep timer when you are not currently using a high power consumption external devices such as the partition ...
... and hold the power button for 4 seconds or more hard disk space on page 26. If the computer still does not respond, remove the AC adapter and the battery. • Your computer might damage your problem. otherwise, you want. • Also make sure that the device is included in the... BIOS setup utility is set so that the Boot Device Priority in the Boot Device Priority list. • Press F12 when the Lenovo logo appears on the network. Disable the sleep timer when you are not currently using a high power consumption external devices such as the partition ...

Lenovo G770 Userguide V1.0
Page 39
... all cables from the computer. 2 Close the computer display, and turn the computer over and reconnect the AC adapter. 35 CRU instructions Note: Use only the battery provided by Lenovo. Any other battery could ignite or explode. To replace the battery, do the following: 1 Turn off the computer, or enter hibernation mode...
... all cables from the computer. 2 Close the computer display, and turn the computer over and reconnect the AC adapter. 35 CRU instructions Note: Use only the battery provided by Lenovo. Any other battery could ignite or explode. To replace the battery, do the following: 1 Turn off the computer, or enter hibernation mode...

Lenovo G770 Userguide V1.0
Page 41
then disconnect the AC adapter and all cables from the computer. 2 Close the computer display, and then turn the computer over. 3 Remove the battery pack. 4 Remove the Hard disk drive/Memory/Central processing unit/Mini PCI Express Card slot compartment cover. a.Loosen the screws that secure the compartment cover a. b.Remove the compartment cover b . 11 1 1 2 1 1 5 Remove the frame fixing screws c . 3 3 37 Appendix A. CRU instructions To replace the hard disk drive, do the following: 1 Turn off the computer;
then disconnect the AC adapter and all cables from the computer. 2 Close the computer display, and then turn the computer over. 3 Remove the battery pack. 4 Remove the Hard disk drive/Memory/Central processing unit/Mini PCI Express Card slot compartment cover. a.Loosen the screws that secure the compartment cover a. b.Remove the compartment cover b . 11 1 1 2 1 1 5 Remove the frame fixing screws c . 3 3 37 Appendix A. CRU instructions To replace the hard disk drive, do the following: 1 Turn off the computer;

Lenovo G770 Userguide V1.0
Page 43
C Tighten the screws. CRU instructions B After aligning the attachment clips with their matching gaps, reinstall the compartment cover. E Turn the computer over again. Connect the AC adapter and the cables to the computer again. 39 Appendix A. D Reinstall the battery pack.
C Tighten the screws. CRU instructions B After aligning the attachment clips with their matching gaps, reinstall the compartment cover. E Turn the computer over again. Connect the AC adapter and the cables to the computer again. 39 Appendix A. D Reinstall the battery pack.
Lenovo G770 Userguide V1.0
Page 44
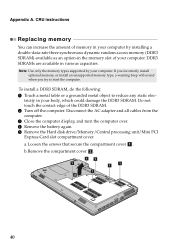
... try to reduce any static elec- Do not touch the contact edge of your body, which could damage the DDR3 SDRAM. Appendix A. Disconnect the AC adapter and all cables from the computer. 3 Close the computer display, and turn the computer over. 4 Remove the battery again. 5 Remove the Hard disk drive/Memory...
... try to reduce any static elec- Do not touch the contact edge of your body, which could damage the DDR3 SDRAM. Appendix A. Disconnect the AC adapter and all cables from the computer. 3 Close the computer display, and turn the computer over. 4 Remove the battery again. 5 Remove the Hard disk drive/Memory...

Lenovo G770 Userguide V1.0
Page 45
B Turn the computer over again. Be sure to the computer again. 41 A Reinstall the battery. Appendix A. Connect the AC adapter and the cables to save the old DDR3 SDRAM for the new one by pressing out on the latches on both edges of the socket ...
B Turn the computer over again. Be sure to the computer again. 41 A Reinstall the battery. Appendix A. Connect the AC adapter and the cables to save the old DDR3 SDRAM for the new one by pressing out on the latches on both edges of the socket ...

Lenovo G770 Userguide V1.0
Page 48
AC adapter Power cord for your computer, and informs you of CRUs (Customer Replaceable Units) for AC adapter Battery Bottom access doors Hard disk drive Memory Optical drive Setup Poster O O O User Guide O O O O O 44 CRU instructions The following table provides a list of where to find replacement instructions. Appendix A.
AC adapter Power cord for your computer, and informs you of CRUs (Customer Replaceable Units) for AC adapter Battery Bottom access doors Hard disk drive Memory Optical drive Setup Poster O O O User Guide O O O O O 44 CRU instructions The following table provides a list of where to find replacement instructions. Appendix A.
Lenovo G770 Hardware Maintenance Manual V1.0
Page 3
... information about replacing RoHS compliant FRUs 18 General checkout 19 What to do first 20 Power system checkout 21 Checking the AC adapter 21 Checking operational charging 21 Checking the battery pack 22 Related service information 23 Restoring the factory contents by using OneKey Recovery ...24 Power-on password 24 Supervisor password 24 Power management 25 Screen blank mode 25 Sleep (standby) mode 25 Hibernation mode 26 Lenovo G770 27 Specifications 27 Status indicators 29 Fn key combinations 31 FRU replacement notices 32 Screw notices 32 Removing and replacing an FRU 33...
... information about replacing RoHS compliant FRUs 18 General checkout 19 What to do first 20 Power system checkout 21 Checking the AC adapter 21 Checking operational charging 21 Checking the battery pack 22 Related service information 23 Restoring the factory contents by using OneKey Recovery ...24 Power-on password 24 Supervisor password 24 Power management 25 Screen blank mode 25 Sleep (standby) mode 25 Hibernation mode 26 Lenovo G770 27 Specifications 27 Status indicators 29 Fn key combinations 31 FRU replacement notices 32 Screw notices 32 Removing and replacing an FRU 33...

Lenovo G770 Hardware Maintenance Manual V1.0
Page 21
... overwritten. This will cause all customer data on the hard disk to see if the symptoms change. Before replacing the adapter or device, remove the FRUs one by one . • If an adapter or a device consists of the FRUs may cause a system malfunction. Replace only the FRU that board, and then replace...
... overwritten. This will cause all customer data on the hard disk to see if the symptoms change. Before replacing the adapter or device, remove the FRUs one by one . • If an adapter or a device consists of the FRUs may cause a system malfunction. Replace only the FRU that board, and then replace...
Lenovo G770 Hardware Maintenance Manual V1.0
Page 24
..., unsuitable physical or operating environment, or improper maintenance by the improper insertion of a PC Card or the installation of an incorrect AC adapter on which the failing FRU was detected 6. Procedure index and page number in the drive, or the insertion of a diskette with multiple...the application of excessive force or from being dropped • Scratched (cosmetic) parts • Distortion, deformation, or discoloration of purchase 5. Lenovo G770 Hardware Maintenance Manual What to do first When you do return an FRU, you attach to it may have been cracked or broken by ...
..., unsuitable physical or operating environment, or improper maintenance by the improper insertion of a PC Card or the installation of an incorrect AC adapter on which the failing FRU was detected 6. Procedure index and page number in the drive, or the insertion of a diskette with multiple...the application of excessive force or from being dropped • Scratched (cosmetic) parts • Distortion, deformation, or discoloration of purchase 5. Lenovo G770 Hardware Maintenance Manual What to do first When you do return an FRU, you attach to it may have been cracked or broken by ...


