User Guide
Page 4
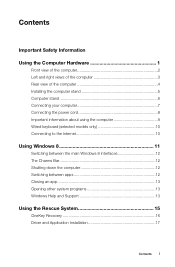
... 7 Connecting the power cord 8 Important information about using the computer 9 Wired keyboard (selected models only 10 Connecting to the Internet 10 Using Windows 8 11 Switching between the main Windows 8 interfaces 12 The Charms Bar 12 Shutting down the computer 12 Switching between apps 12 Closing an app 13 Opening other system programs 13 Windows Help and Support 13 Using the Rescue System 15 OneKey Recovery 16 Driver and Application Installation...
... 7 Connecting the power cord 8 Important information about using the computer 9 Wired keyboard (selected models only 10 Connecting to the Internet 10 Using Windows 8 11 Switching between the main Windows 8 interfaces 12 The Charms Bar 12 Shutting down the computer 12 Switching between apps 12 Closing an app 13 Opening other system programs 13 Windows Help and Support 13 Using the Rescue System 15 OneKey Recovery 16 Driver and Application Installation...
User Guide
Page 5
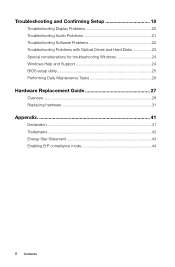
Troubleshooting and Confirming Setup 19 Troubleshooting Display Problems 20 Troubleshooting Audio Problems 21 Troubleshooting Software Problems 22 Troubleshooting Problems with Optical Drives and Hard Disks 23 Special considerations for troubleshooting Windows 24 Windows Help and Support 24 BIOS setup utility 25 Performing Daily Maintenance Tasks 26 Hardware Replacement Guide 27 Overview 28 Replacing hardware 31 Appendix 41 Declaration 41 Trademarks 42 Energy Star Statement 43 Enabling ErP compliance mode 44 ii Contents
Troubleshooting and Confirming Setup 19 Troubleshooting Display Problems 20 Troubleshooting Audio Problems 21 Troubleshooting Software Problems 22 Troubleshooting Problems with Optical Drives and Hard Disks 23 Special considerations for troubleshooting Windows 24 Windows Help and Support 24 BIOS setup utility 25 Performing Daily Maintenance Tasks 26 Hardware Replacement Guide 27 Overview 28 Replacing hardware 31 Appendix 41 Declaration 41 Trademarks 42 Energy Star Statement 43 Enabling ErP compliance mode 44 ii Contents
User Guide
Page 7
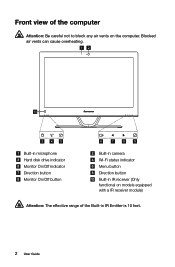
Front view of the Built-in IR receiver (Only functional on models equipped with a IR receiver module) Attention: The effective range of the computer Attention: Be careful not to block any air vents on the computer. Blocked air vents can cause overheating. 12 10 3 45 Built-in microphone Hard disk drive indicator Monitor On/Off indicator Direction button Monitor On/Off button 6 7 8 9 Built-in camera Wi-Fi status indicator Menu button Direction button Built-in IR Emitter is 10 feet. 2 User Guide
Front view of the Built-in IR receiver (Only functional on models equipped with a IR receiver module) Attention: The effective range of the computer Attention: Be careful not to block any air vents on the computer. Blocked air vents can cause overheating. 12 10 3 45 Built-in microphone Hard disk drive indicator Monitor On/Off indicator Direction button Monitor On/Off button 6 7 8 9 Built-in camera Wi-Fi status indicator Menu button Direction button Built-in IR Emitter is 10 feet. 2 User Guide
User Guide
Page 12
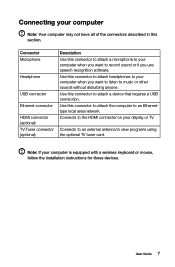
... network. User Guide 7 Use this connector to attach a microphone to your computer when you want to record sound or if you want to listen to your computer when you use speech-recognition software. Connecting your computer Note: Your computer may not have all of the connectors described in this connector to the HDMI connector on your display or TV. Connector Microphone Headphone USB connector Ethernet connector HDMI connector (optional) TV-Tuner connector (optional) Description Use...
... network. User Guide 7 Use this connector to attach a microphone to your computer when you want to record sound or if you want to listen to your computer when you use speech-recognition software. Connecting your computer Note: Your computer may not have all of the connectors described in this connector to the HDMI connector on your display or TV. Connector Microphone Headphone USB connector Ethernet connector HDMI connector (optional) TV-Tuner connector (optional) Description Use...

User Guide
Page 15
.... Test the wireless network by country. F2 -- Follow the manufacturer's instructions. To connect your country. Your computer has the Lenovo Rescue System installed. Wired network connection For wired networks, connect one end of the screen, then click Settings.) 2. In addition to its own functions, the LVT program will allow you 'll need a contract with an Internet Service Provider (ISP) and some hardware. Wired keyboard (selected models only) LVT -- After entering Windows, press this key to run...
.... Test the wireless network by country. F2 -- Follow the manufacturer's instructions. To connect your country. Your computer has the Lenovo Rescue System installed. Wired network connection For wired networks, connect one end of the screen, then click Settings.) 2. In addition to its own functions, the LVT program will allow you 'll need a contract with an Internet Service Provider (ISP) and some hardware. Wired keyboard (selected models only) LVT -- After entering Windows, press this key to run...
User Guide
Page 21
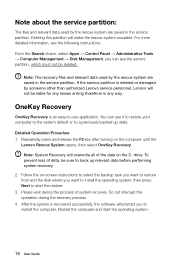
... on the C: drive. Restart the computer and start the restore. 3. Please wait during the recovery process. 4. Note: The recovery files and relevant data used by the rescue system are saved in the service partition. You can see the following instructions: From the Search charm, select Apps → Control Panel → Administrative Tools → Computer Management → Disk Management, you can use it to restore your computer...
... on the C: drive. Restart the computer and start the restore. 3. Please wait during the recovery process. 4. Note: The recovery files and relevant data used by the rescue system are saved in the service partition. You can see the following instructions: From the Search charm, select Apps → Control Panel → Administrative Tools → Computer Management → Disk Management, you can use it to restore your computer...
User Guide
Page 22
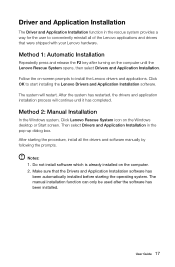
.... Make sure that the Drivers and Application Installation software has been automatically installed before starting the procedure, install all of the Lenovo applications and drivers that were shipped with your Lenovo hardware. Follow the on the Windows desktop or Start screen. Method 2: Manual Installation In the Windows system, Click Lenovo Rescue System icon on -screen prompts to start installing the Lenovo Drivers and Application Installation software. After starting the operating system. Notes: 1. The manual installation function can only be used after turning...
.... Make sure that the Drivers and Application Installation software has been automatically installed before starting the procedure, install all of the Lenovo applications and drivers that were shipped with your Lenovo hardware. Follow the on the Windows desktop or Start screen. Method 2: Manual Installation In the Windows system, Click Lenovo Rescue System icon on -screen prompts to start installing the Lenovo Drivers and Application Installation software. After starting the operating system. Notes: 1. The manual installation function can only be used after turning...
User Guide
Page 25
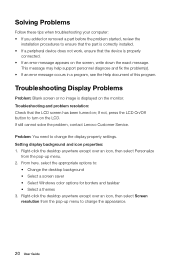
... the pop-up menu. 2. Solving Problems Follow these tips when troubleshooting your computer: • If you added or removed a part before the problem started, review the installation procedures to change the display property settings. Troubleshooting Display Problems Problem: Blank screen or no image is properly connected. • If an error message appears on the monitor. If still cannot solve the problem, contact Lenovo Customer Service. Troubleshooting and problem resolution: Check that the device is displayed on the screen, write down...
... the pop-up menu. 2. Solving Problems Follow these tips when troubleshooting your computer: • If you added or removed a part before the problem started, review the installation procedures to change the display property settings. Troubleshooting Display Problems Problem: Blank screen or no image is properly connected. • If an error message appears on the monitor. If still cannot solve the problem, contact Lenovo Customer Service. Troubleshooting and problem resolution: Check that the device is displayed on the screen, write down...
User Guide
Page 26
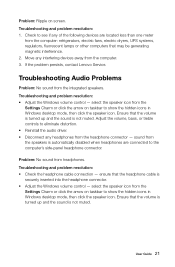
... the following devices are connected to the computer's side-panel headphone connector. Troubleshooting Audio Problems Problem: No sound from headphones. Troubleshooting and problem resolution: • Check the headphone cable connection - Move any headphones from the Settings Charm or click the arrow on taskbar to show the hidden icons in Windows desktop mode, then click the speaker icon. User Guide 21 select the speaker icon from the computer: refrigerators, electric fans, electric dryers...
... the following devices are connected to the computer's side-panel headphone connector. Troubleshooting Audio Problems Problem: No sound from headphones. Troubleshooting and problem resolution: • Check the headphone cable connection - Move any headphones from the Settings Charm or click the arrow on taskbar to show the hidden icons in Windows desktop mode, then click the speaker icon. User Guide 21 select the speaker icon from the computer: refrigerators, electric fans, electric dryers...

User Guide
Page 27
... select Apps → Control Panel from the Programs and Features dialog box and then select Uninstall/Change. 6. Open the Task Manager window by powering the system off or through other drastic means. Back up all documents and system settings related to the program before removing it directly to uninstall the software. 22 User Guide Troubleshooting and problem resolution: 1. Perform the instructions displayed to uninstall the program...
... select Apps → Control Panel from the Programs and Features dialog box and then select Uninstall/Change. 6. Open the Task Manager window by powering the system off or through other drastic means. Back up all documents and system settings related to the program before removing it directly to uninstall the software. 22 User Guide Troubleshooting and problem resolution: 1. Perform the instructions displayed to uninstall the program...
User Guide
Page 29
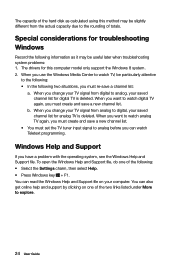
... have a problem with the operating system, see the Windows Help and Support file. The drivers for analog TV is deleted. When you want to watch digital TV again, you change your saved channel list for this method may be useful later when troubleshooting system problems: 1. The capacity of the hard disk as it may be slightly different from analog to explore. 24 User Guide
... have a problem with the operating system, see the Windows Help and Support file. The drivers for analog TV is deleted. When you want to watch digital TV again, you change your saved channel list for this method may be useful later when troubleshooting system problems: 1. The capacity of the hard disk as it may be slightly different from analog to explore. 24 User Guide

User Guide
Page 30
... default boot mode for setting boot devices, security, hardware mode, and other preferences. There are two boot modes: UEFI and Legacy. The legacy Windows operating system cannot be installed if you don't change the boot mode? Repeatedly press and release the F1 key after turning on your computer is the UEFI mode. If you must change the boot mode, start the BIOS setup utility? How can I need to Legacy support. To change the boot mode to install a legacy Windows operating system (any operating system before Windows...
... default boot mode for setting boot devices, security, hardware mode, and other preferences. There are two boot modes: UEFI and Legacy. The legacy Windows operating system cannot be installed if you don't change the boot mode? Repeatedly press and release the F1 key after turning on your computer is the UEFI mode. If you must change the boot mode, start the BIOS setup utility? How can I need to Legacy support. To change the boot mode to install a legacy Windows operating system (any operating system before Windows...
User Guide
Page 33
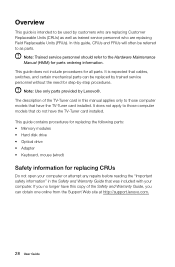
... card installed. This guide contains procedures for replacing the following parts: • Memory modules • Hard disk drive • Optical drive • Adapter • Keyboard, mouse (wired) Safety information for parts ordering information. It does not apply to be replaced by trained service personnel without the need for all parts. Overview This guide is expected that cables, switches, and certain mechanical parts can obtain one online from the Support Web site at http://support.lenovo.com. 28 User Guide...
... card installed. This guide contains procedures for replacing the following parts: • Memory modules • Hard disk drive • Optical drive • Adapter • Keyboard, mouse (wired) Safety information for parts ordering information. It does not apply to be replaced by trained service personnel without the need for all parts. Overview This guide is expected that cables, switches, and certain mechanical parts can obtain one online from the Support Web site at http://support.lenovo.com. 28 User Guide...
User Guide
Page 36
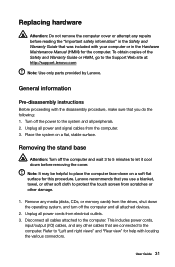
... Pre-disassembly instructions Before proceeding with locating the various connectors. Unplug all attached devices. 2. Remove any media (disks, CDs, or memory cards) from the drives, shut down the operating system, and turn off the computer and all power and signal cables from the computer. 3. User Guide 31 Turn off the computer and wait 3 to 5 minutes to the computer. Replacing hardware Attention: Do not remove the computer cover or attempt any repairs before removing the cover. Removing...
... Pre-disassembly instructions Before proceeding with locating the various connectors. Unplug all attached devices. 2. Remove any media (disks, CDs, or memory cards) from the drives, shut down the operating system, and turn off the computer and all power and signal cables from the computer. 3. User Guide 31 Turn off the computer and wait 3 to 5 minutes to the computer. Replacing hardware Attention: Do not remove the computer cover or attempt any repairs before removing the cover. Removing...
User Guide
Page 37
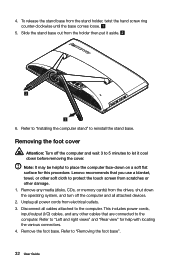
... out from the drives, shut down before removing the cover. Refer to "Installing the computer stand" to the computer. This includes power cords, input/output (I/O) cables, and any media (disks, CDs, or memory cards) from the holder then put it cool down the operating system, and turn off the computer and wait 3 to 5 minutes to "Removing the foot base". 32 User Guide To release the...
... out from the drives, shut down before removing the cover. Refer to "Installing the computer stand" to the computer. This includes power cords, input/output (I/O) cables, and any media (disks, CDs, or memory cards) from the holder then put it cool down the operating system, and turn off the computer and wait 3 to 5 minutes to "Removing the foot base". 32 User Guide To release the...
User Guide
Page 38
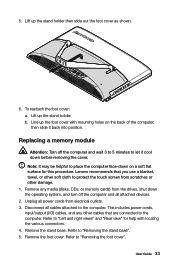
... to protect the touch screen from scratches or other damage. 1. Remove any other cables that you use a blanket, towel, or other soft cloth to let it back into position. This includes power cords, input/output (I/O) cables, and any media (disks, CDs, or memory cards) from electrical outlets. 3. Disconnect all power cords from the drives, shut down before removing the cover. User Guide 33 Line up the...
... to protect the touch screen from scratches or other damage. 1. Remove any other cables that you use a blanket, towel, or other soft cloth to let it back into position. This includes power cords, input/output (I/O) cables, and any media (disks, CDs, or memory cards) from electrical outlets. 3. Disconnect all power cords from the drives, shut down before removing the cover. User Guide 33 Line up the...
User Guide
Page 39
... install a memory module: Align the new memory module with locating the various connectors. 34 User Guide This includes power cords, input/output (I/O) cables, and any media (disks, CDs, or memory cards) from the drives, shut down on both sides of the memory modules can be helpful to let it cool down on the top edge. Make sure the latches lock the memory module in place. 8. Lenovo recommends that are connected...
... install a memory module: Align the new memory module with locating the various connectors. 34 User Guide This includes power cords, input/output (I/O) cables, and any media (disks, CDs, or memory cards) from the drives, shut down on both sides of the memory modules can be helpful to let it cool down on the top edge. Make sure the latches lock the memory module in place. 8. Lenovo recommends that are connected...
User Guide
Page 40
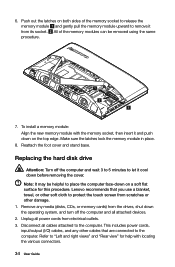
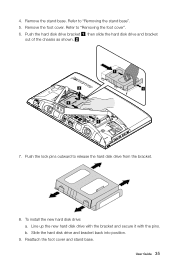
Push the hard disk drive bracket , then slide the hard disk drive and bracket out of the chassis as shown. 1 1 7. b. To install the new hard disk drive: a. Reattach the foot cover and stand base. Refer to release the hard disk drive from the bracket. 8. User Guide 35 Push the lock pins outward to "Removing the stand base". 5. Slide the hard disk drive and bracket back into position. 9. Refer to "Removing the foot cover". 6. 4. Remove the stand base. Remove the foot cover. Line up the new hard disk drive with the bracket and secure it with the pins.
Push the hard disk drive bracket , then slide the hard disk drive and bracket out of the chassis as shown. 1 1 7. b. To install the new hard disk drive: a. Reattach the foot cover and stand base. Refer to release the hard disk drive from the bracket. 8. User Guide 35 Push the lock pins outward to "Removing the stand base". 5. Slide the hard disk drive and bracket back into position. 9. Refer to "Removing the foot cover". 6. 4. Remove the stand base. Remove the foot cover. Line up the new hard disk drive with the bracket and secure it with the pins.
User Guide
Page 41
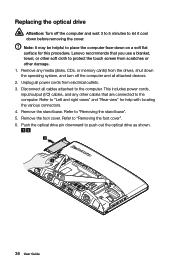
... this procedure. Push the optical drive pin downward to the computer. Disconnect all cables attached to push out the optical drive as shown. 36 User Guide Remove the stand base. Refer to "Removing the foot cover". 6. Refer to "Removing the stand base". 5. This includes power cords, input/output (I/O) cables, and any media (disks, CDs, or memory cards) from the drives, shut down the operating system, and turn off the computer and...
... this procedure. Push the optical drive pin downward to the computer. Disconnect all cables attached to push out the optical drive as shown. 36 User Guide Remove the stand base. Refer to "Removing the foot cover". 6. Refer to "Removing the stand base". 5. This includes power cords, input/output (I/O) cables, and any media (disks, CDs, or memory cards) from the drives, shut down the operating system, and turn off the computer and...

User Guide
Page 46
... comments, contact or visit the Lenovo Web site: Service Web site: http://support.lenovo.com User Guide 41 For the configuration of Lenovo. Carefully read all documents shipped with your computer, or operate the product inappropriately. You are welcome to help you install and use Lenovo's products appropriately. This manual could include technical inaccuracies or typographical errors. None of the manuals included with your computer are...
... comments, contact or visit the Lenovo Web site: Service Web site: http://support.lenovo.com User Guide 41 For the configuration of Lenovo. Carefully read all documents shipped with your computer, or operate the product inappropriately. You are welcome to help you install and use Lenovo's products appropriately. This manual could include technical inaccuracies or typographical errors. None of the manuals included with your computer are...


