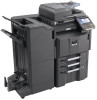
Kyocera TASKalfa 4500i Fuser
View Results Below
Free Kyocera TASKalfa 4500i manuals!
Problems with Kyocera TASKalfa 4500i?
Ask a Question
Free Kyocera TASKalfa 4500i manuals!
Problems with Kyocera TASKalfa 4500i?
Ask a Question
Related Manual Pages
Similar Questions

Erroe C2300 In Kyocera T.a 6056i Ireplace Fuser Motor And It,s Drive System
c2300 i replace fuser motor and its drive and fuser u and all boards controller
c2300 i replace fuser motor and its drive and fuser u and all boards controller
(Posted by minomatic 1 year ago)

Kyocera Taskalfa 3050ci How To Replace The Fuser
(Posted by bridmc 10 years ago)

Difference Between Drum Unit And Fuser Unit
aproximate price to reeplace them. it is wordthed?
aproximate price to reeplace them. it is wordthed?
(Posted by judith26128 10 years ago)
Related Terms
The following terms were also used when searching for Kyocera TASKalfa 4500i Fuser:- kyocera taskalfa 400ci
- kyocera taskalfa 400ci kx
- kyocera taskalfa 400ci manual
- kyocera taskalfa 400ci printer driver
- kyocera taskalfa 400ci toner
- kyocera taskalfa 4500i
- kyocera taskalfa 4500i 64 bit driver
- kyocera taskalfa 4500i admin login
- kyocera taskalfa 4500i admin password
- kyocera taskalfa 4500i brochure
- kyocera taskalfa 4500i brochure pdf
- kyocera taskalfa 4500i copier
- kyocera taskalfa 4500i copier + price
- kyocera taskalfa 4500i copier troubleshooting
- kyocera taskalfa 4500i default admin password
- kyocera taskalfa 4500i default password
- kyocera taskalfa 4500i driver
- kyocera taskalfa 4500i driver 32 bit
- kyocera taskalfa 4500i driver download
- kyocera taskalfa 4500i driver usa
- kyocera taskalfa 4500i drivers
- kyocera taskalfa 4500i error codes
- kyocera taskalfa 4500i fax driver
- kyocera taskalfa 4500i fuser
- kyocera taskalfa 4500i kx
- kyocera taskalfa 4500i kx driver
- kyocera taskalfa 4500i kx driver download
- kyocera taskalfa 4500i kx drivers
- kyocera taskalfa 4500i kx manual
- kyocera taskalfa 4500i kx user manual
- kyocera taskalfa 4500i kx windows 7 driver
- kyocera taskalfa 4500i mac driver
- kyocera taskalfa 4500i maintenance kit
- kyocera taskalfa 4500i manual
- kyocera taskalfa 4500i multifunction printer
- kyocera taskalfa 4500i password
- kyocera taskalfa 4500i price
- kyocera taskalfa 4500i price in india
- kyocera taskalfa 4500i pricing
- kyocera taskalfa 4500i print
- kyocera taskalfa 4500i printer driver
- kyocera taskalfa 4500i retail
- kyocera taskalfa 4500i reviews
- kyocera taskalfa 4500i scan to folder
- kyocera taskalfa 4500i service manual
- kyocera taskalfa 4500i service manual pdf
- kyocera taskalfa 4500i specifications
- kyocera taskalfa 4500i staples
- kyocera taskalfa 4500i toner
- kyocera taskalfa 4500i toner cartridge
- kyocera taskalfa 4500i user guide
- kyocera taskalfa 4500i user manual
- kyocera taskalfa 4500i user reviews
- kyocera taskalfa 4500i windows 7 driver
- taskalfa 400ci
- taskalfa 400ci kx
- taskalfa 400ci manual
- taskalfa 400ci printer driver
- taskalfa 400ci toner
- taskalfa 4500i
- taskalfa 4500i 64 bit driver
- taskalfa 4500i accounting administrator code
- taskalfa 4500i admin login
- taskalfa 4500i admin password
- taskalfa 4500i brochure
- taskalfa 4500i brochure pdf
- taskalfa 4500i copier
- taskalfa 4500i copier + price
- taskalfa 4500i copier troubleshooting
- taskalfa 4500i cost
- taskalfa 4500i default admin password
- taskalfa 4500i default login
- taskalfa 4500i default password
- taskalfa 4500i default username
- taskalfa 4500i driver
- taskalfa 4500i driver 32 bit
- taskalfa 4500i driver download
- taskalfa 4500i driver usa
- taskalfa 4500i drivers
- taskalfa 4500i error codes
- taskalfa 4500i fax confirmation
- taskalfa 4500i fax driver
- taskalfa 4500i fuser
- taskalfa 4500i kx
- taskalfa 4500i kx driver
- taskalfa 4500i kx driver download
- taskalfa 4500i kx drivers
- taskalfa 4500i kx manual
- taskalfa 4500i kx user manual
- taskalfa 4500i kx windows 7 driver
- taskalfa 4500i login
- taskalfa 4500i mac driver
- taskalfa 4500i maintenance kit
- taskalfa 4500i manual
- taskalfa 4500i manual pdf
- taskalfa 4500i mfp
- taskalfa 4500i msrp
- taskalfa 4500i multifunction printer
- taskalfa 4500i panel
- taskalfa 4500i parallel
- taskalfa 4500i password
- taskalfa 4500i price
- taskalfa 4500i price in india
- taskalfa 4500i pricing
- taskalfa 4500i print
- taskalfa 4500i printer driver
- taskalfa 4500i retail
- taskalfa 4500i reviews
- taskalfa 4500i scan to folder
- taskalfa 4500i service manual
- taskalfa 4500i service manual pdf
- taskalfa 4500i skewing from trays
- taskalfa 4500i software
- taskalfa 4500i specification
- taskalfa 4500i specifications
- taskalfa 4500i staples
- taskalfa 4500i toner
- taskalfa 4500i toner cartridge
- taskalfa 4500i twain driver
- taskalfa 4500i user guide
- taskalfa 4500i user manual
- taskalfa 4500i user reviews
- taskalfa 4500i waste toner
- taskalfa 4500i waste toner box
- taskalfa 4500i windows 7 driver